
Preparing the Necessary Tools
Before embarking on the task of removing the battery from your iPhone 10, it's crucial to gather the necessary tools to ensure a smooth and efficient process. Here's a comprehensive list of tools you'll need:
-
Pentalobe Screwdriver: The iPhone 10 is secured with pentalobe screws, so having a pentalobe screwdriver is essential for removing these specialized screws. Ensure that the screwdriver is the correct size to fit the screws snugly, preventing any potential damage during the removal process.
-
Suction Cup: A suction cup is a handy tool for lifting the front panel of the iPhone 10. It provides a secure grip, allowing you to carefully separate the display assembly from the rear case without causing any damage.
-
Spudger Tool: This tool is invaluable for safely disconnecting the various cables and components within the iPhone 10. Its non-conductive and anti-static properties make it ideal for prying and disconnecting delicate components without the risk of electrical damage.
-
Tweezers: Precision tweezers are essential for handling small components and screws during the disassembly process. They provide a firm grip, allowing for meticulous handling of intricate parts without the risk of misplacement.
-
Plastic Cards: Thin plastic cards, such as guitar picks or opening picks, are useful for prying and separating components without causing scratches or damage to the delicate surfaces of the iPhone 10.
-
Heat Gun or Hair Dryer: Applying heat to the adhesive securing the display assembly can make it easier to separate the components. A heat gun or hair dryer can be used to gently warm the edges of the device, facilitating the disassembly process.
-
Adhesive Strips: To reseal the iPhone 10 after the battery replacement, adhesive strips are essential. These strips ensure a secure and reliable bond between the display assembly and the rear case, maintaining the device's structural integrity.
By ensuring that you have these essential tools at your disposal, you can proceed with confidence, knowing that you are well-equipped to safely and effectively remove the battery from your iPhone 10.
Opening the iPhone 10
Opening the iPhone 10 is the crucial first step in accessing the internal components, including the battery. This process requires precision, patience, and the right tools to ensure that the device is opened safely without causing any damage. Here's a detailed guide on how to open the iPhone 10:
-
Power Down the Device: Before beginning the disassembly process, it's essential to power off the iPhone 10 to prevent any potential electrical hazards. Hold down the power button and follow the on-screen prompts to shut down the device completely.
-
Remove the Pentalobe Screws: The iPhone 10 is secured with two pentalobe screws located at the bottom edge of the device. Using a pentalobe screwdriver, carefully remove these screws and set them aside in a secure location. It's important to keep track of the screws and organize them to ensure they can be reinstalled correctly during the reassembly process.
-
Apply Heat to Soften the Adhesive: To facilitate the separation of the display assembly from the rear case, it's beneficial to apply heat to soften the adhesive securing the components. A heat gun or hair dryer can be used to gently warm the edges of the device, helping to loosen the adhesive and make the disassembly process easier.
-
Use a Suction Cup to Lift the Display: Once the adhesive is softened, a suction cup can be employed to carefully lift the front panel of the iPhone 10. Place the suction cup near the bottom edge of the display, ensuring a secure attachment. Slowly and steadily pull up on the suction cup to create a slight gap between the display and the rear case.
-
Insert a Plastic Card to Separate the Display: With the display slightly lifted, a thin plastic card, such as a guitar pick or opening pick, can be inserted into the gap to gently pry apart the adhesive. Carefully slide the plastic card along the edge of the device, gradually separating the adhesive and releasing the clips securing the display assembly.
-
Work Around the Edges: As the adhesive and clips are released, continue to work around the edges of the iPhone 10, gradually separating the display assembly from the rear case. Exercise caution and patience to avoid applying excessive force, as this could lead to damage to the delicate components.
By following these steps meticulously, you can successfully open the iPhone 10, gaining access to the internal components and preparing for the subsequent stages of the battery removal process.
Disconnecting the Battery
Disconnecting the battery is a critical step in ensuring the safety and integrity of the disassembly process. By isolating the power source, the risk of electrical damage and short circuits is minimized, allowing for the safe removal and replacement of the battery. Here's a detailed guide on how to disconnect the battery from your iPhone 10:
-
Identify the Battery Connector: Upon opening the iPhone 10, the battery connector is located near the bottom edge of the device, secured to the logic board. It is essential to identify the battery connector to ensure precise disconnection without causing damage to surrounding components.
-
Use a Spudger Tool: A spudger tool, with its non-conductive and anti-static properties, is the ideal instrument for disconnecting the battery. Gently insert the spudger tool underneath the battery connector, ensuring a firm but cautious approach to avoid bending or damaging the connector.
-
Carefully Pry the Connector: With the spudger tool in place, apply gentle pressure to pry the battery connector from its socket on the logic board. It's crucial to maintain a steady and controlled motion, ensuring that the connector is released smoothly without any abrupt movements that could lead to damage.
-
Verify Disconnection: Once the battery connector is detached, it's important to visually inspect and verify that the connection has been successfully severed. Ensure that there are no residual signs of electrical contact and that the connector is visibly separated from the logic board.
-
Secure the Disconnected Connector: To prevent accidental reconnection during the subsequent steps of the disassembly process, carefully secure the disconnected battery connector away from its original socket. This precautionary measure ensures that the battery remains isolated from the device's power supply, maintaining a safe working environment.
By meticulously following these steps, you can effectively disconnect the battery from your iPhone 10, setting the stage for the final phase of the battery removal process. This meticulous approach prioritizes safety and precision, laying the foundation for a successful battery replacement procedure.
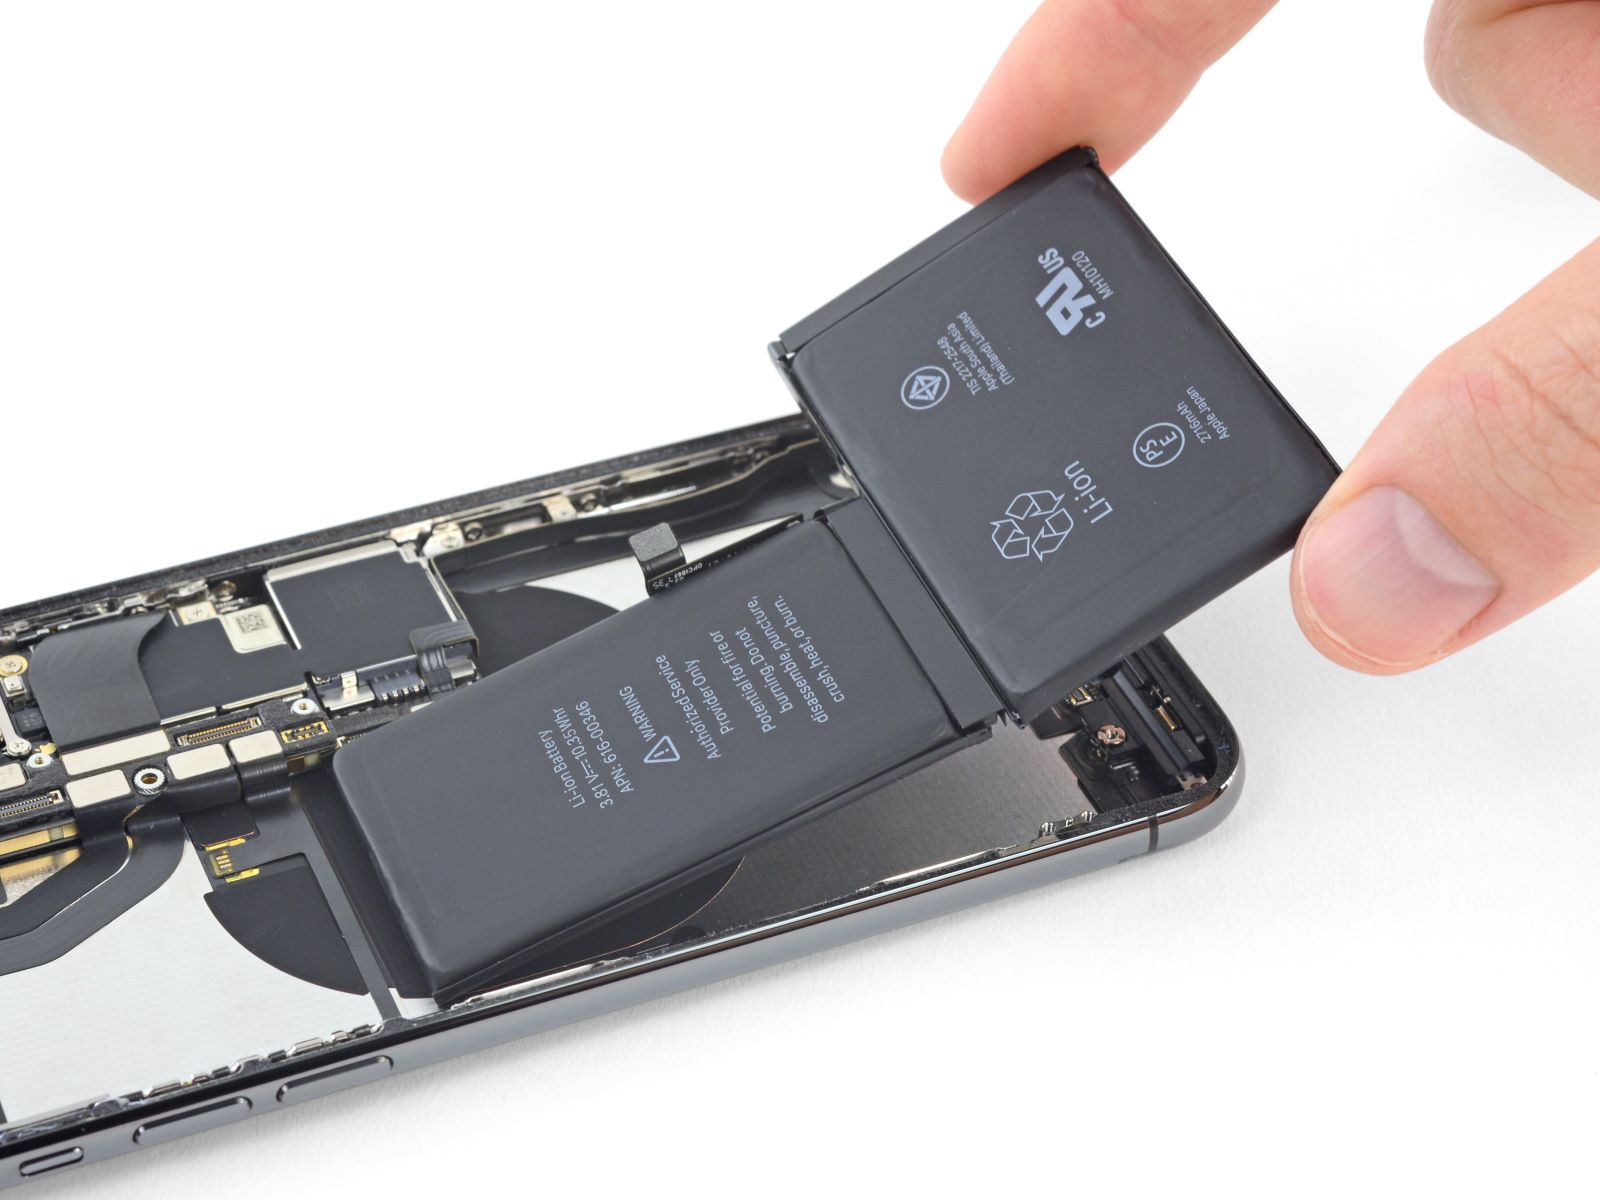
Removing the Battery
With the battery disconnected and the iPhone 10 opened, the next crucial step is the meticulous removal of the battery from the device. The iPhone 10's battery is a vital component, and its safe extraction is essential for both the replacement process and overall device safety. Here's a comprehensive guide on how to remove the battery from your iPhone 10:
-
Identify the Battery Adhesive: The iPhone 10's battery is secured in place with strong adhesive. Carefully inspect the edges of the battery to locate the adhesive strips that hold it in position. It's important to exercise caution and precision during this step to avoid damaging the battery or surrounding components.
-
Apply Heat to Loosen the Adhesive: To facilitate the removal of the battery, gentle heat application is recommended to soften the adhesive securing it to the device. Using a heat gun or hair dryer on a low setting, carefully warm the rear case of the iPhone 10 in the vicinity of the battery. This process helps to loosen the adhesive, making it easier to detach the battery without causing damage.
-
Utilize a Spudger Tool: A spudger tool is invaluable for safely prying the battery from its position. Insert the spudger tool underneath the edge of the battery, ensuring a gradual and controlled approach. By gently maneuvering the spudger tool along the edges of the battery, the adhesive bond can be gradually weakened, allowing for the battery's safe removal.
-
Lift and Remove the Battery: With the spudger tool in place, carefully lift the battery from its position within the iPhone 10. Exercise patience and precision to avoid bending or damaging the battery during the removal process. It's essential to maintain a steady and controlled motion, ensuring that the battery is lifted smoothly without any abrupt movements.
-
Inspect for Residual Adhesive: After the battery has been removed, inspect the battery compartment and the removed battery for any residual adhesive. It's crucial to ensure that the adhesive is completely detached, as any remaining adhesive could interfere with the installation of the new battery.
-
Dispose of the Old Battery Properly: Once the old battery has been successfully removed, it's important to handle its disposal responsibly. Lithium-ion batteries, such as the one found in the iPhone 10, require proper disposal to mitigate environmental impact. Consider recycling options or consult local regulations for safe battery disposal methods.
By meticulously following these steps, you can safely and effectively remove the battery from your iPhone 10, paving the way for the installation of a new battery. This meticulous approach prioritizes safety and precision, ensuring that the battery removal process is carried out with the utmost care and attention to detail.