
What are website push notifications in Safari for OS X?
Website push notifications in Safari for OS X allow websites to send real-time updates and alerts to users even when they are not actively browsing the site. They provide a way for websites to engage with users, deliver important information, and increase user engagement. Unlike traditional browser notifications, website push notifications are sent directly from websites, giving them more control over the content and timing of the notifications.
When a user visits a website that supports push notifications, they are prompted to grant permission for the site to send them notifications. Once permission is granted, the website can send notifications to the user’s Safari browser, which will be displayed as a pop-up or in the notification center of macOS.
Website push notifications are typically used to provide updates on news, new articles, sales, promotions, product releases, and other time-sensitive information. They can be personalized, targeted to specific user segments, and scheduled to be delivered at specific times.
These notifications can be a valuable tool for both websites and users. Websites can re-engage users and drive traffic back to their site, while users can receive timely updates and stay informed about the websites they are interested in.
It is important to note that website push notifications in Safari for OS X are entirely opt-in and users have full control over their notification settings. They can choose to enable or disable notifications for individual websites and customize the types of notifications they receive.
How do website push notifications work in Safari for OS X?
Website push notifications in Safari for OS X utilize the Push API, a web standard that allows websites to send notifications to users, even when they are not actively browsing the site. The process of how website push notifications work in Safari for OS X can be broken down into several steps:
- Permission: When a user visits a website that supports push notifications, they are prompted to grant permission for the site to send them notifications. This permission request is displayed as a pop-up in the browser, and the user can choose to allow or deny the request.
- Registration: If the user grants permission, the website registers the user’s device with the push notification service. This registration involves generating a unique identifier called a push token, which is used to target the user’s device for future notifications.
- Subscription: The website then subscribes the user to specific notification channels or topics. This allows the website to categorize and target notifications based on user preferences.
- Push Notification Server: Once the user is subscribed, the website can send notifications to the user’s device by making requests to a push notification server. This server acts as an intermediary between the website and the user’s device.
- Delivery: The push notification server receives the notification request from the website and forwards it to the user’s device through the push service provided by the operating system. In the case of Safari for OS X, the push service is handled by Apple’s Push Notification Service (APNS).
- Display: When the user’s device receives a push notification, it is displayed as a pop-up or in the notification center of macOS, depending on the user’s settings. The notification typically includes a title, message, and optional actions or buttons for the user to interact with.
It’s worth mentioning that website push notifications can only be sent to users who have granted explicit permission, and the notifications are delivered directly from the website, rather than through the browser itself. This gives websites more flexibility and control over the content and timing of the notifications.
How to enable website push notifications in Safari for OS X?
To enable website push notifications in Safari for OS X, you need to grant permission to individual websites. Here’s a step-by-step guide on how to enable push notifications:
- Open Safari on your Mac and visit the website for which you want to enable push notifications.
- When prompted, you will see a pop-up message requesting permission to send you notifications. Click on “Allow” to grant permission.
- Once permission is granted, the website will be able to send push notifications to your Safari browser.
- If you accidentally denied permission or want to enable push notifications for a website that you previously denied, you can change the settings by following these steps:
- Go to Safari Preferences by clicking on “Safari” in the menu bar and selecting “Preferences.”
- Click on the “Websites” tab at the top of the Preferences window.
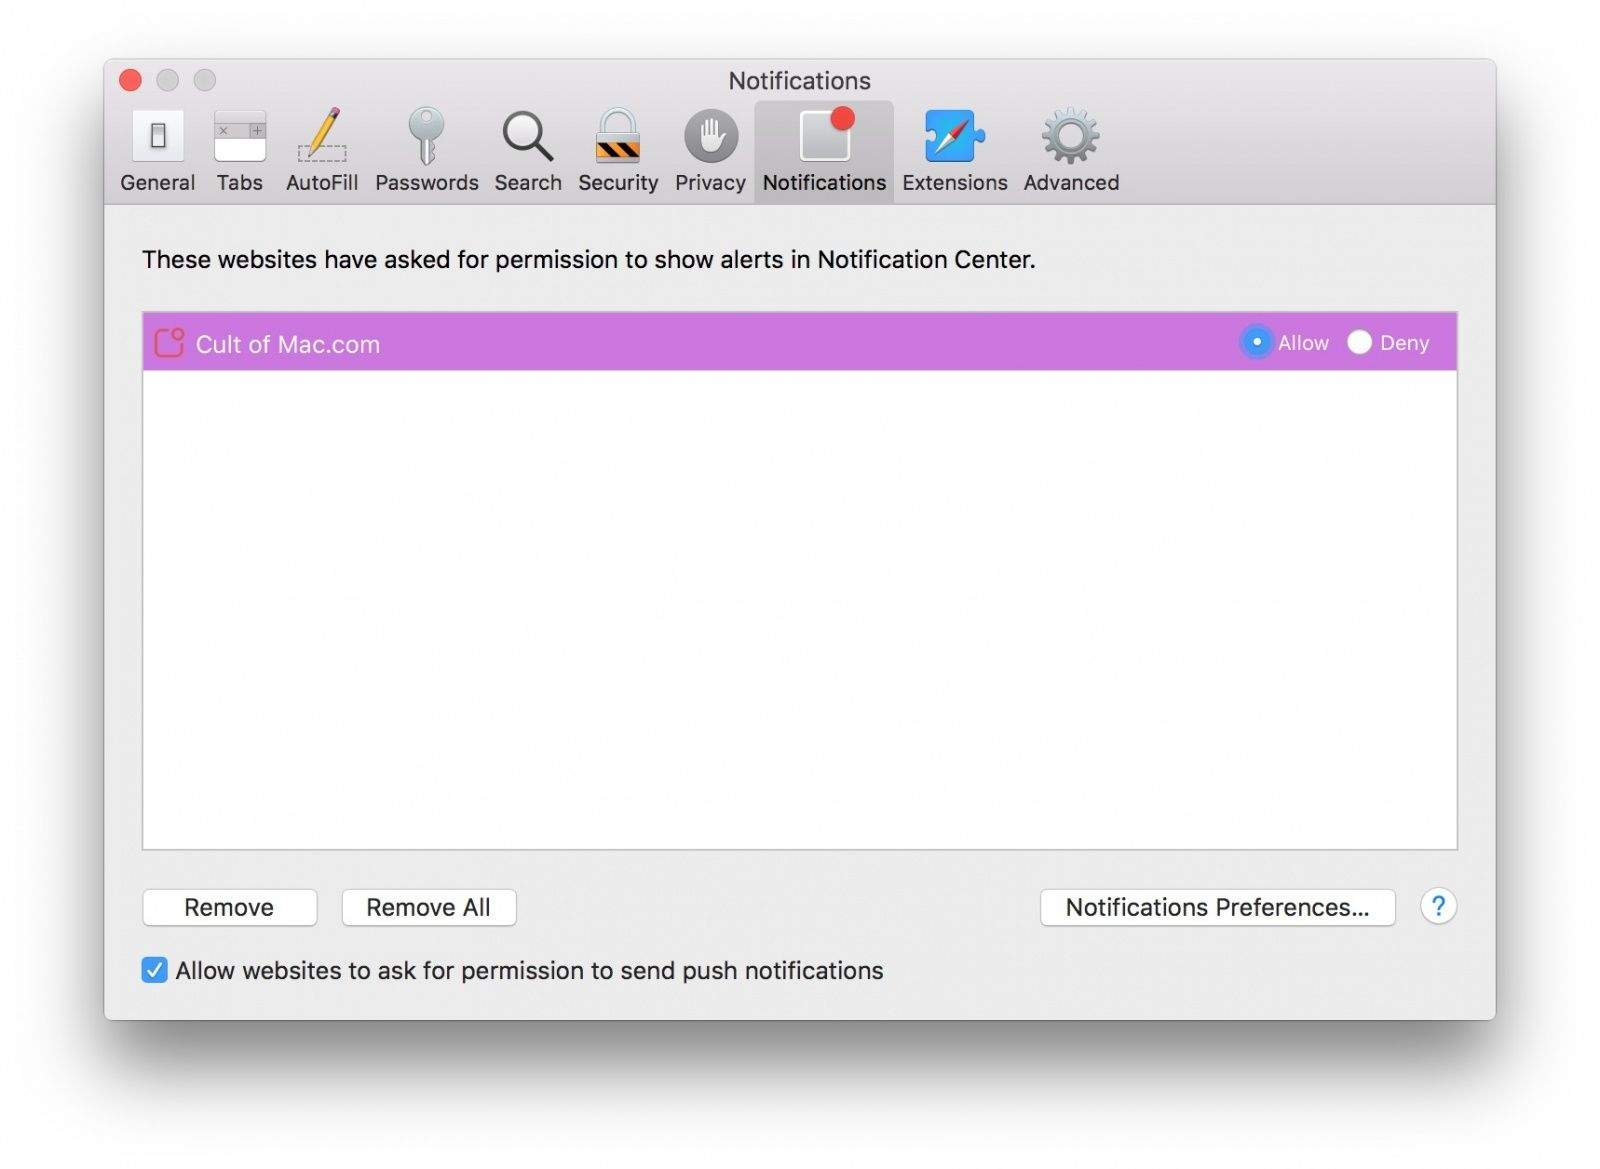
- In the sidebar, select “Notifications.”
- Locate the website for which you want to enable push notifications in the main window.
- Next to the website, select the desired notification settings from the dropdown menu. You can choose options like “Allow,” “Deny,” or “Ask.”
- Close the Preferences window to save the changes.
By following these steps, you can enable push notifications for specific websites in Safari for OS X. It’s important to note that you have full control over the notification settings and can choose which websites are allowed to send you push notifications.
How to disable website push notifications in Safari for OS X?
If you no longer want to receive push notifications from a specific website or you want to disable push notifications altogether in Safari for OS X, you can easily adjust the settings. Here are the steps to disable website push notifications:
- Open Safari on your Mac and click on “Safari” in the menu bar.
- Select “Preferences” from the drop-down menu.
- In the Preferences window, click on the “Websites” tab at the top.
- In the sidebar, select “Notifications.”
- In the main window, you will see a list of websites that have requested to send you push notifications.
- To disable push notifications for a specific website, locate the website in the list and select “Deny” from the dropdown menu next to it.
- If you want to disable push notifications for all websites, uncheck the box that says “Allow websites to ask for permission to send push notifications.”
- Close the Preferences window to save the changes.
By following these steps, you can disable push notifications for specific websites or completely turn off push notifications in Safari for OS X. This allows you to have control over the notifications you receive and ensures a more personalized browsing experience.
How to manage website push notifications in Safari for OS X?
Managing website push notifications in Safari for OS X allows you to have better control over the types of notifications you receive and the websites that can send them. Here are the steps to manage push notifications:
- Open Safari on your Mac and click on “Safari” in the menu bar.
- Select “Preferences” from the drop-down menu.
- In the Preferences window, click on the “Websites” tab at the top.
- In the sidebar, select “Notifications.”
- In the main window, you will see a list of websites that have requested to send you push notifications.
- To manage the notification settings for a specific website, locate the website in the list.
- From the dropdown menu next to the website, you can choose to “Allow,” “Deny,” or “Ask” for permission to receive push notifications from that website.
- If you want to remove a website from the list entirely, click on the “Remove” button next to it.
- You can also customize the notification preferences for websites by selecting the website and adjusting the “Alert style” and “Request Permission” settings at the bottom of the Preferences window.
- Close the Preferences window to save the changes.
By following these steps, you can effectively manage push notifications in Safari for OS X. This allows you to have a more personalized browsing experience and control over the websites that can send you notifications.
How to customize website push notifications in Safari for OS X?
Customizing website push notifications in Safari for OS X allows you to tailor the notifications according to your preferences and prioritize the information you receive. Here are the steps to customize push notifications:
- Open Safari on your Mac and click on “Safari” in the menu bar.
- Select “Preferences” from the drop-down menu.
- In the Preferences window, click on the “Websites” tab at the top.
- In the sidebar, select “Notifications.”
- In the main window, you will see a list of websites that have requested to send you push notifications.
- To customize the notification preferences for a specific website, locate the website in the list.
- From the dropdown menu next to the website, select “Customize” to access the customization options.
- A dialog box will appear, allowing you to customize the alert style and notification behavior for that website.
- You can choose to show notifications as alerts, banners, or not at all.
- Additionally, you can configure how the notifications are grouped and whether they play a sound or not.
- Once you have made your desired changes, click “Done” to save the customization.
- Repeat the above steps for other websites you wish to customize.
- Close the Preferences window to save the changes.
By following these steps, you can customize website push notifications in Safari for OS X to suit your preferences and optimize your browsing experience. This allows you to receive notifications in a way that is most convenient and meaningful to you.
How to clear website push notifications in Safari for OS X?
If your notification center in Safari for OS X is cluttered with old and unnecessary website push notifications, you can easily clear them to maintain a clean and organized notification center. Here’s how you can clear website push notifications:
- Click on the Notification Center icon located on the right side of the macOS menu bar.
- Scroll down to locate the section labeled “Earlier Today” or “Notifications.”
- Click on the “X” button next to each individual push notification that you want to clear.
- If you want to clear all push notifications at once, you can click on the “Clear” or “Clear All” button located at the top or bottom of the Notification Center.
- Alternatively, you can right-click on a specific notification and select “Clear” or “Clear All from XYZ Website” to remove all notifications from that specific website
By following these steps, you can quickly and easily clear website push notifications in Safari for OS X. This helps to declutter your notification center and ensures that you only see the most relevant and recent notifications.
How to troubleshoot website push notifications in Safari for OS X?
If you are experiencing issues with website push notifications in Safari for OS X, there are several troubleshooting steps you can take to resolve the problem. Here are some tips to help you troubleshoot website push notifications:
- Check permissions: Ensure that you have granted permission for the website to send you push notifications. To do this, go to Safari Preferences > Websites > Notifications and check if the website is listed with the appropriate permission status. If not, you may need to revisit the website and grant permission again.
- Restart Safari: Sometimes, restarting your Safari browser can resolve minor issues. Close Safari and reopen it to see if the push notifications start working properly.
- Clear website data: Clearing stored data and cookies for the website in question can also help. Go to Safari Preferences > Privacy > Manage Website Data, search for the specific website, and click on “Remove” to delete its data.
- Disable browser extensions: Certain browser extensions or plugins can interfere with website push notifications. Disable any extensions that you suspect might be causing the issue and check if the notifications start working.
- Check notification settings: Make sure that notifications for Safari are enabled in your macOS system preferences. Go to System Preferences > Notifications and ensure that “Safari” is listed and has the desired notification settings.
- Update Safari: Keeping your Safari browser up to date is essential for optimal performance. Check if there are any available updates for Safari and install them if necessary.
- Contact website support: If the issue persists, it may be specific to the website itself. Contact the website’s support team and provide them with details about the problem and the steps you’ve already taken to troubleshoot.
By following these troubleshooting steps, you can identify and resolve common issues with website push notifications in Safari for OS X. However, if the problem persists, it may be necessary to seek further assistance from technical support or from the website’s development team.