
Download macOS Lion from the App Store
macOS Lion, the eighth major release of the Mac operating system, was released by Apple in 2011. If you wish to install macOS Lion on your Mac, you can download it from the App Store. Here’s a step-by-step guide on how to download macOS Lion:
1. Open the App Store: Launch the App Store on your Mac by clicking on the blue App Store icon in your Dock or by searching for “App Store” in Spotlight.
2. Search for macOS Lion: Once the App Store is open, use the search bar located in the upper-right corner of the window to search for “macOS Lion”.
3. Click on “Get” or the Download button: After locating macOS Lion in the search results, click on the “Get” button or the cloud-shaped Download button to initiate the download process.
4. Sign in with your Apple ID: If prompted, sign in with your Apple ID and password. If you do not have an Apple ID, you will need to create one in order to proceed with the download.
5. Wait for the download to complete: The download size of macOS Lion is approximately 4-5 GB, so depending on your internet connection speed, the download process may take some time.
6. Follow the on-screen prompts: Once the download is finished, the macOS Lion installer will open automatically. Follow the on-screen prompts to complete the installation process.
7. Check compatibility: Before proceeding with the installation, make sure that your Mac meets the system requirements for macOS Lion. You can find the system requirements on Apple’s official website.
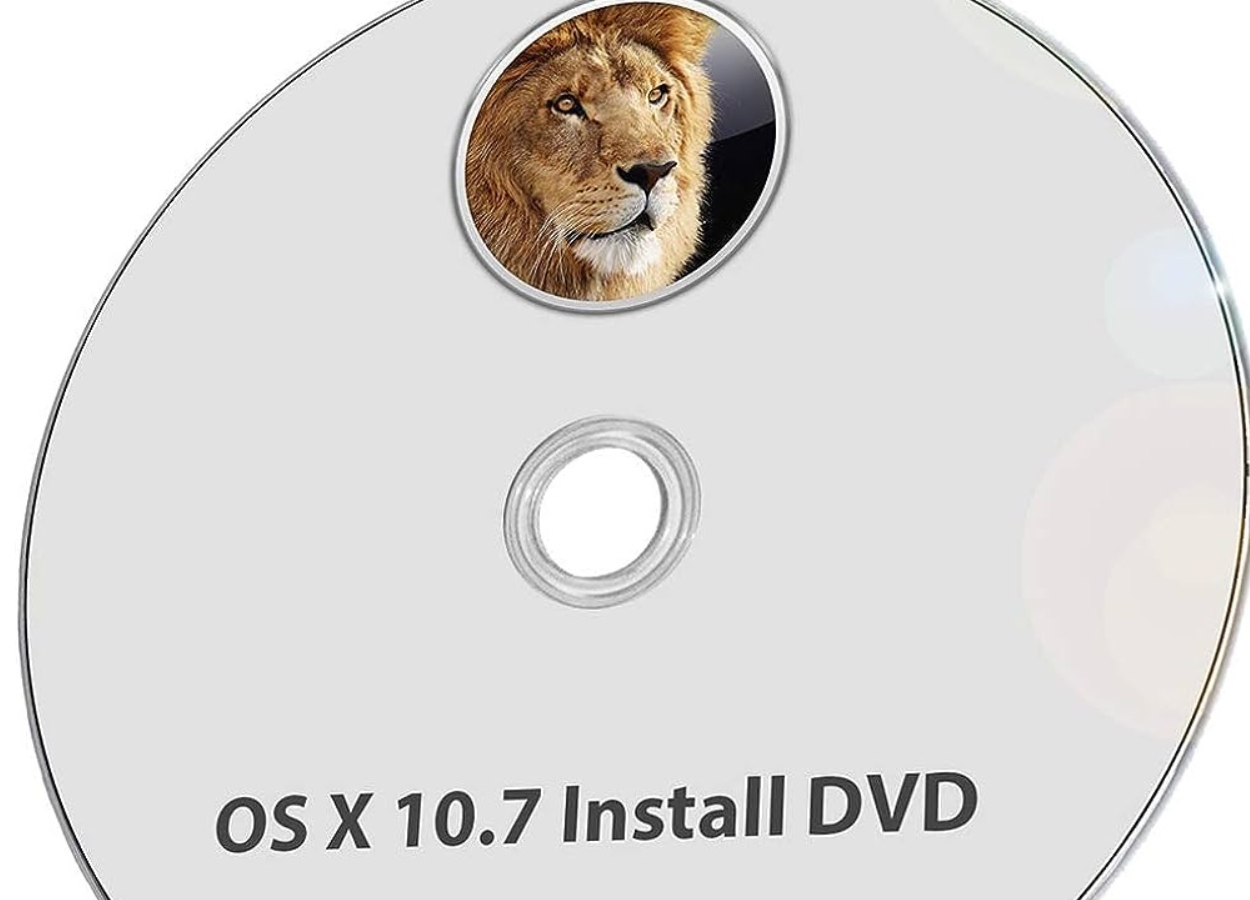
That’s it! You have successfully downloaded macOS Lion from the App Store. Now you can proceed with the installation process or create a bootable DVD to install macOS Lion on multiple Macs or as a backup option.
Remember to backup your important files before installing a new operating system, as the installation process may require erasing and reformatting your disk.
Create a Bootable DVD using Disk Utility
If you prefer to have a physical copy of macOS Lion, you can create a bootable DVD using Disk Utility. This will allow you to install macOS Lion on multiple Macs or serve as a backup option. Here’s a step-by-step guide on how to create a bootable DVD using Disk Utility:
1. Insert a blank DVD: Start by inserting a blank DVD into your Mac’s optical drive. Ensure that the DVD has enough storage capacity to hold the macOS Lion installer.
2. Open Disk Utility: Navigate to your Applications folder, then go to the Utilities folder and open Disk Utility.
3. Select the DVD drive: In Disk Utility, you’ll see a list of drives and volumes on the left sidebar. Select the DVD drive you inserted in the previous step. Be careful not to select your startup disk by mistake.
4. Choose the ISO file: With the DVD drive selected, go to the top toolbar and click on the “Burn” button. A dialog box will appear, asking you to locate the ISO file of the macOS Lion installer.
5. Locate the Install macOS Lion.app file: Click “Cancel” on the dialog box, and go to the Applications folder. Right-click on the “Install macOS Lion.app” file and select “Show Package Contents”.
6. Copy the “SharedSupport” folder: Within the package contents, you will find a folder named “SharedSupport”. Copy this folder to your desktop.
7. Return to Disk Utility: Go back to Disk Utility and select the DVD drive once again. This time, click on the “Burn” button in the toolbar.
8. Create a bootable DVD: In the dialog box that appears, locate and select the “SharedSupport” folder that you copied to the desktop. Then click on the “Burn” button to start creating the bootable DVD.
9. Wait for the burning process to complete: Disk Utility will start the burning process, which may take a while. Once it’s finished, you’ll have a bootable DVD containing the macOS Lion installer.
That’s it! You have successfully created a bootable DVD using Disk Utility. Now you can use this DVD to install macOS Lion on any compatible Mac by following the on-screen prompts during the installation process.
Remember to label and keep this bootable DVD in a safe place for future use, as it can come in handy if you need to reinstall macOS Lion or perform a clean installation.
Insert the Blank DVD into Your Mac
Now that you have prepared the blank DVD, it’s time to insert it into your Mac’s optical drive. Follow these simple steps to properly insert the blank DVD:
1. Remove any previous discs: If there is a disc already in the optical drive, make sure to eject it before proceeding. To do this, simply press the eject button on your Mac’s keyboard or click on the eject button next to the optical drive icon in the Finder.
2. Locate the optical drive: Look for the slot-loading optical drive on your Mac. It is typically located on the side or front of your Mac, depending on the model you are using.
3. Gently insert the blank DVD: Hold the blank DVD carefully by the edges and align it with the opening of the optical drive. Slowly and gently push the DVD into the drive until it is fully inserted.
4. Wait for the Mac to recognize the DVD: Give your Mac a few moments to recognize the inserted DVD. The DVD icon should appear on your desktop, and you may hear the sound of the DVD spinning up as the Mac reads it.
5. Check the DVD in Finder: If the DVD icon does not appear on your desktop, you can also check for it in Finder. Open a Finder window, and on the left sidebar, you will find a list of devices and drives. Look for the DVD drive and click on it to access the DVD contents.
6. Safely eject the DVD: When you are finished with the DVD, make sure to eject it properly. To do this, either drag the DVD icon to the Trash, right-click on the DVD icon and select “Eject,” or press the eject button on your Mac’s keyboard.
That’s it! You have successfully inserted the blank DVD into your Mac’s optical drive. Now you are ready to proceed with the next steps, such as using Disk Utility to create a bootable DVD or burning data onto the DVD using other software.
Remember to handle the DVD with care and avoid touching the laser side of the disc to prevent any scratches or damage. Keeping your optical drive clean and free from dust can also help ensure smooth reading and writing of discs.
Open Disk Utility from the Utilities Folder
Disk Utility is a handy tool built into macOS that allows you to manage and manipulate your storage devices. To create a bootable DVD or perform other disk-related tasks, you need to open Disk Utility. Here’s how you can do it:
1. Go to the Utilities folder: Click on the “Finder” icon in the Dock, which is the smiling blue face icon. In the top menu bar, click on “Go” and then select “Utilities” from the drop-down menu. Alternatively, you can press Shift + Command + U on your keyboard to directly open the Utilities folder.
2. Locate Disk Utility: In the Utilities folder, scroll down or look alphabetically to find the “Disk Utility” application. It has an icon that resembles a hard disk and a stethoscope.
3. Open Disk Utility: Once you’ve located the Disk Utility application, double-click on it to launch it. Disk Utility will now open, and you should see a window with a sidebar on the left and a main area displaying your storage devices and volumes.
4. Familiarize yourself with Disk Utility: Take a moment to explore the main interface of Disk Utility. You will find a list of your internal and external drives, as well as their partitions and mounted volumes. Disk Utility also provides options for formatting, partitioning, and repairing disks.
5. Ensure the DVD drive is visible: In the left sidebar of Disk Utility, you should see a list of storage devices, including your DVD drive. It will typically be labeled with the brand name or model number. If you don’t see the DVD drive listed, make sure it is connected properly and try refreshing the list by clicking on the “View” menu in the top toolbar and selecting “Show All Devices.”
That’s it! You have successfully opened Disk Utility from the Utilities folder. Now you can proceed with the disk-related tasks you need to perform, such as creating a bootable DVD, formatting a drive, or repairing disk permissions.
Remember to exercise caution when using Disk Utility, as disk-related tasks can potentially erase data or modify your storage devices. Always double-check your actions before applying them and ensure you have a backup of important data to avoid any potential data loss.
Select the DVD Drive and Click “Burn”
Once you have opened Disk Utility, the next step is to select the DVD drive and proceed with burning your desired data onto the blank DVD. Follow these steps to select the DVD drive and initiate the burning process:
1. Locate the DVD drive: In Disk Utility, take a look at the left sidebar where you’ll find a list of storage devices. Look for the DVD drive, which is usually listed under the “External” or “Devices” section. It should display the brand name or model number of the DVD drive.
2. Select the DVD drive: Click on the name of the DVD drive in the left sidebar to highlight it. You will now see the details and information about the DVD drive displayed in the main area of Disk Utility.
3. Click on the “Burn” button: In the top toolbar of Disk Utility, you will find a button labeled “Burn”. Click on this button to initiate the burning process.
4. Choose the data to burn: A dialog box will appear, prompting you to select the data or images you want to burn onto the DVD. You can either navigate to the location of the data on your Mac and select it, or drag and drop the files directly into the dialog box.
5. Adjust the burning settings: Before proceeding, you can customize the burning settings by clicking on the “Options” button in the dialog box. Here, you can set the burn speed, select the desired disc format, and enable “Verify burned data” to ensure the accuracy of the burned data.
6. Start the burning process: Once you have selected the desired data and adjusted the settings, click on the “Burn” button to start the burning process. Disk Utility will now begin writing the data onto the blank DVD. You can monitor the progress in the main area of Disk Utility.
7. Wait for the burning process to complete: The time it takes to complete the burning process may vary depending on the size of the data and the speed of your DVD drive. Once the process is finished, Disk Utility will display a notification or sound to indicate that the burning is complete.
That’s it! You have successfully selected the DVD drive and initiated the burning process through Disk Utility. Now you can safely eject the burned DVD from your Mac’s optical drive and use it as desired, whether it’s for storing data or creating a bootable disc for installations.
Remember to handle the burned DVD with care, avoiding scratches or damage. It is recommended to label the DVD and store it in a protective case or sleeve to ensure its longevity and easy identification.
Locate the Install macOS Lion.app File and Right-click to “Show Package Contents”
In order to create a bootable DVD for macOS Lion, you will need to locate the “Install macOS Lion.app” file and access its package contents. Follow these steps to find the file and show its package contents:
1. Open a Finder window: Click on the “Finder” icon in your Dock or use the keyboard shortcut Command + N. This will open a new Finder window.
2. Navigate to the Applications folder: In the left sidebar of the Finder window, you will see a list of shortcuts and locations. Click on “Applications” to open the folder.
3. Find the “Install macOS Lion.app” file: Scroll through the Applications folder until you find the “Install macOS Lion.app” file. It should have an icon that resembles a silver disk with the Mac logo on it.
4. Right-click on the file: Once you’ve located the “Install macOS Lion.app” file, right-click on it (or hold down the Control key while clicking) to open a contextual menu.
5. Select “Show Package Contents”: Within the contextual menu, hover over the “Show Package Contents” option and click on it. This action will allow you to access the internal contents of the app.
6. Explore the package contents: After clicking on “Show Package Contents,” a new Finder window will open, revealing the package contents of the “Install macOS Lion.app” file. Here, you will find folders, files, and resources that make up the installer.
7. Copy the “SharedSupport” folder: Take note of the “SharedSupport” folder within the package contents. This folder holds important files needed to create a bootable DVD later on. You may want to copy the “SharedSupport” folder to your desktop for easier access during the DVD creation process.
That’s it! You have successfully located the “Install macOS Lion.app” file and accessed its package contents. Now, with the “SharedSupport” folder copied to your desktop, you are ready to proceed with creating a bootable DVD using the files from the package.
Remember that the “Install macOS Lion.app” file is crucial for the DVD creation process, so ensure its integrity and availability before continuing with the subsequent steps.
Copy the “SharedSupport” Folder to Your Desktop
After you have located the “Install macOS Lion.app” file and accessed its package contents, the next step is to copy the “SharedSupport” folder to your desktop. This folder contains essential files needed to create a bootable DVD for macOS Lion. Follow these steps to copy the “SharedSupport” folder:
1. Open a Finder window: Click on the “Finder” icon in your Dock or use the keyboard shortcut Command + N. This will open a new Finder window.
2. Navigate to the package contents: In the Finder window, locate the “Install macOS Lion.app” file that you accessed earlier. Right-click on the file (or hold down the Control key while clicking) to open a contextual menu.
3. Select “Show Package Contents”: Within the contextual menu, click on the “Show Package Contents” option. This action will open a new Finder window displaying the contents of the “Install macOS Lion.app” file.
4. Locate the “SharedSupport” folder: In the Finder window with the “Install macOS Lion.app” package contents, look for the “SharedSupport” folder. This folder contains the necessary installation files for creating a bootable DVD.
5. Copy the “SharedSupport” folder to your desktop: With the “SharedSupport” folder selected, right-click on it (or hold down the Control key while clicking) to bring up a contextual menu. From the menu, choose “Copy” to copy the folder.
6. Paste the “SharedSupport” folder on your desktop: Switch to your desktop or a desired location, right-click (or hold down the Control key while clicking) in the location, and choose “Paste” from the contextual menu. The “SharedSupport” folder will now be copied to the selected location.
That’s it! You have successfully copied the “SharedSupport” folder from the package contents of the “Install macOS Lion.app” file to your desktop. This folder contains vital installation files needed for creating a bootable DVD later on.
Ensure that the copied “SharedSupport” folder is kept in a safe place and not modified or deleted during the DVD creation process. It is recommended to create a backup of the “SharedSupport” folder on a separate storage device for future use or as a precaution.
Open Terminal and Type in the Command to Create a Bootable DVD
Now that you have copied the “SharedSupport” folder to your desktop, the next step is to open Terminal and enter the command to create a bootable DVD for macOS Lion. Follow these steps to accomplish this:
1. Open Terminal: To open Terminal, go to your Applications folder, then the Utilities folder, and locate the Terminal application. You can also use Spotlight by pressing Command + Space and typing “Terminal” in the search bar.
2. Type the command: In Terminal, you will need to type a specific command to create the bootable DVD. The command format is as follows:
hdiutil burn /path/to/SharedSupport
Ensure to replace /path/to/SharedSupport with the actual path to the “SharedSupport” folder on your desktop. You can simply drag and drop the folder into the Terminal window to autofill the path, or manually type in the path.
Note: If you have renamed the “SharedSupport” folder or moved it from the desktop to a different location, adjust the command accordingly with the new path.
3. Press Enter: After typing the command with the correct path, press Enter on your keyboard to execute the command.
4. Authenticate if prompted: Depending on your system settings, Terminal may ask for your user password to authenticate the burning process. Type in your password (you won’t see it as you type), and press Enter.
5. Wait for the burning process to complete: Terminal will start creating the bootable DVD using the contents of the “SharedSupport” folder. The burning process may take some time, so be patient and let it complete. You can monitor the progress in the Terminal window.
6. Eject the DVD: Once the burning process finishes, Terminal will display a message indicating the completion. At this point, the bootable DVD is ready to be used. You can now eject the DVD from your Mac’s optical drive.
Congratulations! You have successfully used Terminal to create a bootable DVD for macOS Lion using the “SharedSupport” folder. The DVD can now be used to install macOS Lion on your Mac or other compatible Macs.
Remember to handle the DVD with care and store it in a safe place. Label the DVD for easy identification, and keep it in a protective case or sleeve to prevent scratches or damage.
Insert the Blank DVD into Your Mac Again
After creating the bootable DVD using Terminal, the next step is to insert the blank DVD back into your Mac’s optical drive. Follow these steps to properly insert the blank DVD:
1. Remove any previously inserted discs: If there is a disc already in the optical drive, make sure to eject it before proceeding. You can do this by pressing the eject button on your Mac’s keyboard or by clicking on the eject button next to the optical drive icon in the Finder.
2. Prepare the blank DVD: Take the blank DVD that you previously inserted into your Mac and ensure it’s clean and free from any dust or smudges. Handling the disc by its edges will help avoid any fingerprints or scratches.
3. Insert the blank DVD: Hold the blank DVD vertically by its edges, aligning it with the opening of the optical drive. Slowly and gently push the disc into the drive until it is fully inserted. Be cautious not to force it or push it at an angle, as this may cause damage to both the disc and the drive.
4. Wait for the Mac to recognize the DVD: Give your Mac a few moments to recognize the inserted DVD. The DVD icon should appear on your desktop, and you may hear the sound of the DVD spinning up as the Mac reads it.
5. Verify the DVD in Finder: If the DVD icon does not automatically appear on your desktop, you can also check for it in Finder. Open a Finder window, and on the left sidebar, you will find a list of devices and drives. Look for the DVD drive and click on it to access the DVD’s contents.
6. Proceed with the next steps: With the blank DVD properly inserted, you can now proceed with the next steps of the installation process, such as restarting your Mac and selecting the bootable DVD as the startup option.
That’s it! You have successfully inserted the blank DVD into your Mac’s optical drive once again. Now you can continue with the installation process or follow the instructions provided alongside the bootable DVD to install macOS Lion on your Mac.
Remember to handle the DVD with care, avoiding any sudden movements or rough handling. Store the disc in a safe place when not in use, and always keep it away from direct sunlight or extreme temperatures to prevent damage.
Restart Your Mac and Hold Down the Option Key
After inserting the bootable DVD into your Mac’s optical drive, the next step is to restart your Mac and access the boot options by holding down the Option key. Follow these steps to restart your Mac and access the boot options:
1. Save your work and close all applications: Before restarting your Mac, make sure to save any unsaved work and close all open applications. This will prevent any data loss or potential conflicts during the restart process.
2. Click on the Apple menu: In the top left corner of your screen, click on the Apple menu. This will open a drop-down menu with various options.
3. Select “Restart”: From the drop-down menu, click on the “Restart” option. Your Mac will now begin the restart process.
4. Hold down the Option key: As your Mac restarts, immediately press and hold down the Option (or Alt) key on your keyboard. Hold it down until you see a screen with various startup options.
5. Select the bootable DVD: On the startup options screen, you will see the available startup disks represented by icons. Use the keyboard’s arrow keys or the mouse cursor to select the bootable DVD icon. It typically appears as a “Mac OS X Install” or similar designation.
6. Press Enter or Return: Once you have selected the bootable DVD icon, press the Enter or Return key to confirm your choice. Your Mac will now boot from the DVD and begin the installation process.
7. Follow the on-screen prompts: As the installation process begins, follow the on-screen prompts to complete the installation of macOS Lion. You may need to select a language, agree to terms and conditions, and choose a destination for the installation.
That’s it! You have successfully restarted your Mac and accessed the boot options by holding down the Option key. Now you can proceed with the installation process of macOS Lion using the bootable DVD.
Remember to keep the bootable DVD inserted in the optical drive until the installation is complete. It is also important to keep an eye on the installation progress and respond to any prompts or instructions as needed.
Select the Bootable DVD from the Startup Options
After restarting your Mac and accessing the boot options by holding down the Option key, the next step is to select the bootable DVD from the available startup options. Follow these steps to select the bootable DVD:
1. Wait for the startup options screen: After holding down the Option key during the restart process, your Mac will display a screen with various startup options. This screen typically shows icons representing the available startup disks.
2. Explore the available startup options: Take a moment to review the icons displayed on the startup options screen. Each icon represents a different startup disk or bootable device. Look for the icon that represents the bootable DVD you inserted into your Mac’s optical drive.
3. Use the keyboard or mouse to select the DVD: To select the bootable DVD, you can either use the arrow keys on your keyboard to navigate to the DVD icon, or use the mouse cursor to click on the DVD icon directly.
4. Confirm your selection: Once you have highlighted or clicked on the bootable DVD icon, press the Enter or Return key on your keyboard or click on the “Continue” button to confirm your selection.
5. Wait for the boot process to start: After confirming your selection, your Mac will start the boot process from the selected bootable DVD. You may see a loading screen or a progress bar indicating that the Mac is starting up from the DVD.
6. Follow the on-screen prompts: As the Mac boots from the bootable DVD, you will be presented with on-screen prompts and instructions. Follow these prompts to proceed with the installation of macOS Lion on your Mac.
7. Be patient during the boot process: Depending on the speed of your Mac and the size of the bootable DVD, the boot process may take some time. Be patient and let the process complete without interrupting or restarting your Mac.
That’s it! You have successfully selected the bootable DVD from the startup options on your Mac. Now you can follow the on-screen prompts to continue with the installation process of macOS Lion.
Remember to keep an eye on the progress of the installation and respond to any additional prompts or instructions that appear during the process. Once the installation is complete, your Mac will restart, and you can begin using macOS Lion on your Mac.
Follow the On-Screen Prompts to Install macOS Lion
Once you have selected the bootable DVD from the startup options, the installation process of macOS Lion will begin. Follow these steps to complete the installation:
1. Language selection: On the installation screen, you will be prompted to choose the language for the installation. Select your preferred language and click “Continue” to proceed.
2. Welcome screen: After selecting the language, a welcome screen will appear. Read the information provided and click “Continue” to move to the next step.
3. Terms and conditions: You will now be presented with the terms and conditions. Read through the terms and conditions, and if you agree, click “Agree” to continue.
4. Select a destination: The installation wizard will prompt you to choose the destination where macOS Lion will be installed. Select the appropriate disk or partition and click “Continue”. If necessary, you can format and partition the disk using Disk Utility from the installer menu.
5. Customize the installation (optional): If you want to customize the installation, click on the “Customize” button. From here, you can choose additional installation options such as which components or apps to install.
6. Install macOS Lion: Once you have selected the destination and customized the installation (if desired), click on the “Install” button to begin the installation process. This will copy the necessary files and data to your chosen destination.
7. Progress bar: During the installation, you will see a progress bar indicating the status of the installation process. Allow the installation to complete without interruption. The duration of the installation will depend on the speed of your Mac and the complexity of your installation choices.
8. Restart your Mac: After the installation is complete, your Mac will automatically restart. Do not manually restart your Mac. Instead, let it restart on its own to complete the installation process.
9. Set up macOS Lion: After your Mac restarts, you will be guided through the initial setup process for macOS Lion. Follow the on-screen prompts to set up your user account, choose your preferences, and configure any additional settings.
10. Enjoy macOS Lion: Once you have completed the setup process, you can begin using macOS Lion and exploring its new features and enhancements.
Congratulations! You have successfully followed the on-screen prompts to install macOS Lion on your Mac. Take the time to familiarize yourself with the new operating system and enjoy the enhanced functionality and features it offers.