
Preparing for Installation
Before diving into the installation process of OS X Mountain Lion, it is important to make sure that you are well-prepared. Taking the time to properly prepare will help ensure a smooth and successful installation. Here are some essential steps to follow:
- Check System Requirements: Make sure that your Mac meets the minimum system requirements for OS X Mountain Lion. These include having at least 2GB of RAM and 8GB of available storage space. Additionally, ensure that your Mac is compatible with the new operating system by checking the Apple official website.
- Backup Important Data: It’s always a good practice to back up your important files before making any major system changes. Use Time Machine or any other reliable backup software to create a complete backup of your Mac. In case anything goes awry during the installation, you can easily restore your data.
- Update Software: Before proceeding with the installation, make sure to update all your applications and software. This will help ensure compatibility and minimize potential conflicts with OS X Mountain Lion. Check for updates through the App Store or directly from the developer’s website.
- Free Up Disk Space: Verify that you have enough free disk space to accommodate the installation of OS X Mountain Lion. Clean up unnecessary files, delete old applications or files you no longer need, and empty the trash to free up additional space. This will prevent any installation errors due to insufficient storage.
- Disable Antivirus and Firewall: If you have any antivirus or firewall software installed on your Mac, temporarily disable them during the installation process. These security measures can sometimes interfere with the installation or cause unexpected errors. Remember to re-enable them once the installation is complete.
By following these steps, you will be well-prepared for the installation of OS X Mountain Lion. Taking the time to properly prepare will help minimize the chances of encountering any issues during the installation process, ensuring a smooth and hassle-free upgrade experience.
Creating a Bootable USB Drive
Creating a bootable USB drive is a convenient method to install OS X Mountain Lion, especially if you need to perform a clean installation or upgrade multiple Macs. This allows you to have a portable installation medium that can be used on any compatible Mac. Here’s how you can create a bootable USB drive:
- Download the OS X Mountain Lion Installer: First, you’ll need to download the OS X Mountain Lion installer from the Mac App Store. Once the download is complete, the installer will open automatically. Close the installer as you won’t be using it directly for the creation of the bootable USB drive.
- Format the USB Drive: Connect your USB drive to your Mac and open the Disk Utility application. Select the USB drive in the sidebar and click on the “Erase” tab. Choose a format that is compatible with Mac, such as “Mac OS Extended (Journaled)”, and give it a suitable name. Click on the “Erase” button to format the USB drive.
- Create the Bootable USB Drive: Open a Terminal window, which can be found in the Utilities folder within the Applications folder. Use the following command to create the bootable USB drive:
- Booting from the USB Drive: To install OS X Mountain Lion from the bootable USB drive, restart your Mac and hold down the Option key. This will bring up the boot menu. Select the USB drive labeled with the OS X Mountain Lion installer and press enter. Follow the on-screen instructions to complete the installation process.
sudo /Applications/Install\ OS\ X\ Mountain\ Lion.app/Contents/Resources/createinstallmedia --volume /Volumes/YourUSBDrive --applicationpath /Applications/Install\ OS\ X\ Mountain\ Lion.app --nointeractionReplace “YourUSBDrive” with the name of your formatted USB drive. Enter your administrator password when prompted and press enter. The process will take some time to complete. Once finished, you’ll have a bootable USB drive with OS X Mountain Lion.
Creating a bootable USB drive gives you the flexibility to install OS X Mountain Lion on multiple Macs and perform clean installations whenever needed. It is a convenient method that ensures you always have a reliable installation medium on hand.
Upgrading from a Previous Version of OS X
If you’re currently using a previous version of OS X and want to upgrade to OS X Mountain Lion, the process is relatively straightforward. Follow these steps to seamlessly upgrade your operating system:
- Check Compatibility: Double-check that your Mac meets the system requirements for OS X Mountain Lion. Ensure that your hardware is compatible and that you have enough available disk space for the upgrade.
- Backup Your Data: Before proceeding with the upgrade, it’s crucial to back up your important files and data. Use Time Machine or another trusted backup method to create a complete backup. This way, you’ll have a copy of your data in case anything goes wrong during the upgrade process.
- Connect to a Stable Internet Connection: Make sure your Mac is connected to a stable and reliable internet connection. The upgrade process requires downloading files from the App Store, so a stable connection is essential to ensure a smooth installation.
- Download OS X Mountain Lion: Open the App Store and search for “OS X Mountain Lion” in the search bar. Locate the official OS X Mountain Lion page and click on the “Get” or “Download” button to initiate the download process. The installer will begin downloading in the background.
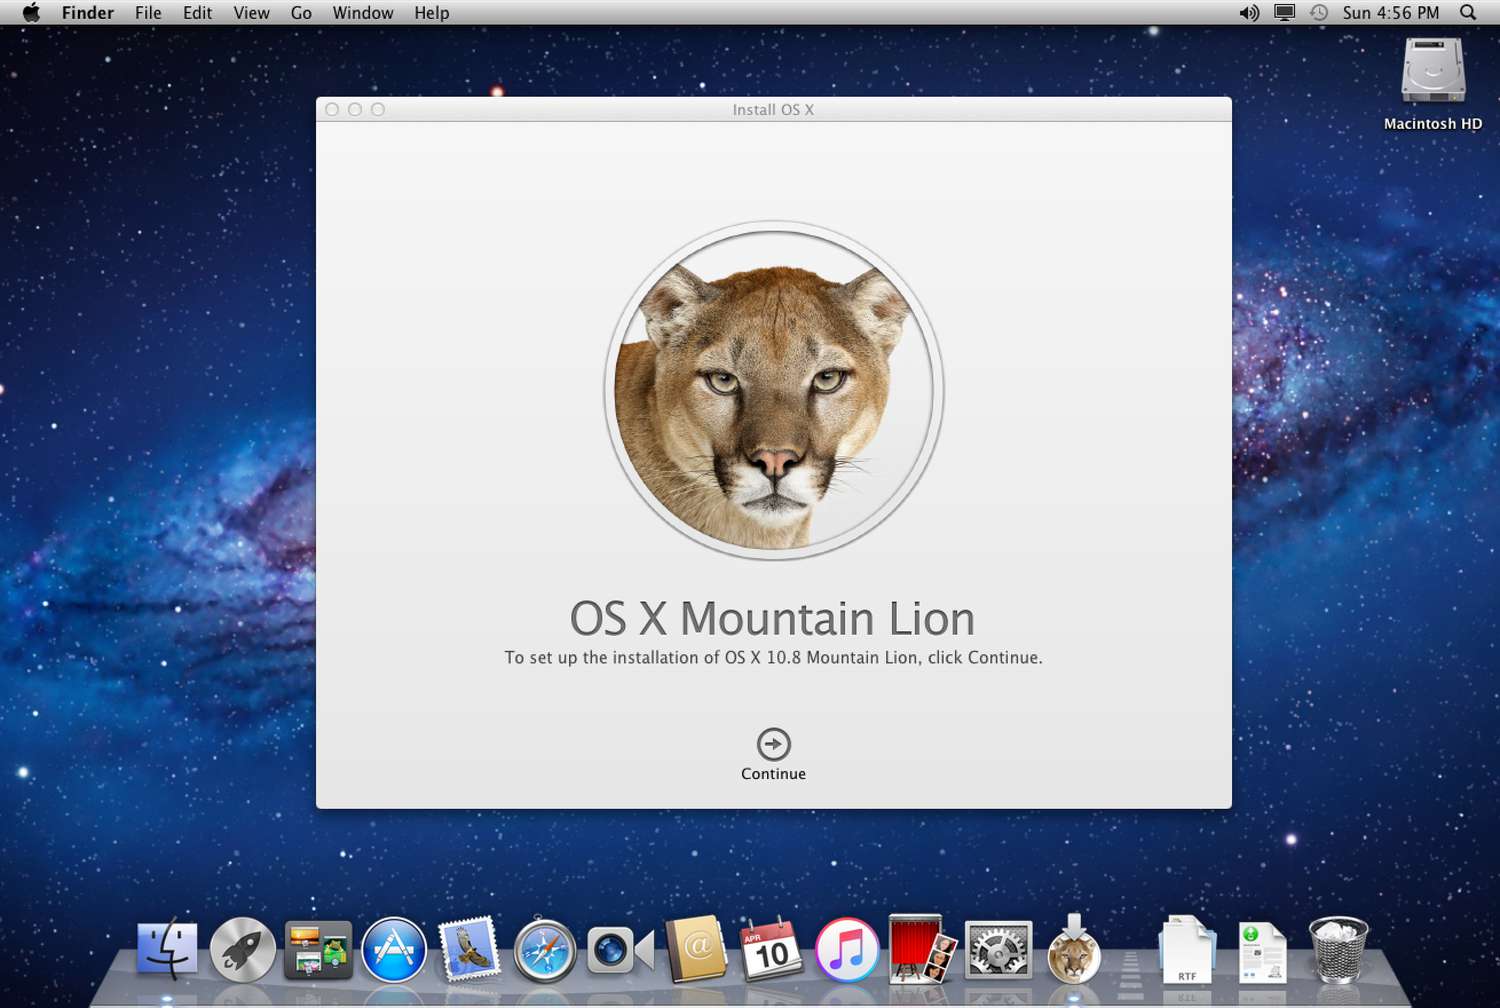
- Prepare for Installation: Once the download is complete, the installer will automatically open. Follow the on-screen instructions to prepare for the installation. Make sure to carefully read and understand any prompts or information presented during this process.
- Perform the Upgrade: After preparing for the installation, the actual upgrade process will begin. The installer will guide you through the steps to upgrade your Mac to OS X Mountain Lion. This may take some time, so be patient and let the process complete.
- Complete the Setup: Once the upgrade is finished, your Mac will restart with the new OS X Mountain Lion installed. Follow the on-screen instructions to complete the setup, including signing in with your Apple ID and configuring any additional settings or preferences as needed.
By following these steps, you can easily upgrade from a previous version of OS X to OS X Mountain Lion. Always remember to back up your data and ensure a stable internet connection to avoid any potential issues during the upgrade process.
Clean Installation of OS X Mountain Lion
A clean installation of OS X Mountain Lion involves erasing your current operating system and starting fresh with a clean slate. This method is useful if you want to remove any lingering issues or if you have a new hard drive or Mac that requires a fresh installation. Here’s how you can perform a clean installation:
- Backup Your Data: Before proceeding with a clean installation, it’s crucial to back up all your important files and data. Use Time Machine or another reliable backup method to create a complete backup. This ensures that you can restore your data after the clean installation.
- Create a Bootable USB Drive: Follow the steps outlined in the previous section to create a bootable USB drive with OS X Mountain Lion.
- Restart and Boot from the USB Drive: Connect the bootable USB drive to your Mac and restart it. As it powers on, hold down the Option key to access the boot menu. Select the USB drive labeled with the OS X Mountain Lion installer and press enter. This will boot your Mac from the USB drive.
- Erase the Current Disk: Once your Mac has booted from the USB drive, open Disk Utility from the Utilities menu. Select your main hard drive or SSD and click on the “Erase” tab. Choose a suitable format, such as “Mac OS Extended (Journaled)”, and give it a name. Click on the “Erase” button to erase the current disk.
- Install OS X Mountain Lion: Close Disk Utility and proceed with the installation process. Select your freshly erased disk as the destination for the installation. Follow the on-screen instructions to complete the installation. This may take some time, so be patient and let the installation finish.
- Complete the Setup: After the installation is complete, your Mac will restart with the clean installation of OS X Mountain Lion. Follow the on-screen prompts to complete the setup, including signing in with your Apple ID and configuring any additional settings or preferences.
- Restore Your Data: Once the setup is complete, you can restore your data from the backup you created earlier. Use Time Machine or the backup method you prefer to restore your files, applications, and settings to your Mac.
Performing a clean installation of OS X Mountain Lion provides a fresh start and can help resolve any persistent issues. Remember to back up your data and follow the steps carefully to ensure a successful clean installation.
Troubleshooting Installation Issues
While installing OS X Mountain Lion is usually a smooth process, sometimes you may encounter issues that hinder the installation. If you’re facing any problems during the installation, here are some troubleshooting steps to help you resolve common issues:
- Check System Requirements: Verify that your Mac meets the minimum system requirements for OS X Mountain Lion. Ensure you have sufficient storage space, compatible hardware, and supported RAM. Upgrading your hardware or freeing up disk space may be necessary.
- Restart Your Mac: Sometimes, a simple restart can resolve installation issues. Restart your Mac and try installing OS X Mountain Lion again. It can refresh your system and overcome any temporary glitches that may have been causing the problem.
- Disconnect External Devices: Unplug any external devices, such as printers, scanners, or USB hubs, that may be connected to your Mac. External devices can sometimes interfere with the installation process. Try reinstalling OS X Mountain Lion after disconnecting them.
- Check Internet Connection: Ensure that you have a stable and reliable internet connection during the installation. A weak or intermittent connection can cause problems while downloading or installing the necessary files. Connect to a different network or check your internet settings if you’re facing connectivity issues.
- Update Mac Firmware: Outdated firmware can sometimes cause installation problems. Check for any available firmware updates for your Mac model. Visit Apple’s website and follow the instructions to download and install the latest firmware updates specific to your Mac.
- Reset PRAM and SMC: Resetting the PRAM (Parameter RAM) and SMC (System Management Controller) on your Mac can resolve certain installation issues. Consult Apple’s support website or user manual to find the appropriate method to reset the PRAM and SMC for your specific Mac model.
- Use Safe Mode: Booting your Mac in Safe Mode can help identify and resolve software conflicts or incompatible drivers that may be causing installation issues. Restart your Mac and hold down the Shift key until the Apple logo appears to boot into Safe Mode. From there, try installing OS X Mountain Lion again.
- Contact Apple Support: If you have exhausted all possible troubleshooting steps and are still unable to install OS X Mountain Lion, it may be time to reach out to Apple support. Apple’s support team can provide specialized assistance and guidance to resolve any installation issues you may be experiencing.
By following these troubleshooting steps, you can overcome common installation issues with OS X Mountain Lion. If the problem persists, don’t hesitate to seek assistance from Apple’s support team for further help and guidance.
Configuring OS X Mountain Lion after Installation
Once you have successfully installed OS X Mountain Lion, there are several important configuration steps to take to optimize your experience and personalize your settings. Here are some essential configurations to consider:
- Set Up iCloud: Sign in with your Apple ID and set up iCloud to seamlessly sync your files, contacts, calendars, and more across all your Apple devices. iCloud provides backup and synchronization capabilities that enhance convenience and accessibility.
- Enable Find My Mac: Protect your Mac in case it gets lost or stolen by enabling Find My Mac. This feature allows you to track your Mac’s location, remotely lock it, and erase its data if necessary. Enable Find My Mac in the iCloud preferences panel.
- Customize System Preferences: Open the System Preferences panel to customize various aspects of your Mac. Set your preferred display resolution, adjust trackpad or mouse settings, configure energy-saving options, and personalize the appearance of your desktop and screensaver.
- Install Essential Software: Install any necessary software and applications that you require for your daily tasks and productivity. Visit the Mac App Store or the developer’s website to download and install applications like productivity tools, media players, browsers, and more.
- Configure Security Settings: Ensure that your Mac is secure by adjusting the security settings. Enable Gatekeeper to protect against the installation of malicious software and only allow applications from the App Store or identified developers. Regularly update your system software to benefit from the latest security patches and enhancements.
- Organize and Customize the Dock: The Dock provides quick access to your favorite applications. Arrange your most-used applications in the Dock by dragging and dropping their icons. You can also customize the Dock’s appearance, size, and behavior in the System Preferences panel.
- Set Up Time Machine: Time Machine is a built-in backup feature that creates automatic backups of your Mac. Connect an external storage device and configure Time Machine to back up your important files regularly. This ensures that you can easily recover your data in case of accidental deletion or system failure.
- Adjust Notification Center: Notification Center keeps you informed about important events and updates. Customize the types of notifications you want to receive, choose the apps that can send notifications, and configure their display settings in the System Preferences panel.
- Explore Additional Features: OS X Mountain Lion offers a range of additional features to enhance your experience. Take some time to explore features like Mission Control for managing multiple windows, Launchpad for easy access to your applications, and AirDrop for convenient file sharing with other Mac users.
By configuring your Mac according to your preferences and needs, you can optimize your productivity, security, and overall user experience with OS X Mountain Lion.
Updating and Managing Software on Mountain Lion
Keeping your software up to date is essential for maintaining optimal performance, security, and compatibility on OS X Mountain Lion. Here are some important steps to update and manage software on your Mac:
- Software Update: OS X Mountain Lion includes a built-in Software Update feature that allows you to easily update your system software. Click the Apple menu and select “Software Update” to check for any available updates. Install any updates listed to keep your Mac up to date with the latest enhancements and security patches.
- App Store Updates: Many applications on your Mac, including those downloaded from the Mac App Store, can receive updates through the App Store itself. Open the App Store, click on the “Updates” tab, and review the available updates. Install the updates for your installed applications to ensure you have the latest features and bug fixes.
- Automatic Updates: Enable the automatic update feature to have your Mac automatically download and install important updates in the background. Open System Preferences and select “App Store”. Check the box next to “Download newly available updates in the background” to enable automatic updates. This ensures that your Mac stays up to date without manual intervention.
- Managing Applications: Use Launchpad or the Applications folder to manage your installed applications. Remove any unused or unwanted applications by dragging them to the Trash. Be cautious when uninstalling applications and ensure that you won’t lose any important data stored within them.
- Uninstalling Unused Plugins and Extensions: Over time, plugins and extensions can accumulate on your Mac and may cause performance issues or conflicts with newer software versions. Use third-party uninstaller tools or manual methods to remove unused plugins and extensions that you no longer need.
- Managing Disk Space: As you install and update software, your Mac’s disk space can fill up quickly. Regularly check your disk usage and remove unnecessary files, applications, and other data to free up space. You can use the Storage tab in the About This Mac window to identify and manage storage usage.
- Updating Third-Party Software: Besides system software and App Store applications, make sure to check for updates for third-party software you have installed. Visit the respective software developer’s website or use dedicated update tools to download and install updates for third-party software.
- Software Support and End of Life: Stay informed about software support and end-of-life dates for the applications you use. Some older software may no longer receive updates or be compatible with newer versions of OS X. In such cases, consider seeking alternative software or upgrading to a more recent version if necessary.
Regularly updating and managing software on OS X Mountain Lion improves stability, performance, and security. By keeping your system and applications up to date, you can enjoy the latest features, bug fixes, and protection from vulnerabilities.
Tips and Tricks for Using OS X Mountain Lion
OS X Mountain Lion offers a range of features and capabilities designed to enhance your overall Mac experience. Here are some useful tips and tricks to help you make the most out of OS X Mountain Lion:
- Take Advantage of Gestures: OS X Mountain Lion supports a variety of multitouch gestures that can make navigating and interacting with your Mac more efficient. Learn and utilize gestures like swiping between full-screen apps, accessing Mission Control, or using the three-finger swipe to switch between desktop spaces.
- Use Spotlight for Quick Searches: Spotlight is a powerful tool for quickly finding files, applications, and other information on your Mac. Press Command + Space to activate Spotlight and start typing your search query. You can also use Spotlight to perform calculations, look up word definitions, and more.
- Organize with Tags: Tags allow you to categorize and organize your files systematically. Apply tags to files and folders to easily locate them in Finder. Create custom tags based on your needs, such as “work,” “personal,” or any other relevant categories.
- Master Mission Control: Mission Control gives you a bird’s eye view of all your open windows, desktop spaces, and full-screen apps. Use the three-finger swipe up gesture or press the Mission Control key to access this feature. Customize your desktop spaces, rearrange windows, and manage your workflow more efficiently.
- Customize Notifications: Tame your notifications by customizing their appearance and behavior. Open the Notification Center in the top-right corner of the menu bar and click on the “Notifications” tab. Adjust the settings for each application to control how and when you receive notifications.
- Boost Productivity with Spaces: Spaces let you create multiple virtual desktops to organize your workspaces. Use Mission Control to create and switch between spaces, keeping related windows and applications grouped together. Assign specific applications to particular spaces for a more organized and focused workflow.
- Secure Your Mac with FileVault: Protect your data by using FileVault, a built-in encryption feature. Enable FileVault in the Security & Privacy preferences panel and encrypt your entire disk. This ensures that even if your Mac falls into the wrong hands, your data remains secure and inaccessible.
- Dictation and Voice Commands: Take advantage of the built-in dictation feature to convert your spoken words into text. Enable dictation in System Preferences and use it in applications that support text input. Additionally, explore voice commands to control your Mac hands-free by enabling “Enhanced Dictation” in the Dictation & Speech preferences panel.
- Maximize Full-Screen Mode: When using supported applications, take advantage of full-screen mode to immerse yourself in your work. Click on the green maximize button in the top-left corner of the window, or swipe with two fingers to enter and exit full-screen mode quickly.
- Utilize Notification Center Widgets: Customize your Notification Center by adding useful widgets. From the Mac App Store, download and install widgets to display weather updates, calendar events, to-do lists, stock market information, and more. Personalize your Notification Center to have quick access to important information.
By implementing these tips and tricks, you can enhance your productivity, efficiency, and enjoyment while using OS X Mountain Lion. Take the time to explore these features and find the ones that best suit your needs and workflow.