
Overview of the Samsung My Files App
The Samsung My Files app is a powerful file management tool that comes pre-installed on Samsung devices, providing users with an efficient way to organize, browse, and manage their files and folders. Whether you’re looking for a specific document, trying to free up storage space, or wanting to transfer files between different locations, the My Files app offers a range of features to assist you.
With its intuitive interface and robust functionality, the app allows users to access and manage files stored both in the device’s internal storage and external storage options like SD cards and USB drives. This makes it a valuable tool for organizing downloads, documents, photos, videos, and more.
One of the standout features of the My Files app is its ability to search for files, making it incredibly easy to locate specific downloads or important documents. Additionally, the app supports various ways to sort and organize files, allowing you to quickly find what you need with minimum effort.
In addition to managing files, the app also enables users to perform file operations such as renaming, moving, and deleting files and folders. This functionality provides flexibility and control over your files, helping you keep your storage space organized and clutter-free.
The My Files app also allows seamless file transfer between different storage locations, such as moving files from the internal storage of your device to an SD card. This can come in handy especially when your device’s internal storage is running low, and you need to free up space.
For added convenience, the My Files app integrates with cloud storage services, enabling you to back up your files and access them from anywhere. This feature ensures that your important files are safely stored and accessible even if your device is lost or damaged.
Furthermore, the My Files app offers customizable settings that allow you to personalize your file management experience according to your preferences. You can customize the view, sort order, and other options to suit your specific requirements and streamline your file management tasks.
In the following sections, we will explore in more detail how to access and navigate the My Files app, as well as how to utilize its features for finding and organizing your downloads effectively.
Accessing the My Files App on Samsung Devices
Accessing the My Files app on your Samsung device is a straightforward process. Follow these simple steps to open the app:
- Unlock your Samsung device and go to the home screen.
- Locate the “Apps” icon, usually denoted by a grid of dots or squares, either on the home screen or in the app drawer. Tap on it.
- Scroll through the list of apps until you find the “My Files” app icon, which resembles a yellow folder with a white document inside. Tap on it to launch the app.
Alternatively, you can access the My Files app through the Quick Settings panel. Simply swipe down on your device’s screen to open the Notification Panel, then swipe down again to access the Quick Settings panel. Look for the “My Files” shortcut icon, represented by a yellow folder, and tap on it to open the app.
Once you’ve opened the My Files app, you will be greeted by the main interface, which displays the various storage locations available on your device, such as “Internal storage,” “SD card,” and any other external storage options you may have connected.
If you want to explore the files and folders stored in your device’s internal storage, tap on the “Internal storage” option. Similarly, if you have an SD card inserted into your device, tap on the “SD card” option to access the files stored on the card.
You can also access other storage locations like USB drives by connecting them to your device. Once connected, the My Files app will automatically detect and display the storage option for easy access.
With the My Files app now open and the desired storage location selected, you’re ready to begin navigating and managing your files and folders. In the next section, we will delve into the various features and functionalities of the My Files app that can help you efficiently find and organize your downloads.
Navigating the My Files App Interface
The My Files app interface is designed to be user-friendly and intuitive, allowing you to navigate through your files and folders with ease. Let’s explore the key components of the interface:
1. Toolbar: The toolbar is located at the top of the My Files app screen and provides you with quick access to essential functions. Here, you will find options such as search, sort, and view options, as well as buttons for creating new folders, selecting multiple files, and more.
2. Folders and Files View: The main screen of the My Files app displays folders and files in a grid or list format, depending on your preference. You can switch between the view options using the icons in the toolbar. The grid view shows thumbnail previews of files, while the list view provides detailed information such as file names, sizes, and modified dates.
3. Breadcrumbs: At the top of the interface, you’ll see a breadcrumb trail that shows the current location within the file hierarchy. This helps you understand where you are in the file system and navigate back to previous folders easily.
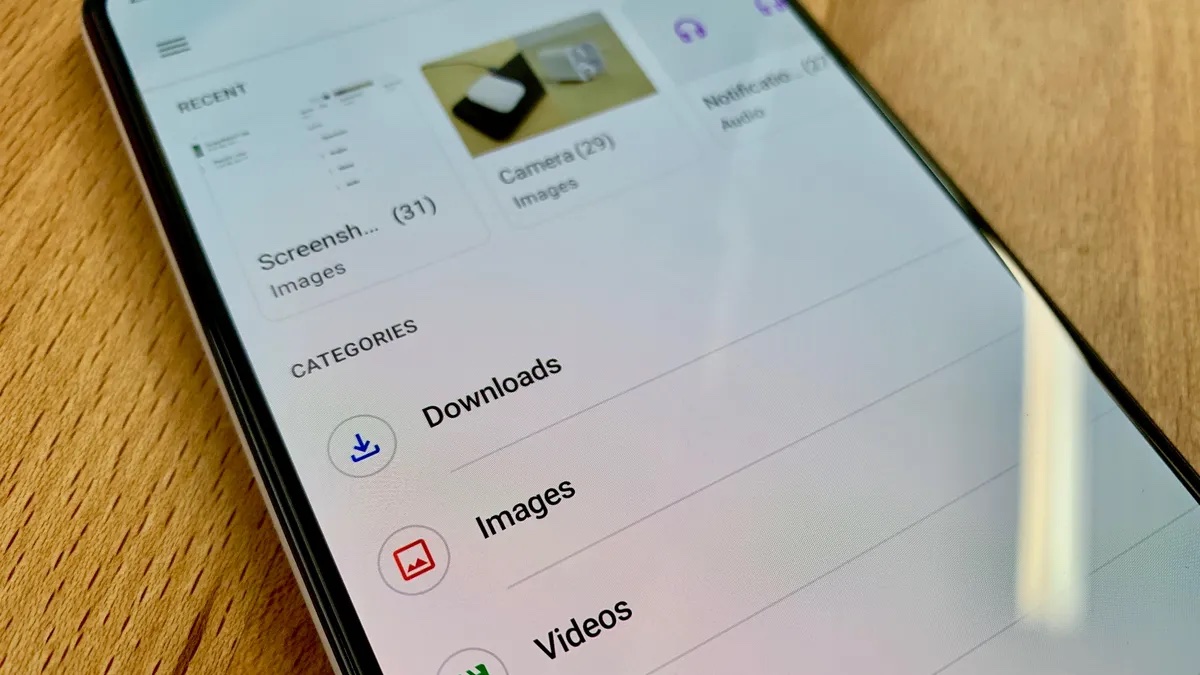
4. Quick Access shortcuts: Below the toolbar, you may find a row of shortcuts to frequently accessed folders. These shortcuts allow you to quickly jump to common locations like Downloads, Documents, or Images, saving you time when locating specific types of files.
5. Context Menu: Tap and hold on a file or folder to bring up a context menu with various options, such as renaming, copying, moving, deleting, and more. This menu provides convenient access to essential file management actions.
6. Dropdown Menus: In the toolbar, you’ll find dropdown menus that let you filter and sort files based on specific criteria. For example, you can sort files by name, size, or date modified. Additionally, you can filter files by type to show only specific file formats, like images or documents.
7. Multi-Select: To select multiple files or folders at once, tap and hold on a file to enter selection mode. From there, you can either tap on other items to select them individually or use the select/deselect all option in the toolbar. This feature is useful for performing batch operations like moving or deleting multiple files simultaneously.
By familiarizing yourself with these interface elements, you will be able to navigate the My Files app effortlessly and make the most of its features. In the next section, we will explore how to find your downloads within the My Files app.
Finding Your Downloads in the My Files App
Locating your downloaded files within the My Files app is a simple process. Follow these steps to find your downloads:
- Open the My Files app on your Samsung device. This will take you to the main interface that displays the available storage options.
- Tap on the storage option where your downloads are most likely to be located. For example, if you frequently download files to your internal storage, select the “Internal storage” option.
- Within the selected storage location, you will see a list of folders and files. Look for a folder named “Downloads” or something similar. Commonly, the downloads folder is located in the root directory of the chosen storage option.
- Tap on the “Downloads” folder to open it. Here, you will find all your downloaded files.
If you cannot find a specific “Downloads” folder, it’s possible that your downloads are stored in a different location. In such cases, you can use the search function within the app to find your downloaded files.
To search for a specific file, follow these steps:
- Tap on the search icon located in the toolbar at the top of the My Files app.
- Enter the name or part of the name of the file you’re looking for in the search box. As you type, the app will provide autocomplete suggestions to help you find your file quickly.
- Browse through the search results to locate the desired file. Tapping on a search result will take you directly to the file’s location within the storage.
The My Files app also supports other search criteria, such as file type, modified date, and size. You can refine your search by tapping on the dropdown menus in the toolbar to access these additional search options.
By following these steps, you can easily find and access your downloaded files within the My Files app on your Samsung device. In the next section, we will explore how to search for specific files or folders within the app.
Searching for Specific Files or Folders
The My Files app on Samsung devices provides a robust search function that allows you to quickly locate specific files or folders. Whether you’re searching for a document, a photo, or any other file type, the app offers an efficient way to find what you’re looking for. Here’s how to search for specific files or folders:
- Open the My Files app on your Samsung device and navigate to the storage location where you want to search.
- In the toolbar at the top of the app, tap on the search icon. This will open the search bar.
- Type in the name or part of the name of the file or folder you’re searching for. As you type, the app will provide autocomplete suggestions based on your input.
- Tap on the desired file or folder from the autocomplete suggestions or complete typing the name and press the search button on your keyboard to initiate the search.
The search results will be displayed, showing the files and/or folders that match your search criteria. You can click on a search result to open the file or navigate to the location of the folder.
Additionally, the My Files app provides advanced search options to refine your search further. Here’s how to utilize these options:
- Tap on the search icon in the toolbar to open the search bar.
- Enter your search query in the search bar.
- In the toolbar, tap on the filter icon. This will open a dropdown menu with different filtering options.
- Select from the available filters such as file type, modified date, or size, to narrow down your search results.
- After applying the desired filters, tap on the search button to initiate the search.
The search results will now be filtered according to your selected criteria, helping you find specific files or folders more precisely.
By utilizing the search function and its advanced options, the My Files app allows you to efficiently search for specific files or folders within your device’s storage. In the next section, we will explore how to sort and organize your downloads within the My Files app.
Sorting and Organizing Your Downloads
The My Files app offers various options to help you sort and organize your downloaded files. By utilizing these features, you can easily arrange your downloads in a way that suits your preferences and enables efficient management. Here’s how to sort and organize your downloads:
Sorting Files:
- Open the My Files app on your Samsung device and navigate to the storage location containing your downloads.
- In the toolbar at the top of the app, tap on the sorting icon. This will open a dropdown menu with different sorting options.
- Select the sorting option you prefer, such as sorting by name, size, or date modified.
- The files in the current folder will now be sorted based on your chosen criteria.
This sorting feature allows you to easily organize your downloads, making it convenient to find files based on specific attributes, such as alphabetical order or the most recent modifications.
Creating Folders:
- In the My Files app, navigate to the location where you’d like to create a new folder for organizing your downloads.
- In the toolbar, tap on the “Create folder” icon. This will prompt a dialog box to enter the desired folder name.
- Type in the name for your new folder and tap on the “Create” button.
- The new folder will now be created in the current location, allowing you to move or save your downloads into it.
Creating folders gives you the flexibility to create a hierarchical structure that suits your organization needs. You can create folders based on categories or themes to group similar files together.
Moving Files:
- Within the My Files app, navigate to the location containing the file you want to move.
- Tap and hold on the file to enter the selection mode.
- Select the desired files by tapping on them, or tap on the “Select all” option in the toolbar to select all files in the current location.
- In the toolbar, tap on the “Move” icon. This will prompt you to choose the destination folder.
- Select the folder where you want to move the files to, and the selected files will be moved to the chosen location.
Moving files allows you to effectively reorganize your downloads into specific folders, enhancing the overall structure and making it easier to locate files in the future.
By sorting your files, creating folders, and moving them around, you can transform your downloads into a well-organized and easily accessible collection within the My Files app.
In the next section, we will explore how to manage your downloads in terms of renaming, moving, and deleting files.
Managing Your Downloads: Renaming, Moving, and Deleting Files
The My Files app provides robust file management capabilities that allow you to effectively manage your downloaded files. With features like renaming, moving, and deleting files, you can organize your downloads and keep your storage space clutter-free. Here’s how to manage your downloads in the My Files app:
Renaming Files:
- Navigate to the location in the My Files app where the file you want to rename is located.
- Tap and hold on the file to enter the selection mode.
- Select the file you wish to rename by tapping on it.
- In the toolbar at the top, tap on the “Rename” icon.
- A dialog box will appear, allowing you to enter the new name for the file.
- Type in the desired name and tap on the “Rename” button.
- The file will now be renamed with the new name you provided.
Renaming files can help you give more descriptive or meaningful names to your downloads, making them easier to identify and locate.
Moving Files:
- In the My Files app, navigate to the location containing the file you want to move.
- Tap and hold on the file to enter the selection mode.
- Select the desired files by tapping on them, or tap on the “Select all” option in the toolbar to select all files in the current location.
- In the toolbar, tap on the “Move” icon. This will prompt you to choose the destination folder.
- Select the folder where you want to move the files to, and the selected files will be moved to the chosen location.
Moving files allows you to organize your downloads by placing them in specific folders. This can be helpful for creating a more structured file system and simplifying the file management process.
Deleting Files:
- Within the My Files app, navigate to the location containing the file you want to delete.
- Tap and hold on the file to enter the selection mode.
- Select the files you wish to delete by tapping on them, or tap on the “Select all” option in the toolbar to select all files in the current location.
- In the toolbar, tap on the “Delete” icon. A confirmation dialog box will appear.
- Confirm the deletion by tapping on the “Delete” button.
- The selected files will be permanently deleted and removed from your device.
Deleting unnecessary or unwanted files helps you free up storage space and keep your downloads folder clean and organized. However, be cautious when deleting files, as they cannot be recovered once they are deleted.
By utilizing the file management functions in the My Files app, you can efficiently rename, move, and delete files, ensuring that your downloads are well-organized and easily manageable. In the next section, we will explore how to transfer files between the internal storage and SD card.
Transferring Files between Internal Storage and SD Card
The My Files app on Samsung devices allows you to easily transfer files between the internal storage and the SD card. This feature is particularly useful when you want to free up space on your device’s internal storage or when you want to access files stored on the SD card. Here’s how you can transfer files between the internal storage and SD card:
Moving Files from Internal Storage to SD Card:
- Open the My Files app and navigate to the location on your device’s internal storage where the file you want to move is located.
- Tap and hold on the file to enter the selection mode.
- Select the file or files you wish to move by tapping on them, or tap on the “Select all” option in the toolbar to select all files in the current location.
- In the toolbar, tap on the “Move” icon.
- A list of storage locations will appear. Select the SD card option to move the selected files to the SD card.
- The files will be moved to the SD card, and you can access them from the SD card location in the My Files app.
By moving files from the internal storage to the SD card, you can free up valuable space on your device and utilize the additional storage capacity of the SD card.
Moving Files from SD Card to Internal Storage:
- Open the My Files app and navigate to the location on your SD card where the file you want to move is located.
- Tap and hold on the file to enter the selection mode.
- Select the file or files you wish to move by tapping on them, or tap on the “Select all” option in the toolbar to select all files in the current location.
- In the toolbar, tap on the “Move” icon.
- Select the internal storage option to move the selected files to the device’s internal storage.
- The files will be moved to the internal storage, and you can access them from the internal storage location in the My Files app.
Moving files from the SD card to the internal storage allows you to retrieve files for easier access, especially if you frequently use certain files or folders.
Transferring files between the internal storage and SD card using the My Files app provides flexibility and efficient management of your files. It enables you to optimize storage space and easily access files no matter where they are stored. In the next section, we will explore how to back up your downloads to the cloud using the My Files app.
Backing Up Your Downloads to the Cloud
The My Files app offers a convenient feature that allows you to back up your downloads to the cloud. By utilizing cloud storage services, you can ensure the safety and accessibility of your files even if your device is lost, damaged, or running out of storage space. Here’s how to back up your downloads to the cloud using the My Files app:
- Open the My Files app on your Samsung device.
- Navigate to the location where your downloaded files are stored.
- Tap and hold on the file or files you want to back up to the cloud to enter the selection mode. You can also tap on the “Select all” option in the toolbar to select all files in the current location.
- In the toolbar at the top, tap on the “More” or “Settings” icon (usually represented by three dots or lines).
- From the options that appear, select the “Share” or “Upload” option.
- Choose the cloud storage service you want to use for the backup.
- Follow the prompts to log in to your cloud storage account and select the destination folder.
- Confirm the backup process and wait for the files to be uploaded to the cloud storage.
By backing up your downloads to the cloud, you can enjoy the benefits of remote storage, data redundancy, and easy accessibility from multiple devices. This provides an additional layer of protection and ensures that your important files are safely stored and can be accessed even if something happens to your device.
It’s worth noting that the cloud storage options available may vary depending on the cloud services you have installed on your device. Popular cloud storage providers for Android devices include Google Drive, Dropbox, and Microsoft OneDrive.
With your downloads safely backed up to the cloud, you can have peace of mind knowing that your files are secure and accessible whenever you need them. In the next section, we will explore how to customize the settings of the My Files app to tailor it to your preferences.
Customizing the My Files App Settings
The My Files app allows you to customize various settings to personalize your file management experience. By adjusting these settings, you can tailor the app to your preferences and streamline your file management tasks. Here’s how to customize the settings of the My Files app:
Changing View and Sort Options:
- Open the My Files app on your Samsung device.
- In the toolbar at the top, tap on the “View” or “Sort” icon.
- Select your desired view option, such as grid or list, or choose your preferred sorting criteria, such as name, size, or date modified.
By adjusting the view and sort options, you can optimize your file browsing experience and efficiently locate files based on your preferred display format or sorting order.
Customizing Home and Recent Folders:
- In the My Files app, tap on the “More” or “Settings” icon in the toolbar (usually represented by three dots or lines).
- Select “Settings” from the options that appear.
- Scroll down to find “Home folder” or “Recent files/folders” settings.
- Tap on the corresponding setting and choose a preferred folder or file options for your home screen or recent files/folders view.
Customizing the home and recent folders allows you to have quick access to the folders or files that matter most to you, making it convenient to navigate to frequently used locations within the app.
Adjusting Display Options:
- In the My Files app, go to the settings by tapping on the “More” or “Settings” icon in the toolbar.
- Look for the “Display” or “Appearance” settings.
- Within the display options, you can adjust settings such as font size, icon size, and grid spacing to customize the visual appearance of the app.
By adjusting the display options, you can optimize the app’s appearance to suit your preferences and enhance the visual clarity of your file browsing experience.
Enabling or Disabling Hidden Files:
- Go to the settings of the My Files app by tapping on the “More” or “Settings” icon in the toolbar.
- Search for the “Show hidden files” or similar option.
- Toggle the setting on or off to show or hide hidden files and folders in the app.
Enabling the display of hidden files can grant you access to files and folders that are typically hidden from view. However, exercise caution when working with hidden files, as they may contain system or important data.
By customizing the settings of the My Files app, you can optimize the app’s functionality and appearance to suit your preferences, making your file management tasks more efficient and enjoyable. In the next section, we will explore how to troubleshoot common issues with the My Files app.
Troubleshooting Common Issues with the My Files App
While the My Files app is generally reliable and user-friendly, occasionally, you may encounter some issues. Here are some common problems you might face with the My Files app and how to troubleshoot them:
App Crashing or Not Responding:
- If the app is crashing or not responding, try closing the app and reopening it. This can help resolve temporary glitches.
- Alternatively, clear the app’s cache and data by going to your device’s Settings, selecting “Apps,” finding the My Files app, and choosing “Clear cache” and “Clear data.”
- If the issue persists, try restarting your device or updating the My Files app to the latest version available.
Files Not Showing Up:
- If files are not appearing in the My Files app, try refreshing the app by pulling down on the screen or tapping the refresh icon in the toolbar.
- In case you recently downloaded the files, wait for a few moments to allow the app to index and display them.
- Ensure that the files are not hidden or in a different location. Use the search feature in the app to locate the specific files.
Inability to Move or Delete Files:
- If you are unable to move or delete files, check if the files are currently being used or opened by another app. Close the app using the file and try again.
- Ensure that you have the necessary permissions to perform file operations. In some cases, certain system files or protected folders may restrict such actions.
SD Card Issues:
- If you’re experiencing problems related to your SD card, verify if it is properly inserted into your device. Remove the card and reinsert it, making sure it’s securely in place.
- Check if the SD card is corrupted or damaged. Try using the card with another device or computer to determine if the issue lies with the card itself.
- If the SD card is not recognized by the My Files app, ensure that it is formatted correctly. Backup the card’s contents, format it, and then transfer the files back to the card.
Cloud Storage Sync Issues:
- If you’re encountering problems with cloud storage synchronization, ensure that you have an active and stable internet connection. A weak or intermittent connection may hinder the sync process.
- Double-check your cloud storage settings and configurations to ensure that the My Files app is properly linked to your cloud storage account.
- If the issue persists, try signing out of your cloud storage account within the My Files app and signing back in to initiate a fresh sync.
If these troubleshooting steps don’t resolve the issues you’re facing with the My Files app, you may want to contact the Samsung support team or seek assistance from a professional to further diagnose and address the problem.
Remember, it’s always a good idea to regularly back up your important files to avoid any potential loss or inconvenience.