
Changing the Default Notification Sound
If you’re tired of hearing the same old default notification sound on your Samsung device, you’ll be delighted to know that you can easily change it. Personalizing your notification sound can add a touch of uniqueness to your device and make it more enjoyable to use. Samsung devices offer a variety of built-in notification sounds to choose from, or you can even use your own custom sound. Here’s how you can change the default notification sound on your Samsung device:
1. Open the Settings app on your Samsung device. You can find the Settings app in your app drawer or by swiping down from the top of the screen and tapping the gear icon.
2. Scroll down and select “Sounds and vibration” or a similar option depending on your device model.
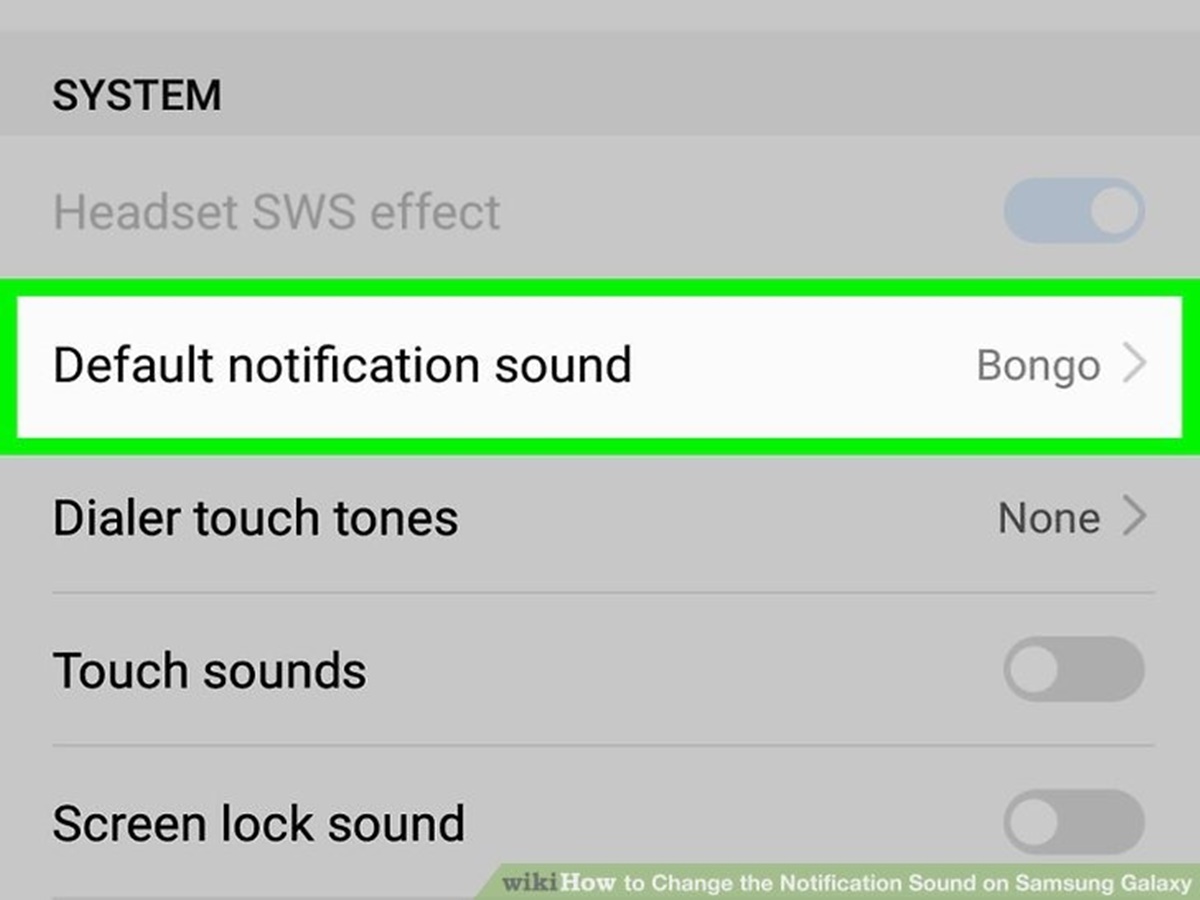
3. Tap on “Notification sounds” or “Notification sound” to access the notification sound settings.
4. You will see a list of pre-installed notification sounds. You can scroll through the list and tap on the sound you want to set as your default notification sound. You can also tap on the play button next to each sound to hear a preview of it.
5. If you want to use a custom notification sound, tap on the “Add” or “Plus” button often represented by a “+” symbol. This will allow you to select a sound file from your device’s storage. Navigate to the folder where your desired sound is located and select it. You can add your own sound files in supported formats like MP3 or WAV.
6. Once you have selected your desired notification sound, you can adjust the volume level using the slider provided. You can also enable or disable vibration along with the notification sound by tapping on the toggle switch next to “Vibration.”
7. After making your desired changes, simply exit the settings app, and your new notification sound will be applied.
Changing the default notification sound on your Samsung device is a simple process that can add a personal touch to your user experience. Whether you choose a pre-installed sound or a custom sound, this small customization can make a big difference in how you interact with your device. So go ahead, explore the different sounds available, or upload your own to give your smartphone a unique touch.
Setting a Custom Notification Sound for Specific Apps
While changing the default notification sound is great, sometimes you may want to have different notification sounds for specific apps. This can be useful in distinguishing important notifications from less urgent ones or simply for personal preference. Fortunately, Samsung devices allow you to set custom notification sounds for specific apps. Here’s how you can do it:
1. Open the Settings app on your Samsung device.
2. Scroll down and select “Apps” or “Applications” (the exact name may vary depending on your device model).
3. Tap on the app for which you want to set a custom notification sound.
4. In the app’s settings, look for “Notifications” or a similar option. Tap on it.
5. You will see the notification settings specific to that app. Look for the “Sound” option and tap on it.
6. Select the desired notification sound from the list. You can choose from the pre-installed sounds or use a custom sound by tapping on the “Add” or “+” button and selecting a sound file from your device’s storage.
7. Adjust the volume level and enable or disable vibration for this specific app’s notifications, if desired.
8. Once you have made the necessary changes, exit the settings app.
Now, whenever you receive a notification from the app you customized, it will play the selected notification sound, differentiating it from other app notifications. You can repeat the above steps for each app you want to set a custom notification sound for.
This feature allows you to personalize your device even further, ensuring that you can easily distinguish between different apps’ notifications based on their unique sounds. Whether it’s assigning a calming tone for your meditation app or a lively sound for your favorite messaging app, setting custom notification sounds for specific apps can make your smartphone experience more enjoyable and personalized.
Adding Custom Notification Sounds from your Phone’s Storage
Want to use your favorite song or a unique sound as your notification alert? Samsung devices allow you to add custom notification sounds from your phone’s storage, giving you the freedom to personalize your device even further. Here’s how you can add custom notification sounds:
1. Connect your Samsung device to your computer using a USB cable.
2. On your computer, navigate to your phone’s storage. This is usually represented as an external device or drive.
3. Create a new folder in your phone’s storage dedicated to custom notification sounds. You can name it something like “Notifications” or “Custom Sounds.”
4. Find the sound file you want to use as a notification sound on your computer. Ensure that the file is in a supported format such as MP3 or WAV.
5. Copy and paste or drag and drop the sound file into the folder you created in Step 3, located in your phone’s storage. Make sure the file is in the correct folder.
6. Disconnect your Samsung device from your computer.
7. Open the Settings app on your Samsung device.
8. Scroll down and select “Sounds and vibration” or a similar option.
9. Tap on “Notification sounds” or “Notification sound” to access the notification sound settings.
10. Tap on the “Add” or “+” button often represented by a “+” symbol.
11. Locate the folder where you saved the custom notification sound on your phone’s storage. Tap on it.
12. You will see the custom notification sound you added. Tap on it to select it as your notification sound.
13. Adjust the volume level using the provided slider and enable or disable vibration for the notification sound, according to your preferences.
14. Once you have made the necessary changes, exit the settings app. The custom notification sound will now be available for you to use.
With the ability to add custom notification sounds from your phone’s storage, you can truly personalize your device and make it reflect your unique style and taste. Whether it’s a favorite song, a sound effect, or a recording that holds special meaning to you, this feature allows you to set your own one-of-a-kind notification sound.
Downloading Custom Notification Sounds from the Internet
If you’re looking for a wide selection of custom notification sounds to choose from, the internet is a treasure trove of options. You can easily download and use custom notification sounds that suit your preferences and style. Here’s how you can download custom notification sounds from the internet on your Samsung device:
1. Open a web browser on your Samsung device.
2. Search for websites that offer free or paid custom notification sounds. There are several popular websites like Zedge, MyTinyPhone, and Notification Sounds that provide a vast collection of notification sounds in various categories.
3. Browse through the available notification sounds on the website. You can listen to previews of the sounds to help you choose.
4. Once you find a notification sound you like, tap on the download button or link next to it.
5. The notification sound file will begin downloading to your device. Depending on your internet connection speed, this may take a few seconds or longer.
6. After the download is complete, open the file explorer or download manager on your Samsung device.
7. Locate the downloaded notification sound file. It is typically saved in the “Downloads” folder on your device.
8. Long-press on the downloaded file to select it, then tap on the menu or options button (usually represented by three dots) and choose “Move” or “Cut.”
9. Navigate to the desired folder or directory where you want to store the notification sound. This can be the default notification sounds folder or a dedicated folder for custom sounds.
10. Paste the notification sound file into the chosen folder.
11. Open the Settings app on your Samsung device and go to the notification sound settings.
12. Tap on the “Add” or “+” button to access the available notification sounds.
13. Navigate to the folder where you saved the downloaded notification sound. Tap on the sound file to select it as your notification sound.
14. Adjust the volume level and enable or disable vibration according to your preferences.
15. Exit the settings app, and your newly downloaded custom notification sound will be applied.
With the ability to download custom notification sounds from the internet, you have an almost endless array of choices to personalize your device. From popular tunes to unique sounds, you can find the perfect notification sound to suit your style and make your device truly one-of-a-kind.
Applying Different Notification Sounds for Different Contacts
Do you want to instantly know who is contacting you without even looking at your Samsung device? By assigning different notification sounds to specific contacts, you can easily identify who is trying to reach you. This can be especially useful if you have important contacts that require immediate attention. Here’s how you can apply different notification sounds for different contacts on your Samsung device:
1. Open the Contacts app on your Samsung device.
2. Find and select the contact for which you want to set a custom notification sound.
3. Tap on the “Edit” or “Edit contact” option. You may need to tap on the menu or options button (usually represented by three dots) to access this option.
4. In the contact’s editing screen, scroll down and look for the “Notification sound” or a similar option.
5. Tap on the “Notification sound” option to access the notification sound settings for that specific contact.
6. Choose the desired notification sound from the available options. You can use the pre-installed sounds or add a custom sound by tapping on the “Add” or “+” button and selecting a sound file from your device’s storage.
7. Adjust the volume level and enable or disable vibration specific to this contact’s notifications, if desired.
8. Once you have made the necessary changes, save the contact’s details.
Now, whenever you receive a call, message, or any other notification from the contact you customized, your Samsung device will play the selected notification sound, making it easy for you to quickly identify who is trying to reach you.
This feature allows you to personalize your device’s notifications even further and create a more personalized communication experience. By assigning unique notification sounds to specific contacts, you can prioritize important contacts and respond to their messages or calls promptly, while differentiating them from other less urgent notifications.
So go ahead and customize the notification sounds for your important contacts on your Samsung device to ensure you never miss an important message or call again!
Creating and Using Audio Files as Notification Sounds
If you have a creative side and want to make your own unique notification sounds, Samsung devices allow you to create and use audio files as notification sounds. This feature gives you the freedom to add a personal touch to your device by using custom-made sounds. Here’s how you can create and use audio files as notification sounds on your Samsung device:
1. Open a sound recording app on your Samsung device. Most Samsung devices come pre-installed with a voice recorder app named “Voice Recorder.” If you don’t have it, you can download a sound recording app from the Google Play Store.
2. Record the sound that you want to use as your notification sound. It can be anything from your voice to ambient sounds or musical compositions. Take your time and be creative.
3. Once you have recorded the sound, open the sound recording app’s settings.
4. Look for an option to export or save the recorded sound as an audio file. Choose the appropriate format, such as MP3 or WAV, and save the file to your device’s storage.
5. Open the Settings app on your Samsung device.
6. Scroll down and select “Sounds and vibration” or a similar option.
7. Tap on “Notification sounds” or “Notification sound” to access the notification sound settings.
8. Tap on the “Add” or “+” button to access the available notification sounds.
9. Navigate to the folder where you saved the audio file you created. Tap on the sound file to select it as your notification sound.
10. Adjust the volume level and enable or disable vibration according to your preferences.
11. Exit the settings app, and your custom-made audio file will be applied as your notification sound.
With the ability to create and use audio files as notification sounds, you can truly make your device unique and reflective of your personal style. From voice recordings to original compositions, you have the opportunity to add a personal touch and express your creativity through your notification sounds.
So unleash your imagination and create your very own notification sound using the built-in sound recording app on your Samsung device. Stand out from the crowd and enjoy a truly personalized smartphone experience!
Adjusting the Volume Level of Notification Sounds
Controlling the volume of your notification sounds is essential to ensure they are audible but not overly intrusive. Samsung devices provide easy options to adjust the volume level of your notification sounds, allowing you to find the perfect balance. Here’s how you can adjust the volume level of notification sounds on your Samsung device:
1. Open the Settings app on your Samsung device.
2. Scroll down and select “Sounds and vibration” or a similar option.
3. Tap on “Volume” or “Volume settings.”
4. Depending on your device model and software version, you may see separate volume controls for different categories such as “Ringtone,” “Media,” and “Notifications.” Look for the volume control specifically labeled for notifications.
5. Adjust the volume slider specifically dedicated to notification sounds. Drag it to the left to decrease the volume or to the right to increase it. You can adjust the volume level according to your preference and the environment you are in.
6. Pay attention to the preview sound that plays when adjusting the volume to ensure it’s at a suitable level for your needs.
7. Some Samsung devices also provide an option to enable or disable “Use volume keys for media.” If enabled, you can use the physical volume keys on the device to control the notification volume even when other media are playing.
8. Exit the settings app, and the new volume level for notification sounds will be applied.
By adjusting the volume level of notification sounds on your Samsung device, you can ensure that you hear the notifications clearly without overpowering other sounds or disrupting your environment. Finding the right balance in volume can enhance your experience and ensure that you don’t miss any important notifications.
So take advantage of the volume control options on your Samsung device and customize the notification sound volume according to your preferences. Whether you prefer a subtle notification chime or a louder alert, it’s up to you to find the perfect volume level that suits your needs.
Enabling or Disabling Vibration along with Notification Sounds
Vibration alerts can be useful when you want to receive notifications discreetly, especially in situations where you can’t have your device make sound. However, there may be times when you prefer to only rely on notification sounds without the additional vibration. Samsung devices offer the flexibility to enable or disable vibration along with notification sounds, giving you control over how you receive alerts. Here’s how you can enable or disable vibration along with notification sounds on your Samsung device:
1. Open the Settings app on your Samsung device.
2. Scroll down and select “Sounds and vibration” or a similar option.
3. Tap on “Vibration” or “Vibration intensity.”
4. You will see different categories for which you can control vibration settings, such as “Incoming calls,” “Notifications,” or “System sounds.” Look for the category specifically related to notifications.
5. Tap on the notification category to access the vibration settings.
6. Here, you can choose to enable or disable vibration along with notification sounds by toggling the switch next to “Vibration” or “Vibrate.”
7. If you want to customize the vibration pattern, tap on “Vibration pattern” or a similar option. This allows you to select from a list of predefined vibration patterns or create a custom vibration pattern by tapping on “Create” or “+” and following the on-screen instructions.
8. Exit the settings app, and the changes to the vibration settings for notification sounds will be applied.
By enabling vibration along with notification sounds, you can ensure that you never miss important alerts even if your device is on silent or in a pocket. On the other hand, disabling vibration can help you avoid distractions in certain situations, such as when you need complete silence or want to rely solely on audio cues.
Take advantage of Samsung’s flexibility in vibration settings and tailor your device to your preferred style of receiving notifications. You have the freedom to choose whether you want an audible alert, vibration, or a combination of both based on your needs and preferences.
So explore the vibration settings on your Samsung device and find the perfect balance between sound and vibration to receive notifications exactly the way you want.
Restoring the Default Notification Sound Settings
If you have made various customizations to your notification sound settings and want to start fresh with the default settings, you can easily restore them on your Samsung device. Restoring the default notification sound settings is helpful if you want to revert back to the original sounds or undo any customizations you’ve made. Here’s how you can restore the default notification sound settings on your Samsung device:
1. Open the Settings app on your Samsung device.
2. Scroll down and select “Sounds and vibration” or a similar option.
3. Tap on “Notification sounds” or “Notification sound” to access the notification sound settings.
4. Look for an option that says “Default” or “Restore defaults” and tap on it.
5. You will be prompted to confirm whether you want to restore the default notification sound settings. Tap on “OK” or “Restore” to proceed.
6. After confirming, the notification sound settings will be restored to their factory defaults.
7. Exit the settings app, and the default notification sound settings will now be applied.
By restoring the default notification sound settings, any custom notification sounds you’ve set will be replaced with the original sounds that come with your Samsung device. This can be helpful if you want a fresh start or if you’re not satisfied with your customizations.
Keep in mind that restoring the default notification sound settings will also reset any volume level adjustments or vibration settings you’ve made. So, if you’ve customized these settings, you’ll need to readjust them after restoring the defaults.
Take advantage of this feature to easily revert back to the default notification sound settings on your Samsung device whenever you desire. Whether you want to return to the original sounds or simply start anew, restoring the default settings can simplify the process and give you a clean slate.