
Overview of the Background Eraser Tool
The Background Eraser Tool in Photoshop is a powerful feature that allows you to easily remove the background from an image and create a transparent or new background. Whether you’re working on graphic design projects, product photography, or retouching portraits, this tool can be a lifesaver in removing unwanted elements and isolating the main subject.
Unlike other selection tools in Photoshop, the Background Eraser Tool detects and erases pixels based on their color and tone similarity to the sampled area. This makes it particularly useful for erasing complex backgrounds with intricate details like hair and fur, where traditional selection tools can often fall short.
To use the Background Eraser Tool, you need to select it from the Photoshop toolbar (usually located under the Eraser Tool). The tool options bar at the top of the screen allows you to adjust the brush size, hardness, and other settings to suit your specific needs.
Once you have selected the Background Eraser Tool, you can simply click and drag the brush over the areas you want to remove. The tool will automatically calculate the color range to be erased based on the center of the brush. As you paint, you will notice that the background is being erased, leaving behind the subject.
It is important to note that the Background Eraser Tool is a destructive tool, meaning it permanently erases the pixels as you apply it. Therefore, it’s a good practice to work on a duplicate layer or make a backup of your original image before using this tool, so you can revert back if needed.
The Background Eraser Tool also provides several options to refine your selection. You can adjust the brush size and hardness to target specific areas more precisely, which is particularly useful when working on images with varied areas of focus. Experimenting with the brush settings will allow you to find the right balance between accurate erasing and smooth transitions.
In addition to the basic mode, the Background Eraser Tool offers additional brush modes such as Discontiguous, Contiguous, and Find Edges. These modes provide different ways to handle the erasing process depending on the complexity of your image and the desired results.
If you need to remove a background that contains intricate details or fine edges, the Extract Tool can be a valuable resource. This feature allows you to make a more precise selection by defining the foreground and background areas, delivering cleaner and sharper results.
Once you have successfully removed the background with the Background Eraser Tool, you can further refine the edges using tools like Feather, Refine Edge, or Refine Mask. These options allow you to smooth out the transition between the subject and the new background, creating a more seamless and professional-looking image.
After removing the background, you can apply various filters and effects to enhance the extracted object. This opens up endless creative possibilities, allowing you to seamlessly blend the subject into new backgrounds, add shadows, adjust the color and lighting, and much more.
Finally, when you’re satisfied with the results, you can save your image with a transparent background or export it with a new background. This makes it easy to use the extracted object in other projects, such as graphic design, website design, or composite images.
Overall, the Background Eraser Tool in Photoshop is an indispensable feature for anyone working with images. It provides a quick and efficient way to remove backgrounds and isolate subjects, allowing you to unleash your creativity and achieve professional-looking results.
Preparing Your Image for Background Erasing
Before diving into the background erasing process, it’s crucial to prepare your image appropriately. Taking some time to set up your image correctly will help you achieve better results and make the background erasing process more efficient.
The first step in preparing your image is to ensure that you have a high-resolution version of it. This is important because it gives you more room to work with and allows for finer details when erasing the background. If you’re working with a low-resolution image, consider finding a higher-resolution version if possible.
Next, it’s beneficial to assess the overall composition of your image. Take a moment to identify any objects or elements that might interfere with the background eraser tool’s accuracy. These could include intricate patterns, overlapping edges, or highly textured areas. If necessary, use other Photoshop tools such as the Healing Brush or Clone Stamp to correct any irregularities before moving on to the background erasing process.
Additionally, it’s essential to ensure that your subject is well-separated from the background. If your subject blends with the background color or if there are similar colors in both the foreground and background, it could prove challenging for the background eraser tool to distinguish between them. To overcome this, consider adjusting the color or lighting of your image to create more contrast between the subject and the background. This could involve adjusting the exposure, saturation, or even adding a temporary solid color background that contrasts with your subject.
Another useful technique is to use masks to temporarily hide areas that you don’t want to erase. By taking advantage of layer masks, you can selectively hide parts of your subject or background, allowing for more precise erasing. This technique can be particularly handy when dealing with complex images or images with overlapping elements.
Lastly, it’s crucial to save your image in a format that supports transparency, such as PNG or PSD. By saving your image with a transparent background, you preserve the extracted subject’s details and allow for easy integration into other projects or backgrounds later on.
Using the Background Eraser Tool in Basic Mode
The Background Eraser Tool in Photoshop offers a straightforward and effective way to remove unwanted backgrounds from your images. In its basic mode, it provides a simple yet powerful approach to erasing backgrounds quickly and efficiently.
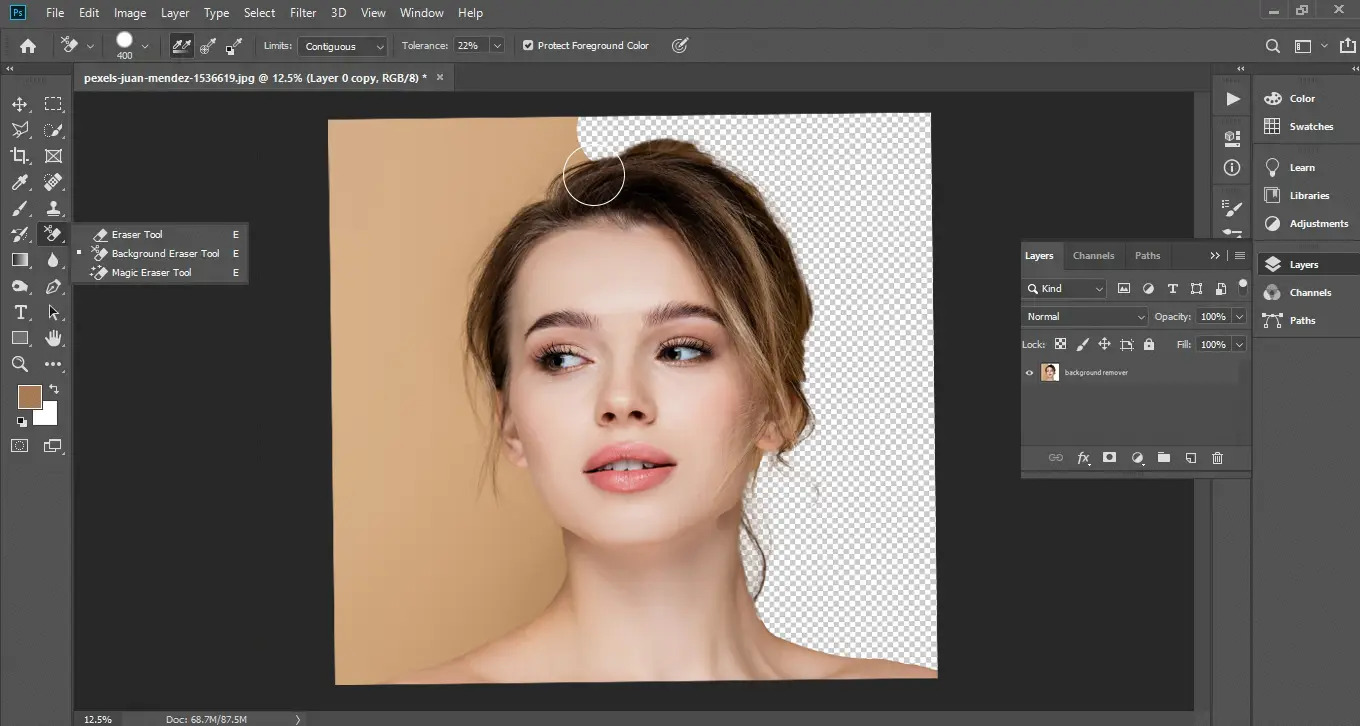
To start using the Background Eraser Tool, make sure you have selected it from the Photoshop toolbar. The tool options bar at the top of the screen will display the available settings and options for the tool.
Before you begin erasing the background, it’s essential to adjust the brush size and hardness to fit your specific needs. The brush size determines the size of the erasing brush, while the hardness affects the edge sharpness. Selecting a larger brush size is suitable for erasing large areas, while a smaller brush size allows for more precision in removing intricate details.
Once you have set your brush settings, click and drag the eraser brush over the areas you want to remove. The tool will sample the color under the brush’s center and erase any pixels that are similar in color and tone.
As you erase, you might notice that some areas are not being removed as expected or that the tool is accidentally erasing parts of the subject. To remedy this, you can adjust the Tolerance setting in the tool options bar. A lower tolerance value makes the tool more selective, only erasing pixels that closely match the sampled color. Conversely, a higher tolerance value allows the tool to erase a broader range of colors.
Another essential feature of the Background Eraser Tool is the Contiguous option in the tool options bar. When this option is enabled, the tool only erases areas of the same color that are connected together. This can be useful when erasing solid backgrounds or distinct areas. However, if you want to erase colors across noncontiguous areas, you can disable the Contiguous option.
Throughout the erasing process, it’s crucial to regularly zoom in and out of the image to ensure accuracy. Zooming in allows for more precise erasing, especially when dealing with smaller details or complex edges. On the other hand, zooming out gives you a better perspective of the overall result and helps identify areas that may need further attention or refinement.
To undo any accidental erasing, you can use the History panel or press Ctrl+Z (or Command+Z on a Mac) to step back through your actions. Additionally, you can use the Eraser tool with a soft brush or the History Brush tool to restore parts of the image if needed.
Remember to save your progress frequently to avoid losing any changes or accidentally erasing more than desired. By regularly saving your work, you can always revert back to a previous step and make adjustments if necessary.
Using the Background Eraser Tool in basic mode provides a quick and efficient way to remove backgrounds from your images. It’s a versatile tool that works well for a wide range of images, from simple compositions to more complex scenes. By mastering the basic functionality of the tool, you’ll be able to isolate and extract subjects with precision and speed, giving your images a professional and polished look.
Adjusting the Tool’s Brush Size and Hardness
One of the key factors in effectively using the Background Eraser Tool in Photoshop is adjusting the brush size and hardness according to the specific area you are working on. Fine-tuning these settings allows for more precise erasing and helps achieve better results in removing the background.
The brush size plays a crucial role in determining the area the tool covers when erasing. It’s important to select a brush size that is appropriate for the size of the details you want to remove. If you are working on a large background or want to remove large areas, a larger brush size is more suitable. Conversely, for smaller or intricate details, choose a smaller brush size for greater accuracy.
You can adjust the brush size by using the Brush Size slider in the tool options bar at the top of the screen. Alternatively, you can use the left and right bracket keys ([ and ]) on your keyboard to decrease or increase the size of the brush, respectively. Keep in mind that the brush size may need to be adjusted multiple times during the background erasing process as you switch between different areas.
Another important setting is the brush hardness. The hardness determines the edge sharpness of the brush. A harder brush has a well-defined, crisp edge, while a softer brush has a more feathered, blended edge. When erasing the background, it’s crucial to make the transition between the subject and the background as smooth as possible. Therefore, adjusting the brush hardness can play a significant role in achieving a seamless result.
You can adjust the brush hardness by using the Hardness slider in the tool options bar. Moving the slider to the left reduces the hardness, while moving it to the right increases it. You can also change the hardness quickly using the Shift+{ and Shift+} keyboard shortcuts.
As a general guideline, a softer brush with lower hardness is often more suitable for gradually blending the subject with the background. This is particularly useful when the subject has softer edges, such as hair or fur. On the other hand, a harder brush with higher hardness may be more appropriate when dealing with sharper edges, like the outline of a product or the silhouette of a person.
Experimenting with different brush sizes and hardness levels is crucial to finding the right balance for your specific image. It’s a good practice to start with a larger brush size and lower hardness for initial erasing, gradually refining the brush size and hardness as you work on smaller details or areas that require more precision.
Ultimately, adjusting the brush size and hardness of the Background Eraser Tool allows you to fine-tune the erasing process and achieve a more accurate and seamless result. By understanding how these settings affect the outcome, you can optimize your workflow and effectively remove the background while preserving the integrity of the subject.
Mastering the Brush Settings for Precise Erasing
When working with the Background Eraser Tool in Photoshop, mastering the brush settings is crucial for achieving precise erasing and ensuring a clean and professional result. Fine-tuning these settings allows you to control the tool’s behavior and improve your accuracy when removing the background.
One of the primary brush settings to consider is the brush blending mode. Located in the tool options bar, the blending mode determines how the erased pixels interact with the underlying layers. By experimenting with different blending modes, you can achieve various effects and refine the way the foreground and background blend together.
The default blending mode for the Background Eraser Tool is “Normal,” which simply removes the selected pixels. However, other blending modes can be useful in different scenarios. For example, using the “Clear” blending mode allows you to erase the pixels to transparency, providing a clean and seamless result. The “Behind” blending mode erases the background while preserving the transparency of any existing layers behind the image, making it ideal for compositing and layering.
Additionally, pay attention to the “Limits” option. This setting determines the range of colors that the tool affects when erasing. Choosing “Discontiguous” allows the erasing brush to ignore connected pixels of the same color, providing more flexibility and precision. “Contiguous,” on the other hand, erases pixels of the same color only if they are connected, making it useful for removing solid backgrounds or areas with clearly defined boundaries.
Another crucial brush setting is the “Protect Foreground Color” option. When enabled, this feature allows you to preserve areas of your image that you don’t want to erase. By sampling the foreground color with the Eyedropper Tool and selecting this option, you can ensure that the Background Eraser Tool will not erase pixels that match that color. This is particularly useful when dealing with complex images or objects that have similar colors to the background.
Adjusting the “Sampling” settings can also improve the precision of your erasing. The “Sampling” option determines how the tool samples colors from the image while erasing. By default, it’s set to “Continuous,” meaning that the tool continuously samples colors as you paint. However, changing it to “Once” samples the color only when you initially click, resulting in a more targeted and controlled erase.
When using the Background Eraser Tool in areas with fine details or complex edges, you may find that the edges appear jagged or rough. In these cases, enabling the “Protect Detail” option can help preserve the intricate details by preventing the tool from erasing them. This option works by analyzing the pixels within the brush and preserving those that contain high-frequency information, such as textures or fine lines.
Lastly, for even more control over the erasing process, consider adjusting the opacity and flow settings in the tool options bar. Reducing the opacity or flow will create a more gradual erasing effect, allowing you to remove the background in stages and achieve smoother transitions.
Mastering the brush settings of the Background Eraser Tool gives you greater control and precision when removing the background from your images. By understanding how each setting affects the erasing process, you can optimize your workflow and produce professional-looking results with ease.
Exploring Additional Brush Modes for Different Effects
While the Basic Mode of the Background Eraser Tool in Photoshop provides powerful functionality for erasing backgrounds, exploring additional brush modes can take your editing capabilities to the next level. These brush modes offer different ways to handle the erasing process and provide a range of effects and results to suit your specific needs.
One of the brush modes available is the “Discontiguous” mode. This mode allows the eraser brush to remove pixels of the same color that are not connected. This can be useful when you want to erase specific areas of the background while preserving other areas, such as intricate patterns or textures. By selectively erasing non-contiguous colors, you can maintain the integrity of the subject while removing unwanted background elements.
On the other hand, the “Contiguous” mode erases pixels that are connected and of the same color. This mode is beneficial when you need to remove solid or uniform backgrounds, as it erases the colors within the defined boundaries. It ensures that only adjacent pixels with the same color as the sampled area are erased, preserving the subject’s integrity without affecting other connected elements.
If you want to create a more defined and crisp erasing effect, the “Find Edges” brush mode is a great option. When using this mode, the Background Eraser Tool will detect the edges and contours of objects, giving you precise control over the erasing process. It can be particularly useful when working with images that have intricate or detailed edges, such as hair or branches.
Another useful brush mode is the “Protect Foreground Pixels” mode. Enabling this mode allows you to preserve the foreground elements by preventing the eraser from removing pixels similar to the sampled foreground color. This is particularly helpful when you’re working with complex images or subjects that have similar colors to the background. By sampling the foreground color and using this mode, you can avoid accidentally erasing pixels you want to keep intact.
Each of these brush modes offers a unique approach to the erasing process and allows for different effects and outcomes. By experimenting with these modes, you can expand your creative possibilities and achieve the desired result for your specific image.
It’s important to note that not all brush modes may be suitable for every image or situation. Depending on the complexity of the background and the desired outcome, you may need to adjust and try different modes to find the most effective one.
Exploring the additional brush modes offered by the Background Eraser Tool can elevate your editing capabilities and enable you to achieve different effects and results. By understanding how each mode works and when to use them, you can enhance your editing workflow and take your background erasing skills to new levels of creativity and precision.
Utilizing the Sampling Options for Improved Accuracy
The Background Eraser Tool in Photoshop provides several sampling options that allow you to achieve greater accuracy when removing backgrounds from your images. By understanding and utilizing these sampling options effectively, you can ensure cleaner and more precise results.
One of the key sampling options is the “Sampling Once” setting. When selected, the tool samples the color and tone from the initial click position and erases pixels that closely match that sampled color as you drag the brush. This option is particularly useful when you want to make a targeted erase based on the sampled color, helping you maintain the subject’s integrity and avoid accidentally erasing pixels that should be preserved.
Another important sampling setting is the “Continuous” option. In this mode, the Background Eraser Tool continuously samples and erases colors as you paint, updating the sampled color dynamically. This mode is beneficial when the background contains a mix of colors or when you’re working on a gradient or textured background. The continuous sampling ensures that the tool adapts to the changes in color as you move the brush, resulting in more accurate and consistent erasing.
Furthermore, the “Background Swatch” option allows you to sample colors from a specific area of the image as the background color. By clicking and holding down the Option (Alt) key, you can sample the color from any part of the image and set it as the background color. This option is helpful when you want to erase colors similar to the sampled background color but want to avoid erasing pixels that match the foreground color or other elements in the image.
The “Protect Foreground Color” feature is another valuable sampling option. By selecting this option and sampling the foreground color using the Eyedropper Tool, you can protect areas with similar colors from being erased. This is particularly useful when working with images that have complex or detailed foreground elements that share similar color values with the background. By preserving the foreground color, you can ensure that the Background Eraser Tool focuses only on removing the desired background elements.
When using the sampling options, it’s essential to pay attention to the brush size and hardness. The size of the brush determines the area from which the Background Eraser Tool samples the colors, while the hardness affects how sharply the tool transitions between erasing and preserving pixels. Adjusting the brush size and hardness according to the specific details and boundaries of the image can significantly improve the accuracy and precision of the background erasing process.
By utilizing the sampling options appropriately, you can improve the accuracy of the Background Eraser Tool and achieve cleaner and more precise results. Understanding how these options work and experimenting with different settings will help you refine your skills and tackle various challenges when it comes to background removal in Photoshop.
Removing Complex Backgrounds with the Extract Tool
When dealing with complex backgrounds that are difficult to remove using traditional methods, the Extract Tool in Photoshop offers a powerful solution. This tool allows you to make precise selections and remove backgrounds with intricate details, giving you full control over the extraction process and producing clean and accurate results.
To access the Extract Tool, navigate to the “Filter” menu, then select “Extract”. This opens the Extract dialog box, which provides a range of options to refine your selections and remove the background effectively.
Using the Extract Tool starts with defining the foreground and background areas. After opening the Extract dialog box, you can use the Edge Highlighter tool to trace along the edges of the subject you want to extract. The tool intelligently detects the edges and creates a highlighted overlay to guide you.
Next, you can switch to the Fill tool to paint over the parts of the image that you want to keep as the foreground. This includes the subject that you want to extract. The tool automatically fills the traced area with a solid color, visually separating the foreground from the background.
Once you have defined the foreground area, click on the Preview button in the Extract dialog box to see a preview of the extraction. Adjust the settings as needed, such as the edge thickness, smoothing, and smart highlighting, to refine the extraction process and improve the accuracy of the result.
If you encounter any areas where the extraction is not accurate, you can use the Edge Touchup and Eraser tool to make further adjustments. These additional tools allow you to refine the selection by adding or removing areas along the edges, ensuring a precise extraction.
After you are satisfied with the preview, click on the OK button to apply the extraction and remove the background. The result will be a clean and isolated foreground object with a transparent background.
It’s important to note that the Extract Tool is most effective when used on images with clear and well-defined edges. If the image has fuzzy or soft edges, it may be necessary to combine the Extract Tool with other selection tools, such as using the Pen Tool to create a more accurate path around the subject before using the Extract Tool.
By utilizing the Extract Tool, you can overcome the challenges of removing complex backgrounds with precision and efficiency. Whether you’re working on images with intricate details, objects with fuzzy edges, or subjects surrounded by cluttered backgrounds, this tool empowers you to achieve clean extractions and seamlessly integrate the subjects into new compositions or backgrounds.
Refining the Edges after Background Erasing
After using the Background Eraser Tool in Photoshop to remove the background from an image, it’s essential to refine the edges to ensure a seamless and professional result. Refining the edges helps to smooth out any jagged or rough areas, ensuring that the subject blends seamlessly into new backgrounds or compositions.
One of the most effective tools for refining edges is the Refine Edge or Refine Mask feature, available in Photoshop. This feature allows you to precisely adjust the edge selection, smooth out transitions, and enhance the overall quality of the extracted object.
To access the Refine Edge or Refine Mask feature, ensure that the subject layer is selected, and go to the “Select” menu. From there, choose “Refine Edge” or “Refine Mask”. This will open a dialog box with various adjustment options.
The first adjustment you can make is to the Edge Detection settings. Use the sliders for Radius and Smart Radius to fine-tune the edge selection. Increasing the Radius value expands the selection and captures more of the subject’s fine details. The Smart Radius option enhances the algorithm’s detection of complex edges, making it especially useful for subjects with intricate or wispy elements such as hair or fur.
The Refine Edge or Refine Mask dialog box also provides tools such as the Refine Radius Brush and Erase Refinements to manually refine the edges. The Refine Radius Brush allows you to add or subtract areas from the edge selection, ensuring that the important details are not lost. The Erase Refinements tool helps remove any extraneous selections or uneven areas that may have been introduced during the background erasing process.
Additionally, the dialog box includes options to smooth, feather, and contract the selection. These settings can help further refine the edges and create a more natural transition between the subject and the background. Experimenting with these options allows you to customize the look and feel of the edges according to your desired outcome.
Another technique for refining edges involves using the Layer Mask. After removing the background with the Background Eraser Tool, you can add a Layer Mask to the subject layer. Then, using a soft-edged brush, you can manually paint on the mask to further refine the edges. This technique gives you more control over the edge refinement process and allows you to fix any imperfections or areas that may have been missed during the initial erasing.
Lastly, taking the time to zoom in and inspect the edges of the extracted object is crucial. Zooming in allows you to closely examine and address any areas that may require additional refinement. By focusing on the details, you can ensure that the edges are smooth, the transitions are seamless, and the subject is well-integrated into its new environment.
Refining the edges after background erasing is a critical step in achieving a professional and polished result. By utilizing tools such as Refine Edge, Layer Masks, and careful attention to detail, you can ensure that the subject is accurately extracted, free from rough edges, and seamlessly blended into new compositions or backgrounds.
Applying Filters and Effects to the Extracted Object
Once you have successfully removed the background and extracted the object using the Background Eraser Tool or other techniques, you can enhance the visual impact of the image by applying filters and effects to the extracted object. These creative modifications can add depth, texture, and visual interest, transforming a plain extracted subject into a visually captivating element.
One of the simplest yet effective ways to enhance the extracted object is by adjusting its color and tone. Photoshop offers a wide range of adjustment options, such as levels, curves, and color balance, to fine-tune the overall appearance. You can tweak the brightness, contrast, and color saturation to achieve the desired look and ensure that the extracted object seamlessly integrates with its new background or composition.
Additionally, applying filters can give the extracted object a unique and artistic flair. Photoshop provides various filter options, including blurs, distortions, and artistic effects that can dramatically alter the appearance of the subject. For example, applying a Gaussian blur can create a soft and dreamy effect, while a lens flare filter can add a touch of drama and excitement to the image.
If you want to give the extracted object a textured or aged appearance, you can explore the texture filters available in Photoshop. These filters can add grain, noise, or even simulate the look of canvas or watercolor. Experimenting with different textures can evoke specific moods or enhance the overall visual aesthetic of the image.
Another way to enhance the extracted object is by applying creative effects, such as gradients, overlays, or vignettes. These effects can add depth, focus, and dimensionality to the subject, making it visually stand out. Experiment with different blending modes, opacities, and layer styles to achieve the desired effect.
Furthermore, you can also consider applying selective adjustments to specific areas of the extracted object using adjustment layers and layer masks. This allows you to target and modify specific aspects of the subject, such as highlighting certain details or areas, and creating a more balanced and visually pleasing image.
Remember to take into account the overall composition and intended purpose of the image when applying filters and effects. The goal is to enhance the extracted object while ensuring that it harmonizes with its environment and complements the overall visual narrative.
As with any creative process, experimentation is key. Play around with different combinations of filters, effects, and adjustments to find the perfect visual treatment that best represents your artistic vision and brings the extracted object to life.
Applying filters and effects to the extracted object offers an opportunity to add style, visual interest, and artistic flair. By creatively modifying the appearance of the subject, you can elevate the impact of your image and create a captivating visual experience for your audience.
Saving the Extracted Object with Transparent Background
Once you have successfully removed the background and extracted the object to your satisfaction, it is important to save the image with a transparent background to maintain the integrity of the extracted object’s edges and enable seamless integration into other projects or backgrounds. Saving with a transparent background allows you to freely place the object onto various backgrounds, without any unwanted background color or pixels interfering with the final composition.
To save the extracted object with a transparent background, follow these steps:
- Ensure that the extracted object is on its own layer and that the background has been completely removed. You can double-check this by toggling the visibility of the background layer and verifying that only the desired subject remains.
- Go to the “File” menu and select “Save As” (or use the shortcut Ctrl+Shift+S on Windows, or Command+Shift+S on Mac).
- Choose a file format that supports transparency, such as PNG or TIFF. Both formats maintain high-quality image data while preserving the alpha channel, which defines the transparency.
- Next, ensure that the “Transparency” option or “Alpha Channel” is selected in the Save As dialog box. This ensures that the image is saved with the transparency intact.
- Specify the desired destination folder and file name, and click “Save” to save the image.
By saving the extracted object with a transparent background, you retain the flexibility to incorporate it seamlessly into various projects and compositions. Whether you need to place the object into a different background, overlay it on other images, design marketing materials, or create composite images, having a transparent background gives you greater freedom and versatility in your creative endeavors.
It’s worth noting that when using the transparent image with other software or platforms, it’s important to verify that they support the transparency you’ve saved. Some applications or file formats may automatically fill the transparent areas with a default color when opening the image, so it’s crucial to check the compatibility and settings of the software or platform you intend to use.
Saving the extracted object with a transparent background ensures that you maintain the clean and professional appearance of the extraction, allowing for seamless integration into various projects. The transparency opens up a world of creative possibilities, as you can effortlessly blend the extracted object with different backgrounds and elements, creating visually stunning and impactful compositions.