
Why Blur a Background?
When it comes to visual elements in photography or design, the background plays a crucial role in setting the tone and drawing attention to the subject. However, there are situations where you might want to blur the background to achieve a specific effect or highlight the main subject even more. Blurring the background can create a sense of depth, separate the subject from the surroundings, and add a touch of professionalism to your photos or designs.
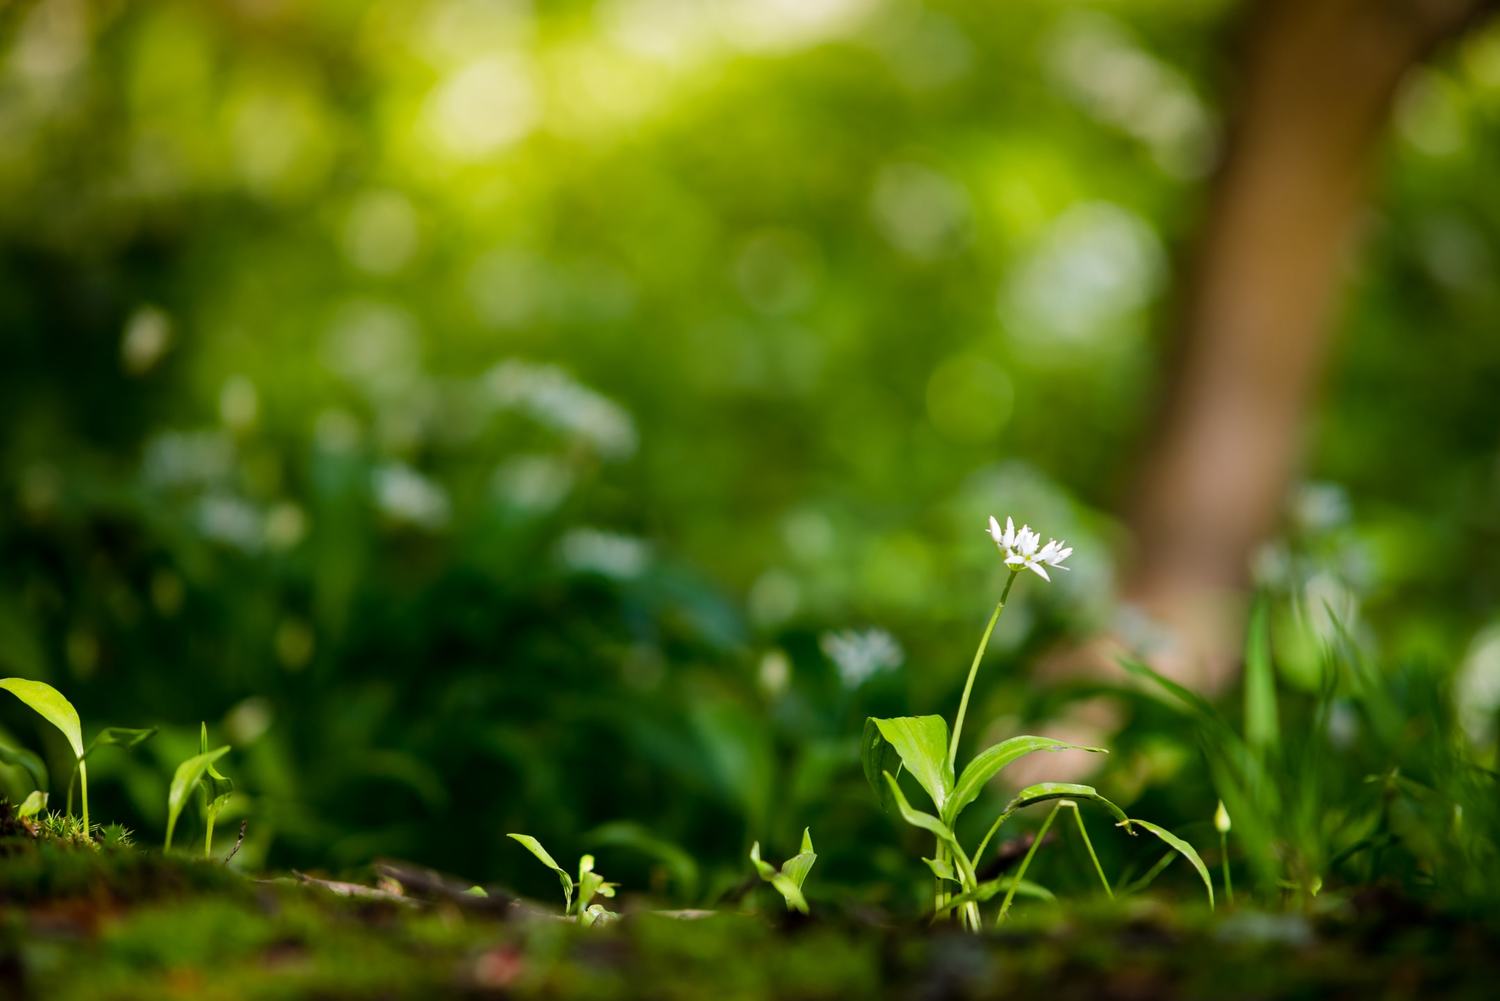
One of the main reasons to blur a background is to create a shallow depth of field effect. This effect is commonly used in portrait photography, where the subject is in sharp focus while the background is intentionally blurred. By doing so, the subject becomes the main focus and stands out, drawing the viewer’s attention.
Blurring the background can also be useful when you want to remove distractions or unwanted elements that may be present in the background of your image. By blurring the background, these distractions are minimized or completely eliminated, allowing the focus to solely be on the subject.
Another reason to blur a background is to create a sense of motion or dynamism. This technique is often used in sports or action photography to give the impression of speed. By keeping the subject sharp and blurring the background, the image captures the fast-paced nature of the moment.
Additionally, blurring the background can be a strategic choice when it comes to design. In graphic design or web design, a blurred background can provide a visually pleasing backdrop that complements or contrasts with the main content. It can add a sense of depth and elegance to the overall design.
Overall, blurring a background is a powerful technique that can enhance your photos and designs. Whether you want to create a shallow depth of field, remove distractions, add a sense of motion, or create a visually appealing design, blurring the background allows you to achieve various creative effects. In the following sections, we will explore how to blur a background using Photoshop, a widely used and versatile image editing software.
Getting Started with Photoshop
Photoshop is a powerful image editing software that offers a wide range of tools and functionalities for manipulating and enhancing photos. Before diving into the process of blurring a background, it’s important to familiarize yourself with basic navigation and tools in Photoshop.
Upon opening Photoshop, you will be greeted with the main workspace, which consists of various panels and tool options. The most commonly used tools for blurring a background are located in the toolbar on the left-hand side. These include the selection tools, the brush tool, and the gradient tool.
First, you’ll need to open the image you want to edit. To do this, go to the top menu and click on “File” and then “Open.” Locate the image file on your computer and click “Open.” The image will appear in the main Photoshop workspace.
It’s a good practice to create a duplicate layer of your original image before making any edits. This ensures that you have a backup and allows you to easily revert to the original image if needed. To create a duplicate layer, go to the bottom of the Layers panel and click on the “Create a new layer” icon. Alternatively, you can use the keyboard shortcut Ctrl+J (Cmd+J on Mac).
To apply any edits or effects, you’ll need to work with layer masks in Photoshop. Layer masks allow you to hide or reveal certain parts of an image, which is essential for selectively blurring the background. To add a layer mask, select the duplicate layer in the Layers panel and click on the “Add layer mask” icon at the bottom of the panel. This will add a white layer mask thumbnail next to the duplicate layer.
Now that you’re familiar with the basic tools and functionalities, you’re ready to start blurring the background of your image. In the next section, we will discuss how to select the right image for blurring and explore different methods to achieve the desired blur effect in Photoshop.
Selecting the Right Image for Blurring
When it comes to blurring a background in Photoshop, selecting the right image is crucial to achieve the desired effect. Different images require different approaches to achieve a natural and appealing blur. Here are some tips to consider when choosing an image for blurring:
1. Subject Separation: Look for images where the subject stands out from the background. Images with clear subject-background separation make it easier to apply the blur effect without affecting the subject. This can be achieved through differences in color, brightness, or contrast between the subject and the background.
2. Depth of Field: Consider the depth of field in the image. Images shot with a wide aperture (low f-stop number) tend to have a shallow depth of field, which means that the background is naturally blurred. Blurring the background in these images can enhance the overall effect and draw more attention to the subject.
3. Background Elements: Pay attention to the elements present in the background. Images with cluttered or distracting backgrounds may require more extensive editing to achieve a pleasing blur effect. Look for images with simple and clean backgrounds, as they often produce the best results when blurring.
4. Image Resolution: Higher resolution images tend to provide more flexibility and better results when it comes to blurring the background. Higher pixel density allows for finer details and smoother transitions in the blurred area, resulting in a more realistic and professional-looking effect.
5. Lighting Conditions: Consider the lighting conditions in the image. Images with an even and diffused lighting setup tend to produce better results when blurring the background. Harsh lighting or strong shadows can sometimes complicate the blurring process, so it’s important to choose images with balanced lighting for optimal results.
Remember, while these tips can help guide your image selection process, experimenting with different images and adjusting the blur effect in Photoshop will ultimately help you achieve the desired outcome. In the next section, we will dive into the process of applying the blur effect using Photoshop’s Gaussian Blur filter.
Understanding Layer Masks
When it comes to blurring a background in Photoshop, layer masks are an essential tool that allows you to selectively hide or reveal parts of an image. Understanding how layer masks work is key to achieving precise and seamless blur effects. Here’s a brief overview of layer masks in Photoshop:
A layer mask is a grayscale image attached to a layer that determines the visibility of that layer’s content. The white areas of the layer mask indicate the visible parts of the layer, while the black areas indicate the hidden parts. Shades of gray represent varying levels of transparency.
To edit a layer mask, select the layer with the mask in the Layers panel, and then click on the layer mask thumbnail to make it active. This allows you to paint on the layer mask using brushes, apply filters, or make adjustments to control the visibility of the layer below.
When applying the blur effect, you will typically use layer masks to hide the background and reveal only the subject. By painting on the layer mask with a soft brush, you can gradually blend the background into the blurred effect, creating a smooth transition.
Start by selecting a brush tool and setting the foreground color to black. With the layer mask active, begin painting on the areas of the image that you want to hide. As you paint with black, the background will disappear, revealing the blur effect underneath. If you make a mistake, simply switch the foreground color to white and paint over the areas to bring back the original content.
You can also use different levels of transparency by varying the opacity of the brush. This allows for more subtle and controlled blending between the blurred and non-blurred areas of the image.
In addition to painting on the layer mask, you can also use selection tools to create precise masks. For example, you can use the Quick Selection Tool or the Pen Tool to make a selection of the subject, invert the selection, and then apply the blur effect to the background while keeping the subject sharp.
Understanding layer masks and their functionality is essential for achieving the desired blur effect. The next section will guide you through the process of creating a duplicate layer, which will serve as the foundation for applying the blur effect to the background.
Creating a Duplicate Layer
Creating a duplicate layer is a crucial step in the process of blurring the background in Photoshop. It allows you to work on a separate layer without affecting the original image, providing flexibility and the ability to revert back to the untouched image if necessary. Here’s a step-by-step guide on how to create a duplicate layer:
1. With your image open in Photoshop, navigate to the Layers panel on the right-hand side of the workspace. This panel displays the layers of your image.
2. Select the layer that contains your image. By default, this layer is labeled “Background.” Right-click on this layer and choose “Duplicate Layer” from the context menu. Alternatively, you can select the layer and go to the top menu, click “Layer,” then “Duplicate Layer.”
3. A dialog box will appear, allowing you to customize the settings for the duplicate layer. You can leave the default settings as they are or rename the layer for clarity. Click “OK” to create the duplicate layer.
4. The duplicate layer will appear in the Layers panel on top of the original layer. You can toggle the visibility of the duplicate layer on and off by clicking on the eye icon next to it.
It’s recommended to name the duplicate layer to keep your Photoshop project organized. Naming it based on the edits you plan to make, such as “Blur Effect Layer,” can help you easily identify its purpose later on.
By working on the duplicate layer, you retain the option to make adjustments or try different techniques without altering the original image. If you make a mistake or are unhappy with the results, you can simply delete the duplicate layer and start again, leaving the original image untouched.
Creating a duplicate layer ensures that you have a backup of your original image and provides the flexibility to experiment and refine your blurring effect. In the next section, we will explore how to apply the Gaussian Blur filter to achieve the desired background blur.
Applying the Gaussian Blur Filter
The Gaussian Blur filter is a powerful tool in Photoshop that allows you to apply a smooth and natural blur effect to the background of an image. This filter creates a soft and gradual blur by averaging nearby pixels, resulting in a realistic depth of field effect. Here’s how you can apply the Gaussian Blur filter to achieve the desired background blur:
1. With your duplicate layer selected, go to the top menu and click on “Filter.” From the dropdown menu, select “Blur” and then choose “Gaussian Blur.”
2. A dialog box will appear, presenting you with a preview of the image and various parameters to adjust the blur effect. The Radius value determines the extent of the blur, with higher values resulting in a more pronounced blur effect.
3. Start by adjusting the Radius value by sliding the slider or inputting a specific value. Take care not to overdo it; a subtle blur often produces more natural results. You can also check the “Preview” box to see the real-time effect on the image as you make changes.
4. Once you are satisfied with the amount of blur, click “OK” to apply the Gaussian Blur filter to the duplicate layer. The background of the image will now be blurred while the subject remains sharp.
Remember that the Gaussian Blur filter is applied to the entire image on the duplicate layer. If you find that other parts of the image, such as the subject or foreground, have been unintentionally blurred, don’t worry. We will refine the blur effect in the upcoming sections.
If you’re not completely satisfied with the overall blur effect, you can easily adjust the filter settings. Simply go to the Layers panel and double-click on the “Gaussian Blur” filter’s name. This opens up the filter’s dialog box again, where you can modify the Radius value and fine-tune the blur effect.
The Gaussian Blur filter is a powerful tool to achieve a natural and pleasing background blur. In the next section, we will discuss how to adjust the strength of the blur effect and refine it further using additional tools and techniques.
Adjusting the Blur Strength
After applying the Gaussian Blur filter to the duplicate layer, you may find that the blur effect is either too strong or too subtle for your desired outcome. Fortunately, Photoshop offers several ways to adjust the blur strength and refine the overall effect. Here are some techniques you can use to fine-tune the blur:
1. Opacity and Fill: One way to adjust the blur strength is by adjusting the opacity or fill of the duplicate layer. In the Layers panel, you’ll find the opacity and fill sliders next to the layer thumbnail. By reducing the opacity or fill, you can partially reveal the original image and reduce the intensity of the blur effect.
2. Layer Blend Modes: Another option is to experiment with different layer blend modes for the duplicate layer. This can significantly impact the overall appearance of the blur effect. Try blending modes such as Soft Light, Overlay, or Multiply to achieve a more subtle or dramatic blur effect.
3. Gaussian Blur Filter Settings: If you find that the blur effect is too strong, you can revisit the Gaussian Blur filter settings and reduce the Radius value. Lowering the radius value will decrease the amount of blur applied and create a more subtle effect.
4. Layer Opacity Mask: Another technique to adjust the blur strength is by using a layer opacity mask. With the duplicate layer selected, click on the “Add layer mask” button at the bottom of the Layers panel. Then, use a soft brush with black color to paint over the areas of the image that you want to reduce the blur effect. This allows you to selectively control the strength of the blur in certain areas.
By using a combination of these techniques, you can fine-tune the blur strength to achieve your desired effect. It’s essential to strike a balance where the background is suitably blurred, while the subject remains clear and well-defined. Remember to experiment and make adjustments until you achieve the desired result.
Next, we will explore refining the blur effect further using the Eraser tool and other advanced techniques to ensure a seamless transition between the blurred and sharp areas of the image.
Refining the Blur Effect with the Eraser Tool
While the Gaussian Blur filter is effective in blurring the background, you may encounter situations where you want to refine the blur effect or make adjustments to specific areas. The Eraser Tool in Photoshop provides a simple and precise way to refine the blur and ensure a seamless transition between the blurred and sharp areas of the image. Here’s how you can use the Eraser Tool to refine the blur effect:
1. Select the duplicate layer in the Layers panel. Make sure that the layer mask thumbnail is active. This ensures that any edits made with the Eraser Tool affect the layer’s mask and not the image itself.
2. Choose the Eraser Tool from the toolbar on the left or press the E key on your keyboard to activate it. Adjust the brush size and hardness according to your needs. For refining the blur effect, a soft-edged brush is usually preferred for smoother transitions.
3. Start erasing the areas where you want to reduce or remove the blur effect. By erasing on the layer mask, you reveal the original content of the duplicate layer. This technique allows you to selectively bring back the sharpness in specific areas, such as the subject or foreground, while keeping the desired blur in the background.
4. To achieve a gradual transition between the blurred and sharp areas, you can vary the opacity of the Eraser Tool. Lowering the opacity will create a more subtle transition, blending the blur with the sharp areas more smoothly.
5. If you make a mistake or accidentally erase too much, simply switch the foreground color to white and paint back over the areas to bring back the desired blur effect. This flexibility allows you to make precise adjustments and refine the blur effect to your liking.
The Eraser Tool is a powerful tool for refining the blur effect and ensuring a seamless transition in your image. It allows you to have complete control over the areas that should be sharp and the ones that should remain blurred.
In the next section, we will explore how to blur only a part of the background using various selection techniques, providing even more control over the blur effect and creating unique creative opportunities.
Blurring Only a Part of the Background
While blurring the entire background can be effective in certain cases, there may be situations where you want to selectively blur only a specific part of the background to create a more dynamic and visually appealing image. Photoshop offers various selection techniques to help you achieve this desired effect. Here’s how you can blur only a part of the background:
1. Start by creating a selection around the area that you want to blur. You can use tools such as the Quick Selection Tool, Lasso Tool, or Pen Tool based on the complexity of the selection. Make sure to encompass the precise area you want to blur, ensuring a clean selection.
2. Once you have made the selection, go to the top menu and select “Select” and then “Inverse.” This will invert the selection, so now the background outside of your selected area will be active.
3. With the inverted selection active, apply the Gaussian Blur filter to the duplicate layer. Adjust the blur radius to achieve the desired effect. This will blur only the background outside of your selection while keeping your subject or focal point sharp.
4. If needed, you can further refine the effect by using the Eraser Tool on the layer mask. Set the Eraser Tool to a soft brush and carefully erase any unwanted blur from areas that should remain sharp. This allows for precise control over the blurred and sharp areas of the background.
By selectively blurring a part of the background, you can create a visual hierarchy and draw attention to your subject. This technique is particularly effective when you want to highlight a specific area or subject while maintaining context with the background.
Experiment with different selection techniques and blur strengths to achieve the desired effect. Remember, the key is to ensure a seamless transition between the blurred and sharp areas to achieve a natural and visually appealing result.
In the next section, we will explore using the Gradient Tool to create a gradual blur effect, providing even more control and versatility in blurring the background.
Using the Gradient Tool for a Gradual Blur
The Gradient Tool in Photoshop offers a powerful way to create a gradual blur effect in your image, allowing for a smooth transition between the blurred and sharp areas of the background. This technique is particularly useful when you want to achieve a more artistic or subtle blur effect. Here’s how you can use the Gradient Tool to create a gradual blur:
1. With your duplicate layer selected, choose the Gradient Tool from the toolbar on the left or press the G key on your keyboard to activate it. Make sure the foreground and background colors are set to black and white, respectively.
2. In the options bar at the top of the screen, select the “Radial Gradient” mode. This mode creates a gradient that radiates outwards from a central point, allowing for a centered blur effect.
3. Click and drag the Gradient Tool in the direction you want the blur effect to occur. Typically, dragging from the subject towards the background creates a smooth transition from sharpness to blur.
4. As you drag the Gradient Tool, it will create a gradient overlay on your image, indicating the direction and range of the blur effect. The black portion represents the area of complete blur, while the white portion remains sharp.
5. Once you release the mouse button, the gradient overlay will be applied to the duplicate layer. Photoshop will interpret the gradient as a layer mask, revealing the sharp subject and gradually blurring the background according to the gradient’s direction and range.
6. If needed, you can further refine the effect by adjusting the opacity and hardness of the Gradient Tool. This allows for more control over the gradual blur and the transition between sharp and blurred areas.
Using the Gradient Tool for a gradual blur effect provides versatility and allows for more creative control. You can experiment with different gradient directions and ranges to achieve unique and visually appealing results.
In the next section, we will explore how to enhance the subject in the image by using sharpening tools, ensuring that it stands out even more against the blurred background.
Enhancing the Subject with Sharpening Tools
When blurring the background of an image, it’s essential to ensure that the subject remains sharp and stands out against the blurred backdrop. To further enhance the subject’s focus and details, Photoshop offers a range of sharpening tools. These tools allow you to selectively sharpen specific areas and bring out the subject’s clarity, making it more prominent in the composition. Here’s how you can use sharpening tools to enhance the subject:
1. Select the duplicate layer in the Layers panel to work on the blurred version of the image. It’s crucial to sharpen this layer without affecting the original image.
2. Choose the Sharpen Tool from the toolbar on the left or press the J key on your keyboard to activate it. The Sharpen Tool allows you to selectively apply sharpening to specific areas of the image.
3. In the options bar at the top of the screen, adjust the brush size and strength settings of the Sharpen Tool. Start with a low strength setting to avoid over-sharpening and gradually increase as needed.
4. Carefully paint with the Sharpen Tool over the areas of the subject that you want to enhance. Focus on important details such as the eyes, facial features, or other key elements that you want to emphasize. Take care not to overdo it and maintain a natural look.
5. If you accidentally sharpen an area that you don’t want to, switch the foreground color to black and use the Brush Tool to paint over the area. This will effectively undo the sharpening in that specific region.
6. Alternatively, you can use Adjustment Layers, such as the Unsharp Mask or Smart Sharpen, to apply sharpening with more control. Adjustment Layers allow you to apply sharpening as a separate layer, allowing for easy adjustment or removal if needed.
By selectively sharpening the subject, you ensure that it remains the focal point of the image and stands out against the blurred background. Adjusting the sharpness can help bring out important details and add a sense of clarity and depth to your composition.
In the final section, we will explore how to fine-tune the overall image by making contrast, saturation, and color adjustments to achieve the desired visual impact.
Final Touches: Contrast, Saturation, and Color Adjustments
After blurring the background and enhancing the subject, the final step in refining your image is to make contrast, saturation, and color adjustments. These adjustments can help you achieve the desired visual impact and ensure a cohesive look throughout the composition. Here are some final touches you can apply to your image:
1. Contrast Adjustment: Adjusting the contrast can make the elements in your image appear more defined and vibrant. Use the Levels or Curves adjustment layers to fine-tune the contrast. Increase the contrast to make the colors pop and the subject stand out, or decrease it to create a softer and more muted look.
2. Saturation Adjustment: Saturation affects the intensity of colors in your image. Use the Hue/Saturation adjustment layer to increase or decrease the saturation. Increasing the saturation can make the colors more vibrant and eye-catching, while decreasing it can create a more subdued and muted color palette.
3. Color Balance: The color balance of your image is another aspect that can greatly impact its overall appearance. Use the Color Balance adjustment layer to adjust the levels of different color tones. By fine-tuning the color balance, you can achieve a desired mood or correct any color casts that may be present in the image.
4. Vibrance Adjustments: The Vibrance adjustment can help you further enhance the colors in your image while preserving skin tones. Use the Vibrance adjustment layer to increase the vibrancy of the overall image. This can be particularly useful in bringing out the subtle colors and details in your composition.
5. Dodge and Burn: Dodge and Burn tools allow you to selectively lighten or darken specific areas of an image. This technique can help you add depth and dimension to the subject or background. Use a soft brush with low opacity to gently dodge and burn areas to enhance the overall lighting and contrast.
By making contrast, saturation, and color adjustments, you can fine-tune the overall look and feel of your image. These final touches add depth, vibrancy, and visual interest, ensuring a polished and professional result.
Once you’re satisfied with the adjustments, save your image in a suitable file format, such as JPEG or PNG, and consider making a duplicate of the final edited image to preserve the original unedited version. This way, you can always revisit and make further adjustments in the future if needed.
With these final touches, your blurred background image is now ready to be shared, printed, or incorporated into your desired project.
Saving and Exporting the Blurred Image
Once you have finished editing and fine-tuning the blur effect, it’s time to save and export your image in a suitable format for your intended use. Here’s how you can save and export the blurred image:
1. Go to the top menu and click on “File” and then “Save” to save your image in the native Photoshop format (.PSD). Saving your image in this format preserves all the layers, adjustments, and edits you have made, allowing you to easily make further changes in the future if needed.
2. If you want to share the image online, go to the top menu and click on “File” and then “Export” or “Save for Web.” In the export window, choose the appropriate format (e.g., JPEG) that suits your needs for file size and image quality.
3. Adjust the export settings such as image quality, resolution, and file size to your liking. Keep in mind that higher-quality settings typically result in larger file sizes, while lower-quality settings reduce file size but may sacrifice image clarity and detail to some extent.
4. Choose the destination folder where you want to save the blurred image. Give the file a meaningful name that reflects the content and purpose of the image.
5. Click “Save” or “Export” to save the image to your desired location. Wait for the save process to complete, and then navigate to the folder to verify that the image has been saved successfully.
By saving and exporting the blurred image, you ensure that it is ready to be shared, printed, or used in your desired project. Choosing the appropriate format and adjusting the export settings allow you to balance the image’s quality and file size based on your specific requirements.
Remember to keep the original PSD file with layers intact so that you can revisit and make further adjustments in the future if needed. This way, you have the flexibility to make any necessary changes without starting from scratch.
With your blurred image saved and exported, you can now confidently share your work or incorporate it into your design, photography, or any other creative project.