
What is Netstat?
Netstat, short for Network Statistics, is a command-line tool used to display detailed network information, connections, and statistics on a computer or network device. It provides a wealth of data that can be useful for network troubleshooting, security analysis, and monitoring network activities.
Using Netstat, you can view active network connections, monitor network traffic, display protocol statistics, check for established connections, and much more. It is a powerful utility that can help you gain insights into your network usage and identify potential issues.
With Netstat, you can check which processes or applications are communicating over the network, identify ports and addresses being used, and detect any suspicious or unauthorized connections. It is particularly useful for system administrators, network engineers, and security professionals who need to monitor network activities and diagnose network problems.
Netstat is available on various operating systems, including macOS, Windows, and Linux. In this article, we will focus on the usage of Netstat on macOS, specifically on a Mac computer.
Using Netstat effectively requires some basic knowledge of networking concepts and commands. However, with a little practice and familiarity, you’ll be able to harness the power of this command-line tool to analyze and troubleshoot your network connections effectively.
Opening the Terminal on Mac
Before we dive into using the Netstat command on your Mac, you need to open the Terminal application. The Terminal is a command-line interface that allows you to interact with your Mac using text-based commands. Here’s how you can open it:
- Click on the Finder icon located in the Dock to open a Finder window.
- In the top menu, click on the “Go” option and select “Utilities”.
- Scroll down or search for “Terminal” in the Utilities folder and double-click on it.
Alternatively, you can use the Spotlight search to open the Terminal. Simply press Command + Spacebar to open Spotlight, type “Terminal” in the search bar, and press Enter when the Terminal application appears in the search results.
Once you’ve opened the Terminal, a new window will appear with a command prompt. This is where you’ll enter the Netstat command and view the output.
It’s worth noting that the Terminal provides a direct way to interact with your computer at a system level. Therefore, caution should be exercised while executing commands, especially those that can modify or delete system files. It’s always a good idea to verify the commands you’re using and their potential effects before executing them.
Now that you have the Terminal open, you’re ready to start utilizing the Netstat command to delve into your network connections and statistics on your Mac.
Basic Usage of the Netstat Command
Once you have the Terminal open on your Mac, you can start using the Netstat command to retrieve valuable network information. The basic syntax of the Netstat command is as follows:
netstat [options]
Here, options refer to the various parameters and flags that can be used to customize the output of the Netstat command. Let’s explore some of the most commonly used options:
-a: This option displays all active connections and listening ports.-n: It shows the network addresses and ports in numerical format.-p: This option displays the process ID and program name associated with each connection.-r: It displays the routing table, which shows the network destinations and the routes to reach them.-s: This option shows the network protocol statistics, such as number of packets transmitted and received.
To use Netstat with a specific option, simply type netstat followed by the desired option in the Terminal and press Enter. The output will then be displayed accordingly.
For example, to view all active connections and listening ports, you can use the -a option by entering netstat -a in the Terminal. This will provide you with a list of all active connections on your Mac, along with the corresponding local and remote addresses, and the state of each connection.
By leveraging different options and combining them, you can extract the specific information you need from the Netstat command’s output. This flexibility allows you to tailor the command to your requirements and gain a better understanding of your network’s status.
In the next sections, we will explore in detail some of the key features and options of the Netstat command, enabling you to delve even deeper into your network’s intricacies and troubleshoot any potential issues.
Displaying Active Network Connections
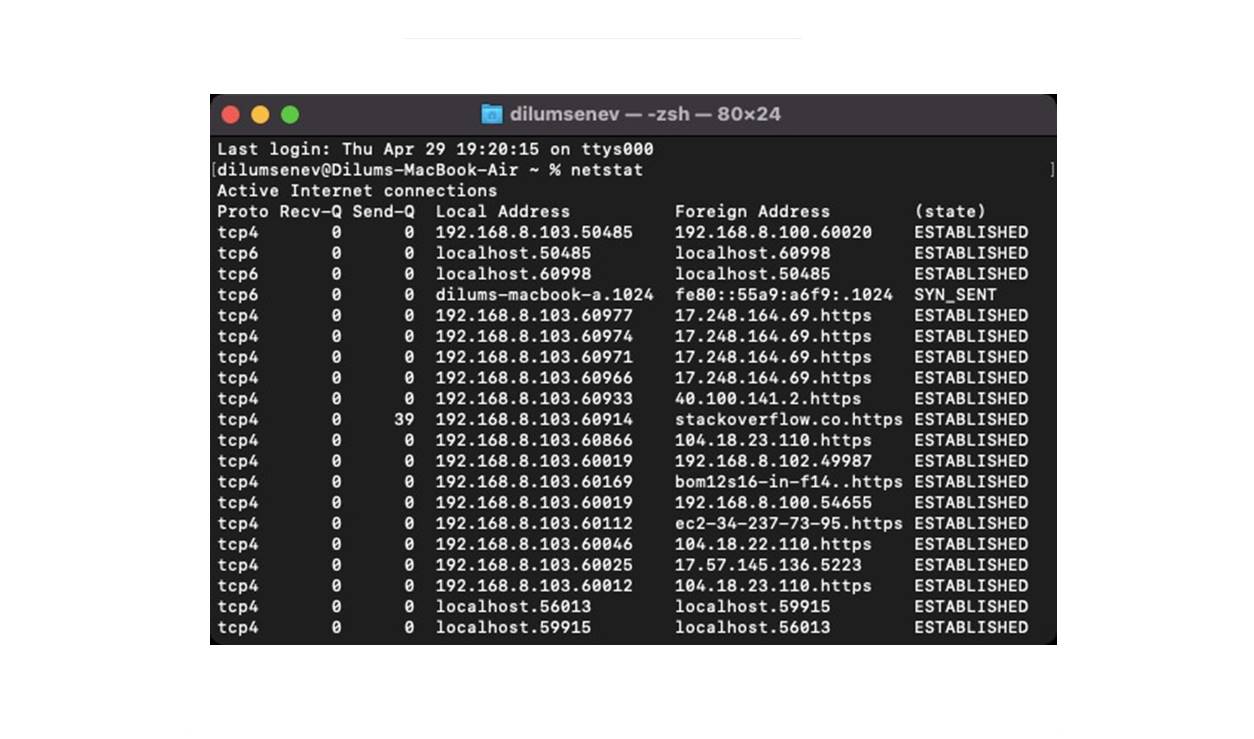
One of the fundamental use cases of the Netstat command is to view active network connections on your Mac. This information can help you understand which processes or applications are communicating over the network and identify any potentially unauthorized connections. To display active network connections, you can use the -a option along with the Netstat command. Here’s how:
netstat -a
When you execute this command in the Terminal, Netstat will generate a list of all active connections, both incoming and outgoing. The output will include information such as the local and remote addresses, ports, and the state of each connection.
The state of a connection provides insights into its current status. Some common states you may come across include “ESTABLISHED,” indicating that the connection is open and active, “CLOSE_WAIT,” indicating that the connection is in the process of closing, and “TIME_WAIT,” indicating that the connection is waiting to ensure all data packets have been received correctly.
By analyzing the active network connections, you can identify any suspicious or unwanted connections that may put your network security at risk. If you notice any unfamiliar IP addresses or ports, it’s essential to investigate further to determine their origin and potential impact.
Furthermore, you can combine the -a option with other flags to narrow down the output based on specific criteria. For example, you can use the -n option along with -a to display the numerical IP addresses and port numbers instead of resolving them to hostnames. This can provide a more concise and precise view of the active connections.
By regularly monitoring active network connections using the Netstat command, you can stay informed about the applications and processes using your network resources and detect any abnormal network behavior or unauthorized access attempts.
Showing Network Statistics
In addition to displaying active network connections, the Netstat command can also show you valuable network statistics, providing insights into the traffic and data transmission on your Mac. The -s option is used to retrieve these network statistics. Here’s how you can use it:
netstat -s
When you execute this command in the Terminal, Netstat will generate a comprehensive report of network protocol statistics. This includes information on the number of packets transmitted and received, errors encountered, discarded packets, and more.
Network statistics can help you identify network bottlenecks, troubleshoot performance issues, and monitor the overall health of your network connections. By analyzing these statistics, you can pinpoint areas of concern and take appropriate actions to optimize your network performance.
In addition to protocol-specific statistics, Netstat can also provide information on other network-related parameters. For example, using the -s option along with the -p flag (netstat -p -s) will display protocol statistics along with the process ID and program name associated with each connection. This can be particularly useful in identifying which applications or processes are responsible for the network traffic.
By regularly checking network statistics with the Netstat command, you can proactively identify any abnormalities, diagnose network issues, and ensure that your network is running smoothly and efficiently.
In the following sections, we will explore more advanced features and options of the Netstat command that enable you to filter and customize the output according to your specific requirements.
Filtering Netstat Output
The Netstat command provides various options to filter the output and focus on specific information that is relevant to your needs. By using these filtering options, you can streamline the output and extract the desired data more efficiently. Here are some common filtering options you can utilize:
-t: This option displays only TCP connections.-u: It shows only UDP connections.-l: This option filters the output to display only listening ports.-p: It displays connections associated with a specific program or process.-c: This option displays a continuous update of the Netstat command output.
To use these options, append them to the Netstat command in the Terminal. For example, if you want to display only TCP connections, you can use the -t option like this:
netstat -t
Similarly, if you want to view only UDP connections, you can use the -u option like this:
netstat -u
Filtering the output using the -l option allows you to display only the listening ports. This can be particularly useful when you want to check which ports are open and waiting for incoming connections:
netstat -l
To filter the output based on specific programs or processes, you can combine the -p option with the Netstat command. This will display only the connections associated with the specified program or process name. For example:
netstat -p Safari
In this example, the command will display connections related to the Safari web browser.
By using these filtering options, you can focus on specific information and narrow down the output of the Netstat command to extract the data that is most relevant to your network analysis or troubleshooting tasks.
Displaying Listening Ports
Listening ports refer to the ports on your Mac that are actively waiting for incoming connections. Displaying these listening ports using the Netstat command can help you identify which services or applications are listening for network requests. To view the listening ports, you can use the -l option in combination with the Netstat command. Here’s how:
netstat -l
Executing this command in the Terminal will generate a list of listening ports on your Mac, along with the corresponding applications or services associated with each port. The output will include information such as the protocol (TCP or UDP), local addresses, and the state of each listening port.
By monitoring the listening ports, you can gain insights into the network services running on your Mac and detect any unauthorized access attempts. It’s essential to regularly review the list of listening ports to ensure that no unnecessary or potentially vulnerable services are active.
In addition to displaying all listening ports, you can narrow down the output even further by combining the -l option with other filtering options. For example, using the -t option along with -l will show only the listening TCP ports, while the -u option along with -l will display only the listening UDP ports.
Furthermore, you can utilize the -p option in conjunction with the -l option to find the program or process associated with each listening port. This can help you identify which application is responsible for listening on a specific port.
By regularly checking the listening ports using the Netstat command, you can ensure that your Mac is not exposing unnecessary services to the network and take appropriate security measures to protect your system from potential threats.
Checking for Established Connections
Another useful application of the Netstat command is to check for established network connections on your Mac. Establishing a connection involves the three-way handshake process, and knowing which connections are currently active can provide valuable insights into your network activities. To check for established connections, you can use the -n option along with the Netstat command. Here’s how:
netstat -n
Executing this command in the Terminal will display a list of established connections, both incoming and outgoing, on your Mac. The output will include the local and remote addresses, ports, and the state of each established connection.
By monitoring established connections, you can identify which applications or processes are actively communicating over the network and taking up network resources. You can also detect any suspicious or unauthorized connections that may pose a security risk.
To further refine the output and focus only on the established TCP connections, you can use the -t option in conjunction with the -n option:
netstat -nt
This command will display only the established TCP connections on your Mac, providing a more specific view of your network activities.
Alternatively, if you want to check for established UDP connections, you can use the -u option along with the -n option:
netstat -nu
In addition, you can combine the -p option with the -n option to identify the program or process associated with each established connection. This can be accomplished by executing the following command:
netstat -np
By regularly checking for established connections with the Netstat command, you can monitor network activities, identify resource-intensive applications, and ensure the security and efficiency of your network connections.
Using Netstat to Troubleshoot Network Issues
Netstat is a powerful tool that can be utilized to troubleshoot various network-related issues on your Mac. By analyzing the output and using different options, you can gain insights into your network connections, identify potential problems, and take appropriate actions to resolve them. Here are a few ways you can use Netstat for network troubleshooting:
1. Identifying network congestion: By monitoring the number of packets transmitted and received, as well as network errors and discarded packets using the -s option, you can identify if there is network congestion or high traffic that may be causing performance issues.
2. Detecting unauthorized connections: By checking for established and active connections using the -a option, you can identify any unauthorized or suspicious connections that may indicate a security breach. Look for unknown IP addresses or unfamiliar ports to further investigate and protect your network.
3. Resolving port conflicts: Using the -l option, you can view the list of listening ports and identify any conflicts. If multiple applications or processes are attempting to listen on the same port, it can cause issues. In such cases, you may need to reconfigure the applications or change the port assignments to resolve the conflict.
4. Checking for established connections: Monitoring established connections using the -n option can help you identify any resource-intensive applications or processes that may be causing network slowdowns or high bandwidth usage. By understanding which connections are active, you can optimize your network resources effectively.
5. Verifying network configurations: By reviewing the routing table using the -r option, you can ensure that network routes are correctly configured. Any incorrect or missing routes can cause connectivity issues, and by using Netstat, you can identify and rectify those configuration issues.
Remember, Netstat is just one of the many tools available for network troubleshooting. It is important to combine its usage with other diagnostic tools and techniques to effectively identify and resolve network problems.
By leveraging the capabilities of Netstat and its various options, you can troubleshoot network issues on your Mac, improve network performance, and ensure a smooth and secure network experience.
Advanced Netstat Options
In addition to the basic usage of the Netstat command, there are advanced options and flags that can further enhance your network analysis and troubleshooting capabilities. These advanced options provide more detailed information and allow for greater customization of the Netstat output. Here are a few notable advanced Netstat options:
-g: This option displays the multicast group membership information, providing insights into the multicast communication on your network.-o: It adds the PID (Process ID) to the Netstat output, allowing you to associate connections with specific processes or applications.-v: This option enables more verbose output, including additional details such as the TCP send and receive queue sizes.-w: It specifies the timeout in seconds for TCP connections waiting to close. This can be useful in adjusting the duration before a connection is closed after no activity is detected.-f: This option filters the output based on specific network protocols, such as IPv4 or IPv6.
By combining these advanced options with the basic Netstat command, you can fine-tune the output to focus on the precise information you require for your network analysis or troubleshooting tasks. For example, using the -o option can help you identify which processes are responsible for specific connections, facilitating troubleshooting and resource allocation.
Another advanced option worth mentioning is -c, which continuously refreshes the Netstat output in the Terminal, providing real-time updates on network connections and statistics. This is especially useful when you need to monitor network activities or track changes over time.
It’s important to note that the availability of these advanced Netstat options may vary depending on your operating system and version. Therefore, it’s recommended to refer to the documentation specific to your system for a comprehensive list of available options.
By exploring and utilizing the advanced Netstat options, you can gain deeper insights into your network connections and effectively troubleshoot and analyze complex network scenarios.