
Basic Command Prompt Commands
The Command Prompt (CMD) is a powerful tool that allows users to interact with their computer through text-based commands. Whether you’re a beginner or an advanced user, understanding the basic command prompt commands is essential for navigating and managing the Windows operating system efficiently. In this section, we’ll explore some of the fundamental commands that every CMD user should know.
1.1. cd – Change Directory
The ‘cd’ command is used to change the current directory in the command prompt. For example, to navigate to the ‘Documents’ folder, you would type “cd Documents” and press Enter.
1.2. dir – List Directory Files
The ‘dir’ command displays a list of files and folders in the current directory. It provides information such as the file name, size, and created/modified dates. Simply type “dir” and press Enter to see the directory listing.
1.3. cls – Clear the Screen
If the command prompt window becomes cluttered with too much information, you can use the ‘cls’ command to clear the screen. Typing “cls” and pressing Enter will remove all previous commands and output from the window.
1.4. exit – Close the Command Prompt
To exit the command prompt, simply type “exit” and press Enter. This command will close the command prompt window and return you to the regular Windows interface.
1.5. help – Get Help
If you’re unsure about how to use a specific command or need a reminder of all available commands, the ‘help’ command is your go-to resource. Typing “help” and pressing Enter will display a list of supported commands and provide a brief description of each.
1.6. echo – Print Text
The ‘echo’ command is used to display text on the command prompt. For example, typing “echo Hello, World!” and pressing Enter will print the text “Hello, World!” on the screen.
These are just a few examples of the basic command prompt commands at your disposal. Experimenting with different commands and learning their functionalities will greatly enhance your command prompt skills.
Remember to always exercise caution with commands that modify or delete files, as they can have irreversible consequences. It’s also recommended to run the command prompt as an administrator to access advanced commands and settings.
Stay tuned for the next section, where we’ll explore navigation commands that allow you to move around the file system efficiently.
Navigation Commands
When working with the Command Prompt (CMD), having a solid understanding of navigation commands is crucial for efficient file and folder management. In this section, we’ll explore some essential navigation commands that will help you navigate through your file system like a pro.
2.1. cd – Change Directory
The ‘cd’ command, which we touched upon in the previous section, is essential for navigating through directories. To move to a specific directory, use the command followed by the directory’s path. For example, to navigate to the ‘Documents’ folder, you would enter “cd Documents” and press Enter.
2.2. cd.. – Move Up One Directory
Using “cd..” allows you to move up one directory level. For instance, if you’re currently in the ‘Documents’ folder and want to go back to its parent directory, simply type “cd..” and hit Enter.
2.3. cd\ – Move to Root Directory
The command “cd\” takes you directly to the root directory of your system. This is useful if you need to access files or folders located at the highest level of your file system.
2.4. dir – List Directory Contents
As mentioned in the previous section, the ‘dir’ command displays the contents of the current directory. However, you can modify this command by adding additional parameters to view specific information. For example, “dir /b” displays only the file names, while “dir /s” shows the files and subfolders in the current directory and all its subdirectories.
2.5. tree – Display Directory Structure
The ‘tree’ command provides a visual representation of the directory structure. It shows all the directories and subdirectories starting from the current directory. This command is particularly helpful when you want to understand the hierarchical arrangement of your folders.
2.6. pushd/popd – Directory Stack Management
The ‘pushd’ command allows you to save the current directory and move to a new directory simultaneously. To return to the previous directory, use the ‘popd’ command. These commands are useful when you need to navigate between multiple directories quickly.
By mastering these navigation commands, you’ll be able to traverse your file system with ease and quickly locate the files or folders you need. In the next section, we’ll explore file and directory commands that will allow you to create, delete, and manage your files efficiently.
File and Directory Commands
When working with the Command Prompt (CMD), it’s important to have a good grasp of file and directory commands. These commands allow you to create, delete, rename, and manage files and folders effectively. In this section, we’ll explore some essential commands to help you work with files and directories like a pro.
3.1. mkdir – Create Directory
The ‘mkdir’ command allows you to create a new directory. To create a directory named “NewFolder” within the current directory, use the command “mkdir NewFolder”. You can also specify the path to create a directory in a different location.
3.2. rmdir – Remove Directory
To delete an empty directory, use the ‘rmdir’ command followed by the directory name. For example, to delete a directory named “OldFolder”, you would enter “rmdir OldFolder”. Note that this command only works for empty directories.
3.3. del – Delete Files
The ‘del’ command allows you to delete one or more files. To delete a file named “example.txt”, simply type “del example.txt” and press Enter. You can also use wildcard characters to delete multiple files at once. For example, “del *.txt” will delete all files with the .txt extension in the current directory.
3.4. ren – Rename Files or Directories
With the ‘ren’ command, you can rename files or directories. To rename a file named “old.txt” to “new.txt”, use the command “ren old.txt new.txt”. Similarly, you can rename directories by specifying their paths.
3.5. copy – Copy Files
The ‘copy’ command allows you to make a copy of a file. To create a copy of a file named “original.txt” in the same directory, use the command “copy original.txt copy.txt”. You can also specify a different destination directory by providing the path.
3.6. move – Move Files or Directories
The ‘move’ command is used to move files or directories from one location to another. To move a file named “file.txt” to a different directory, use the command “move file.txt destination”. This command can also be used to rename a file by specifying a new file name.
These are just a few examples of the file and directory commands available in the command prompt. Familiarize yourself with these commands, and explore additional options and parameters to suit your specific needs. In the following sections, we’ll dive into system information, network, and task-related commands to further expand your command prompt knowledge.
System Information Commands
One of the powerful aspects of the Command Prompt (CMD) is its ability to provide detailed information about your system. By using system information commands, you can gather valuable insights and troubleshoot issues. In this section, we’ll explore some essential commands that will help you retrieve various system details.
4.1. systeminfo – System Information
The ‘systeminfo’ command displays detailed information about your computer’s hardware and software configuration. This includes the operating system version, BIOS version, processor details, installed memory, and much more. Simply type “systeminfo” and hit Enter to see the comprehensive system summary.
4.2. ipconfig – IP Configuration
The ‘ipconfig’ command provides information about your network configuration. It displays your IP address, subnet mask, default gateway, and other network-related information. Typing “ipconfig” and pressing Enter will show the details of all network interfaces on your system.
4.3. hostname – System Hostname
The ‘hostname’ command reveals the hostname of your computer. By typing “hostname” and hitting Enter, you can see the unique name assigned to your system, which is used to identify it on a network.
4.4. tasklist – Running Processes
The ‘tasklist’ command lists all the currently running processes on your system. It provides information such as the process ID, memory usage, and executable path. To see the complete list of running processes, type “tasklist” and press Enter.
4.5. taskmgr – Task Manager
If you prefer a graphical representation of running processes, you can launch the Task Manager by typing “taskmgr” in the command prompt and hitting Enter. The Task Manager allows you to monitor process performance, CPU usage, memory usage, and much more.
4.6. ver – Operating System Version
The ‘ver’ command displays the version of your operating system. This can be particularly useful when troubleshooting compatibility issues or determining whether you’re using the latest version of an operating system.
These system information commands are valuable for understanding your computer’s configuration, diagnosing network issues, and monitoring running processes. Continue to the next section, where we’ll explore network-related commands that will help you troubleshoot network connectivity and perform various network-related tasks.
Network Commands
The Command Prompt (CMD) provides a variety of powerful networking commands that can help you troubleshoot network connectivity issues, gather network information, and perform various network-related tasks. In this section, we’ll explore some essential network commands that every CMD user should know.
5.1. ping – Test Network Connectivity
The ‘ping’ command is used to test network connectivity between your computer and a specific IP address or hostname. Typing “ping google.com” and pressing Enter will send a series of network packets to the specified website and display the response time. This command helps diagnose network connectivity issues and measure network latency.
5.2. ipconfig – IP Configuration
We mentioned the ‘ipconfig’ command in the previous section about system information. In the context of networking, ‘ipconfig’ is used to view and manage IP-related configurations. To display the IP address, subnet mask, and default gateway, type “ipconfig” and press Enter. This command is particularly useful for troubleshooting network connectivity problems.
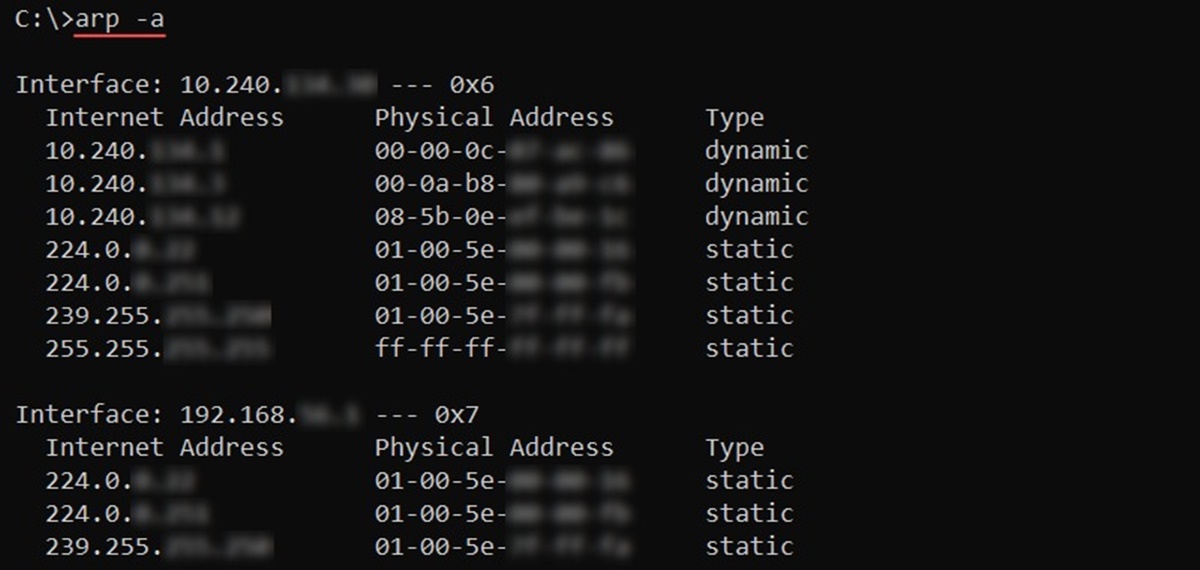
5.3. netstat – Network Statistics
The ‘netstat’ command displays detailed network statistics, including active connections, listening ports, and protocol statistics. Entering “netstat” and pressing Enter will provide a list of network connections established by your system, which can help troubleshoot network-related issues and detect any suspicious activity.
5.4. tracert – Trace Route
The ‘tracert’ command allows you to trace the route that network packets take from your computer to a specific destination. For example, typing “tracert google.com” and pressing Enter will display the IP addresses and response times of each hop along the network path. This command is helpful for diagnosing network latency or packet loss issues.
5.5. nslookup – DNS Lookup
The ‘nslookup’ command is used to query DNS (Domain Name System) servers and retrieve information about domain names and IP addresses. By typing “nslookup google.com” and hitting Enter, you can obtain the IP address associated with a domain name or perform a reverse lookup by entering an IP address.
5.6. netsh – Network Shell
The ‘netsh’ command is a powerful tool for managing network settings and configurations. It provides various subcommands that allow you to configure network interfaces, set IP addresses, create firewall rules, and more. Typing “netsh” and pressing Enter will switch you to the netsh command prompt, where you can explore its capabilities.
These network commands are invaluable for troubleshooting network connectivity issues, gathering network information, and managing network settings. Now, let’s proceed to the next section, where we’ll explore task and process commands that will help you manage running processes and tasks on your system.
Task and Process Commands
In the Command Prompt (CMD), you have access to various commands that enable you to manage running tasks and processes on your system. These commands allow you to view active processes, end tasks, and monitor system performance. In this section, we’ll explore some essential task and process commands that will help you effectively manage your system.
6.1. tasklist – List Running Processes
The ‘tasklist’ command allows you to view a list of all running processes on your system. It displays information such as the process name, process ID (PID), memory usage, and more. Typing “tasklist” and pressing Enter will provide you with a detailed overview of the processes currently running on your system.
6.2. taskkill – End Running Processes
With the ‘taskkill’ command, you can terminate or end a running process. By specifying the process ID or process name, you can selectively stop a process. For example, to terminate a process named “notepad.exe”, you would enter “taskkill /im notepad.exe” and hit Enter. It’s important to exercise caution when using this command, as terminating critical system processes can result in system instability.
6.3. wmic – Windows Management Instrumentation Command-line
The ‘wmic’ command allows you to access the Windows Management Instrumentation (WMI) and retrieve a wide range of system information. With ‘wmic’, you can query processes, services, and other system components. This versatile command provides extensive capabilities for managing and monitoring your system.
6.4. perfmon – Performance Monitor
The ‘perfmon’ command launches the Performance Monitor tool, which enables you to monitor system performance in real-time. You can track various metrics such as CPU usage, memory consumption, disk activity, and network performance. The Performance Monitor provides valuable insights into system resource utilization and helps identify bottlenecks or performance issues.
6.5. schtasks – Schedule Tasks
The ‘schtasks’ command allows you to create, modify, and manage scheduled tasks on your system. With ‘schtasks’, you can automate processes, run scripts at specific times, or schedule system maintenance tasks. By typing “schtasks” and pressing Enter, you can explore the available options and syntax to set up scheduled tasks.
6.6. taskmgr – Task Manager
The ‘taskmgr’ command launches the Task Manager tool, a graphical interface for managing running processes, monitoring system performance, and analyzing resource usage. Task Manager provides real-time information about CPU, memory, disk, and network usage, allowing you to identify problematic processes and optimize system performance.
These task and process commands are powerful tools for managing and monitoring running processes on your system. Use them wisely to optimize system performance and troubleshoot any issues that may arise. Now, let’s proceed to the next section, where we’ll explore disk and drive management commands.
Disk and Drive Management Commands
In the Command Prompt (CMD), there are several commands available for managing disks and drives on your system. These commands allow you to view disk information, format drives, create partitions, and perform various disk-related tasks. In this section, we’ll explore some essential disk and drive management commands that will help you effectively manage your storage devices.
7.1. diskpart – Disk Partitioning
The ‘diskpart’ command is a powerful tool for managing disks, partitions, and volumes. It provides a command-line interface for creating, deleting, resizing, and formatting partitions. By typing “diskpart” in the command prompt and pressing Enter, you can access an interactive diskpart prompt where you can execute a variety of disk management commands.
7.2. chkdsk – Check Disk for Errors
The ‘chkdsk’ command is used to check a disk for errors and repair any issues that it finds. By typing “chkdsk C:” (replace C: with the appropriate drive letter) and pressing Enter, you can initiate a scan of the specified disk. Chkdsk will provide a detailed report on any errors or bad sectors it discovers.
7.3. format – Format Drives
The ‘format’ command allows you to format a drive with a specific file system. By typing “format D:” (replace D: with the appropriate drive letter) and pressing Enter, you can format the specified drive. Be cautious when using this command, as formatting a drive erases all data on it.
7.4. fsutil – File System Utility
The ‘fsutil’ command provides various file system management capabilities. It allows you to query and modify file system information, configure disk quotas, and manage file and folder permissions. By typing “fsutil” and pressing Enter, you can explore the available subcommands and their functionalities.
7.5. diskmgmt.msc – Disk Management GUI
The ‘diskmgmt.msc’ command launches the Disk Management tool, a graphical interface for managing disks and volumes. Disk Management provides an intuitive interface to create and format partitions, assign drive letters, extend volumes, and perform other disk-related tasks. Simply type “diskmgmt.msc” in the command prompt and hit Enter to launch the utility.
7.6. defrag – Disk Defragmentation
The ‘defrag’ command is used to defragment a disk, which helps optimize disk performance by rearranging fragmented files. By typing “defrag C:” (replace C: with the appropriate drive letter) and pressing Enter, you can initiate the defragmentation process on the specified disk.
These disk and drive management commands provide you with the tools necessary to manage your storage devices efficiently. Use them cautiously, as disk-related tasks have the potential to affect your system’s data. Now, let’s move on to the next section, where we’ll explore user account commands.
User Account Commands
In the Command Prompt (CMD), you have access to various commands that allow you to manage user accounts on your system. These commands enable you to create, modify, and troubleshoot user accounts, change passwords, and manage user permissions. In this section, we’ll explore some essential user account commands that will help you effectively manage user accounts on your system.
8.1. net user – User Account Management
The ‘net user’ command is used to manage user accounts on your system. By typing “net user” and pressing Enter, you can view a list of user accounts. To create a new user account, use the command “net user username /add”. You can also modify user information, reset passwords, and enable/disable user accounts using various parameters of the ‘net user’ command.
8.2. net localgroup – Local Group Management
The ‘net localgroup’ command enables you to manage local user groups on your system. By typing “net localgroup” and pressing Enter, you can view a list of local groups. To add a user to a local group, use the command “net localgroup groupname username /add”. Similarly, you can remove users from groups and manage group memberships using various parameters of the ‘net localgroup’ command.
8.3. net accounts – Account Policies
The ‘net accounts’ command allows you to view and configure account policies on your system. By typing “net accounts” and pressing Enter, you can see the current account policy settings, such as password complexity requirements and password aging. You can modify these settings using the appropriate parameters of the ‘net accounts’ command.
8.4. net user /domain – Domain User Account Management
If your system is connected to a domain, you can manage domain user accounts using the ‘net user /domain’ command. By typing “net user /domain” and pressing Enter, you can view a list of user accounts in the domain. You can create, modify, and manage domain user accounts using the same syntax and parameters as the local user accounts.
8.5. lusrmgr.msc – Local Users and Groups GUI
The ‘lusrmgr.msc’ command launches the Local Users and Groups tool, a graphical interface for managing user accounts and groups. The tool allows you to create, modify, and delete user accounts, assign user privileges, and manage group memberships. Simply type “lusrmgr.msc” in the command prompt and hit Enter to launch the utility.
8.6. control userpasswords2 – User Accounts GUI
The ‘control userpasswords2’ command opens the User Accounts control panel, a graphical interface for managing user accounts and their settings. It allows you to change passwords, manage user profiles, configure automatic login, and perform other user account-related tasks. Type “control userpasswords2” in the command prompt and press Enter to launch the control panel.
These user account commands give you the ability to effectively manage user accounts, groups, and related settings on your system. Use them with caution and adhere to proper security practices. Now, let’s move on to the next section, where we’ll explore security commands that will help you enhance the security of your system.
Security Commands
In the Command Prompt (CMD), there are several commands available to enhance the security of your system. These commands enable you to manage user access, reset passwords, configure firewall settings, and perform other security-related tasks. In this section, we’ll explore some essential security commands that will help you strengthen the security of your system.
9.1. net user – Password Reset
The ‘net user’ command can be used to reset user passwords. By typing “net user username newpassword” and pressing Enter, you can set a new password for the specified user account. It’s important to regularly update passwords to mitigate security risks.
9.2. net accounts – Password Policy
The ‘net accounts’ command allows you to configure password policies on your system. By typing “net accounts /minpwlen:8” and pressing Enter, you can set a minimum password length of 8 characters (replace 8 with your desired length). Adjusting other parameters such as password complexity and password aging can enhance the security of user passwords.
9.3. netstat – Network Security
The ‘netstat’ command mentioned earlier in the network commands section can also be used for network security purposes. By typing “netstat -ano” and pressing Enter, you can view active network connections and associated processes. Monitoring these connections can help detect unauthorized access or suspicious activity.
9.4. gpedit.msc – Group Policy Editor
The ‘gpedit.msc’ command opens the Group Policy Editor, a powerful tool for configuring system security settings. It allows you to define policies, enforce security restrictions, manage user rights, and control various aspects of your system’s behavior. Type “gpedit.msc” in the command prompt and press Enter to launch the editor.
9.5. firewall.cpl – Windows Firewall
The ‘firewall.cpl’ command opens the Windows Firewall settings, where you can configure inbound and outbound rules to protect your system from unauthorized network traffic. It allows you to define specific rules for applications or ports, customize firewall profiles, and monitor firewall activity.
9.6. cipher – File Encryption
The ‘cipher’ command enables you to encrypt files and folders to protect sensitive data. By typing “cipher /e /s:C:\foldername” and pressing Enter, you can encrypt all files within the specified folder (replace C:\foldername with your desired folder path). This helps ensure that your data remains secure even if it falls into the wrong hands.
These security commands provide you with the tools necessary to enhance the security of your system. Use them in conjunction with other security best practices to protect your data and privacy effectively. Now, let’s proceed to the final section, where we’ll explore troubleshooting commands that can help you diagnose and resolve common system issues.
Troubleshooting Commands
The Command Prompt (CMD) offers various troubleshooting commands that can help you diagnose and resolve common system issues. These commands enable you to check system files, repair network connections, verify hardware, and perform other troubleshooting tasks. In this section, we’ll explore some essential troubleshooting commands that will assist you in resolving system problems.
10.1. sfc /scannow – System File Checker
The ‘sfc /scannow’ command scans your system files for any corrupt or missing files and attempts to repair them. Running this command can help fix issues related to system file integrity. Type “sfc /scannow” in the command prompt and press Enter to run the scan.
10.2. ipconfig /release and ipconfig /renew – IP Configuration
If you’re experiencing network connectivity issues, using the ‘ipconfig /release’ and ‘ipconfig /renew’ commands can often help. ‘ipconfig /release’ releases the current IP address, and ‘ipconfig /renew’ requests a new IP address from the DHCP server. Running these commands in sequence can resolve network configuration problems.
10.3. chkdsk /f – Disk Error Checking
The ‘chkdsk /f’ command checks your disk for errors and attempts to fix them. This command is particularly useful if you encounter disk-related issues such as system crashes or data corruption. Type “chkdsk /f” followed by the drive letter (e.g., “chkdsk /f C:”) and press Enter to run the disk error check.
10.4. netsh winsock reset – Winsock Reset
When you’re facing network-related problems, resetting the Winsock catalog can often help resolve the issue. The ‘netsh winsock reset’ command resets the network settings back to their default state. Type “netsh winsock reset” in the command prompt and press Enter to reset the Winsock catalog.
10.5. msconfig – System Configuration
The ‘msconfig’ command launches the System Configuration tool, which allows you to manage startup programs, enable or disable services, and modify system boot settings. Using this tool can help identify and resolve issues caused by conflicting software or unnecessary startup programs. Type “msconfig” in the command prompt and press Enter to open the System Configuration utility.
10.6. eventvwr – Event Viewer
The ‘eventvwr’ command opens the Event Viewer tool, which provides detailed information about system events, errors, and warnings. It helps diagnose and troubleshoot issues related to system performance, application crashes, or driver problems. Type “eventvwr” in the command prompt and press Enter to launch the Event Viewer.
These troubleshooting commands provide you with valuable tools to diagnose and resolve various system issues. Remember to research and understand the usage of each command before executing them. Combine these commands with other troubleshooting techniques to effectively resolve problems and optimize your system performance.
Congratulations! You’ve now gained a comprehensive understanding of essential Command Prompt commands across different categories. Utilize this knowledge to navigate and manage your computer efficiently. Happy troubleshooting and working on the Command Prompt!