
What is the Magnetic Lasso Tool?
The Magnetic Lasso Tool is a powerful feature in Adobe Photoshop that allows you to make precise and accurate selections by automatically detecting the edges of an object. It is especially useful when you need to quickly select complex shapes or objects with well-defined edges.
This tool works by analyzing the contrast and color changes along the edges of an object and creating selection points as you move the cursor around the contour. It intelligently snaps to the edges, making it easier to create accurate selections without the need for manual tracing or selecting each point individually.
With the Magnetic Lasso Tool, you can select objects like trees, people, or any other element that might have irregular shapes. It is an essential tool for graphic designers, photographers, and digital artists, as it allows for precise selections, making image editing and manipulation much more efficient.
Whether you need to extract the subject from a photo, isolate an object for compositing, or remove a background, the Magnetic Lasso Tool can help you accomplish these tasks with ease.
By using the Magnetic Lasso Tool, you can save valuable time and effort compared to manual selection methods. It offers a great level of flexibility and control in your editing process, enabling you to focus on enhancing and perfecting your designs.
Understanding how to effectively use the Magnetic Lasso Tool will elevate your Photoshop skills and give you the freedom to create professional-looking compositions and edits.
How to Access the Magnetic Lasso Tool
Accessing the Magnetic Lasso Tool in Adobe Photoshop is simple and straightforward. Here’s how you can find and select this powerful tool:
- Launch Photoshop and open the image you want to work on.
- Click on the “Lasso Tool” present in the Photoshop toolbar. If you can’t find it, click and hold on the “Rectangular Marquee Tool” icon to reveal additional selection tools, then select the “Magnetic Lasso Tool” from the dropdown menu.
- Alternatively, you can access the Magnetic Lasso Tool by using the keyboard shortcut. Press “L” on your keyboard to activate the Lasso Tool and then press “Shift + L” to cycle through the different lasso options until you reach the Magnetic Lasso Tool.
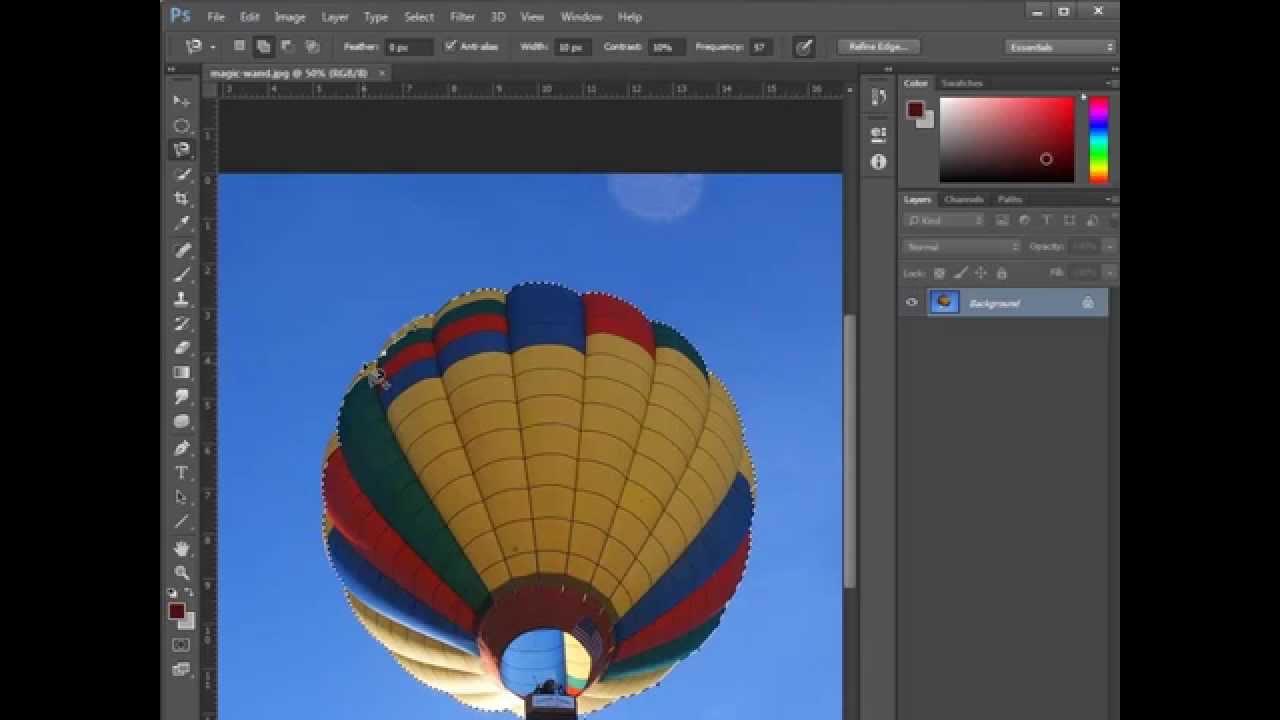
- Once you have selected the Magnetic Lasso Tool, you can customize its settings in the options bar at the top of the Photoshop window. Here, you can adjust parameters such as the width, contrast, and frequency to fine-tune the tool’s behavior for your specific needs.
With just a few simple steps, you can access the Magnetic Lasso Tool and begin using its powerful selection capabilities in Adobe Photoshop. Take the time to familiarize yourself with the tool’s interface and settings for optimal results.
Using the Magnetic Lasso Tool for Basic Selections
The Magnetic Lasso Tool is a versatile tool that can be used for various selection tasks. It is particularly effective for creating basic selections with well-defined edges. Here’s how you can use the Magnetic Lasso Tool for basic selections:
- Select the Magnetic Lasso Tool from the Photoshop toolbar or use the keyboard shortcut (L and Shift + L).
- Position the cursor at the starting point of the object’s edge that you want to select.
- Click once to set the starting point.
- Continue moving the cursor along the object’s contour, keeping it as close to the edge as possible.
- As you move, you’ll see the tool automatically creating anchor points that follow the object’s edges. If the tool deviates from the desired path, simply click on the last anchor point to reset it and adjust the cursor position accordingly.
- Once you have traced the entire object, bring the cursor back to the starting point or connect it with the first anchor point. You’ll notice a small circle appear next to the cursor, indicating that the selection is about to be closed.
- Click once to close the selection and create the final path.
- The selection will now be active, allowing you to perform various operations like copying, cutting, pasting, or applying adjustments to the selected area.
Remember, the accuracy of your selection depends on how closely you trace the object’s edges. Take your time and adjust the cursor position as needed to create a precise selection. You can always refine the selection later using the techniques discussed in the next section.
By following these steps, you can effectively use the Magnetic Lasso Tool to create basic selections in Adobe Photoshop. Practice using the tool on different objects to familiarize yourself with its behavior and enhance your selection skills.
Adjusting the Magnetic Lasso Tool Settings
To get the most out of the Magnetic Lasso Tool in Adobe Photoshop, it’s essential to understand and adjust its settings according to your specific selection needs. Customizing the tool’s settings allows you to achieve more accurate and precise selections. Here are some key settings you can adjust:
- Width: This setting determines the width of the selection border that the Magnetic Lasso Tool creates. A wider width may make it easier to detect edges, especially for objects with less contrast. However, a narrower width can yield more precise results and prevent accidental selection of nearby objects.
- Frequency: The frequency setting controls how often the Magnetic Lasso Tool places anchor points along the object’s edge. A higher frequency can make the selection more detailed but may also result in a larger number of points, which can be harder to maintain control over. Lower frequencies can simplify the selection but might miss smaller details.
- Contrast: Adjusting the contrast setting affects how the Magnetic Lasso Tool detects edges. Increasing the contrast helps the tool distinguish between an object and its background. Use a higher contrast value when the object has low contrast with its surroundings. Lower the contrast if the object has high contrast, as it can cause the tool to snap unnecessarily to small variations in tone or color.
- Edge Detection: Enable this option to allow the Magnetic Lasso Tool to automatically detect and snap to edges. When disabled, the tool won’t correct the selection path, giving you more manual control. Use this option when dealing with objects that have irregular or soft edges.
Experiment with different combinations of these settings to find the optimal configuration for your specific selection task. There is no one-size-fits-all approach, as each image and object may require different settings to obtain the desired outcome.
Remember that practice is key when it comes to using the Magnetic Lasso Tool effectively. Take the time to familiarize yourself with the settings and observe how they impact your selections. With patience and experimentation, you’ll master the adjustments necessary to create precise and accurate selections using the Magnetic Lasso Tool.
Refining the Selection with the Magnetic Lasso Tool
While the Magnetic Lasso Tool in Adobe Photoshop can generate accurate selections, there may be instances where you need to refine or adjust the selection further. Here are some techniques to refine your selections using the Magnetic Lasso Tool:
- Add to Selection: If you need to include additional areas in your selection, hold down the Shift key and click at different points along the desired edges. The Magnetic Lasso Tool will extend the selection to encompass these areas.
- Subtract from Selection: To remove areas from your selection, hold down the Alt (Windows) or Option (Mac) key and click on the portions you wish to exclude. This allows you to selectively refine the selection and exclude unwanted regions.
- Smooth the Selection: If your selection has jagged or uneven edges, you can smooth them out using the Smooth option in the options bar. Simply increase the value to soften the selection and create a more polished result.
- Feather the Selection: For blending the selection more seamlessly with its surroundings, you can apply feathering. This softens the edges of the selection, resulting in a smoother transition between the selected and unselected areas. Adjust the feathering value to control the level of blending.
- Refine Edge: If you need more advanced control over the selection, consider using the “Refine Edge” option. It provides additional tools and settings to fine-tune the edges, including options for adjusting the smoothness, contrast, and feathering. This feature can be accessed from the options bar or by right-clicking on the selection and choosing “Refine Edge”.
By utilizing these techniques, you can refine and improve your selections made with the Magnetic Lasso Tool. Take the time to experiment with different adjustments and methods to achieve the best results for your specific image and intended purpose.
Remember, practice plays a crucial role in mastering the art of selection. With time and experience, you’ll develop an understanding of how to effectively refine your selections using the Magnetic Lasso Tool.
Making Smooth and Accurate Selections with the Magnetic Lasso Tool
To achieve professional-quality selections with the Magnetic Lasso Tool in Adobe Photoshop, it’s important to focus on creating smooth and accurate outlines. Here are some tips to help you make precise selections:
- Zoom In: Zoom in on your image to get a closer view of the edges you are tracing. This allows you to see finer details and make more accurate selections.
- Take Your Time: Patience is key when using the Magnetic Lasso Tool. Carefully follow the contours of the object and take your time to ensure each anchor point is placed accurately.
- Use Short Strokes: Instead of trying to trace the entire object with one continuous stroke, break it down into shorter strokes. This reduces the risk of mistakes and allows for more precise control over the selection.
- Make Corrections: If the Magnetic Lasso Tool creates an anchor point that deviates from the desired path, simply click on it to remove it. Then, adjust the cursor position to correctly align with the edge of the object.
- Use Guide Lines: If you’re working on an object with straight edges or specific alignment requirements, consider using the built-in guide lines in Photoshop. These can assist you in creating precise selections by providing visual references.
- Shortcut Keys: Take advantage of keyboard shortcuts to improve your workflow. Press the space bar to temporarily switch to the Hand tool for panning around the image, and use the bracket keys ([ and ]) to adjust the brush size on the fly.
It’s important to note that no selection method is perfect, and some objects may require additional refinement techniques. Don’t be discouraged if your first attempt doesn’t yield a flawless outcome. With practice and experimentation, you’ll become more proficient at using the Magnetic Lasso Tool and achieving smooth and accurate selections.
Always remember to save your work frequently and consider working on a duplicate layer when making complex selections. This allows you to easily revert back to previous stages or make adjustments without affecting the original image.
By implementing these techniques and adopting a meticulous approach, you can enhance your ability to create smooth and precise selections using the Magnetic Lasso Tool in Adobe Photoshop.
Troubleshooting Common Issues with the Magnetic Lasso Tool
While the Magnetic Lasso Tool in Adobe Photoshop is a powerful selection tool, it can sometimes present challenges or encounter issues. Here are some common problems you may encounter when using the Magnetic Lasso Tool and how to troubleshoot them:
- Inaccurate Selections: If the Magnetic Lasso Tool is not accurately capturing the edges of your object, try adjusting the tool’s settings. Experiment with different values for width, frequency, and contrast to find the optimal configuration for your specific image.
- Noisy Background: If the background of your image is complex or has a lot of noise, it may interfere with the Magnetic Lasso Tool’s ability to detect edges accurately. In such cases, using the tool in combination with other selection tools, like the Quick Selection Tool or the Pen Tool, can help create a more precise selection.
- Overlapping Edges: When dealing with objects that have overlapping or intertwined edges, it can be challenging for the Magnetic Lasso Tool to distinguish between them. In such cases, it’s best to break down the selection process into smaller sections and carefully trace each object separately.
- Unwanted Anchor Points: Sometimes, the Magnetic Lasso Tool may create excessive anchor points that deviate from the desired path. Use the Backspace (Windows) or Delete (Mac) key to remove unwanted anchor points and adjust the cursor position as needed.
- Smoothness and Feathering: If your selection edges appear jagged or rough, try increasing the smoothness setting or applying a feathering effect. This will help blend the selection more seamlessly with its surroundings and produce smoother results.
It’s also worth noting that practice and experimentation are critical when using the Magnetic Lasso Tool. Each image and object may require different approaches and adjustments. Don’t get discouraged if your initial attempts are not perfect. With time and experience, you’ll become more adept at troubleshooting and producing accurate selections.
Should you encounter more complex selection challenges or require more precise control, exploring other selection tools in Photoshop, such as the Quick Selection Tool, Pen Tool, or Refine Edge feature, can provide additional options for tackling difficult selections.
By being aware of common issues and employing the appropriate troubleshooting techniques, you can overcome challenges and achieve better results when using the Magnetic Lasso Tool in Adobe Photoshop.