
Overview
The IF function is a powerful tool in Excel that allows you to perform logical tests and make decisions based on the results. With IF, you can specify different actions to take depending on whether a condition is met or not. This can be extremely useful when working with large amounts of data or when creating complex formulas.
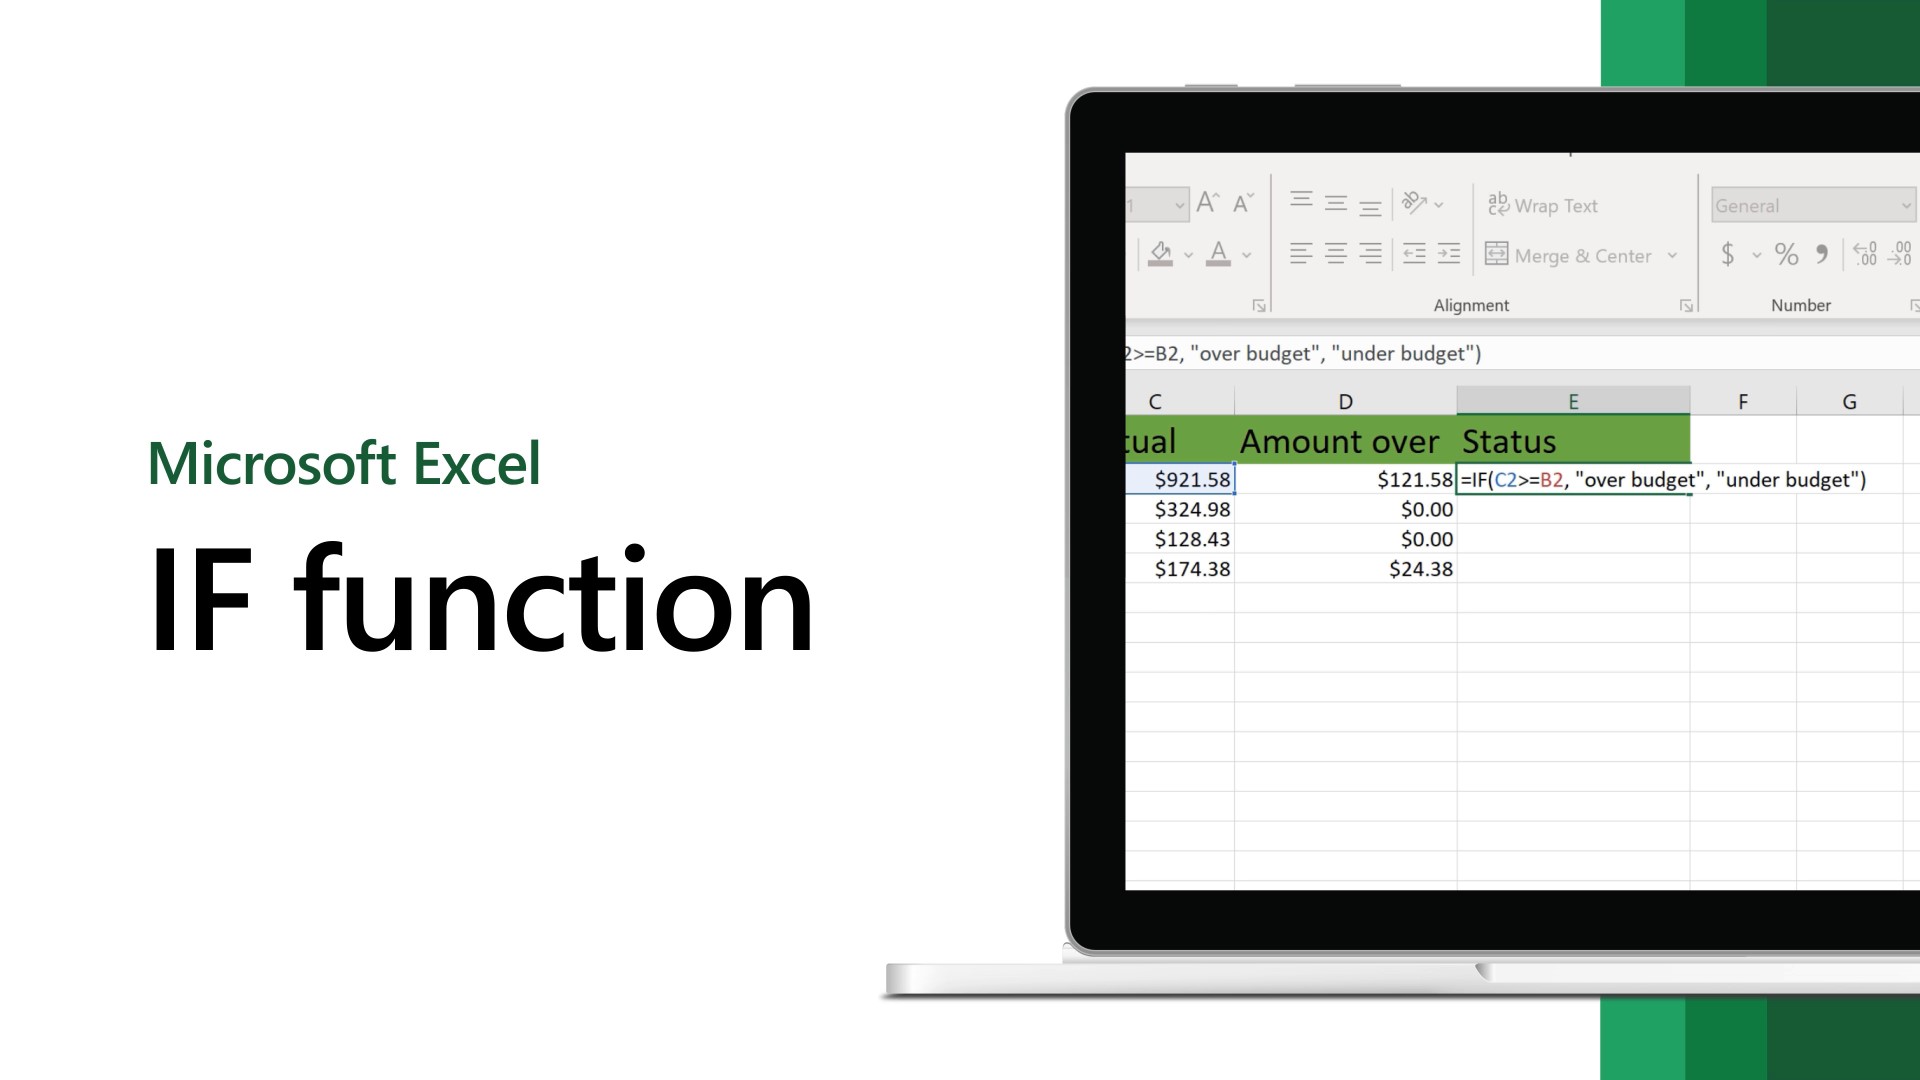
The syntax of the IF function is:
=IF(logical_test, value_if_true, value_if_false)
Where:
- logical_test: This is the condition that you want to test.
- value_if_true: This is the value or formula that will be returned if the logical_test evaluates to true.
- value_if_false: This is the value or formula that will be returned if the logical_test evaluates to false.
The IF function can be used to perform simple tasks such as checking if a number is greater than a certain value or if a cell is empty. It can also be used to perform more complex tasks by nesting multiple IF statements or combining it with other functions and logical operators.
In this article, we will explore the different ways you can use the IF function in Excel. We will cover basic IF statements, nested IF statements, using the IF function with other functions, logical operators, text, dates and times, errors, cell references, multiple conditions, checking for blanks, returning multiple results, and performing calculations. By the end of this article, you will have a solid understanding of how to effectively use the IF function to make your spreadsheets more dynamic and efficient.
So, let’s dive in and discover the incredible potential of the IF function in Excel.
Syntax
The syntax of the IF function in Excel is straightforward and easy to understand. It follows the following structure:
=IF(logical_test, value_if_true, value_if_false)
The IF function requires three arguments:
- logical_test: This is the condition that you want to evaluate. It can be a comparison between values, a logical expression, or a function that returns a logical value.
- value_if_true: This is the value or formula that will be returned if the logical_test evaluates to true.
- value_if_false: This is the value or formula that will be returned if the logical_test evaluates to false.
It’s important to note that the value_if_true and value_if_false arguments can be any valid Excel value, including numbers, text, dates, and even formulas. This allows you to perform a wide range of actions based on the condition you specify.
Here’s an example to illustrate the syntax:
=IF(A1>10, "Value is greater than 10", "Value is less than or equal to 10")
In this example, the logical_test is A1>10. If the value in cell A1 is greater than 10, the IF function will return the string “Value is greater than 10”. If the value is less than or equal to 10, it will return the string “Value is less than or equal to 10”.
It’s important to ensure that the logical_test you specify is a valid comparison or logical expression. Otherwise, the IF function may produce unexpected results.
That’s the basic syntax of the IF function in Excel. In the following sections, we will explore various ways to use the IF function to accomplish different tasks and make your spreadsheets more powerful.
Basic IF Statement
The basic IF statement is the most commonly used form of the IF function in Excel. It allows you to perform a simple logical test and specify different actions to take based on the result.
To create a basic IF statement, you need to provide a logical_test, a value_if_true, and a value_if_false. The logical_test is the condition that you want to evaluate. If the logical_test is true, the value_if_true will be returned, and if it is false, the value_if_false will be returned.
Let’s look at an example to better understand how the basic IF statement works:
=IF(A1>50, "Pass", "Fail")
In this example, the logical_test is A1>50. If the value in cell A1 is greater than 50, the IF function will return the string “Pass”. If the value is less than or equal to 50, it will return the string “Fail”.
You can also use numbers or formulas as the value_if_true or value_if_false. For instance:
=IF(A2>B2, A2-B2, B2-A2)
In this example, if the value in cell A2 is greater than the value in cell B2, the IF function will return the result of A2-B2. If A2 is not greater than B2, it will return the result of B2-A2.
The basic IF statement can be used for a variety of tasks, such as grading students’ exam scores, determining eligibility for a discount, categorizing data, and much more. It provides a powerful way to make decisions and automate processes in your Excel spreadsheets.
Remember to always wrap your logical_test, value_if_true, and value_if_false in double quotation marks if using text values, or without quotation marks if using numbers or formulas.
Now that you understand the basic IF statement, let’s explore some more advanced techniques and scenarios in the following sections.
Nested IF Statements
Nested IF statements allow you to create more complex decision-making structures in Excel. With nested IF statements, you can perform multiple logical tests and specify different actions for each test.
The structure of a nested IF statement involves using multiple IF functions within each other. The logical_test of the outer IF statement is evaluated first, and if it is true, the value_if_true of the outer IF statement is returned. If the logical_test of the outer IF statement is false, the inner IF statements are evaluated until a logical_test is found to be true, and its corresponding value_if_true is returned. If none of the logical_tests are true, the value_if_false of the final IF statement is returned.
Let’s illustrate this with an example:
=IF(A1>90, "Excellent", IF(A1>80, "Good", IF(A1>70, "Average", "Below Average")))
In this example, the outer IF statement has a logical_test of A1>90. If the value in cell A1 is greater than 90, the IF function will return “Excellent”. If the value is not greater than 90, the inner IF statement IF(A1>80, "Good", IF(A1>70, "Average", "Below Average")) is evaluated. If the value in A1 is greater than 80, “Good” is returned. If it is not, the next inner IF statement is evaluated. The process continues until a logical_test is found to be true, or the final value_if_false is reached, which in this case is “Below Average”.
Nested IF statements can be extended to include as many logical tests and value_if_true arguments as needed. However, it is important to keep in mind that as the complexity increases, the formula can become harder to manage and understand.
Nested IF statements are particularly useful when you need to categorize data into multiple levels or when you have multiple conditions to evaluate. They provide a flexible way to handle complex decision-making tasks in Excel.
Remember to properly close each IF statement with its corresponding parentheses to ensure the formula is structured correctly.
Now that you understand how to use nested IF statements, let’s explore how you can combine the IF function with other functions to further enhance its functionality.
Using the IF Function with Other Functions
One of the strengths of the IF function in Excel is its ability to work harmoniously with other functions. By combining the IF function with other functions, you can create more advanced and dynamic formulas to suit your specific needs.
Here are a few examples of how you can use the IF function with other functions:
- SUMIF: The SUMIF function allows you to sum values that meet a particular condition. You can use the IF function to set that condition dynamically. For example:
- AVERAGEIF: Similar to SUMIF, the AVERAGEIF function calculates the average of values that meet a specific condition. Here’s an example of using the IF function with AVERAGEIF:
- CONCATENATE: The CONCATENATE function is used to combine multiple values into a single string. You can use the IF function to conditionally add certain values to the string. For example:
=SUMIF(A1:A5, ">80", IF(B1:B5<>"", B1:B5, 0))
In this example, the SUMIF function is used to sum values in cells B1 to B5 that are greater than 80, only if the corresponding cell in column A is not empty. If the condition is met, the values are summed, otherwise, a value of 0 is returned.
=AVERAGEIF(A1:A5, "Pass", IF(B1:B5>80, B1:B5, ""))
In this case, the AVERAGEIF function is used to calculate the average of values in cells B1 to B5 that are greater than 80 and have a corresponding cell in column A with the value “Pass”. The IF function is used to filter out any empty cells, so only the required values are included in the average calculation.
=CONCATENATE(IF(A1="Male", "Mr. ", "Ms. "), B1)
In this example, the CONCATENATE function is used to create salutations based on the value in cell A1. If A1 equals “Male”, the salutation “Mr. ” is added to the string, otherwise, “Ms. ” is added. The value in cell B1 is then appended to the salutation.
Keep in mind that the IF function can be combined with a wide array of functions in Excel, including mathematical functions, text functions, date and time functions, and more. This versatility allows you to tailor your formulas to fit specific scenarios and requirements.
By leveraging the power of the IF function combined with other functions, you can create robust and dynamic formulas that automate processes and provide meaningful insights from your data.
Now that you have a good grasp of using the IF function with other functions, let’s explore how you can utilize logical operators in conjunction with the IF function.
Using the IF Function with Logical Operators
Logical operators are powerful tools that allow you to perform comparisons and evaluate multiple conditions simultaneously. By combining logical operators such as AND, OR, and NOT with the IF function in Excel, you can create more sophisticated and precise logical tests.
Here are some examples of how you can use logical operators with the IF function:
- AND operator: The AND operator allows you to evaluate multiple conditions and return true only if all conditions are true. You can use the AND operator to create complex logical tests within the IF function. For instance:
- OR operator: The OR operator allows you to evaluate multiple conditions and return true if any of the conditions are true. This can be useful when you want to check if at least one condition is satisfied. For example:
- NOT operator: The NOT operator allows you to negate a logical condition. It converts a true condition into false and a false condition into true. You can use the NOT operator within an IF function to reverse the outcome of a logical test. Here's a simple example:
=IF(AND(A1>10, B1<20), "Condition met", "Condition not met")
In this example, the IF function will return "Condition met" only if both A1 is greater than 10 and B1 is less than 20. If either condition is not true, it will return "Condition not met".
=IF(OR(A1="Red", A1="Blue", A1="Green"), "Primary Color", "Not a Primary Color")
In this case, the IF function will return "Primary Color" if the value in cell A1 is either "Red", "Blue", or "Green". If the value is none of these, it will return "Not a Primary Color".
=IF(NOT(A1>10), "Less than or equal to 10", "Greater than 10")
In this example, the IF function will return "Less than or equal to 10" if the value in cell A1 is not greater than 10. If it is greater than 10, it will return "Greater than 10".
Using logical operators with the IF function allows you to create more complex and precise logical tests. You can combine multiple conditions to fulfill specific criteria and make decisions based on those conditions. This capability is especially valuable when working with large datasets or when dealing with complex decision-making scenarios.
Now that you understand how to use logical operators with the IF function, let's explore how you can apply the IF function to manipulate and analyze text data.
Using the IF Function with Text
The IF function in Excel is not limited to working with numerical values only. It can also be used effectively with text data, allowing you to perform conditional operations and manipulate text strings based on specific criteria.
Here are a few examples of how you can utilize the IF function with text:
- Checking for specific text: You can use the IF function to check if a cell contains a specific text value. For example:
- Performing pattern matching: You can use wildcard characters, such as asterisks (*) and question marks (?), along with the IF function to perform pattern matching. For instance:
- Concatenating text: The IF function can be used to combine different text values conditionally. For example:
=IF(A1="Apple", "Fruit", "Not a Fruit")
In this case, if the value in cell A1 is "Apple", the IF function will return "Fruit". Otherwise, it will return "Not a Fruit".
=IF(A1="API*", "Valid", "Invalid")
In this example, if the value in cell A1 starts with "API", the IF function will return "Valid". Otherwise, it will return "Invalid".
=IF(A1>10, "High", "Low") & " priority"
In this case, if the value in cell A1 is greater than 10, the IF function will return "High priority". Otherwise, it will return "Low priority". This is achieved by concatenating the result of the IF function with the text string " priority".
The ability to leverage the IF function with text data allows you to automate text-based operations and customize the output based on specific conditions. It provides flexibility in handling textual information in your Excel spreadsheets.
Remember to enclose text values within double quotation marks when using them as arguments within the IF function. Also, ensure the text values in your logical tests match the text exactly, as Excel is case-sensitive in text comparisons.
Now that you're familiar with using the IF function with text, let's explore how you can apply it to date and time data.
Using the IF Function with Dates and Times
The IF function in Excel is versatile when it comes to working with date and time values. It allows you to evaluate and manipulate dates and times based on specific conditions, making it a powerful tool for managing time-based data.
Here are a few ways you can utilize the IF function with dates and times:
- Comparing dates: You can use the IF function to compare dates and determine if they are greater than, less than, or equal to each other. For example:
- Calculating time differences: By combining the IF function with other date and time functions, you can calculate the difference between two time values and perform actions based on the result. For instance:
- Working with specific dates: The IF function can be used to check if a date falls within a specific range or falls on a specific day of the week. For example:
=IF(A1>TODAY(), "Future Date", "Past Date")
In this case, if the value in cell A1 is later than today's date, the IF function will return "Future Date". Otherwise, it will return "Past Date".
=IF(TEXT(A1-B1, "h")>8, "Overtime", "Regular Hours")
In this example, if the difference between the values in cells A1 and B1 is greater than 8 hours, the IF function will return "Overtime". Otherwise, it will return "Regular Hours". The TEXT function is used to format the time difference displayed in hours for comparison.
=IF(AND(A1>=DATE(2022,1,1), A1<=DATE(2022,12,31)), "Within Range", "Outside Range")
In this case, if the date in cell A1 falls between January 1, 2022, and December 31, 2022 (inclusive), the IF function will return "Within Range". Otherwise, it will return "Outside Range".
Using the IF function with dates and times allows you to perform various tasks such as conditional formatting, scheduling, time tracking, and more. It provides a convenient way to analyze and manage time-related data in Excel.
When working with dates and times, ensure that your date and time values are formatted correctly in Excel, and consider using appropriate date functions to handle specific requirements.
Now that you're familiar with using the IF function with dates and times, let's explore how you can handle errors using the IF function.
Using the IF Function with Errors
The IF function in Excel is not only useful for handling regular data but also for managing errors that may occur within your spreadsheet. By incorporating the IF function, you can identify and handle errors in a controlled manner.
Here are a few ways to use the IF function with errors:
- Checking for errors: The IF function can be used to detect specific error types, such as #VALUE!, #DIV/0!, and #N/A. For example:
- Handling errors: You can use the IF function along with other functions to handle errors and provide alternative values or messages. For instance:
- Suppressing errors: By using the IF function, you can prevent errors from being displayed and instead show specific messages or values. For example:
=IF(ISERROR(A1), "Error occurred", "No error")
In this case, if an error exists in cell A1, the IF function will return "Error occurred". Otherwise, it will return "No error".
=IF(ISNA(VLOOKUP(A1, B1:C10, 2, FALSE)), "Value not found", VLOOKUP(A1, B1:C10, 2, FALSE))
In this example, if the VLOOKUP function encounters a #N/A error, the IF function will return "Value not found". Otherwise, it will return the result of the VLOOKUP function.
=IFERROR(A1/B1, "Division error")
In this case, if an error occurs during the division in cell A1/B1, the IF function will return "Division error" instead of displaying the error message.
Utilizing the IF function with errors allows you to effectively handle unexpected situations and create more robust spreadsheet solutions. It enables you to customize error handling based on your specific requirements.
Remember to use appropriate error-checking functions, such as ISERROR, ISNA, and IFERROR, in conjunction with the IF function to effectively identify and manage errors in your Excel worksheets.
Now that you've learned how to use the IF function with errors, let's explore how you can incorporate cell references within the IF function.
Using the IF Function with Cell References
One of the key features of the IF function in Excel is its ability to work seamlessly with cell references. By incorporating cell references, you can create dynamic formulas that adapt to changes in your spreadsheet's data.
Here are a few examples of how you can use the IF function with cell references:
- Referencing cells for logical tests: Instead of using hardcoded values or formulas in the logical_test argument, you can refer to other cells to perform the comparison. For example:
- Referencing cells for value_if_true and value_if_false: Similarly, you can refer to specific cells for the value_if_true and value_if_false arguments. This allows you to dynamically retrieve values from other cells based on the logical test. For instance:
- Using ranges with cell references: It's also possible to use cell ranges as arguments within the IF function. This can be useful when you need to perform calculations or aggregations based on a range of cells. For example:
=IF(A1>B1, "Greater", "Less or equal")
This formula compares the values in cells A1 and B1. If the value in A1 is greater than the value in B1, the IF function will return "Greater". Otherwise, it will return "Less or equal".
=IF(C1="Yes", D1, E1)
In this example, if the value in cell C1 is "Yes", the IF function will return the value in cell D1. Otherwise, it will return the value in cell E1.
=IF(SUM(A1:A5)>100, "Total exceeds 100", "Total is within range")
In this case, if the sum of values in cells A1 to A5 is greater than 100, the IF function will return "Total exceeds 100". Otherwise, it will return "Total is within range".
By utilizing cell references in conjunction with the IF function, you can create formulas that update dynamically when the referenced cells change. This makes your spreadsheet more flexible and adaptable to evolving data.
When referencing cells, ensure that the cell references are absolute ($A$1) or relative (A1) as per your requirement. Using relative references allows the formula to adjust automatically when it is copied to other cells.
Now that you understand how to use the IF function with cell references, let's explore how you can use the IF function to evaluate multiple conditions.
Using the IF Function with Multiple Conditions
The IF function in Excel can handle multiple conditions by combining logical operators and nested IF statements. This allows you to perform complex tests and make decisions based on multiple criteria.
Here are a few examples of how you can use the IF function with multiple conditions:
- Using logical operators: You can use logical operators such as AND and OR to combine multiple conditions within the logical_test argument of the IF function. For example:
- Using nested IF statements: With nested IF statements, you can evaluate multiple conditions sequentially. Here's an example:
- Combining logical operators and nested IF statements: You can combine logical operators and nested IF statements to create even more complex logical tests. For instance:
=IF(AND(A1>10, B1<20), "Condition met", "Condition not met")
In this case, the IF function will return "Condition met" only if both conditions, A1>10 and B1<20, are true. Otherwise, it will return "Condition not met".
=IF(A1>10, "High", IF(A1>5, "Medium", IF(A1>0, "Low", "Invalid")))
In this example, if the value in cell A1 is greater than 10, the IF function will return "High". If it is greater than 5 but less than or equal to 10, it will return "Medium". If it is greater than 0 but less than or equal to 5, it will return "Low". Otherwise, it will return "Invalid".
=IF(AND(A1>10, OR(B1="Yes", C1="Yes")), "Condition met", "Condition not met")
In this case, the IF function will return "Condition met" only if A1 is greater than 10 and either B1 or C1 is equal to "Yes". Otherwise, it will return "Condition not met".
By utilizing multiple conditions within the IF function, you can create flexible and tailored decision-making processes based on diverse criteria. It allows you to automate complex logic and streamline data analysis in Excel.
Remember to structure your multiple conditions carefully to ensure the desired logic and result. Test your formulas thoroughly to verify that the correct actions are taken based on your specified conditions.
Now that you understand how to use the IF function with multiple conditions, let's explore how you can use it to check for blank cells.
Using the IF Function to Check for Blanks
The IF function in Excel is a valuable tool for checking whether cells are blank or contain empty values. By utilizing the IF function, you can perform tests to identify and handle blank cells in your spreadsheet.
Here are a few examples of how you can use the IF function to check for blanks:
- Checking for truly blank cells: You can use the IF function in combination with the ISBLANK function to determine if a cell is truly blank (contains no value). Here's an example:
- Checking for empty cells: Sometimes, a cell may appear blank but actually contains an empty string or formula result. You can use the IF function along with the LEN function to identify such cells. For example:
- Handling blank cells: You can use the IF function to handle blank cells by providing alternative values or actions. For instance:
=IF(ISBLANK(A1), "Cell is blank", "Cell is not blank")
In this case, if cell A1 is blank, the IF function will return "Cell is blank". Otherwise, it will return "Cell is not blank".
=IF(LEN(A1)=0, "Cell is empty", "Cell is not empty")
In this example, if the length of the value in cell A1 is zero, meaning it is empty or only contains a space, the IF function will return "Cell is empty". Otherwise, it will return "Cell is not empty".
=IF(A1="", "No value", A1*10)
In this case, if cell A1 is blank, the IF function will return "No value". Otherwise, it will perform a calculation by multiplying the value in A1 by 10.
Using the IF function to check for blanks allows you to identify and manage empty cells effectively. Whether you need to distinguish between truly blank cells or those that appear blank, the IF function provides a valuable tool for handling these scenarios.
When checking for blanks, it's important to be mindful of the presence of leading or trailing spaces, as they can affect the results. Consider using additional functions, such as TRIM, if necessary to handle whitespace-related issues.
Now that you know how to use the IF function to check for blank cells, let's explore how you can employ it to return multiple results.
Using the IF Function to Return Multiple Results
While the IF function in Excel typically returns a single value based on a condition, you can use it creatively to return multiple results by leveraging nested IF statements or combining it with other functions.
Here are a few examples of how you can use the IF function to return multiple results:
- Using nested IF statements: By nesting multiple IF statements inside each other, you can create complex logical tests that result in different outcomes. Here's an example:
- Using INDEX and MATCH functions: You can combine the IF function with the INDEX and MATCH functions to return specific values from a range based on a condition. For example:
- Using CONCATENATE function: By combining the IF function with the CONCATENATE function, you can create dynamic text strings based on different conditions. For instance:
=IF(A1>90, "Excellent", IF(A1>80, "Good", IF(A1>70, "Average", "Below Average")))
In this case, the IF function evaluates the value in cell A1 and returns the corresponding result based on multiple conditions. Depending on the value, it will return "Excellent" for values greater than 90, "Good" for values between 80 and 90, "Average" for values between 70 and 80, and "Below Average" for values below 70.
=IF(A1="Fruit", INDEX(C1:C5, MATCH(A1, B1:B5, 0)), "Not Found")
In this example, if the value in cell A1 is "Fruit", the IF function uses the INDEX and MATCH functions to search for that value in the range B1:B5 and returns the corresponding value from the range C1:C5. If no match is found, it returns "Not Found".
=IF(Score>=80, CONCATENATE("Congratulations, ", Name, "!"), CONCATENATE("Hello, ", Name, ", you need to improve your score."))
In this case, if the score is equal to or greater than 80, the IF function returns a message that starts with "Congratulations" followed by the name. Otherwise, it returns a message that begins with "Hello" followed by the name and advises improving the score.
Using the IF function to return multiple results enables you to create dynamic and conditional outputs based on various criteria. Whether it's displaying different text strings, returning specific values, or performing calculations, the IF function can be combined with other Excel functions to achieve the desired outcome.
Remember to structure your nested IF statements or combine the IF function with appropriate functions to ensure accurate and meaningful results based on your specific requirements.
Now that you understand how to use the IF function to return multiple results, let's address some common errors and troubleshooting tips when working with the IF function in Excel.
Using the IF Function to Perform Calculations
The IF function in Excel can not only perform logical tests but also be used to perform calculations based on specific conditions. It allows you to incorporate formulas and mathematical operations within the value_if_true or value_if_false arguments, enabling dynamic calculations within your IF function.
Here are a few examples of how you can use the IF function to perform calculations:
- Performing basic arithmetic: You can utilize the IF function to perform basic arithmetic operations based on conditions. For example:
- Calculating with mathematical functions: The IF function can be combined with various mathematical functions to perform complex calculations conditionally. For instance:
- Using formulas within IF functions: You can embed formulas or nested functions within the IF function to perform intricate calculations. Here's an example:
=IF(A1>10, A1*2, A1+10)
In this case, if the value in cell A1 is greater than 10, the IF function will multiply it by 2. Otherwise, it will add 10 to the value.
=IF(A1>0, POWER(A1, 2), ABS(A1))
In this example, if the value in cell A1 is greater than 0, the IF function will calculate the square of the value using the POWER function. Otherwise, it will return the absolute value of A1 using the ABS function.
=IF(A1>10, SUM(A1:A5), AVERAGE(A1:A5))
In this case, if the value in cell A1 is greater than 10, the IF function will calculate the sum of the range A1:A5 using the SUM function. Otherwise, it will calculate the average of the same range using the AVERAGE function.
By integrating calculations with the IF function, you can achieve dynamic and conditional results in your Excel worksheets. It allows you to perform calculations that adapt to changing conditions and criteria defined by your logical tests.
When employing calculations with the IF function, ensure that your formulas are formatted correctly, and any necessary functions or operators are used appropriately. Validate the results with test data to ensure accuracy.
Now that you understand how to use the IF function to perform calculations, let's delve into some common errors and troubleshooting tips when working with the IF function in Excel.
Common Errors and Troubleshooting
While using the IF function in Excel, you may encounter some common errors. Understanding these errors and troubleshooting them will help ensure the accurate functioning of your IF formulas. Here are a few of the most common errors and how to address them:
- #VALUE! error: This error occurs when the data types within your IF formula are incompatible. Ensure that the values you are comparing are of the same type, such as both numbers or both text.
- #DIV/0! error: This error occurs when you attempt to divide a value by zero within the IF formula. Add logic to handle the division by zero scenario, such as checking for zero denominators before performing the division.
- #N/A error: This error occurs when the lookup value in your IF formula is not found. Verify that the lookup value exists within the specified range or adjust your logic to account for the possibility of non-existent values.
- Nested IF errors: When using nested IF statements, it is important to properly close parentheses and maintain a consistent number of opening and closing parentheses. Mismatched parentheses can result in errors and unexpected outcomes.
- Logical operator errors: Review the usage of logical operators, such as AND, OR, and NOT. Ensure that you are combining conditions correctly and using the appropriate operator for your intended logic.
- Quotation mark errors: When working with text values, be mindful of using proper quotation marks ("") around the text within the formula. Missing or mismatched quotation marks can cause syntax errors.
To troubleshoot these errors, double-check your formulas for any typos or syntax issues, verify the correct use of functions and operators, and review your logical conditions for accuracy. You can also use Excel's formula auditing tools, such as the "Evaluate Formula" feature, to step through your formula and identify any errors.
A thorough understanding of these common errors and how to troubleshoot them will save you time and frustration when working with the IF function in Excel. Regularly validate your formulas with test data and pay attention to any error messages or unexpected results to address issues promptly.
Now that you're equipped with troubleshooting knowledge, you can confidently work with the IF function and overcome common challenges.