
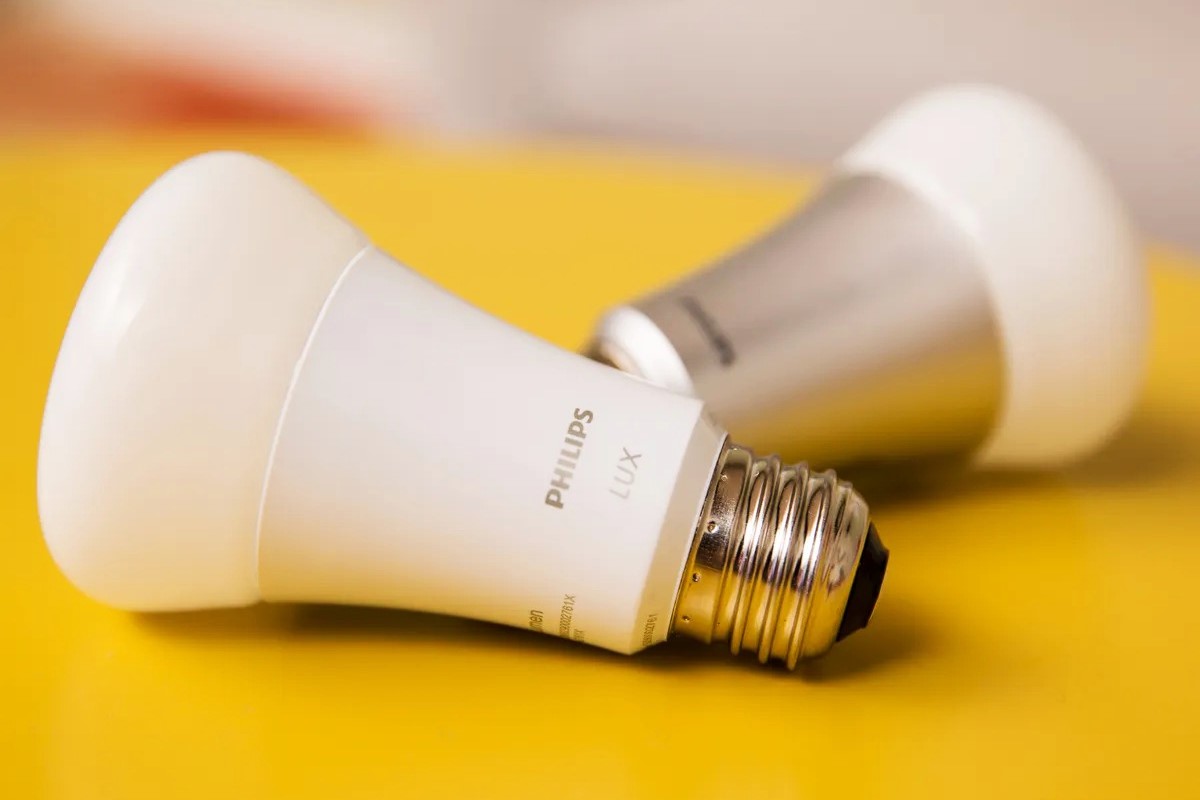
Getting Started
Welcome to the world of Philips Hue! If you’re new to the Philips Hue Java API and looking to explore the endless possibilities of controlling your Hue lights programmatically, you’ve come to the right place.
Before diving into the exciting world of Hue automation, there are a few things you need to do to get started.
The first step is to make sure you have the necessary hardware. To use the Philips Hue Java API, you’ll need a Hue Bridge, which acts as the hub and connects your lights to your network. Additionally, you’ll need at least one Hue light bulb or light strip to control.
Once you have the required hardware, the next step is to install the Philips Hue Java API library. You can either download it from the official repository or include it as a dependency in your Java project. The library provides a set of classes and methods that simplify communication with the Hue Bridge and control the lights.
After installing the library, the next crucial step is to discover your Hue Bridge. The bridge is responsible for managing all your Hue lights and acts as the central point of control. You can use the provided discovery feature of the Java API to find your bridge’s IP address automatically, or you can manually enter the IP address if you already know it.
Once you have the IP address of the Hue Bridge, you can establish a connection using the Java API. The API provides various methods to handle the connection, establish authentication, and enable secure communication with the bridge.
Before you can start controlling your lights, you need to register a new application with the Hue Bridge. This process involves generating a unique username that identifies your application to the bridge. This username will be used for subsequent API calls to authenticate and perform actions on the lights.
With the basic setup completed, you can now start exploring the features of the Philips Hue Java API. You can retrieve information about your lights, such as their state, brightness level, and color. Moreover, you can control your lights by adjusting their brightness, changing their color, or even creating and managing groups for synchronized lighting effects.
As you become more comfortable with the API, you can also set up schedules and alarms to automate your lighting based on specific times or events. Additionally, you can handle events triggered by the Hue Bridge, such as changes in the light state or power status.
In this guide, we will walk you through the different functionalities of the Philips Hue Java API and provide code examples to demonstrate its usage. Whether you’re a beginner or an experienced developer, this guide will help you harness the power of your Philips Hue lights and unleash your creativity.
Installing the Philips Hue Java API
If you’re ready to dive into the exciting world of controlling your Philips Hue lights programmatically, the first step is to install the Philips Hue Java API. Here’s a step-by-step guide to help you get started.
To begin, you’ll need to download the Philips Hue Java API library. It is available for download from the official repository or as a dependency that you can include in your Java project. Make sure to choose the latest version to benefit from any bug fixes or new features.
Once you have the library downloaded, you can add it to your Java project. If you’re using an Integrated Development Environment (IDE) such as Eclipse or IntelliJ, you can simply add the library as an external JAR file. If you’re working with Maven or Gradle, you can add the library as a dependency in the respective build file.
After adding the library to your project, you’ll need to import the necessary classes and packages to start using the Philips Hue Java API in your code. Import the relevant packages to access the required classes, such as the Bridge class for establishing connection and authentication, Light class for controlling individual lights, and Group class for managing groups of lights.
Once the library is installed and the necessary classes are imported, you’re ready to start coding. Open a new Java file in your project and create an instance of the Bridge class using the bridge IP address and username you obtained during the Hue Bridge setup process.
With the bridge instance created, you can now establish a connection to the bridge using the connect() method. This will establish a secure connection and authenticate your application with the bridge using the provided username. Remember to handle any exceptions that may occur during the connection process.
Once the connection is established, you can start exploring the various features of the Philips Hue Java API. You can retrieve information about your lights, such as their states, brightness levels, and colors. Moreover, you can control your lights by adjusting their brightness, changing their colors, or even creating and managing groups for synchronized lighting effects.
In this guide, we will provide code examples to demonstrate how to use the various functionalities of the Philips Hue Java API. These examples will help you understand the API’s usage and get you up and running quickly with controlling your Philips Hue lights programmatically.
Now that you have successfully installed the Philips Hue Java API and are ready to start coding, let’s move on to the next section and learn how to discover and connect to your Hue Bridge.
Discovering the Hue Bridge
Before you can start controlling your Philips Hue lights using the Java API, you need to discover your Hue Bridge. The Hue Bridge acts as the central hub that connects your lights to your network and allows for communication with the Philips Hue system.
The Philips Hue Java API provides a built-in discovery feature to find the IP address of your Hue Bridge automatically. This eliminates the need for manual configuration and makes the setup process much more convenient.
To discover your Hue Bridge, you can use the BridgeDiscovery class provided by the Java API. This class contains methods to scan your network for the Hue Bridge and retrieve its IP address.
Here’s a step-by-step guide on how to discover your Hue Bridge using the Java API:
- Import the necessary classes from the Philips Hue Java API, including the BridgeDiscovery class.
- Create an instance of the BridgeDiscovery class.
- Call the discover() method on the BridgeDiscovery instance.
- The discover() method will scan your network for the Hue Bridge and return a list of Bridge objects.
- If a Hue Bridge is found, you can retrieve its IP address using the getIP() method on the Bridge object.
Once you have obtained the IP address of your Hue Bridge, you can use it to establish a connection and authenticate your application with the bridge. This is an essential step in controlling your Hue lights programmatically.
If, for some reason, the automatic discovery process doesn’t work, you can still manually enter the IP address of your Hue Bridge. This can be done by using the setIPAddress() method on the Bridge object and passing the IP address as a parameter.
By discovering your Hue Bridge using the Philips Hue Java API, you can ensure a seamless and hassle-free setup process. Whether you prefer automatic discovery or manual entry, the Java API provides the flexibility to accommodate your needs.
Now that you have discovered your Hue Bridge, you’re ready to move on to the next step – connecting to the bridge. In the next section, we will guide you through the process of establishing a connection using the Java API.
Connecting to the Hue Bridge
Once you have discovered the IP address of your Hue Bridge, the next step is to establish a connection and authenticate your application with the bridge. This connection is crucial for controlling your Philips Hue lights programmatically using the Java API.
The Philips Hue Java API provides a convenient way to connect to the Hue Bridge using the Bridge class. Here’s a step-by-step guide on how to establish a connection:
- Import the necessary classes from the Philips Hue Java API, including the Bridge class.
- Create an instance of the Bridge class by passing the IP address of the Hue Bridge as a parameter.
- Call the connect method on the Bridge instance.
- The connect method will establish a connection to the Hue Bridge using the provided IP address.
- If the connection is successful, the authenticate method will be automatically called to authenticate your application with the bridge.
- If the authentication is successful, you will receive a success response and be ready to start controlling your Hue lights programmatically.
It is important to handle any exceptions that may occur during the connection and authentication process. This ensures that your application can gracefully recover from any errors and provide a smooth user experience.
Once the connection is established and your application is authenticated, you can start exploring the various features of the Philips Hue Java API. You can retrieve information about your lights, such as their states, brightness levels, and colors. Moreover, you can control your lights by adjusting their brightness, changing their colors, or even creating and managing groups for synchronized lighting effects.
By connecting to the Hue Bridge using the Philips Hue Java API, you unlock the ability to control your Hue lights programmatically and unleash your creativity. Whether you want to create dynamic lighting scenes, synchronize your lights with media, or automate your lighting based on schedules and events, the Java API provides the tools and flexibility to bring your ideas to life.
In the next section, we will guide you through the process of registering a new application with the Hue Bridge, which is a necessary step for authentication and enabling advanced control of your lights.
Registering a New Application
Before you can start controlling your Philips Hue lights programmatically using the Java API, you need to register a new application with the Hue Bridge. This registration process involves generating a unique username that identifies your application to the bridge, enabling authentication and authorization for your API requests.
The registration process can be easily accomplished using the Philips Hue Java API. Here’s a step-by-step guide on how to register a new application:
- Import the necessary classes from the Philips Hue Java API, including the Bridge class.
- Create an instance of the Bridge class by passing the IP address of the Hue Bridge as a parameter.
- Call the createUser method on the Bridge instance, providing a descriptive name for your application as a parameter.
- The createUser method will send a request to the Hue Bridge to generate a new username for your application.
- If the request is successful, the bridge will generate a unique username and return it as the response.
- Save the generated username for future API requests. This username will be used to authenticate your application with the bridge.
It is important to note that each application needs its own unique username for authentication. If you’re developing multiple applications that will access the Hue Bridge, you’ll need to generate a separate username for each application.
Make sure to handle any exceptions that may occur during the registration process. This includes checking for errors such as unauthorized access, connection issues, or errors returned by the bridge.
With the registration process complete, you now have a unique username that identifies your application to the Hue Bridge. This username will be used for subsequent API requests to authenticate and perform actions on your lights.
In the next section, we will explore how to retrieve information and control the lights using the Philips Hue Java API. This will allow you to unleash the full potential of your Hue lights and create exciting lighting experiences programmatically.
Retrieving and Setting Lights
One of the key features of the Philips Hue Java API is the ability to retrieve information about your lights and control them programmatically. With the API, you can easily access details such as the current state, brightness level, and color of your lights, as well as control them by adjusting these properties.
To retrieve information about your lights, you can use the Light class provided by the Philips Hue Java API. Here’s a step-by-step guide on how to retrieve and set lights:
- Import the necessary classes from the Philips Hue Java API, including the Light class.
- Create an instance of the Light class by providing the Bridge instance and the light ID as parameters.
- Call the getLight() method on the Light instance to retrieve the current state and details of the light.
- The getLight() method will provide information such as the light’s name, type, whether it is on or off, brightness level, and color.
- You can also set the state of a light by calling the setLightState() method on the Light instance, providing the desired state and properties of the light.
- The setLightState() method allows you to toggle the light on or off, adjust the brightness level, and change the color.
With the Philips Hue Java API, you have the power to retrieve information about your lights and control them programmatically. Whether you want to create dynamic lighting scenes, adjust the brightness for a specific mood, or change the color to match your preferences, the Java API provides the necessary tools and methods to do so.
Additionally, the API allows you to control individual lights as well as groups of lights. By creating and managing light groups, you can synchronize the effects of multiple lights and create stunning lighting experiences.
Stay tuned as we explore more advanced features of the Philips Hue Java API, including controlling light color, creating and managing groups, synchronizing lights with media, and setting up schedules and alarms.
Controlling Light Brightness
Controlling the brightness of your Philips Hue lights is an essential aspect of creating the perfect lighting ambiance. The Philips Hue Java API provides a simple and intuitive way to adjust the brightness level of your lights programmatically.
To control the brightness of a light using the Java API, you can use the setBrightness() method provided by the Light class. Here’s a step-by-step guide:
- Import the necessary classes from the Philips Hue Java API, including the Light class.
- Create an instance of the Light class by providing the Bridge instance and the light ID as parameters.
- Call the setBrightness() method on the Light instance, passing the desired brightness level as a parameter.
- The setBrightness() method adjusts the brightness of the light, ranging from 0 (minimum brightness) to 254 (maximum brightness).
By adjusting the brightness level of your lights, you can create different lighting moods and cater to various activities. For example, you can dim the lights for a cozy evening at home or increase the brightness for a productive work environment.
In addition to directly controlling the brightness level, you can also use the Java API to retrieve the current brightness level of your lights. This can be done by calling the getLight() method on the Light instance and accessing the brightness property.
The ability to control the brightness of your Philips Hue lights programmatically gives you the freedom to create dynamic lighting scenes and adapt the ambiance to your needs. With the flexibility provided by the Philips Hue Java API, you can easily incorporate brightness adjustments into your application or automation routines.
Stay tuned as we explore more functionalities of the Philips Hue Java API, including controlling light colors, creating and managing light groups, and synchronizing lights with media.
Controlling Light Color
The ability to control the color of your Philips Hue lights opens up a world of possibilities for creating vibrant and dynamic lighting experiences. With the Philips Hue Java API, you can programmatically change the color of your lights to match your mood, decor, or specific lighting requirements.
The Philips Hue Java API provides various methods and classes to control the color of your lights. Here’s a step-by-step guide on how to control the color using the Java API:
- Import the necessary classes from the Philips Hue Java API, including the Light class and the HueColor class.
- Create an instance of the Light class by providing the Bridge instance and the light ID as parameters.
- Call the setLightState() method on the Light instance, passing a new LightState object as a parameter.
- Within the LightState object, use the setXy() method to set the desired color coordinates.
- The setXy() method expects a two-dimensional array representing the XY color coordinates in the CIE 1931 color space.
By specifying different XY coordinates, you can achieve a wide range of colors for your lights, including shades of white and various color tones. The Philips Hue Java API provides convenience methods to help you convert RGB color values to XY coordinates for ease of use.
In addition to setting the color using XY coordinates, you can also set the color of a light using other color models such as RGB or HEX. The Java API provides methods to convert these color models to XY coordinates before setting the light color.
To enhance your lighting experience, you can also retrieve the current color information of your lights. This can be done by calling the getLight() method on the Light instance and accessing the color properties such as XY coordinates or color temperature.
With the ability to control the color of your Philips Hue lights programmatically, you can create captivating lighting scenes, color-changing effects, and immersive experiences. Whether you want to create a relaxing atmosphere with warm, cozy colors or energize your space with vibrant, dynamic hues, the Java API empowers you to bring your desired lighting vision to life.
Stay tuned as we explore more functionalities of the Philips Hue Java API, including creating and managing light groups, synchronizing lights with media, and setting up schedules and alarms.
Creating and Managing Groups
Managing individual lights is great, but what if you want to control multiple lights as a single unit? That’s where groups come in. With the Philips Hue Java API, you can create and manage groups of lights, allowing you to control them together for synchronized and coordinated lighting effects.
To create and manage groups using the Java API, you can use the Group class provided by the Philips Hue Java API. Here’s a step-by-step guide on how to create and manage light groups:
- Import the necessary classes from the Philips Hue Java API, including the Group class.
- Create an instance of the Group class by providing the Bridge instance and the group ID as parameters.
- Call the getLights() method on the Group instance to retrieve the lights associated with the group.
- The getLights() method returns a list of Light objects that belong to the group.
- You can control the group by adjusting the state, brightness, and color of the lights in the group collectively.
- Additionally, you can change the name of the group using the setName() method on the Group instance.
- To create a new group, call the createGroup() method on the Bridge instance, providing a name and a list of light IDs to include in the group.
Creating and managing groups allows you to have greater control over your lighting setup. You can create groups based on room or area, such as a living room group or a bedroom group, and control all the lights in that group simultaneously. This enables you to easily create customized lighting scenes or synchronized effects for different areas in your home or office.
In addition to controlling groups, you can also retrieve information about the groups you have created. This can be done by calling the getGroup() method on the Bridge instance and providing the group ID as a parameter. The getGroup() method returns a Group object containing information about the specified group.
With the flexibility provided by the Philips Hue Java API, you can unleash your creativity and transform your space with synchronized and immersive lighting experiences.
In the next sections, we will explore more functionalities of the Philips Hue Java API, including synchronizing lights with media, setting up schedules and alarms, and handling events triggered by the Hue Bridge.
Synchronizing Lights with Media
Imagine enhancing your movie night or music listening experience with synchronized lighting effects that complement the content you’re enjoying. With the Philips Hue Java API, you can easily synchronize your lights with media, creating a captivating and immersive atmosphere.
To synchronize lights with media using the Java API, you can utilize various techniques and libraries. One popular option is to use the Hue Entertainment feature, which allows you to synchronize your lights with compatible entertainment platforms.
The Philips Hue Java API provides integration with popular entertainment platforms, such as Ambilight TV, Hue Sync, and music visualizers. These platforms can analyze the audio and video content and send commands to the Hue Bridge to control the lights accordingly.
To synchronize your lights with media, follow these general steps:
- Import the necessary classes from the Philips Hue Java API, including the Entertainment class.
- Create an instance of the Entertainment class, specifying the group of lights you want to synchronize.
- Connect and authenticate your application with the Hue Bridge.
- Set up the necessary configurations for the media player or entertainment platform you’re using.
- Start playing your media content on the entertainment platform.
- Let the entertainment platform send commands to the Hue Bridge to control the lights in synchronization with the media.
By synchronizing your lights with media, you can create stunning visual effects that match the mood, intensity, and colors of the content you’re enjoying. Whether it’s transforming your living room into a cinematic experience or immersing yourself in the pulsating rhythm of music, synchronized lighting adds a new dimension to your entertainment setup.
It’s important to note that the specific implementation and available features for synchronizing lights with media may vary depending on the entertainment platform or library you choose to use.
Stay tuned as we explore more functionalities of the Philips Hue Java API, including setting up schedules and alarms, handling events triggered by the Hue Bridge, and troubleshooting common issues.
Setting Up Schedules and Alarms
One of the great features of the Philips Hue lighting system is the ability to set up schedules and alarms. With the Philips Hue Java API, you can easily automate your lighting based on specific times or events, enhancing convenience and creating a personalized lighting routine.
To set up schedules and alarms using the Java API, you can use the Schedule and Sensor classes provided by the Philips Hue Java API. Here’s a step-by-step guide on how to set up schedules and alarms:
- Import the necessary classes from the Philips Hue Java API, including the Schedule and Sensor classes.
- Create an instance of the Schedule class by providing the Bridge instance and the desired schedule properties, such as name, time, and actions.
- Specify the desired time for the schedule using methods like setTime() or setLocalTime() on the Schedule instance.
- Set up the actions to be performed by the schedule, such as turning on or off lights, adjusting brightness, or changing colors.
- Create an instance of the Sensor class and specify the desired properties for the sensor, such as the type, name, and conditions.
- Set up the desired conditions for the sensor, such as a specific time or a trigger event.
- Make use of the enable() method on the Schedule or Sensor instance to activate the schedule or sensor.
By setting up schedules and alarms, you can automate your lighting based on your daily routine or specific events. For example, you can schedule your lights to gradually brighten in the morning to simulate a sunrise, or set them to dim in the evening to create a relaxing ambiance before bedtime.
In addition to time-based schedules, you can also use sensors or trigger events to activate your lighting scenes. This allows you to create dynamic lighting experiences based on motion detection, door/window openings, or other environmental factors.
The flexibility of the Philips Hue Java API enables you to tailor your lighting automation to suit your preferences and lifestyle. You can easily create a personalized lighting routine that enhances comfort, convenience, and energy efficiency in your home or workspace.
Stay tuned as we explore more functionalities of the Philips Hue Java API, including handling events triggered by the Hue Bridge, troubleshooting common issues, and running the API with examples and demos.
Handling Hue Bridge Events
The Philips Hue Bridge is capable of emitting events that can be captured and handled by your application. These events can include changes in the state of lights, power status, or other important notifications. By handling these events using the Philips Hue Java API, you can stay updated with real-time information and take appropriate actions based on the event triggers.
To handle Hue Bridge events using the Java API, you can make use of the Event API provided by the Philips Hue Java API. Here’s a step-by-step guide on how to handle Hue Bridge events:
- Import the necessary classes from the Philips Hue Java API, including the Event API classes.
- Create an instance of the EventStream class.
- Register event listeners using the method
EventStream#addEventListener(), specifying the specific event types you want to listen for. - In the event callback, implement the logic to handle the specific event and perform the desired actions.
By registering event listeners for specific event types, you can capture and respond to events such as light state changes, power status changes, or sensor activations. Depending on the event type, you can trigger different actions, such as adjusting the lights’ state, updating the user interface, or sending notifications.
Handling Hue Bridge events provides you with real-time updates and allows your application to react promptly to changes in the lighting system. It enables you to create dynamic and interactive experiences by synchronizing your application with the state of the lights and other devices connected to the Hue Bridge.
In addition to handling events directly from the Hue Bridge, you can also generate custom events within your application and send them to the bridge for external devices or applications to capture. This enables you to integrate your application with other smart devices and create complex automation scenarios.
Now that you have an understanding of how to handle Hue Bridge events, you can further enhance the capabilities of your application by capturing and responding to real-time changes in the lighting system.
Next, we will explore how to run the Philips Hue Java API with examples and demos to showcase its functionality in action.
Running the Java API with Examples and Demos
Now that you have familiarized yourself with the Philips Hue Java API and its various functionalities, it’s time to dive into running the API with examples and demos to see its capabilities in action. By running examples and demos, you can gain further insights into how the API can be utilized and explore practical use cases.
The Philips Hue Java API provides a collection of examples and demos that showcase different aspects of controlling and interacting with Philips Hue lights. These examples cover a wide range of functionalities, including retrieving information about lights, controlling their states, adjusting brightness and colors, and creating synchronized lighting effects across groups.
To run the Java API examples, you can follow these steps:
- Download or clone the example code from the official Philips Hue Java API repository.
- Import the example code into your preferred IDE, such as Eclipse or IntelliJ.
- Ensure that you have installed the required dependencies, including the Philips Hue Java API library.
- Review the example code, which often includes comments and explanations to guide you through the functionality being demonstrated.
- Compile and run the examples, either individually or as a suite, to see the API in action and experience the various features.
Running the examples and demos allows you to interact with your actual Philips Hue lights. It provides a hands-on experience and fosters a deeper understanding of how to integrate the Java API into your own projects or applications.
In addition to the provided examples, you can also experiment and create your own custom demos by leveraging the capabilities of the Philips Hue Java API. From creating unique lighting scenes to incorporating advanced automation routines, the possibilities are endless.
By running examples and demos, you can gain valuable insights into the practical usage of the Philips Hue Java API, empowering you to utilize its functionalities effectively and unleash your creativity in controlling your Philips Hue lights programmatically.
Next, we will delve into troubleshooting common issues that you may encounter while working with the Philips Hue Java API, providing tips and solutions to overcome any obstacles.
Troubleshooting Common Issues
As with any software development, you may encounter common issues when working with the Philips Hue Java API. These issues can range from connectivity problems to authentication errors or unexpected behavior. Here are some common issues you might come across and tips to troubleshoot them:
1. Connection Issues: If you’re having trouble connecting to the Hue Bridge, make sure that your Bridge is powered on and connected to the same network as your computer. Double-check the IP address and ensure that there are no firewall or network configuration issues preventing the connection.
2. Authentication Errors: If you’re receiving authentication errors, verify that you have correctly registered your application with the Hue Bridge and obtained a valid username. Make sure to enter the correct username when establishing the connection with the Bridge.
3. Missing Dependencies: Ensure that you have installed all the necessary dependencies, including the Philips Hue Java API library and any required third-party libraries. Check your project configuration and make sure all dependencies are properly included.
4. API Version Compatibility: Ensure that you’re using a compatible version of the Philips Hue Java API library with your Hue Bridge firmware. Newer versions of the API might have changes that are not supported by older Hue Bridges, so verify the compatibility to avoid any compatibility issues.
5. Light or Group Not Found: If you’re unable to retrieve or control a specific light or group, confirm that you are using the correct ID. Double-check the IDs of your lights and groups, as they are case-sensitive and must be entered accurately.
6. Power Cycling Lights: If you’re experiencing issues with lights not responding, try power cycling them by turning them off and on again. This can help reset the connection and resolve any temporary issues.
7. Handling Exceptions: Make sure to handle any exceptions thrown by the API methods. Proper error handling can provide valuable insights into the cause of the issue and help you troubleshoot more effectively.
8. Debugging and Logging: Make use of the debugging and logging capabilities provided by the Philips Hue Java API. Enabling logging and examining the log output can provide valuable information about the API’s behavior, network requests, and potential errors.
Remember that each issue can have multiple potential causes, and it may require a systematic troubleshooting approach to identify the exact problem. Refer to documentation, forums, and community resources for additional guidance if you’re encountering persistent issues.
By troubleshooting common issues, you can ensure a smooth and efficient experience while working with the Philips Hue Java API. Troubleshooting skills will empower you to overcome obstacles and fully unleash the potential of controlling your Philips Hue lights programmatically.
In the next sections, we will explore more advanced topics related to the Philips Hue Java API, providing additional insights into its capabilities and usage.