
Choosing the Right Drawing App
When it comes to using your iPad as a drawing tablet, selecting the right drawing app is essential. With numerous options available on the App Store, it’s important to find an app that suits your artistic style, skill level, and preferences. Here are some key factors to consider when choosing the right drawing app for your iPad:
- Features: Look for apps that offer a comprehensive set of drawing tools such as brushes, pencils, layers, and blending modes. It’s also helpful to have access to customizable brushes and the ability to import and export files in different formats.
- User Interface: A user-friendly interface can make a big difference in your drawing experience. Seek apps that have an intuitive layout, easy-to-navigate menus, and customizable workspace options. The app should also provide quick access to commonly used tools.
- Compatibility: Ensure that the app is compatible with your iPad model and operating system version. Some apps may require specific hardware or software requirements, so it’s essential to confirm compatibility before making a choice.
- Community and Support: Look for drawing apps that have an active community of artists, online forums, and tutorials. This will allow you to connect with fellow artists, gain inspiration, and learn new techniques. Additionally, good customer support is crucial in case you encounter any issues or have questions about the app.
- Price: Consider your budget and whether you prefer a free app with in-app purchases or a paid app with a one-time fee. It’s worth trying out free versions or trial periods to test the app’s features and functionality before committing to a purchase.
Remember, the best drawing app for you ultimately depends on your individual needs and preferences as an artist. Take the time to explore and experiment with different apps to find the one that aligns with your creative vision and provides you with the tools and features you need to bring your artistic ideas to life.
Setting Up Your iPad for Drawing
Before you can start using your iPad as a drawing tablet, you’ll need to make sure it’s properly set up for your artistic endeavors. Here are the steps to get your iPad ready for drawing:
- Update your iPad: Ensure that your iPad is running the latest version of iOS or iPadOS. Updates often include bug fixes and performance improvements that can enhance your drawing experience.
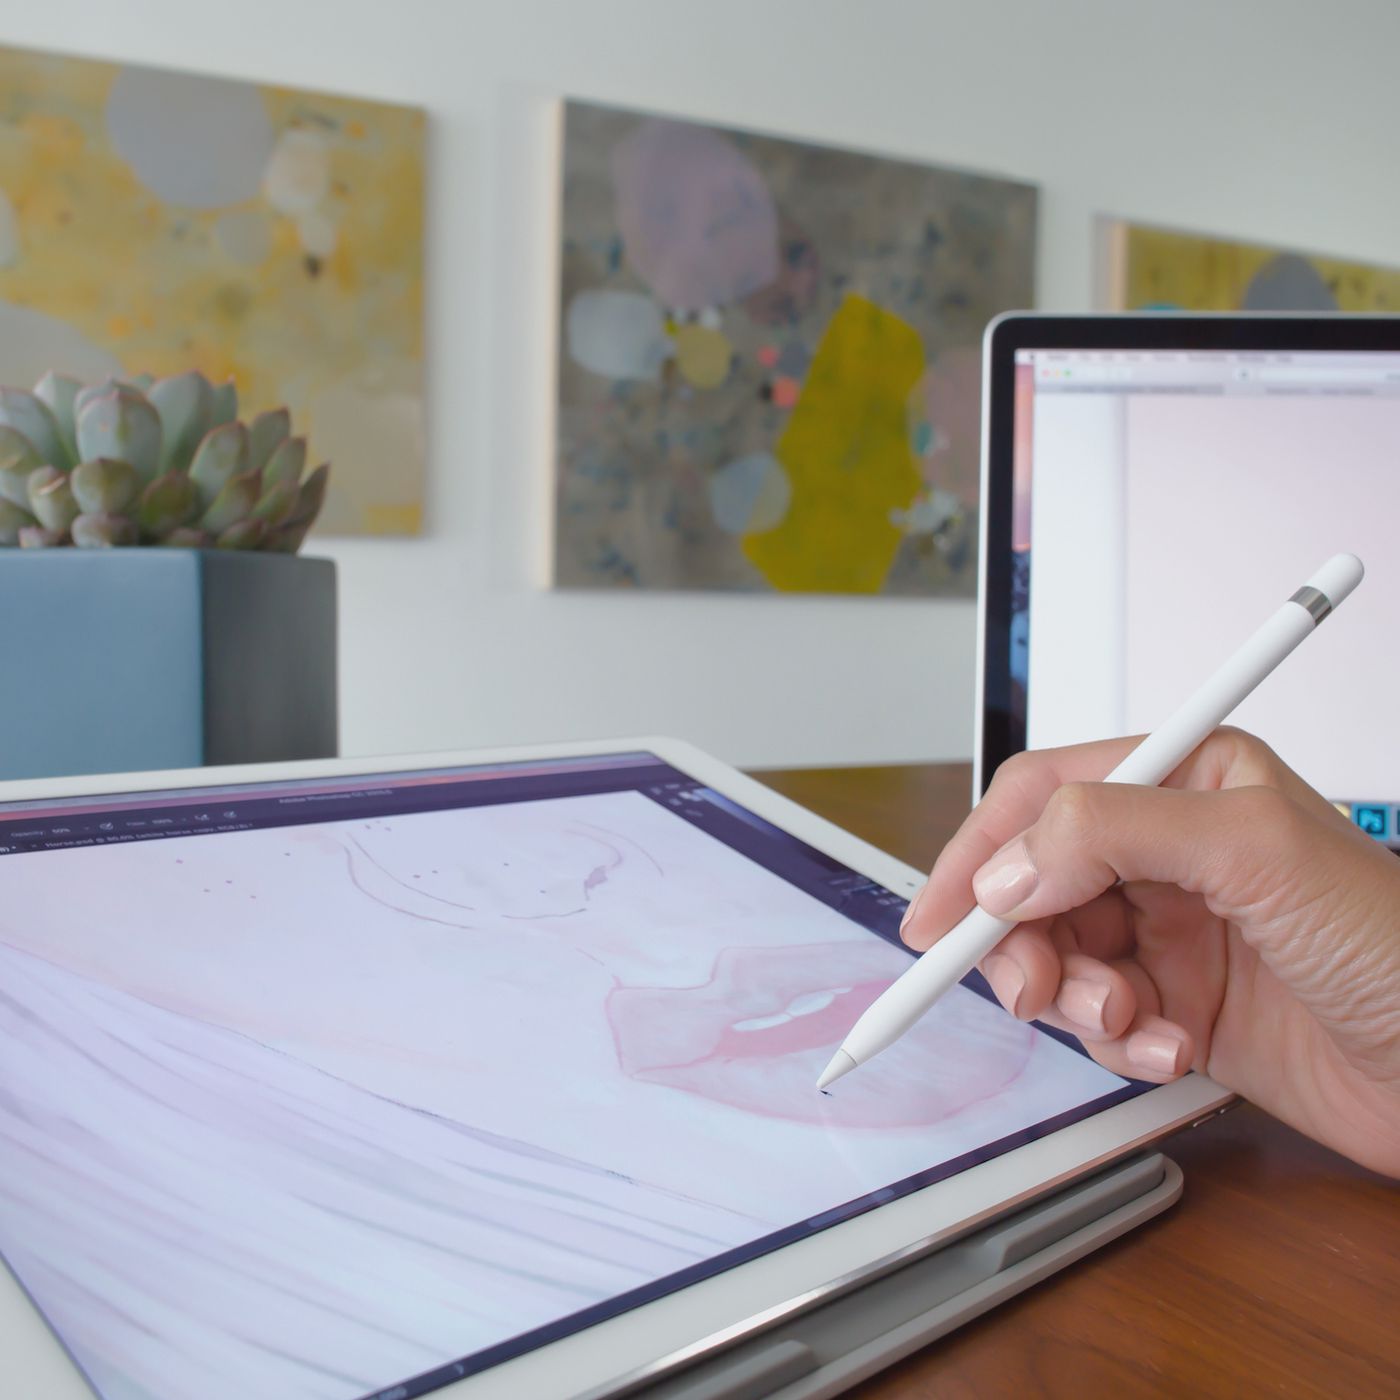
- Get a stylus or Apple Pencil: While you can use your finger to draw on the iPad, investing in a stylus or an Apple Pencil can greatly improve precision and control. These accessories offer pressure sensitivity and palm rejection, making them ideal for digital drawing.
- Install a drawing app: Choose a drawing app that meets your requirements and install it from the App Store. Follow the app’s instructions for installation and any initial setup steps.
- Adjust touch controls: Depending on your drawing app, you may need to adjust touch control settings to prevent accidental touches while drawing. This will ensure a smoother drawing experience without any unintended interruptions.
- Calibrate your stylus (if necessary): If you’re using a stylus, it’s a good idea to calibrate it to ensure precise input. Check the settings of your drawing app or stylus manufacturer’s instructions on how to calibrate it for optimal performance.
- Consider using a screen protector: To protect your iPad’s screen from scratches and reduce friction while drawing, consider applying a screen protector specifically designed for drawing tablets. This will give your stylus a smoother surface to glide on.
- Adjust brightness and display settings: Depending on your personal preference, you may want to adjust the brightness, color temperature, and other display settings of your iPad to create a more comfortable and accurate drawing experience.
- Organize your drawing files: Set up a dedicated folder or cloud storage for your digital art files. This will help you keep your drawings organized and easily accessible, allowing you to focus on your creativity.
By following these steps, you’ll have your iPad properly set up for drawing. Take the time to experiment with different settings and explore the capabilities of your drawing app to unlock your artistic potential.
Connecting Your iPad to Your Computer
If you’re looking to use your iPad as a drawing tablet in conjunction with your computer, you’ll need to establish a connection between the two devices. Here’s how you can connect your iPad to your computer and get started with digital drawing:
- USB cable: Start by connecting your iPad to your computer using a USB cable. Ensure that the cable is properly plugged into both the iPad and the computer’s USB port.
- iTunes/Finder: On your computer, open iTunes (if you’re using a Mac with macOS Mojave or earlier) or Finder (if you’re using a Mac with macOS Catalina or later). Your iPad should appear under the Devices or Locations section.
- Trust your computer: If it’s your first time connecting your iPad to the computer, you may need to trust the computer by entering your iPad passcode or using Touch ID/Face ID authentication.
- Enable syncing: In iTunes or Finder, select your iPad and navigate to the “Summary” or “General” tab. Check the “Sync with this iPad over Wi-Fi” option if you want to sync your iPad wirelessly in the future.
- Open drawing software: Install drawing software on your computer that supports using an iPad as a drawing tablet, such as Adobe Photoshop, Procreate, or Clip Studio Paint.
- Launch the app: Open the drawing software on your computer and ensure that your iPad is recognized as a connected device.
- Configure settings: Depending on the drawing software, you may need to configure specific settings to use your iPad as a drawing tablet. This could involve selecting your iPad as the input device or adjusting pressure sensitivity settings.
- Start drawing: With your iPad connected to your computer and the drawing software configured, you can now start using your iPad as a drawing tablet. Enjoy the seamless integration of your iPad’s touch controls and the drawing software’s expansive features.
Keep in mind that the specific steps may vary depending on the operating system you’re using on your computer and the drawing software you have installed. Refer to the documentation or support resources provided by the software developer for more detailed instructions tailored to your setup.
Using Your iPad as a Drawing Tablet with Mac
If you own a Mac and want to utilize your iPad as a drawing tablet, you’re in luck. Apple provides a built-in feature called Sidecar that allows you to seamlessly extend your Mac screen to your iPad. Here’s how you can use your iPad as a drawing tablet with your Mac:
- Ensure compatibility: Make sure your Mac and iPad meet the system requirements for Sidecar. Sidecar is available on Macs running macOS Catalina or later and iPads running iPadOS 13 or later.
- Connect your iPad: Connect your iPad to your Mac using a USB cable, or if your devices are on the same Wi-Fi network, you can use a wireless connection.
- Enable Sidecar: On your Mac, click on the AirPlay icon in the menu bar and select your iPad from the list of available devices. Alternatively, you can open System Preferences, go to Sidecar, and choose your iPad from the list.
- Customize Sidecar settings: In System Preferences, you can customize various Sidecar settings. Adjust options like showing the Sidebar, Touch Bar, or using the Apple Pencil to draw with pressure sensitivity.
- Open drawing software: Launch your preferred drawing software on your Mac, such as Adobe Photoshop, Affinity Designer, or Sketch, and your iPad will function as a secondary display.
- Start drawing: With Sidecar enabled, you can use your Apple Pencil or any compatible stylus on your iPad to draw directly on the Mac app. Enjoy the precision and control of a dedicated drawing tablet with the convenience of your iPad.
- Use additional features: Sidecar also allows you to use touch gestures on your iPad to interact with Mac apps. You can zoom, scroll, and navigate the Mac interface using intuitive touch controls on the iPad’s display.
- Disconnect and customize: When you’re done using Sidecar, simply disconnect your iPad from your Mac. You can adjust the Sidecar settings or reconnect your iPad whenever you want to use it as a drawing tablet again.
Using your iPad as a drawing tablet with your Mac using Sidecar offers a seamless and integrated experience. Experiment with different drawing apps and explore the full potential of your creativity with this powerful combination.
Using Your iPad as a Drawing Tablet with Windows
If you have a Windows computer and want to use your iPad as a drawing tablet, there are third-party software solutions available that can help you achieve this. One popular option is using apps like Duet Display or Astropad. Here’s how you can use your iPad as a drawing tablet with Windows:
- Check compatibility: Ensure that your iPad and Windows computer meet the system requirements for the chosen app. Check the app’s website or documentation for specific compatibility details.
- Download and install the app: Visit the app’s official website and download the software for your Windows computer. Follow the installation instructions provided by the app.
- Install the app on your iPad: On your iPad, open the App Store and search for the app you downloaded. Install the app and launch it on your iPad.
- Connect your iPad: Connect your iPad to your Windows computer using a USB cable or set up a wireless connection if supported by the app.
- Launch the app on your Windows computer: Open the app on your Windows computer and ensure that your iPad is recognized as a connected device.
- Configure the settings: Depending on the app, you may need to configure settings such as screen resolution, touch gestures, or pressure sensitivity. Follow the instructions provided by the app to customize your drawing experience.
- Open your drawing software: Launch your preferred drawing software on your Windows computer, such as Adobe Photoshop, Corel Painter, or Krita.
- Start drawing: With the app running on your Windows computer and your iPad connected, you can now use your iPad as a drawing tablet. Use your stylus on the iPad’s screen to draw directly in your chosen drawing software with precision and control.
- Explore additional features: Depending on the app you’re using, you may have access to additional features like customizable hotkeys, gesture controls, and on-screen tools to enhance your drawing experience.
- Disconnect and customize: When you’re finished using your iPad as a drawing tablet, you can disconnect it from your Windows computer. You can also adjust the settings in the app or reconnect your iPad whenever you want to use it again.
Using your iPad as a drawing tablet with Windows opens up a world of possibilities for digital artists. Take advantage of the available apps to turn your iPad into a powerful and versatile drawing companion for your Windows computer.
Customizing Your Drawing Experience on iPad
When using your iPad as a drawing tablet, you have the flexibility to customize your drawing experience according to your preferences and artistic style. Here are some key ways you can customize your drawing experience on iPad:
- Configure brushes and tools: Most drawing apps allow you to customize brushes and tools to match your desired stroke thickness, opacity, and texture. Experiment with different brush settings to find the right combination that suits your artistic vision.
- Adjust pressure sensitivity: If you’re using an Apple Pencil or a compatible stylus, you can often adjust pressure sensitivity settings in your drawing app. Tailor the pressure sensitivity levels to suit your drawing style and create a more dynamic and expressive artwork.
- Create custom palettes: Many drawing apps enable you to create custom color palettes, allowing you to save your favorite colors and easily access them while drawing. Organize your palettes according to themes or projects for efficient color selection.
- Utilize layers: Layers are a powerful feature in drawing apps that allow you to separate different elements of your artwork. Experiment with layer blending modes, opacity adjustments, and layer organization to add depth and complexity to your drawings.
- Explore image importing and tracing: Some drawing apps allow you to import images as references or backgrounds for your artwork. This can be particularly useful for tracing or creating digital illustrations based on existing images.
- Gesture controls: Take advantage of gesture controls offered by certain drawing apps to streamline your workflow. Assign specific gestures to frequently used functions, such as undo/redo or zoom in/out, to save time and increase efficiency.
- Backup and synchronization: Configure automatic backup or synchronization options within your drawing app to ensure that your artwork is saved regularly and accessible across multiple devices. This serves as a safeguard against data loss and enables you to continue your work seamlessly.
- Experiment with different apps: Don’t limit yourself to just one drawing app. Explore different drawing apps available on the App Store to discover unique features, brushes, and tools that can enhance your artistic capabilities.
Take the time to personalize your drawing experience on iPad. Customizing brushes, adjusting pressure sensitivity, and utilizing advanced features will enable you to create artwork that truly reflects your creativity and vision.
Exploring Advanced Features of Drawing Apps
As you become more comfortable with using your iPad as a drawing tablet, you can start exploring the advanced features offered by drawing apps. These features can greatly enhance your artistic capabilities and take your digital art to the next level. Here are some advanced features to explore:
- Advanced brush settings: Dive deeper into your drawing app’s brush settings to discover additional options like texture, scattering, and dynamics. Experimenting with these settings can give your artwork a unique and textured look.
- Masking and selection tools: Many drawing apps provide powerful masking and selection tools that allow you to isolate specific areas of your artwork for editing or applying effects. These tools enable you to create intricate details and make precise adjustments with ease.
- Transform and distort: Get creative with transform and distort tools that let you resize, rotate, and distort elements within your artwork. These features are especially useful for creating perspective, adding movement, or experimenting with unconventional compositions.
- Filters and effects: Explore the wide array of filters and effects available in your drawing app. Apply filters to alter colors, add textures, or create unique visual styles that give your artwork a distinctive look and feel.
- Vector editing: Some drawing apps support vector-based drawing and editing. Vector graphics allow for precise scaling, manipulation, and editing of your artwork without losing quality. Explore the vector editing capabilities of your app to create scalable and editable illustrations.
- Animation and timeline: Discover animation tools within your drawing app that allow you to create frame-by-frame animations or add simple motion effects to your artwork. The ability to bring your illustrations to life can open up new creative possibilities.
- Cloud syncing and collaboration: If your drawing app supports cloud syncing and collaboration features, take advantage of them. Store your artwork in the cloud for easy access across devices or collaborate with others on shared projects, allowing for feedback and collaboration in real-time.
- Gesture-based navigation: Explore gesture-based navigation options within your drawing app to streamline your workflow and access tools and features more efficiently. Familiarize yourself with gesture shortcuts for tasks like zooming, panning, and tool selection.
By delving into these advanced features, you can unlock the full potential of your drawing app and elevate your digital art to new heights. Take your time to experiment, learn, and incorporate these features into your artistic process.
Tips and Tricks for Using Your iPad as a Drawing Tablet
Using your iPad as a drawing tablet can be a fulfilling and enjoyable experience. To help you make the most of this setup, here are some tips and tricks to enhance your drawing process:
- Experiment with different brushes: Take the time to explore the variety of brushes available in your drawing app. Experiment with different textures, sizes, and shapes to add depth and variety to your artwork.
- Utilize layers effectively: Layers offer flexibility and control in your artwork. Use them to separate different elements, make non-destructive edits, and experiment with different effects and adjustments.
- Take advantage of shortcuts: Familiarize yourself with shortcuts within your drawing app and use them to speed up your workflow. Assign custom shortcuts for frequently used tools or functions to further optimize your drawing process.
- Use reference images: Import reference images into your drawing app to help you with proportions, anatomy, or capturing specific details. Referencing from real-life objects or photographs can greatly improve the accuracy of your artwork.
- Try different drawing techniques: Don’t limit yourself to one style or technique. Experiment with different drawing approaches, such as cross-hatching, stippling, or blending, to hone your skills and explore new artistic realms.
- Backup your artwork: Regularly back up your artwork to prevent any accidental loss or damage. Make use of cloud storage, external hard drives, or online backup services to ensure the safety of your valuable creations.
- Explore online tutorials and resources: Take advantage of the wealth of online tutorials, classes, and resources available. Join art communities, watch video tutorials, and read blogs to learn new techniques and gain inspiration from fellow artists.
- Practice regularly: Like any skill, practice is key to improving your digital drawing abilities. Dedicate time each day or week to practice drawing on your iPad and challenge yourself to try new subjects and styles.
- Social sharing: Share your artwork on social media platforms or art-sharing websites to gain feedback, connect with fellow artists, and build a supportive community. Embrace constructive criticism and use it as an opportunity for growth.
- Have fun and experiment: The beauty of digital art is the freedom to experiment. Don’t hesitate to try new techniques, unconventional colors, or unexpected compositions. Let your creativity flow and enjoy the process of creating on your iPad.
By incorporating these tips and tricks into your workflow, you can maximize your productivity, improve your skills, and create stunning digital artwork with your iPad as a drawing tablet.
Troubleshooting Common Issues
While using your iPad as a drawing tablet can be a seamless experience, you may encounter some common issues along the way. Here are some troubleshooting tips for addressing these issues:
- Connection problems: If your iPad is not connecting to your computer or experiencing intermittent connectivity, try using a different USB cable and ensure that both devices are running the latest software updates. If using wireless connectivity, make sure your iPad and computer are connected to the same Wi-Fi network.
- Lag or latency: If you experience lag or latency while drawing on your iPad, close any unnecessary apps running in the background. Adjust the drawing app’s performance settings to optimize performance, and consider restarting your device for a fresh start.
- Pressure sensitivity issues: If your pressure-sensitive stylus is not registering strokes or is behaving inconsistently, check if the stylus is fully charged. Adjust the pressure sensitivity settings in your drawing app and ensure that the stylus is properly calibrated.
- Palm rejection: If you’re encountering issues where your palm touches the iPad’s screen and interferes with drawing, check if the palm rejection feature is enabled in your drawing app. Some apps offer specific settings to ignore touch input from your palm while drawing.
- App crashes or freezes: If your drawing app crashes or freezes frequently, make sure you have the latest version of the app installed. Quit and relaunch the app, or try reinstalling it. If the issue persists, contact the app developer for support.
- Artifacts or pixelation: If your artwork appears pixelated or contains artifacts, check the canvas size or resolution settings in your drawing app. Increase the canvas size or choose a higher resolution to achieve better image quality.
- File compatibility: If you encounter issues opening or exporting files in specific formats, ensure that the drawing app supports the file format you’re trying to use. Consider converting the file format or using alternative apps for compatibility.
- Power and battery concerns: If you’re experiencing battery drain while using your iPad as a drawing tablet, close unnecessary background apps, reduce screen brightness, and enable power-saving features. Consider using a charging adapter with higher wattage for improved charging while using the iPad.
- General glitches or errors: If you encounter general glitches or errors in your drawing app, such as misaligned elements, missing tools, or unexpected behavior, try restarting the app or restarting your device. If the issue persists, reach out to the app developer for assistance.
If you encounter persistent issues that are impacting your drawing experience, consulting online forums, user communities, or reaching out to customer support or the app developer can provide further guidance and troubleshooting solutions specific to your situation. Remember, patience and persistence are key when troubleshooting, so don’t get discouraged and continue to enjoy the process of drawing on your iPad.