
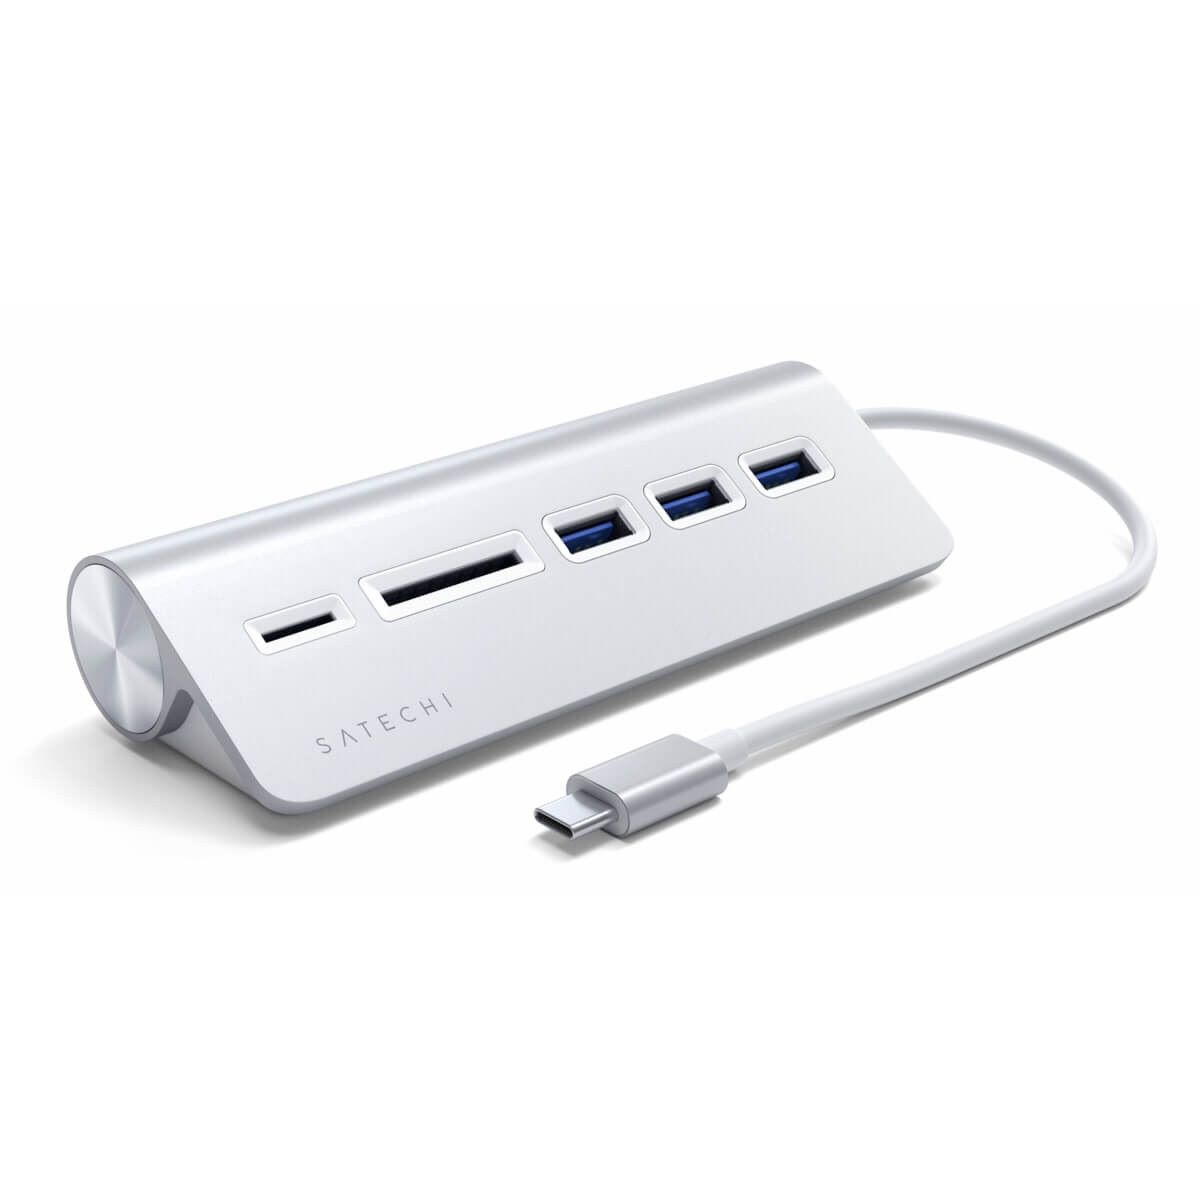
Selecting a USB Hub
When it comes to selecting a USB hub for use with a card reader, there are a few factors to consider to ensure compatibility and optimal performance. Here are some key points to keep in mind:
- Number of ports: Determine how many devices you plan to connect to the USB hub, including the card reader itself. USB hubs come in various port configurations, ranging from 4-port hubs to 10-port hubs or more. Consider the number of USB devices you need to connect simultaneously, and choose a hub with enough ports to accommodate them.
- Power requirements: Some card readers require additional power to function properly. Make sure to check the power requirements of your card reader and choose a USB hub that can provide enough power to all the connected devices. Look for hubs with an external power adapter or high power output to ensure reliable operation.
- USB compatibility: Ensure that the USB hub you choose is compatible with your computer’s USB ports. Most USB hubs are backward compatible, meaning they will work with USB 2.0 or USB 3.0 ports. However, for optimal performance, consider using a USB 3.0 hub if your computer supports it.
- Data transfer speed: If you frequently transfer large files or work with high-resolution media, consider a USB hub with USB 3.0 ports for faster data transfer speeds. This will reduce the time taken to transfer files between your memory card and computer.
- Compactness and portability: If you often work on the go or travel frequently, look for a USB hub that is compact and portable. This will make it easier to carry and connect your card reader and other devices wherever you go.
By considering these factors, you can choose a USB hub that suits your specific needs and ensures seamless connectivity between your card reader and computer. Keep in mind that investing in a high-quality USB hub will provide better performance and longevity, making it a worthwhile investment for your digital workflow.
Connecting the USB Hub to Your Computer
After selecting the appropriate USB hub for your needs, the next step is to connect it to your computer. Follow these steps to ensure a successful connection:
- Locate an available USB port: Identify an available USB port on your computer where you will connect the USB hub. USB ports are typically located on the front or back of your computer tower, or on the sides of a laptop.
- Plug in the USB hub: Take the USB cable that came with your USB hub and insert the USB connector into the chosen port on your computer. Make sure the connection is secure.
- Connect the power source: If your USB hub requires external power, plug in the power adapter to an electrical outlet. Then, connect the other end of the power adapter to the USB hub. This will provide the necessary power to the hub and any connected devices.
- Check for successful connection: Once everything is connected, check if the USB hub is properly recognized by your computer. You can do this by going to your computer’s operating system and checking for new devices. If the USB hub is successfully recognized, you are ready to proceed.
Now that the USB hub is connected to your computer, you can start using it with your card reader. The USB hub allows you to expand the number of available USB ports and provides a centralized point to connect multiple devices, including your card reader.
Before connecting the card reader to the USB hub, make sure to familiarize yourself with its features and how it functions, as outlined in the next section.
Understanding the Card Reader
A card reader is a device that allows you to access data stored on various types of memory cards, such as SD cards, microSD cards, and CF cards. Before connecting the card reader to your USB hub, it’s important to understand its features and how it functions. Here are some key aspects to consider:
- Card compatibility: Check the card reader’s specifications to ensure it supports the types of memory cards you plan to use. Most modern card readers are designed to be versatile, with support for multiple card formats.
- Interface type: Card readers can be found in different interface types, such as USB-A, USB-C, or Thunderbolt. Make sure the card reader has a compatible interface that matches the USB ports on your USB hub.
- Card insertion: Familiarize yourself with the proper way to insert memory cards into the card reader. Usually, there is a slot or a tray where you can insert the card. Follow the manufacturer’s instructions to avoid damaging the card reader or the memory card.
- LED indicators: Many card readers have LED indicators that show the status of the connection and card activity. These indicators can provide useful information, such as when a card is being read or when data transfer is in progress.
- Data transfer rate: Card readers have different data transfer rates, which can affect the speed at which files are transferred between the memory card and your computer. Higher data transfer rates can save you time, especially when dealing with large files.
- Additional features: Some card readers come with extra features, such as built-in USB hubs, multiple card slots, or the ability to read other storage devices like USB flash drives or external hard drives. Consider these features if they align with your needs.
Understanding these aspects of the card reader will help you make the most of its functionalities when connected to your USB hub. Next, we’ll delve into the steps for connecting the card reader to the USB hub and transferring data from the memory card to your computer.
Connect the Card Reader to the USB Hub
Now that you have a clear understanding of the card reader’s features, it’s time to connect it to the USB hub. Follow these steps to ensure a successful connection:
- Locate an available USB port on the USB hub: Look for an available USB port on the USB hub where you will connect the card reader. Make sure the USB hub is powered on and connected to your computer.
- Insert the card reader into the USB port: Take the USB cable of the card reader and plug it into the selected USB port on the USB hub. Ensure that the connection is snug and secure.
- Wait for the card reader to be recognized: After connecting the card reader, give your computer a moment to detect and recognize the device. You may see a notification on your screen indicating that a new device has been connected.
- Verify the connection: To verify the successful connection, you can navigate to the file explorer on your computer and check if the card reader is listed as a removable storage device. This will confirm that the card reader has been successfully connected to your USB hub.
With the card reader successfully connected to the USB hub, you are now ready to start transferring data from the memory card to your computer. The USB hub provides a convenient and centralized connection point, allowing you to work with multiple devices simultaneously.
Before transferring data, make sure that your USB hub is adequately powered to avoid any interruptions during the transfer process. If necessary, refer to the next section on powering the USB hub.
Powering the USB Hub
Powering the USB hub is essential to ensure stable and reliable operation of all connected devices, including the card reader. Here are a few important points to consider when it comes to powering your USB hub:
- External power source: Some USB hubs require an external power source to function properly. These hubs typically come with a power adapter that you need to connect to an electrical outlet. The power adapter provides the necessary power to the USB hub and its connected devices.
- USB-powered hubs: On the other hand, there are USB hubs that draw power directly from the USB port of your computer. These are known as USB-powered hubs. While they are more convenient in terms of portability, they may not provide sufficient power for all connected devices, especially if you are using power-hungry devices like external hard drives or multiple card readers simultaneously.
- Power consumption of devices: Consider the power requirements of your connected devices, including the card reader. Some card readers may require more power than others, especially if they have additional features like built-in USB hubs or multiple card slots. Make sure that your USB hub can supply enough power to all connected devices without overloading.
- Power limitations of USB ports: Keep in mind that individual USB ports on your computer have power limitations. USB 2.0 ports typically provide less power compared to USB 3.0 or USB-C ports. Check the power output specifications of each USB port to ensure that you distribute the power load evenly among the ports and avoid exceeding their limits.
- Power indicators: Some USB hubs come with power indicators that give you visual feedback about the power status. These indicators can help you monitor if the hub is receiving power and if the connected devices are drawing power successfully.
To ensure optimal performance and prevent any power-related issues, it’s recommended to use a powered USB hub when connecting power-hungry devices like external hard drives or multiple card readers. By doing so, you can ensure that your USB hub and card reader function efficiently without any power-related interruptions.
Next, we’ll explore the process of inserting a memory card into the card reader and transferring data from the card to your computer.
Inserting a Memory Card into the Card Reader
Inserting a memory card into the card reader is a straightforward process. Follow these steps to ensure a proper insertion:
- Identify the memory card slot: Locate the appropriate memory card slot on the card reader. Common memory card slots include SD, microSD, CompactFlash (CF), and Memory Stick (MS) slots. Choose the slot that matches the type of memory card you are using.
- Orient the memory card correctly: Pay attention to the orientation of the memory card and align it correctly before insertion. Most memory cards have a notched corner or a label that indicates the correct orientation. Ensure that the metal contacts on the card face down and match up with the corresponding connectors in the card reader.
- Gently insert the memory card: With the correct orientation, gently insert the memory card into the slot. Apply slight pressure until the card is fully inserted. Avoid using excessive force, as this may damage the card or the card reader.
- Push the card until it clicks into place: Once the memory card is properly inserted, push it further into the card reader until you hear or feel a click. This indicates that the card is securely locked in place and ready for use.
It’s important to handle memory cards with care and avoid touching the metal contacts or exposing them to dust or dirt. Contaminants on the contacts can interfere with proper data transfer and potentially damage the card.
With the memory card successfully inserted into the card reader, you can now proceed to transfer data from the memory card to your computer. Keep reading to learn how to perform this task effectively.
Transferring Data from the Memory Card to Your Computer
Transferring data from the memory card to your computer is a simple process that allows you to access and work with the files stored on the card. Here’s how you can perform this task:
- Open the file explorer: On your computer, open the file explorer or file manager. This can be accessed through the Start menu on Windows or Finder on Mac.
- Locate the card reader: In the file explorer, you should see the card reader listed as a removable storage device. Click on the card reader to open it.
- Navigate to the memory card’s files: Within the card reader’s folder, you will find the files and folders stored on the memory card. Navigate through the folders to locate the specific files you wish to transfer.
- Select files for transfer: Select the files you want to transfer by clicking on them. To select multiple files, hold down the Ctrl key (or Command key on Mac) while clicking on the desired files.
- Copy or move the selected files: Once the files are selected, you can either copy or move them to your computer’s local storage. To copy, right-click on the selected files and choose “Copy” from the context menu. Then, navigate to the desired location on your computer, right-click and choose “Paste” to copy the files. If you prefer to move the files, choose “Cut” instead of “Copy” and “Paste” them to the desired location.
- Monitor the transfer progress: Depending on the file size and the speed of the memory card and your computer, the transferring process may take a few seconds to a few minutes. You can monitor the transfer progress by checking the file explorer or using any transfer status indicators provided by your operating system.
- Verify the transferred files: Once the transfer is complete, navigate to the destination folder on your computer where you copied or moved the files. Verify that the transferred files are intact and accessible.
It’s always a good practice to safely eject the memory card from the card reader after transferring the files to avoid any data loss or corruption. Use the “Eject” or “Safely Remove Hardware” option provided by your operating system for this purpose.
Now that you have successfully transferred the data from the memory card to your computer, you can work with the files or edit them as needed. In the next section, we’ll cover the steps for safely ejecting the memory card from the card reader.
Ejecting the Memory Card from the Card Reader
After successfully transferring data from the memory card to your computer, it’s important to safely eject the memory card from the card reader to avoid any potential data loss or corruption. Follow these steps to properly eject the memory card:
- Ensure all file transfers are complete: Before ejecting the memory card, make sure that all file transfers or operations involving the card have been completed. Verify that the files have been copied or moved successfully to your computer’s local storage.
- Locate the memory card in the file explorer: Open the file explorer or file manager on your computer and navigate to the card reader. Locate the memory card within the card reader’s folder structure.
- Use the Eject option: Right-click on the memory card icon or folder and look for the “Eject” or “Safely Remove Hardware” option in the context menu. Click on it to initiate the ejection process.
- Wait for the ejection to complete: Once you have initiated the ejection process, wait for your operating system to safely disconnect the memory card from the card reader. This may take a few moments, and you may see a notification indicating that the memory card can now be physically removed.
- Physically remove the memory card: Carefully remove the memory card from the card reader’s slot. Hold the card with your fingers on the edges, being cautious not to touch the metal contacts or expose them to dust or dirt.
By following these steps, you can ensure that the data on your memory card remains intact and that the card is safely disconnected from the card reader. It’s crucial to avoid abruptly removing the memory card without properly ejecting it, as this can lead to data corruption or damage to the card or the card reader.
Now that you have safely ejected the memory card, you can either store it securely or use it in another device. In the next section, we’ll discuss the proper way to disconnect the card reader from the USB hub.
Disconnecting the Card Reader from the USB Hub
When you’re finished using the card reader, it’s important to disconnect it from the USB hub properly. Follow these steps to safely disconnect the card reader:
- Ensure all file transfers are complete: Before disconnecting the card reader, double-check that all file transfers involving the card reader have been completed. Verify that you have safely ejected the memory card and that you have saved any changes to the files on your computer.
- Close any open files or applications: Ensure that you have closed any files or applications that were using the card reader or accessing files on the memory card. This will prevent any data loss or conflicts when the card reader is disconnected.
- Safely disconnect the USB hub: If your USB hub has a dedicated power switch or disconnect button, turn off the hub or press the disconnect button to stop the power supply. This will ensure a smooth disconnection without any power surges or interruptions to the connected devices.
- Remove the card reader from the USB port: Gently pull the USB cable connected to the card reader out of the USB port on the USB hub. Hold the connector firmly and avoid yanking or twisting the cable, as this may damage the connector or the USB port.
- Store the card reader safely: Once disconnected, store the card reader in a secure and clean location. Protect it from dust, moisture, and other potential hazards that may affect its performance or longevity.
Properly disconnecting the card reader from the USB hub ensures the safe removal of the device and protects both the card reader and the USB hub from potential damage. It also allows you to use the USB hub for other devices or tasks without any conflicts.
By following these steps, you can maintain the longevity and usability of your card reader and USB hub, ensuring that they continue to function reliably for your future memory card usage.
Now that you know how to properly disconnect the card reader, you can safely remove it from the USB hub and conclude your memory card-related tasks.
Troubleshooting Common Issues
While using a USB hub with a card reader, you may encounter certain issues that can impact the functionality and performance of the setup. Here are some common issues and potential troubleshooting steps:
- Card reader not recognized: If the card reader is not being recognized by your computer, try disconnecting and reconnecting the USB hub. Ensure that the USB cable is securely connected to both the USB hub and the computer. You can also try connecting the card reader to a different USB port on the hub or to a different USB port on your computer.
- Slow data transfer: If you experience slow data transfer speeds, ensure that you are using a USB hub and card reader that support high-speed data transfers, such as USB 3.0. Check if other devices connected to the USB hub are consuming excessive bandwidth, and disconnect any unnecessary devices. Additionally, ensure that your memory card is not faulty or fragmented.
- Power issues: If the USB hub does not provide enough power to adequately operate the card reader or other connected devices, consider using a USB hub with an external power supply. This will ensure sufficient power for all devices. Double-check the power requirements of the card reader and ensure they are compatible with the USB hub’s power capabilities.
- Driver or software conflicts: Update the drivers for both the USB hub and the card reader to the latest versions compatible with your operating system. Check the manufacturer’s website for driver updates or use the automatic driver update feature provided by your operating system. If there are any conflicting software applications, close them to eliminate potential conflicts.
- Physical connectivity issues: Ensure that all cables are securely connected and not loose. Check for any visible damage or bent pins on the USB cables or connectors. If you suspect a cable is faulty, try using a different cable to establish a connection. Inspect the memory card for any signs of damage or dirt and clean it gently if necessary.
- Compatibility issues: Verify the compatibility of the USB hub and card reader with your operating system. Ensure that the USB hub and card reader are supported and compatible with your computer. In some cases, you may need to install additional drivers or software provided by the manufacturer to ensure compatibility.
If you encounter any other persistent issues with your USB hub and card reader setup, refer to the user manual or contact the manufacturer’s customer support for further assistance. They can provide specific troubleshooting steps or guide you through resolving the problem.
By troubleshooting common issues and ensuring that all components are properly connected and compatible, you can maximize the functionality and performance of your USB hub and card reader combination.