
Understanding the Nest Thermostat
The Nest Thermostat is a smart home device that allows you to control and monitor the temperature in your home. It is designed to learn your preferences and adjust the temperature accordingly, helping you save energy and reduce your utility bills. The Nest Thermostat features a sleek and intuitive interface that makes it easy to use, even for those who are not tech-savvy.
One of the key features of the Nest Thermostat is its ability to learn your schedule and adjust the temperature automatically. By using built-in sensors, it can detect when you are at home or away, and adjust the temperature accordingly. This feature not only provides you with a customized and comfortable living environment but also helps to conserve energy when you are not home.
The Nest Thermostat also offers a remote control option through its dedicated mobile app. This means that you can adjust the temperature of your home from anywhere, using your smartphone or tablet. Whether you are lying in bed, at the office, or on vacation, you have the ability to control your home’s temperature with just a few taps on your device.
Another great feature of the Nest Thermostat is its compatibility with other smart home devices. It can integrate seamlessly with devices like smart speakers, lighting systems, and security systems. This allows you to create a truly connected and automated home environment, where the thermostat works in harmony with other devices to enhance your comfort and convenience.
Additionally, the Nest Thermostat provides detailed energy usage reports, giving you insights into how much energy your HVAC system is consuming. This information can help you make more informed decisions about your energy usage and identify potential areas for improvement. By adjusting your thermostat settings and making small changes to your daily habits, you can further optimize your energy efficiency and reduce your carbon footprint.
Setting Up Your Nest Thermostat
Setting up your Nest Thermostat is a straightforward process that can be completed in a few simple steps. Follow these guidelines to ensure a smooth installation:
- Start by turning off the power to your HVAC system at the circuit breaker. This is for safety purposes.
- Remove your old thermostat from the wall. Take note of the wires connected to it and their corresponding labels.
- Next, install the Nest Thermostat base on the wall using screws or adhesive strips. Make sure it is level and securely mounted.
- Connect the wires from your HVAC system to the corresponding ports on the Nest Thermostat base. Refer to the labels you noted earlier to ensure correct wiring.
- Once the wiring is complete, attach the Nest Thermostat display to the base by aligning it and pressing it firmly until it clicks into place.
- Turn the power back on at the circuit breaker and wait for the Nest Thermostat to power up. Follow the on-screen instructions to complete the setup process.
- During setup, you will connect your Nest Thermostat to your Wi-Fi network. Make sure you have your network name and password handy.
- Once connected, you can customize the settings, such as language, temperature units, and creating a Nest account.
- After setup is complete, the Nest Thermostat will start learning your preferences and adjusting the temperature accordingly. You can also start using the Nest app to remotely control your thermostat.
It is important to note that if you are uncomfortable with any part of the installation process, it is recommended to seek professional assistance. A licensed HVAC technician can ensure proper installation and avoid any potential issues.
Connecting Your Nest Thermostat to Wi-Fi
Connecting your Nest Thermostat to Wi-Fi is essential for accessing its full range of features, such as remote control and energy usage reports. Follow these steps to connect your thermostat to Wi-Fi:
- Ensure that your Nest Thermostat is powered on and displaying the home screen.
- On the thermostat, tap on the menu button located on the right side of the display.
- Select “Settings” from the menu options.
- In the settings menu, choose “Network” and then “Wi-Fi”.
- Select your Wi-Fi network from the available networks listed.
- Enter your Wi-Fi password using the thermostat’s display and the alphabet and number keys.
- Once your password is entered, press the “Done” or “Connect” button on the display.
- The Nest Thermostat will attempt to connect to your Wi-Fi network.
- If the connection is successful, you will see a confirmation message on the display.
- For added security, you can enable a passcode on your Nest Thermostat to prevent unauthorized access. This can be done in the settings menu under “Safety & Security”.
It is important to ensure that your Wi-Fi network is stable and within range of your Nest Thermostat. Weak or intermittent Wi-Fi signals may cause connectivity issues. If you experience difficulty connecting your thermostat, try moving your router closer to the thermostat or consider installing a Wi-Fi range extender to boost the signal.
Once your Nest Thermostat is successfully connected to Wi-Fi, you can control it remotely using the Nest app on your smartphone or tablet. This allows you to adjust the temperature, create schedules, and monitor your energy usage from anywhere, providing you with enhanced convenience and control over your home’s climate.
Adjusting the Temperature on Your Nest Thermostat
Adjusting the temperature on your Nest Thermostat is a breeze. Whether you want to make a quick change or create a customized schedule, the thermostat offers various options to suit your preferences. Here’s how you can adjust the temperature:
1. Manual adjustments:
- Simply twist the outer ring of the thermostat to adjust the temperature up or down. The display will show the set temperature as you make the adjustment.
- You can also tap the thermostat to wake it up and then use the touch screen to adjust the temperature.
2. Creating a schedule:
- The Nest Thermostat allows you to create a customized schedule to automatically adjust the temperature based on your daily routine.
- Using the Nest app or the thermostat itself, you can set different temperature preferences for various times of the day, such as morning, afternoon, evening, and night.
- You can also create different schedules for weekdays and weekends to accommodate different routines.
3. Using the Quick View menu:
- The Quick View menu, accessible by pressing the thermostat display twice, allows you to make temporary adjustments to the temperature without affecting the programmed schedule.
- You can select options like “Home” to set your preferred temperature, “Away” to conserve energy when you’re not home, or “Off” to turn off the HVAC system temporarily.
4. Using the Nest app:
- The Nest app offers seamless control of your thermostat from your smartphone or tablet, even when you’re away from home.
- You can adjust the temperature, create or modify schedules, and access energy usage reports with just a few taps on your device.
Remember that the Nest Thermostat continually learns your preferences and adjusts the temperature accordingly, so manual adjustments may not always be necessary. As you interact with the thermostat and make changes over time, it will adapt to your preferences and create a more personalized and comfortable environment in your home.
Creating a Schedule for Your Nest Thermostat
Creating a schedule for your Nest Thermostat is a great way to automate temperature adjustments in your home and ensure optimal comfort and energy efficiency. With a schedule in place, your thermostat will automatically adjust the temperature based on your preferences at different times of the day. Here’s how you can create a schedule:
1. Using the Nest app:
- Open the Nest app on your smartphone or tablet and navigate to the Home screen.
- Select your Nest Thermostat from the list of devices if you have multiple devices connected.
- Tap on the Schedule icon or option to access the scheduling feature.
- Choose weekdays or weekends to customize your schedule accordingly.
- For each time period (e.g., morning, afternoon, evening, night), set the desired temperature and duration.
- You can also add or remove time periods according to your needs by tapping the “Add Time Period” or “Remove Time Period” option.
2. Using the thermostat’s display:
- On your Nest Thermostat, wake up the display by tapping on it or turning the outer ring slowly.
- Tap on the Schedule icon to access the scheduling feature.
- Using the display’s touch screen, select weekdays or weekends to customize your schedule.
- For each time period, adjust the temperature and duration using the display’s interface.
3. Making adjustments:
- If you want to make temporary adjustments to the schedule, you can use the Quick View menu by double-pressing the display.
- The Quick View menu offers options like “Home,” “Away,” or “Off,” allowing you to override the schedule temporarily.
- These adjustments will not affect the programmed schedule and will revert to the schedule at the next time period.
Remember to consider your daily routine and preferences when creating a schedule. Think about when you typically wake up, leave for work, return home, and go to bed. By setting different temperatures for these time periods, you can maximize comfort and energy efficiency throughout the day.
It’s worth noting that the Nest Thermostat also has a learning feature that observes your temperature adjustments and can create a schedule for you based on your habits. Over time, the thermostat will learn and adapt to your preferences, making it even easier to maintain the ideal temperature in your home.
Using the Nest App to Control Your Thermostat
The Nest app allows you to have complete control over your Nest Thermostat from the convenience of your smartphone or tablet. With the app installed, you can adjust the temperature, create schedules, monitor energy usage, and access various features of your thermostat remotely. Here’s how you can use the Nest app to control your thermostat:
1. Install the Nest app:
- Download and install the Nest app from the App Store (for iOS devices) or Google Play Store (for Android devices).
- Open the app and sign in with your Nest account. If you do not have an account, you will need to create one.
2. Connect to your Nest Thermostat:
- Ensure that your Nest Thermostat is connected to the Wi-Fi network in your home. This step is essential for remote control via the app.
- Open the Nest app and navigate to the Thermostat screen.
- Select your thermostat from the list of devices if you have multiple devices.
- The app will establish a connection with your thermostat, and you will be able to control it remotely.
3. Adjust the temperature:
- To adjust the temperature, simply tap on the temperature display in the app and use the slider or the “+” and “-” buttons to increase or decrease the temperature setting.
- The Nest Thermostat will respond to the changes immediately, adjusting the temperature in your home accordingly.
4. Create and modify schedules:
- Using the app, you can easily create or modify schedules for your Nest Thermostat.
- Tap on the Schedule icon to access the scheduling feature.
- Follow the prompts to set the desired temperature and duration for each time period.
- You can also make adjustments to the schedule or add/remove time periods as needed.
5. Access energy usage reports:
- With the Nest app, you can view detailed energy usage reports to gain insights into your HVAC system’s consumption.
- These reports can help you make informed decisions about your energy usage and identify ways to maximize efficiency.
- Navigate to the Energy History section in the app to access these reports.
With the Nest app, you have the convenience of controlling your thermostat from anywhere. Whether you’re at work, on vacation, or simply relaxing in another room, you can effortlessly adjust your home’s temperature to your liking and maintain optimal comfort at all times.
Using the Nest Thermostat’s Learning Feature
The Nest Thermostat is equipped with a powerful learning feature that allows it to adapt to your preferences and create a customized heating and cooling schedule. By observing your temperature adjustments, the thermostat learns your preferred temperature settings and automatically adjusts them based on your daily routine. Here’s how you can make the most of the Nest Thermostat’s learning feature:
1. Initial setup:
- During the initial setup process, you will be prompted to answer a few questions about your heating and cooling preferences.
- Provide accurate information to help the thermostat understand your needs and optimize its learning capabilities.
2. Manual adjustments:
- To assist the thermostat in learning your preferences, make occasional manual adjustments to the temperature as needed.
- If you prefer a slightly cooler room while sleeping or a warmer living area during the evening, make these adjustments to help the thermostat understand your comfort preferences.
3. Monitor the learning:
- Throughout the day, check the Nest app or the thermostat’s display to see how the thermostat adapts and adjusts the temperature based on your habits.
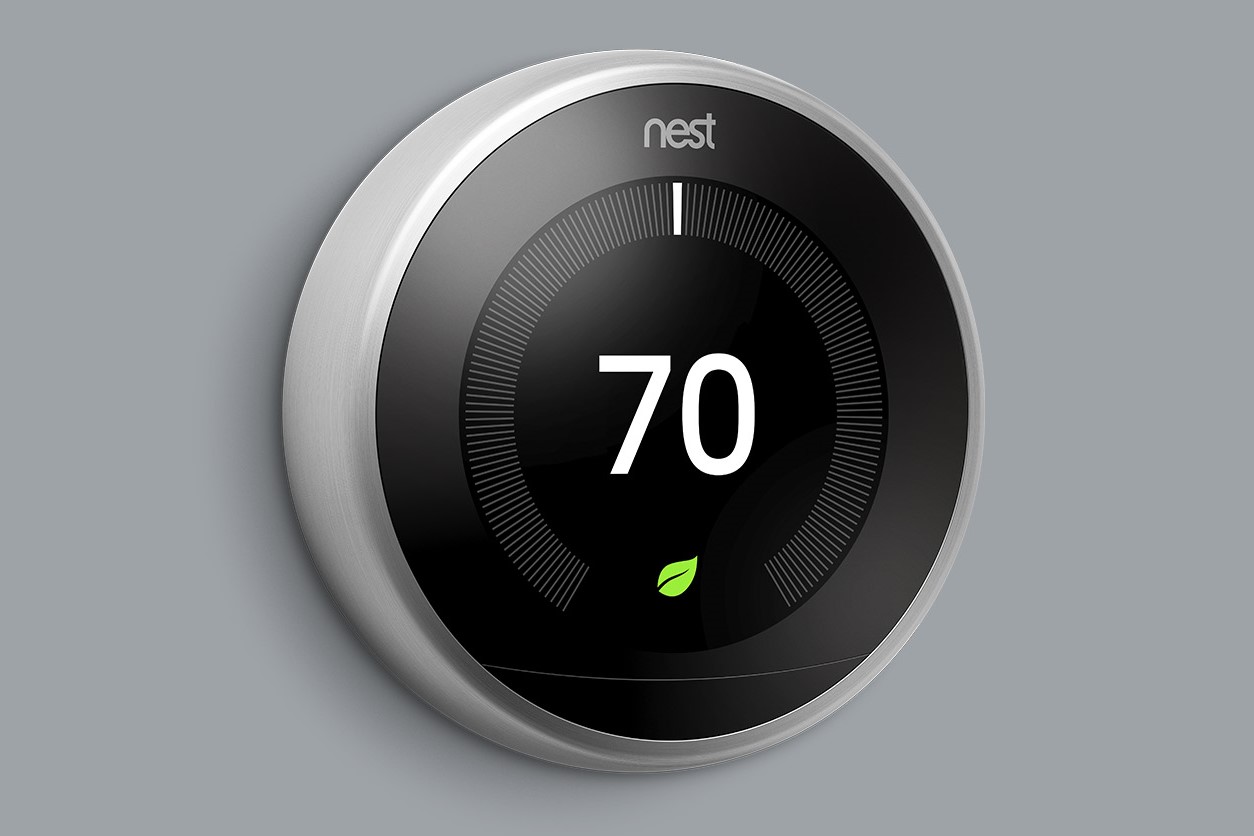
- The thermostat displays a leaf icon when it’s in energy-saving mode and your temperature adjustments are contributing to energy efficiency.
4. Allow time for adaptation:
- The Nest Thermostat requires time to learn your habits and preferences. It may take a few days or weeks for it to fully adapt to your schedule.
- Be patient and give the thermostat the opportunity to observe your patterns and adjust the temperature settings accordingly.
5. Fine-tune with schedules:
- Once the Nest Thermostat has learned your habits, you can further optimize your comfort and energy efficiency by creating schedules.
- Using the Nest app or the thermostat’s display, set different temperatures for various times of the day to align with your routine.
- The thermostat will combine its learned temperature preferences with your schedule, providing you with an even more tailored heating and cooling experience.
The learning feature of the Nest Thermostat is designed to simplify your life and provide you with a comfortable environment without the need for constant manual adjustments. By allowing the thermostat to learn your habits and preferences, you can enjoy the convenience of optimal temperature control while maximizing energy efficiency.
Making Your Home More Energy Efficient with Nest
The Nest Thermostat’s energy-saving features can help you make your home more energy efficient, reducing your carbon footprint and saving money on your utility bills. Here are some ways you can maximize energy efficiency with Nest:
1. Auto-Schedule:
- The Nest Thermostat’s Auto-Schedule feature learns your temperature preferences and creates a customized schedule based on your daily routine.
- By automatically adjusting the temperature when you are away from home, the thermostat helps conserve energy without sacrificing your comfort.
- Over time, the thermostat learns your patterns and adapts to changes in your routine, optimizing energy savings.
2. Energy History:
- Access the Energy History feature on the Nest app to track your HVAC system’s energy usage and identify potential areas for improvement.
- The Energy History report provides insights into how your thermostat settings impact your energy consumption.
- Use this information to make informed decisions about adjusting your temperature settings and optimizing energy efficiency.
3. Eco Mode:
- The Nest Thermostat’s Eco Mode helps save energy when you’re away from home for an extended period.
- When the thermostat detects that no one is home, it lowers the temperature to a more energy-efficient level.
- Once you return, the thermostat quickly adjusts the temperature back to your preferred settings.
- Enabling Eco Mode can lead to significant energy savings without compromising your comfort.
4. Temperature Sensors:
- Consider using temperature sensors in different rooms of your home to ensure optimal comfort and energy efficiency.
- Sensors can provide more accurate readings, and the thermostat can adjust the temperature based on the readings from these sensors.
- This feature allows you to prioritize certain rooms or areas of your home for heating or cooling, reducing energy waste in unoccupied spaces.
5. Integration with other smart devices:
- Integrate your Nest Thermostat with other smart home devices, such as smart lighting and occupancy sensors.
- This integration allows for more efficient use of energy by coordinating the operation of different devices to align with your occupancy patterns.
- For example, when the occupancy sensors detect that no one is in a particular room, it can signal the thermostat to adjust the temperature accordingly, saving energy.
By leveraging the energy-saving features of the Nest Thermostat and integrating it with other smart home devices, you can create a more energy-efficient and eco-friendly living environment. The combination of intelligent scheduling, energy monitoring, and automation helps you reduce wasted energy, lower your utility bills, and contribute to a greener future.
Troubleshooting Common Issues with the Nest Thermostat
While the Nest Thermostat is designed to be user-friendly and reliable, you may encounter some common issues that can be easily resolved. Here are solutions to troubleshoot common problems:
1. Connectivity issues:
- If your Nest Thermostat is not connecting to your Wi-Fi network, ensure that the Wi-Fi network is functioning properly and within range.
- Restart your router and modem to refresh the connection, and then try reconnecting the thermostat to the Wi-Fi network.
- If you’re still unable to establish a connection, check for any potential interference sources, like other electronic devices that could be affecting the signal.
2. Heating or cooling problems:
- If your HVAC system is not heating or cooling properly, check if the thermostat’s temperature setting is correctly adjusted.
- Ensure that the wires are securely connected to the thermostat’s base and that they are connected to the correct terminals.
- If the issue persists, you may want to consider contacting a professional HVAC technician to inspect and troubleshoot the system.
3. Display or touch screen issues:
- If the display or touch screen of your Nest Thermostat is unresponsive, check if it is clean and free of any debris or smudges.
- Gently clean the display using a soft, lint-free cloth. Avoid using chemicals or abrasive cleaning agents.
- If the problem persists, try restarting the thermostat by turning off the power at the circuit breaker, waiting a few seconds, and then turning it back on.
4. Battery issues:
- If your Nest Thermostat is displaying a low battery warning, replace the batteries with fresh ones.
- Ensure that you are using the correct type of batteries as specified in the thermostat’s manual.
- If the low battery warning persists even after replacing the batteries, contact Nest customer support for further assistance.
5. Firmware updates:
- Ensure that your Nest Thermostat is updated with the latest firmware version from Nest.
- Updates often include bug fixes, performance improvements, and new features that can resolve potential issues.
- Allow your thermostat to automatically update or manually check for updates through the Nest app or thermostat’s settings.
If these troubleshooting steps do not resolve your issue, consult the Nest Thermostat’s user manual or reach out to Nest customer support. They have a dedicated team available to assist you in resolving any technical difficulties and ensuring your Nest Thermostat continues to operate smoothly.
Nest Thermostat Tips and Tricks
The Nest Thermostat offers a range of features and capabilities that can enhance your comfort and energy efficiency. Here are some useful tips and tricks to get the most out of your Nest Thermostat:
1. Enable geofencing:
- Geofencing allows your Nest Thermostat to automatically adjust the temperature based on your location.
- Using your smartphone’s GPS, the thermostat detects when you are nearing home and adjusts the temperature in preparation.
- This feature ensures that your home is at a comfortable temperature when you arrive, without wasting energy when you’re away.
2. Utilize the Sunblock feature:
- If your thermostat is exposed to direct sunlight, the Sunblock feature can prevent temperature inaccuracies caused by the heat from the sun.
- Enable the Sunblock setting in the thermostat’s settings menu to ensure accurate temperature readings and optimal performance.
3. Customize the Farsight feature:
- The Farsight feature allows the thermostat’s display to show information, such as the current temperature or weather conditions, from a distance.
- You can customize what information is displayed and how long it stays visible through the thermostat’s settings menu.
4. Utilize manual scheduling:
- In addition to the Nest Thermostat’s learning feature, you can manually create a schedule tailored to your specific routine.
- Use the scheduling option in the Nest app to set your desired temperature at different times of the day.
- This can be helpful if you have a consistent daily schedule or if you prefer to have more control over your thermostat’s settings.
5. Enable HVAC system alerts:
- The Nest Thermostat can provide alerts for potential issues with your HVAC system, such as a malfunctioning compressor or a clogged air filter.
- Enable HVAC system alerts in the Nest app to stay informed about any problems that may affect the efficiency or performance of your system.
6. Use the Nest Temperature Sensor:
- The Nest Temperature Sensor can be placed in different rooms of your home to ensure even temperature distribution and improved comfort.
- You can prioritize specific rooms for heating or cooling based on your preferences.
- This feature is especially helpful if you have rooms that tend to be hotter or colder than others.
By utilizing these tips and tricks, you can optimize your Nest Thermostat’s performance, enhance your comfort, and maximize energy efficiency in your home. Explore the different features and settings available to customize your thermostat to meet your specific needs and preferences.