
Setting Up Your Ledger Nano S
Setting up your Ledger Nano S is the first step towards securing your cryptocurrency assets. By following a few simple steps, you can ensure that your device is properly configured and ready to use.
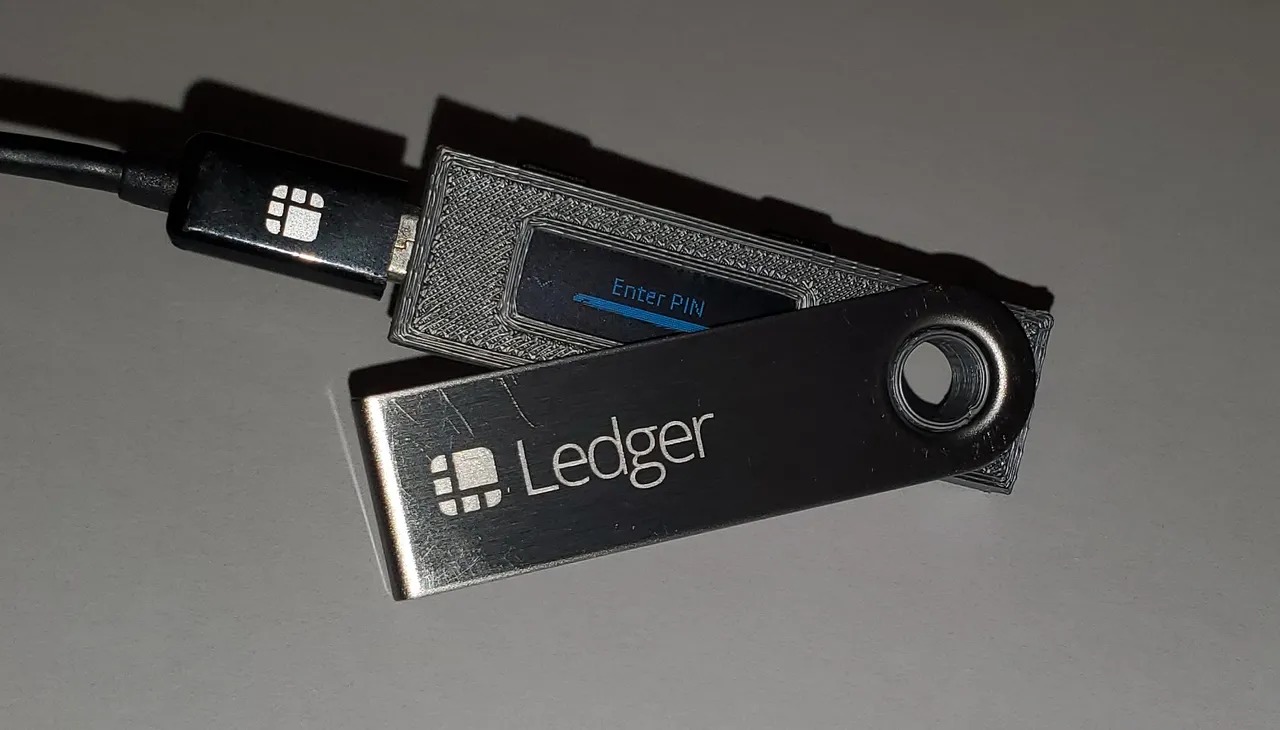
1. Unboxing and Connecting: Begin by unboxing your Ledger Nano S and locating the USB cable. Connect one end of the cable to your Ledger device and the other end to a USB port on your computer. The device will power on automatically once connected.
2. Initializing the Device: On the Ledger Nano S screen, you’ll be prompted to choose the preferred language. Use the device’s buttons to navigate and select the desired language. Next, you will need to set up a PIN code. Create a PIN code using the device’s buttons, ensuring it is unique and secure.
3. Setting up the Recovery Phrase: The recovery phrase is a crucial aspect of the Ledger Nano S. It serves as a backup in case your device is lost or damaged. Follow the instructions on the device’s screen to generate a 24-word recovery phrase. Write down the words in the order provided and keep them in a safe place away from prying eyes.
4. Confirming the Recovery Phrase: After noting down the recovery phrase, the device will prompt you to confirm it by selecting the words from the provided list. This step ensures that you have correctly written down the backup phrase and can access your funds if needed.
5. Installing Ledger Live: Ledger Live is the official software that allows you to manage and interact with your Ledger Nano S. Visit the Ledger website and download the appropriate version of Ledger Live for your operating system. Follow the installation instructions, and once installed, launch the software.
6. Connecting Ledger Live: Connect your Ledger Nano S to your computer using the USB cable. Open Ledger Live and follow the instructions to connect your device. Once connected, Ledger Live will recognize your Ledger Nano S and display the available options for managing your cryptocurrency assets.
7. Updating Firmware: It’s important to ensure that your Ledger Nano S has the latest firmware version installed for optimal security and performance. Check for firmware updates within the Ledger Live software and follow the prompts to update your device if necessary.
With these steps completed, your Ledger Nano S is set up and ready for use. Remember to keep your PIN code and recovery phrase secure and never share them with anyone. Regularly check for firmware updates and maintain caution while interacting with your cryptocurrency assets to keep them safe and secure.
Installing the Ledger Live Software
The Ledger Live software is essential for managing and interacting with your Ledger Nano S. It provides a user-friendly interface that allows you to view your cryptocurrency balances, send and receive funds, and manage your accounts. Follow the steps below to install the Ledger Live software:
1. Visit the Official Website: Start by visiting the official Ledger website at www.ledger.com. Look for the “Downloads” section and navigate to the Ledger Live page.
2. Choose Your Operating System: Select the appropriate version of Ledger Live for your operating system. The software is compatible with Windows, macOS, and Linux.
3. Download and Install the Software: Click on the download link, and the Ledger Live software will begin to download. Once the download is complete, run the installer file and follow the on-screen instructions to install the software on your computer.
4. Launch Ledger Live: Once the installation is complete, locate the Ledger Live icon on your desktop or in your applications folder and double-click to launch the software.
5. Connect Your Ledger Nano S: Before you can start using Ledger Live, connect your Ledger Nano S to your computer using the provided USB cable. Insert one end of the cable into the USB port on your computer and the other end into the USB port on your Ledger Nano S.
6. Set Up a New Device: Once your Ledger Nano S is connected, Ledger Live will prompt you to set up a new device. Follow the on-screen instructions to set a secure PIN code and write down the recovery phrase that will serve as a backup for your device.
7. Complete the Setup Process: After setting up your device, Ledger Live will guide you through the remaining steps to finalize the setup process. This may include firmware updates and additional security checks.
8. Add Accounts: Once the setup is complete, you can start adding cryptocurrency accounts to Ledger Live. Simply click on the “Add Account” button and select the desired cryptocurrency from the provided list. Ledger Live will generate a new address for each account, allowing you to receive funds.
By following these steps, you can install the Ledger Live software and connect it to your Ledger Nano S. The software provides a secure and convenient platform for managing your cryptocurrency assets, ensuring that you have full control over your funds.
Creating and Securing Your Wallet
Creating a wallet for your cryptocurrency is an essential step in securing your funds. With the Ledger Nano S, you can easily create and manage multiple wallets for various cryptocurrencies. Follow the steps below to create and secure your wallet:
1. Launch Ledger Live: Start by opening the Ledger Live software on your computer. Ensure that your Ledger Nano S is connected via the USB cable.
2. Select Your Cryptocurrency: In Ledger Live, click on the “Accounts” tab and choose the desired cryptocurrency from the list. Click on the “Add Account” button to create a new wallet for that cryptocurrency.
3. Confirm on Your Device: On your Ledger Nano S, navigate to the newly added cryptocurrency account and confirm the account creation by pressing the device’s buttons. This step ensures that only you have control over your wallet.
4. Set a Wallet Name: In Ledger Live, you will be prompted to set a name for your wallet. Choose a unique and recognizable name to easily identify your wallet in the future.
5. Backup Your Wallet: Creating a backup of your wallet ensures that you can recover your funds in the event of loss or damage to your Ledger Nano S. Ledger Live will guide you through the process of creating a backup. Follow the instructions carefully and jot down the recovery phrase provided. Store this phrase in a secure location, away from prying eyes.
6. Enable Passphrase (Optional): The Ledger Nano S gives you the option to enable an additional security feature called a passphrase. This passphrase acts as an extra layer of protection for your wallet. If you choose to enable this feature, make sure to select a strong and unique passphrase.
7. Secure Your Seed Phrase: The recovery phrase generated during the setup process is the key to accessing your wallet. Guard it with the highest level of security. Keep it in a fireproof safe or consider storing it offline in a hardware wallet specifically designed for recovery phrases, like the Cryptosteel.
8. Update Firmware: Keeping your Ledger Nano S firmware up to date is crucial for security purposes. Regularly check for firmware updates within the Ledger Live software and follow the prompts to install any available updates.
By following these steps, you can create and secure your wallet on the Ledger Nano S. Remember to never share your recovery phrase or passphrase with anyone and keep your device and backups in secure locations. With proper wallet security, you can have peace of mind knowing that your cryptocurrency funds are protected.
Managing and Adding Accounts
With the Ledger Nano S, you have the flexibility to manage and add multiple cryptocurrency accounts. This allows you to organize and track your various assets in one place. Follow the steps below to effectively manage and add accounts on your Ledger Nano S:
1. Launch Ledger Live: Open the Ledger Live software on your computer and ensure that your Ledger Nano S is connected via the USB cable.
2. Access the Accounts Tab: In Ledger Live, click on the “Accounts” tab. Here, you will see a list of all your existing cryptocurrency accounts.
3. View Account Details: Click on the account you want to manage to view its details, including the current balance and transaction history.
4. Send and Receive Funds: To send funds from an account, select the account and click on the “Send” button. You will be prompted to enter the recipient’s address and the amount you wish to send. To receive funds, click on the “Receive” button, and Ledger Live will generate a unique address for that account.
5. Add New Accounts: To add a new account for another cryptocurrency, click on the “Add Account” button. Choose the desired cryptocurrency from the list and follow the instructions to set up the account on your Ledger Nano S.
6. Rename and Reorder Accounts: Ledger Live allows you to rename and reorder your accounts for better organization. Simply click on the account you wish to edit, select the “Edit” button, and make the desired changes. You can also manually reorder your accounts by dragging and dropping them in the account list.
7. Hide Unused Accounts: If you have accounts that you no longer use or want to keep hidden, you can choose to hide them in Ledger Live. This feature allows you to declutter your account list while still maintaining access to the hidden accounts if needed.
8. Track Portfolio Performance: Ledger Live provides a portfolio overview, allowing you to monitor the overall performance of your cryptocurrency holdings. You can view the current value of your portfolio and track the performance over time.
Remember to regularly update your Ledger Nano S firmware and Ledger Live software to ensure optimal security and functionality. By effectively managing and adding accounts on your Ledger Nano S, you can easily track and control your cryptocurrency assets in a secure and organized manner.
Receiving Cryptocurrency on Your Ledger Nano S
Receiving cryptocurrency on your Ledger Nano S is a straightforward process that allows you to securely store and manage your digital assets. Follow the steps below to receive cryptocurrency onto your Ledger Nano S:
1. Open Ledger Live: Launch the Ledger Live software on your computer and ensure that your Ledger Nano S is connected via the USB cable.
2. Navigate to the Accounts Tab: In Ledger Live, click on the “Accounts” tab to access your cryptocurrency accounts.
3. Select the Account: Choose the account for which you want to receive cryptocurrency. The account name and current balance will be displayed.
4. Click on the “Receive” Button: To generate a unique receiving address for the selected account, click on the “Receive” button in Ledger Live. A new window will appear with the account’s QR code and address.
5. Verify the Address: Carefully double-check the receiving address displayed on Ledger Live. It is crucial to ensure accuracy to prevent any loss of funds. You can cross-verify the address on your Ledger Nano S screen, which should show the same address as the one displayed in Ledger Live.
6. Share the Receiving Address: To receive cryptocurrency from another wallet or exchange, you will need to provide the generated receiving address. You can share it by copying the address or using the QR code.
7. Track Incoming Transactions: Ledger Live will automatically track incoming transactions to your Ledger Nano S. It will update your account balance once the transaction is confirmed on the blockchain. You can view the transaction history within the account details in Ledger Live.
8. Keep Your Ledger Nano S Secure: Remember to securely store your Ledger Nano S device and protect it from unauthorized access. Keep your PIN code, recovery phrase, and device in a safe place away from potential threats.
By following these steps, you can easily receive cryptocurrency onto your Ledger Nano S. The device’s robust security measures and Ledger Live’s user-friendly interface ensure that your digital assets are stored safely and securely.
Sending Cryptocurrency from Your Ledger Nano S
Sending cryptocurrency from your Ledger Nano S allows you to transfer your digital assets securely to another wallet or exchange. Follow the step-by-step guide below to send cryptocurrency from your Ledger Nano S:
1. Open Ledger Live: Launch the Ledger Live software on your computer and ensure that your Ledger Nano S is connected via the USB cable.
2. Navigate to the Accounts Tab: In Ledger Live, click on the “Accounts” tab to access your cryptocurrency accounts.
3. Select the Account: Choose the account that holds the cryptocurrency you want to send. Verify the account name and balance before proceeding.
4. Click on the “Send” Button: To initiate the sending process, click on the “Send” button in Ledger Live for the selected account.
5. Enter the Recipient’s Address: In the “Send” window, enter the recipient’s wallet address to whom you want to send the cryptocurrency. Double-check the address to ensure accuracy as transactions on the blockchain are irreversible.
6. Specify the Amount: Enter the amount of cryptocurrency you wish to send. You can choose to either enter the amount in the cryptocurrency units or switch to the fiat currency value for better clarity.
7. Set the Network Fee: Ledger Live will automatically recommend a network fee for the transaction. You can adjust the fee level based on your preference. Higher fees generally result in faster confirmation times.
8. Review and Confirm: Before finalizing the transaction, review all the details, including the recipient’s address, amount, and network fee. Verify that everything is correct, then click on the “Send” button to initiate the transaction.
9. Confirm on Your Ledger Nano S: Once you click “Send,” your Ledger Nano S will prompt you to confirm the transaction. Review the details on the device’s screen and press the appropriate button to confirm the transaction.
10. Track Outgoing Transactions: Ledger Live will track the status of the outgoing transaction and update your account balance once it is confirmed on the blockchain. You can view the transaction history within the account details in Ledger Live.
It’s important to note that transaction times may vary depending on network congestion and the cryptocurrency being sent. Always double-check the recipient’s address and transaction details to avoid any irreversible mistakes. With the Ledger Nano S, you can confidently send cryptocurrency while maintaining full control and security over your digital assets.
Using Apps and Managing Applications
The Ledger Nano S supports a variety of apps that allow you to manage different cryptocurrencies and access various blockchain-based services. Understanding how to use and manage these apps is essential for maximizing the functionality of your Ledger Nano S. Follow the steps below to effectively utilize apps and manage applications:
1. Install Ledger Live: Ensure that you have Ledger Live installed and your Ledger Nano S connected to your computer.
2. Access the Manager: In Ledger Live, click on the “Manager” tab. This section displays all the available apps that can be installed or uninstalled on your Ledger Nano S.
3. Install Apps: To install an app, scroll through the list of available apps in the Manager tab. Click on the app you wish to install and follow the on-screen instructions to install it on your Ledger Nano S.
4. Open the App on Your Device: After installing the app, you need to open it on your Ledger Nano S. To do so, navigate to the app on your Ledger Nano S using the device screen and buttons.
5. Use the App: Once the app is open on your Ledger Nano S, you can interact with its features and functionalities. Each app may have different capabilities, such as sending and receiving transactions or accessing specific blockchain services. Follow the app’s instructions to utilize its functionalities effectively.
6. Manage Applications: Over time, you may accumulate several apps on your Ledger Nano S. To keep your device storage organized, you can remove apps that you no longer use. In the Manager tab of Ledger Live, click on the app you wish to uninstall and follow the instructions to remove it from your device.
7. Update Apps: It’s important to keep your apps up to date for security and compatibility reasons. Check the Manager tab in Ledger Live regularly for any available app updates. Follow the prompts to update your apps on your Ledger Nano S.
8. Explore Available Apps: Ledger regularly adds support for new cryptocurrencies and blockchain-based services. Keep an eye on the Manager tab in Ledger Live for any new app releases. This allows you to take advantage of the expanding ecosystem of supported apps on your Ledger Nano S.
By following these steps, you can effectively use apps and manage applications on your Ledger Nano S. Stay updated with the latest app releases, and regularly update your apps to enhance the security and functionality of your Ledger Nano S experience.
Updating Firmware on Your Ledger Nano S
Updating the firmware on your Ledger Nano S is crucial for maintaining optimal security and compatibility with the latest features and improvements. Firmware updates provide bug fixes, security enhancements, and new functionalities. Follow the steps below to update the firmware on your Ledger Nano S:
1. Install and Open Ledger Live: Ensure that you have the Ledger Live software installed on your computer and your Ledger Nano S connected via the USB cable.
2. Access the Manager Tab: In Ledger Live, click on the “Manager” tab. This section displays your installed apps and available firmware updates.
3. Check for Updates: Ledger Live will automatically check for firmware updates when you open the Manager tab. If there is a new firmware version available, you will see a notification indicating an update is ready for your Ledger Nano S.
4. Prepare Your Ledger Nano S: Before initiating the firmware update, ensure your Ledger Nano S has enough battery power and is connected to your computer via the USB cable.
5. Initiate the Update: To start the firmware update process, click on the “Update” button next to the firmware version available in the Manager tab. Follow the on-screen instructions to proceed with the update.
6. Confirm on Your Ledger Nano S: During the update process, your Ledger Nano S will display instructions and prompts on its screen. Carefully follow the instructions and press the appropriate buttons on your device to confirm the firmware update.
7. Do Not Disconnect: It is crucial to keep your Ledger Nano S connected to your computer throughout the firmware update process. Disconnecting the device may interrupt the update and could potentially cause issues with your Ledger Nano S.
8. Wait for the Update to Complete: The firmware update process may take a few minutes to complete. Follow the instructions on your computer and the device’s screen, and be patient as the update progresses.
9. Verify the Update: Once the firmware update is successfully completed, Ledger Live will display a confirmation message. You can also check the firmware version displayed on your Ledger Nano S screen to ensure that it matches the updated firmware version.
Regularly updating the firmware on your Ledger Nano S is an essential security measure. By staying up to date, you can benefit from the latest security enhancements and features, ensuring the ongoing protection of your cryptocurrency assets.
Adding Additional Security Measures
While the Ledger Nano S provides a high level of security for your cryptocurrency, there are additional measures you can take to further enhance the safety of your digital assets. By implementing these additional security measures, you can have added peace of mind knowing that your funds are well protected. Follow the steps below to add extra security to your Ledger Nano S:
1. Enable Two-Factor Authentication (2FA): Many cryptocurrency exchanges and online services offer 2FA as an option for accessing your account. Enable 2FA whenever possible and link it to an authenticator app or a hardware-based solution, such as a YubiKey, for an extra layer of protection.
2. Use a Strong and Unique PIN Code: When setting up your Ledger Nano S, create a PIN code that is both strong and easy for you to remember. Avoid using obvious combinations and consider including letters, numbers, and special characters. Keep your PIN code confidential and make sure it is not easily guessable.
3. Enable Passphrase: The Ledger Nano S allows you to set up an optional passphrase, which acts as an additional password for your wallet. This feature provides extra protection in case your device is stolen or compromised. Ensure that you choose a strong passphrase and do not forget it, as it cannot be recovered if lost.
4. Keep Your Firmware Updated: Regularly check for firmware updates for your Ledger Nano S and install them promptly. Firmware updates often include important security patches that address potential vulnerabilities.
5. Use a Hardware Security Module (HSM): An HSM is an external security device that provides enhanced protection for your private keys. Consider using a hardware security module, such as the Ledger Vault, in conjunction with your Ledger Nano S to further secure your assets.
6. Store Your Recovery Phrase Securely: Your recovery phrase serves as a backup for your Ledger Nano S. Ensure that you write it down on durable material, such as metal or waterproof paper, and store it in a secure location away from prying eyes and potential threats. Consider using a secure storage solution, such as a fireproof safe or a Cryptosteel device.
7. Be Wary of Phishing Attempts: Exercise caution when interacting with online platforms and avoid clicking on suspicious links or providing sensitive information. Always double-check the URL of websites you visit to ensure they are the official and legitimate ones.
8. Use a Dedicated Computer: Consider using a dedicated computer or a virtual machine for managing your cryptocurrency assets. This reduces the risk of installing malicious software or being exposed to potential security threats that may compromise your Ledger Nano S.
By implementing these additional security measures, you can significantly enhance the safety of your cryptocurrency investments while using your Ledger Nano S. Stay vigilant, stay informed, and keep your digital assets secure.
Troubleshooting Common Issues
While the Ledger Nano S is a reliable and secure device, you may encounter some common issues during its use. Understanding how to troubleshoot and resolve these issues can help ensure a smooth experience with your Ledger Nano S. Here are some common issues and their troubleshooting steps:
1. Connectivity Issues:
- Ensure that the USB cable is securely connected to both your computer and the Ledger Nano S.
- Try using a different USB port or cable to rule out any potential connectivity problems.
- If the issue persists, restart your computer and try connecting the Ledger Nano S again.
2. Device Not Recognized:
- Make sure that you have the latest version of Ledger Live installed on your computer.
- Try connecting your Ledger Nano S to a different computer to see if it is recognized.
- If the device is still not recognized, reset the device by pressing the left and right buttons simultaneously for a few seconds. Set it up again using your recovery phrase.
3. App Installation Issues:
- Ensure that you have the latest version of Ledger Live and that your device firmware is up to date.
- Check the Ledger Live Manager tab to see if the app you are trying to install is supported by your Ledger Nano S. If not, check for any future updates that may include compatibility for the app.
- If the installation fails, uninstall and reinstall the Ledger Live software, then try installing the app again.
4. Transaction Verification Issues:
- If you are having trouble verifying transactions on your Ledger Nano S, ensure that the transaction details on your computer screen match those displayed on your device.
- Double-check the recipient’s address and transaction amount to ensure accuracy.
- If the transaction still fails, try using a different internet browser or clearing your browser cache and cookies.
5. PIN Code Issues:
- If you forget your PIN code, you have three attempts before the device wipes itself as a security measure. Afterward, you can restore access using your recovery phrase.
- If you suspect that someone knows your PIN code, reset the device by entering an incorrect PIN code three times, and then set it up again using your recovery phrase.
If you are experiencing a persistent issue that you cannot resolve, refer to the official Ledger Support website for more specific troubleshooting steps or contact their customer support for assistance. They have a dedicated team to help you address any issues and ensure the safe use of your Ledger Nano S.
Best Practices for Using a Ledger Nano S
To ensure the security and optimal functionality of your Ledger Nano S, it is important to follow best practices for its use. By implementing these practices, you can minimize risks and safeguard your cryptocurrency investments. Here are some key best practices for using a Ledger Nano S:
1. Purchase from Verified Sources:
- Only purchase your Ledger Nano S from the official Ledger website or authorized resellers to ensure that you receive a genuine and tamper-proof device.
2. Verify the Authenticity of the Device:
- Check the packaging and device seals to ensure they have not been tampered with.
- Verify the device’s integrity by comparing the serial number printed on the device with the one displayed on the Ledger Live software during setup.
3. Keep Your Firmware Up to Date:
- Regularly check for firmware updates in the Ledger Live software and install them promptly.
- Updating the firmware ensures that your device has the latest security enhancements and performance improvements.
4. Safely Store Your Recovery Phrase:
- Write down your recovery phrase on paper or a compatible metal backup solution like the Cryptosteel.
- Store it in a secure location away from prying eyes and potential threats, such as a fireproof safe or a safety deposit box.
5. Protect Your PIN Code:
- Create a strong PIN code for your Ledger Nano S and avoid using easily guessable combinations.
- Do not share or disclose your PIN code with anyone, including Ledger support. Ledger will never ask for your PIN code.
6. Enable Passphrase:
- Consider using the optional passphrase feature for an extra layer of security.
- Choose a strong passphrase and make sure to memorize it or securely store it separate from your device.
7. Double-Check Addresses:
- Always verify the accuracy of the recipient’s address and the amount before initiating any transactions.
- Cross-check the address displayed on your Ledger Nano S screen with the one shown in Ledger Live.
8. Be Wary of Phishing Attempts:
- Exercise caution when receiving emails, messages, or links related to your Ledger Nano S.
- Always double-check the URL and only use the official Ledger website and software for your interactions.
9. Backup Wallets Regularly:
- Back up your Ledger Nano S regularly to ensure that you have the most up-to-date version of your wallets.
- Regular backups help protect against potential device loss, damage, or hardware failures.
10. Keep Your Ledger Live Software Secure:
- Download Ledger Live only from the official Ledger website to mitigate the risk of downloading compromised software.
- Keep your computer’s operating system, antivirus, and firewall up to date to minimize potential security vulnerabilities.
By following these best practices, you can maximize the security and usability of your Ledger Nano S. Remember that safeguarding your cryptocurrency assets requires ongoing vigilance and proactivity. Stay informed and stay cautious while enjoying the benefits of hardware wallet security.