
What is Wabi?
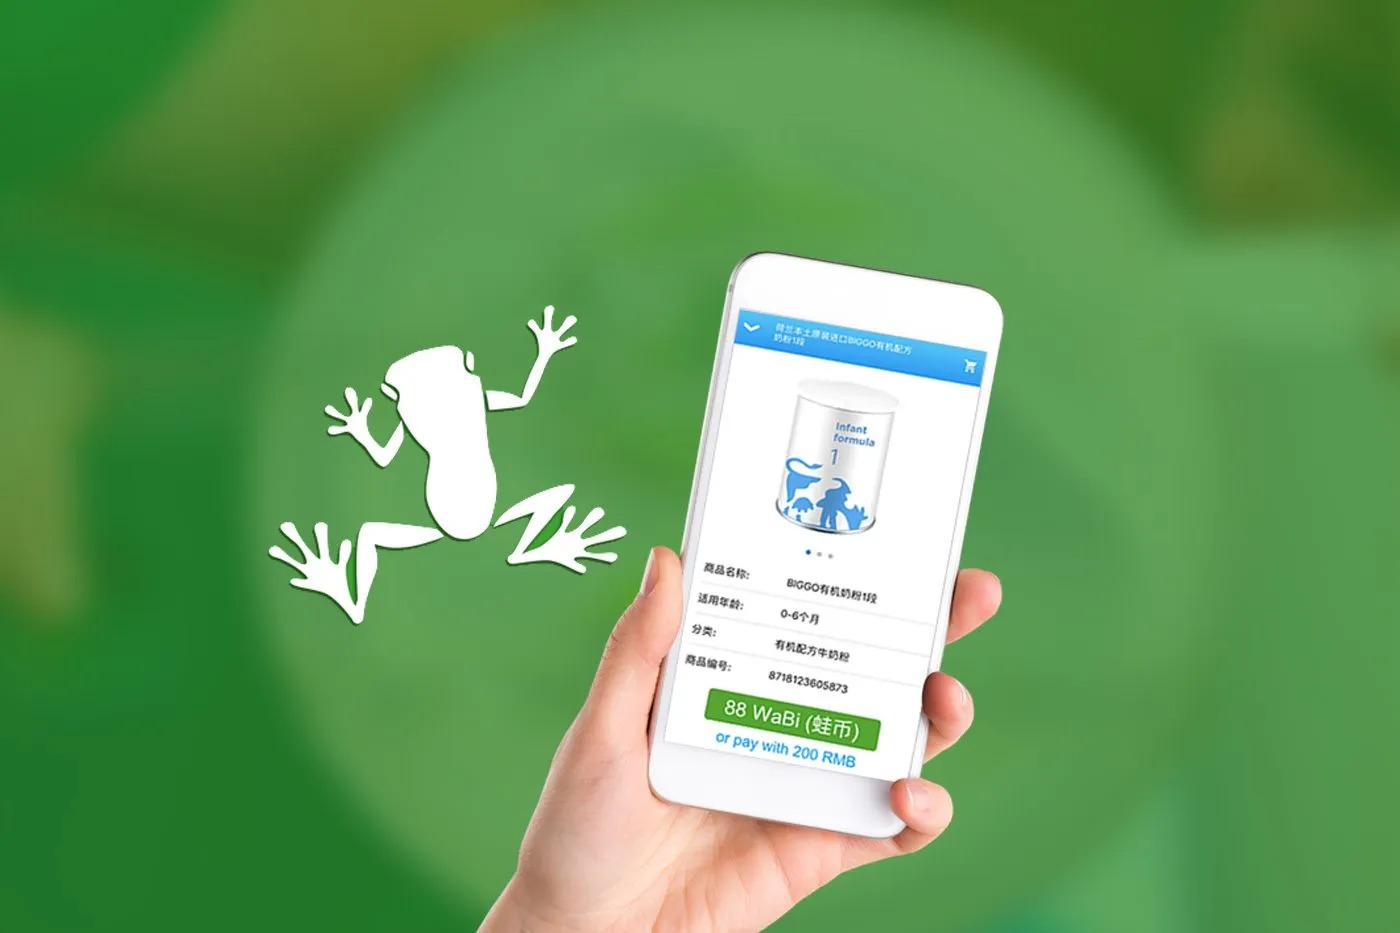
Wabi is a blockchain-based cryptocurrency that focuses on enhancing supply chain transparency and product authentication. It is designed to combat counterfeiting and increase consumer confidence in the products they purchase. Wabi achieves this by using RFID (Radio-Frequency Identification) technology to create a unique digital signature for each product, which can be verified by scanning it with a smartphone.
The Wabi project originated from the need to address the prevalent issue of counterfeit goods in the consumer market. With Wabi, consumers can have peace of mind knowing that the products they buy are authentic and safe. This is especially important for products such as baby formula, cosmetics, and wellness supplements, where counterfeit versions can be extremely harmful.
Wabi’s core technology lies in its ability to track and trace products throughout the supply chain. By leveraging blockchain technology, each product’s journey is recorded and accessible by consumers, retailers, and manufacturers alike. This allows for complete transparency and accountability in the supply chain, reducing the possibility of counterfeit goods entering the market.
Moreover, Wabi integrates the use of its dedicated scanning app, which consumers can use to verify the authenticity of a product. The app scans the unique QR code or RFID tag on the product, instantly providing information about its origin, manufacturing date, and other relevant details. This empowers consumers to make informed purchasing decisions and avoid counterfeit products that might jeopardize their health or safety.
With Wabi, consumers can contribute to a more secure and trustworthy market environment. By supporting brands that embrace Wabi’s technology, consumers actively discourage and restrict the circulation of counterfeit goods. This not only protects consumers but also helps legitimate brands thrive in an increasingly competitive landscape.
Overall, Wabi is a valuable tool in the fight against counterfeiting, offering a secure and transparent solution for authenticating products in the supply chain. Its innovative use of blockchain technology and RFID scanning makes it an essential cryptocurrency for brands and consumers who prioritize product authenticity and consumer safety.
What is Ledger Nano S?
Ledger Nano S is a popular hardware wallet offering a secure and convenient way to store various cryptocurrencies, including Wabi. It is a compact device that resembles a USB stick and is designed to keep your digital assets safe from hacking and theft.
The Ledger Nano S operates offline, providing an extra layer of security by keeping your private keys offline and out of reach of potential attackers. It features a built-in display that allows you to verify and confirm transactions directly on the device, ensuring that you have full control over your cryptocurrency transactions.
One of the key advantages of using the Ledger Nano S is its compatibility with multiple cryptocurrencies, making it a versatile choice for crypto enthusiasts. In addition to Bitcoin and Ethereum, Ledger Nano S supports a wide range of altcoins, including Wabi.
The setup process for the Ledger Nano S is relatively straightforward. After unboxing the device, you will need to connect it to your computer using the included USB cable. Ledger Live, the companion app for the Ledger Nano S, can then be installed on your computer to easily manage your cryptocurrency holdings.
To ensure the security of your Ledger Nano S, it is essential to always purchase it directly from the official Ledger website or authorized resellers. This helps to prevent the risk of receiving tampered devices that could compromise the safety of your crypto assets.
With its robust security features and wide range of supported cryptocurrencies, the Ledger Nano S is a reliable choice for individuals looking to securely store their Wabi and other digital assets. Its user-friendly interface, combined with its offline transaction signing capability, makes it an ideal option for those seeking both convenience and peace of mind in managing their cryptocurrency portfolios.
Getting Started
Before you can add Wabi to your Ledger Nano S, you need to ensure that you have the necessary setup and software in place. Follow these steps to get started:
- Install Ledger Live: Ledger Live is the official companion app for managing your Ledger Nano S. Visit the official Ledger website and download the app for your operating system. Follow the installation instructions to set it up on your computer.
- Connect Ledger Nano S to the Computer: Take your Ledger Nano S device and use the USB cable provided to connect it to your computer. Follow the on-screen instructions to set up your device and generate your recovery phrase. Make sure to securely store your recovery phrase as it is crucial for accessing your funds in case your device is lost or damaged.
- Update Ledger Nano S Firmware: It is important to ensure that your Ledger Nano S has the latest firmware installed. Open Ledger Live and go to the Manager section. If a firmware update is available, follow the prompts to update your device’s firmware.
- Enable Browser Support: To interact with the Wabi application and manage your Wabi coins using Ledger Live, you need to enable browser support on your Ledger Nano S. Go to the Settings section in Ledger Live and toggle the “Browser Support” option to enable it.
Once you have completed these steps, you are ready to add Wabi to your Ledger Nano S and start securely managing your Wabi holdings.
It is worth noting that while the Ledger Nano S provides a high level of security for your cryptocurrencies, it is crucial to take additional measures to safeguard your recovery phrase and protect your device from physical theft or damage. Always keep your recovery phrase offline and in a secure location, and consider using a PIN code to access your Ledger Nano S.
By following these setup steps and ensuring the security of your Ledger Nano S, you can confidently proceed to add Wabi to your device and enjoy the benefits of securely managing your Wabi tokens.
Install Ledger Live
Ledger Live is the official companion application for managing your Ledger Nano S and other Ledger devices. To add Wabi to your Ledger Nano S, you need to have Ledger Live installed on your computer. Here’s how to install Ledger Live:
- Visit the Official Ledger Website: Open your web browser and go to the official Ledger website at www.ledger.com. Navigate to the “Downloads” section.
- Choose Your Operating System: On the Downloads page, select the appropriate version of Ledger Live for your operating system. Ledger Live is available for Windows, macOS, and Linux.
- Download and Install: Click on the download link for your operating system and wait for the file to download. Once downloaded, locate the file on your computer and double-click to run the installer. Follow the on-screen instructions to install Ledger Live.
- Launch Ledger Live: After the installation is complete, locate the Ledger Live application on your computer and open it. You may need to grant the necessary permissions to run the application.
- Create or Restore a Wallet: When you launch Ledger Live for the first time, you will be prompted to create a new wallet or restore a wallet using an existing recovery phrase. Follow the on-screen instructions to create or restore your wallet. If you are setting up a new wallet, make sure to store your recovery phrase in a safe and secure location.
Once you have installed Ledger Live and set up your wallet, you are ready to connect your Ledger Nano S and proceed to add Wabi to your device.
It is essential to download Ledger Live exclusively from the official Ledger website to ensure that you are using a legitimate and secure application. Avoid downloading Ledger Live from unofficial sources to mitigate the risk of malware or tampered software.
By installing Ledger Live, you gain access to a user-friendly interface for managing your Ledger Nano S and various cryptocurrencies, including Wabi. It provides a seamless experience for adding, sending, and receiving Wabi coins, all within a secure and convenient environment.
Connect Ledger Nano S to the Computer
In order to add Wabi to your Ledger Nano S, you need to connect the device to your computer. Follow these steps to establish a connection:
- Locate the USB Cable: Take the USB cable that came with your Ledger Nano S and ensure it is readily available.
- Open Ledger Live: Make sure that Ledger Live is already installed on your computer. If not, refer to the previous section on how to install it. Open the Ledger Live application.
- Unlock Your Ledger Nano S: On your Ledger Nano S, press both buttons simultaneously to wake up the device. Enter your PIN code when prompted to unlock it.
- Connect Ledger Nano S to Computer: Use the USB cable to connect your Ledger Nano S to an available USB port on your computer. Insert one end of the cable into the corresponding port on the Ledger Nano S device and the other end into a USB port on your computer.
- Follow On-screen Instructions: After connecting your Ledger Nano S, a prompt may appear on the device’s display asking you to “Allow Ledger Manager.” Press the right button on your device to give permission.
- Device Detected: Ledger Live should now detect your Ledger Nano S and show a corresponding icon on the app interface. The device is now successfully connected to your computer.
It is important to connect your Ledger Nano S directly to your computer using the provided USB cable, as using third-party cables or adapters may not establish a stable or secure connection. Ensure that the USB port you are using is functioning properly to avoid any potential issues.
By connecting your Ledger Nano S to your computer, you enable the secure transfer of data between the device and Ledger Live. This connection is crucial for managing your Wabi coins and performing various actions, such as adding, sending, and receiving Wabi securely with your Ledger Nano S.
Update Ledger Nano S Firmware
Keeping your Ledger Nano S firmware up to date is essential for maintaining the security and functionality of your device. Firmware updates often include bug fixes, performance improvements, and security enhancements. Follow these steps to update your Ledger Nano S firmware:
- Open Ledger Live: Ensure that Ledger Live is open and your Ledger Nano S is connected to your computer as described in the previous section.
- Click on Manager: In the Ledger Live application, click on the “Manager” tab located at the top of the screen. This section allows you to manage the applications and firmware on your Ledger Nano S.
- Connect Nano S in Bootloader Mode (if required): In some cases, you may need to update your Ledger Nano S firmware while it is in bootloader mode. If prompted, follow the on-screen instructions to enter the bootloader mode. This usually involves pressing the left button on your Ledger Nano S when asked.
- Check for Firmware Update: Ledger Live will automatically detect if there is a firmware update available for your Ledger Nano S. If an update is available, it will be displayed with relevant details such as the new version number and release notes.
- Start the Firmware Update: Click on the “Update” button to initiate the firmware update process. Follow any additional on-screen instructions that may appear. Make sure to keep your Ledger Nano S connected to your computer throughout the update process.
- Wait for the Update to Complete: The Ledger Live application will display a progress bar indicating the status of the firmware update. Do not disconnect your Ledger Nano S or close the Ledger Live application until the update is complete.
- Confirm Firmware Update: Once the firmware update is complete, Ledger Live will notify you. On your Ledger Nano S device, confirm the firmware update by following the instructions displayed on the device’s screen.
Updating your Ledger Nano S firmware ensures that you are benefiting from the latest security patches and improvements. It is recommended to regularly check for firmware updates and keep your device up to date.
By updating your Ledger Nano S firmware, you can have peace of mind knowing that you are using the most secure and reliable version of the device’s software. This allows you to confidently manage your Wabi coins and other cryptocurrencies stored on your Ledger Nano S.
Enable Browser Support
In order to interact with the Wabi application and manage your Wabi coins using Ledger Live, you need to enable browser support on your Ledger Nano S. Enabling browser support allows you to securely and conveniently access your Wabi wallet directly from your computer’s web browser. Follow these steps to enable browser support:
- Open Ledger Live: Make sure that Ledger Live is open and your Ledger Nano S is connected to your computer.
- Go to Settings: In the Ledger Live application, click on the “Settings” tab located at the top right corner of the screen. This section allows you to customize various settings related to your Ledger Nano S device.
- Enable Browser Support: In the Settings section, locate the “Experimental Features” category. Toggle the “Browser Support” option to enable it. You may be prompted to confirm your decision.
- Enter Your Ledger Nano S PIN: Follow the on-screen instructions and enter your Ledger Nano S PIN code when prompted to authorize the enabling of browser support.
- Confirmation on Ledger Nano S: On your Ledger Nano S device, you will see a message asking if you want to enable browser support. Use the device’s buttons to navigate to “Confirm” and press both buttons simultaneously to confirm.
- Browser Support Enabled: Once browser support is successfully enabled, you will be able to use Ledger Live to access the Wabi application and manage your Wabi coins through your computer’s web browser.
Enabling browser support on your Ledger Nano S allows for seamless integration with the Wabi application and provides a convenient way to interact with your Wabi wallet. It ensures that you can securely manage your Wabi coins and perform transactions directly from your computer without compromising the safety of your private keys.
By enabling browser support, you can enjoy the benefits of a user-friendly interface and easy access to your Wabi coins through Ledger Live, making it a convenient and efficient solution for managing your cryptocurrency holdings.
Install Wabi Application on Ledger Nano S
To add Wabi to your Ledger Nano S, you need to install the Wabi application on your device. The Wabi application allows you to securely manage and access your Wabi coins directly from your Ledger Nano S. Follow these steps to install the Wabi application:
- Open Ledger Live: Make sure that Ledger Live is open and your Ledger Nano S is connected to your computer.
- Go to Manager: In the Ledger Live application, click on the “Manager” tab located at the top of the screen. This section allows you to manage the applications and firmware on your Ledger Nano S.
- Connect Nano S in Bootloader Mode (if required): In some cases, you may need to install the Wabi application while your Ledger Nano S is in bootloader mode. If prompted, follow the on-screen instructions to enter the bootloader mode.
- Search for Wabi Application: In the Manager section, type “Wabi” in the search bar or scroll through the list of available applications to find Wabi.
- Install the Wabi Application: Click on the “Install” button next to the Wabi application. You will be prompted to confirm the installation on your Ledger Nano S device. Follow the on-screen instructions and use the device’s buttons to confirm the installation.
- Wait for Installation to Complete: Ledger Live will display a progress bar indicating the status of the installation. Do not disconnect your Ledger Nano S or close the Ledger Live application until the installation is complete.
- Application Installed: Once the installation is complete, Ledger Live will notify you that the Wabi application has been successfully installed on your Ledger Nano S.
By installing the Wabi application on your Ledger Nano S, you can securely manage your Wabi coins directly from your device. This ensures that your private keys and Wabi holdings remain protected within the secure hardware of your Ledger Nano S at all times.
Installing the Wabi application allows you to access Wabi-specific features and functionalities through Ledger Live. You can view your Wabi balance, send and receive Wabi coins, and stay up to date with your Wabi transactions—all while having full control and ownership of your private keys.
With the Wabi application installed on your Ledger Nano S, you are ready to proceed with adding Wabi to your Ledger Live and securely manage your Wabi coins with ease.
How to Add Wabi to Ledger Nano S
Adding Wabi to your Ledger Nano S allows you to securely store and manage your Wabi coins. Follow these steps to add Wabi to your Ledger Nano S:
- Ensure Ledger Live is Open and Ledger Nano S is Connected: Make sure that Ledger Live is open on your computer and your Ledger Nano S is successfully connected to your computer.
- Select the Wabi Application: In Ledger Live, go to the “Manager” tab and open the Wabi application on your Ledger Nano S device by clicking on it.
- Open Wabi Application on Ledger Nano S: On your Ledger Nano S device, scroll through the available applications and locate the Wabi application. Press both buttons simultaneously to open it.
- Access Wabi in Ledger Live: After opening the Wabi application on your Ledger Nano S, go back to Ledger Live on your computer and select the “Accounts” tab.
- Create a Wabi Account: Click on “Add Account” and select “Wabi” from the list of available cryptocurrencies. Follow the on-screen instructions to create a new Wabi account.
- Copy the Wabi Receive Address: Once the Wabi account is created, you will be provided with a receive address. Copy this address as you will need it to receive Wabi coins.
- Send Wabi to Your Ledger Nano S: In another wallet or exchange platform where you hold Wabi, initiate a transfer to the receive address of your newly created Wabi account on Ledger Live.
- Confirm the Transaction: Follow the prompts for the Wabi transfer and confirm the transaction details, including the destination address. Verify that the address matches the one displayed on your Ledger Live account.
- Wait for Confirmation: The Wabi transaction may take some time to be confirmed on the blockchain. Wait for the transaction to be completed and confirmed.
- Verify Wabi Balance: Once the transaction is confirmed, you should see the updated Wabi balance reflected in your Ledger Live account.
By following these steps, you can successfully add Wabi to your Ledger Nano S and have control over your Wabi coins within the secure environment provided by the Ledger Nano S hardware wallet.
Ensure that you double-check the destination address and other transaction details to avoid any mistakes or potential loss of funds. Always send a small test transaction first before sending larger amounts of Wabi to your Ledger Nano S to ensure everything is set up correctly.
With Wabi added to your Ledger Nano S, you can confidently manage and secure your Wabi coins, knowing that your private keys are protected and your Wabi holdings are stored safely on your Ledger Nano S.
Add Wabi to Ledger Live
Once you have successfully added Wabi to your Ledger Nano S, the next step is to add it to your Ledger Live account. Ledger Live provides a convenient interface for managing your cryptocurrencies, including Wabi. Follow these steps to add Wabi to your Ledger Live account:
- Ensure Ledger Live is Open and Ledger Nano S is Connected: Make sure that Ledger Live is open on your computer and your Ledger Nano S is successfully connected to your computer.
- Go to the Accounts Tab: In the Ledger Live application, click on the “Accounts” tab located at the top of the screen. This section displays the list of your cryptocurrency accounts.
- Click on Add Account: Click on the “Add Account” button to add a new account to your Ledger Live.
- Select Wabi: In the list of supported cryptocurrencies, scroll down or use the search function to find Wabi. Click on “Wabi” to select it.
- Choose the Ledger Nano S Account: Ledger Live will display a list of available Ledger Nano S accounts. Select the account that you have assigned for Wabi or create a new account if necessary.
- Confirm the Account Addition: Review the account details and click on the “Add Account” button to confirm the addition of the Wabi account to Ledger Live.
- View Your Wabi Account: After adding the Wabi account, you will see it listed under the Accounts tab in Ledger Live. Click on the account to view the details, including your Wabi balance and transaction history.
By adding Wabi to your Ledger Live account, you can conveniently track your Wabi balance, monitor transactions, and perform other actions such as sending and receiving Wabi coins directly from the Ledger Live interface.
Remember to keep your Ledger Live application up to date to ensure you have access to the latest features and improvements. Ledger Live provides a user-friendly and secure environment for managing your Wabi coins, ensuring that your private keys and funds are protected at all times.
With Wabi added to your Ledger Live account, you can efficiently manage and monitor your Wabi holdings, making it easier to stay in control of your cryptocurrency portfolio.
Send and Receive Wabi with Ledger Nano S
With Wabi added to your Ledger Nano S and configured in Ledger Live, you can easily send and receive Wabi coins using your hardware wallet. Follow these steps to send and receive Wabi with your Ledger Nano S:
Receiving Wabi:
- Ensure Ledger Live is Open and Ledger Nano S is Connected: Make sure that Ledger Live is open on your computer and your Ledger Nano S is successfully connected to your computer.
- Go to the Accounts Tab: In the Ledger Live application, click on the “Accounts” tab located at the top of the screen. This section displays the list of your cryptocurrency accounts.
- Select Wabi Account: Locate your Wabi account in the list of accounts. Click on the account to view its details.
- Copy the Receive Address: On the Wabi account page, you will find a receive address for your Wabi coins. Click on the copy icon next to the address to copy it to the clipboard.
- Share the Receive Address: Share the copied receive address with the sender who wants to send you Wabi coins. They can use this address to initiate the transfer of Wabi coins to your Ledger Nano S.
- Verify Received Wabi: Once the sender successfully sends the Wabi coins to your Ledger Nano S, you can verify the transaction by checking your Ledger Live account. The incoming transaction will be reflected in your Wabi account’s transaction history.
Sending Wabi:
- Ensure Ledger Live is Open and Ledger Nano S is Connected: Make sure that Ledger Live is open on your computer and your Ledger Nano S is successfully connected to your computer.
- Go to the Accounts Tab: In the Ledger Live application, click on the “Accounts” tab located at the top of the screen. This section displays the list of your cryptocurrency accounts.
- Select Wabi Account: Locate your Wabi account in the list of accounts. Click on the account to view its details.
- Click on Send: On your Wabi account page, click on the “Send” button to initiate a Wabi transfer.
- Enter the Recipient’s Address: Provide the recipient’s Wabi address to which you want to send the Wabi coins. Ensure that you have the correct and verified address of the recipient to avoid any loss of funds.
- Enter the Amount: Specify the amount of Wabi coins you want to send to the recipient. Double-check the amount to ensure its accuracy.
- Confirm the Transaction: Verify the details of your transaction, including the recipient address and Wabi amount. Once you have confirmed the details, click on the “Send” button to initiate the Wabi transfer.
- Confirm the Transaction on Ledger Nano S: On your Ledger Nano S device, confirm the transaction details as displayed on the device’s screen. Follow the device’s instructions to authorize the Wabi transfer.
- Wait for Transaction Confirmation: The Wabi transaction may take some time to be confirmed on the blockchain. Wait until the transaction is confirmed, and the Wabi coins are successfully sent to the recipient.
By following these steps, you can easily send and receive Wabi coins using your Ledger Nano S. The Ledger Nano S ensures that your private keys are securely stored, providing you with peace of mind while conducting transactions with your Wabi holdings.
Always verify the accuracy of the recipient’s address before initiating a transaction to avoid any loss of funds. Take note of any transaction fees associated with sending Wabi, as these will be deducted from the total amount being sent.
With the ability to send and receive Wabi using your Ledger Nano S, you can conveniently manage your Wabi holdings and engage in transactions securely and efficiently.
Securely Store Your Wabi on Ledger Nano S
One of the main advantages of using a Ledger Nano S is the enhanced security it offers for storing your Wabi and other cryptocurrencies. To ensure the utmost protection for your Wabi holdings, follow these best practices when storing your Wabi on your Ledger Nano S:
- Choose a Strong PIN: Set a strong and unique PIN code for your Ledger Nano S. This PIN code serves as a first line of defense against unauthorized access to your device and Wabi coins.
- Backup Your Recovery Phrase: During the initial setup of your Ledger Nano S, you were provided with a recovery phrase. This phrase is crucial for recovering access to your Wabi coins if your device is lost, stolen, or damaged. Write down the recovery phrase and store it in a safe and secure location away from prying eyes.
- Keep Your Firmware Updated: Regularly check for firmware updates for your Ledger Nano S and ensure that it is always running the latest version. Firmware updates often include security patches and performance improvements, keeping your device and Wabi holdings secure.
- Enable Auto-Lock: Configure your Ledger Nano S to automatically lock itself after a certain period of inactivity. This prevents unauthorized access to your device and ensures that your Wabi coins remain secure even if the device is left unattended.
- Protect from Physical Damage: Handle your Ledger Nano S with care and protect it from physical damage. Avoid exposing it to water, extreme temperatures, or harsh environments. Store it in the provided protective case when not in use.
- Double-Check Addresses: When sending or receiving Wabi, double-check the addresses to ensure accuracy. Verify the recipient’s address before initiating a transaction to prevent sending Wabi to the wrong address.
- Secure Your Computer: Ensure that the computer you use to access your Ledger Nano S is secure. Keep your operating system, antivirus software, and other security measures up to date to minimize the risk of malware or keyloggers compromising your Wabi or other sensitive information.
- Verify Transaction Details on Ledger Nano S: Always confirm and verify transaction details, such as the recipient address and amount, on your Ledger Nano S’s display. By relying on the device’s screen, you can mitigate the risk of potential phishing attacks or fraudulent transactions.
By adhering to these safety practices, you can ensure that your Wabi coins stored on the Ledger Nano S remain secure and protected from unauthorized access. The Ledger Nano S provides you with the peace of mind that your private keys are kept offline and under your control, minimizing the risk of theft or loss.
Remember, the security of your Wabi ultimately relies on your actions and practices. By implementing these security measures and staying vigilant, you can confidently store and manage your Wabi holdings on your Ledger Nano S.
Frequently Asked Questions (FAQs)
Here are some frequently asked questions about adding and managing Wabi on the Ledger Nano S:
Q1: Can I store multiple cryptocurrencies, including Wabi, on the Ledger Nano S?
A1: Yes, the Ledger Nano S supports various cryptocurrencies, including Wabi. You can store multiple cryptocurrencies on the device simultaneously.
Q2: Can I add Wabi to the Ledger Live application on my computer without a Ledger Nano S?
A2: No, in order to add Wabi to your Ledger Live account, you need to have a Ledger Nano S hardware wallet. The Ledger Nano S is required for securely storing and managing your Wabi.
Q3: Can I add Wabi to Ledger Live on multiple devices?
A3: Yes, you can install Ledger Live on multiple devices, such as your computer and smartphone. Simply connect your Ledger Nano S to each device and access your Wabi account through Ledger Live.
Q4: How can I update the Wabi application on my Ledger Nano S?
A4: To update the Wabi application on your Ledger Nano S, open the Ledger Live application on your computer, go to the Manager tab, and find the Wabi application. Click on the update button next to the Wabi application to initiate the update process.
Q5: What happens if I lose my Ledger Nano S or it gets damaged?
A5: If you lose your Ledger Nano S or it gets damaged, you can recover your Wabi and other cryptocurrencies using the recovery phrase that you generated during the initial setup. With the recovery phrase, you can restore your account on a new Ledger Nano S or another compatible wallet.
Q6: Can I send Wabi from my Ledger Nano S to an exchange or another wallet?
A6: Yes, you can send your Wabi coins from your Ledger Nano S to an exchange or another Wabi-compatible wallet. Use the “Send” feature in Ledger Live to initiate the transaction and provide the recipient’s wallet address.
Q7: Are my Wabi coins visible on the blockchain?
A7: No, your Wabi coins are not directly visible on the blockchain. Instead, the Ledger Nano S stores your private keys, which allow you to access and manage your Wabi coins securely. The blockchain records the transactions associated with your Wabi address.
Q8: How do I ensure the privacy of my Wabi transactions with Ledger Nano S?
A8: Ledger Nano S does not provide privacy features for Wabi transactions. If privacy is a concern, consider utilizing other privacy-focused cryptocurrencies or services that offer enhanced privacy features.
If you have additional questions or encounter any difficulties while adding or managing Wabi on your Ledger Nano S, refer to the official Ledger website’s support section or consult their customer support for further assistance.