
Preparing for the Update
Before updating your Oculus Rift runtime, it’s important to ensure that your system is ready for the update process. Here are a few key steps to follow:
1. Check system requirements: Make sure your computer meets the minimum system requirements for the updated Oculus Rift runtime. This may include having a compatible graphics card, sufficient RAM, and a supported operating system.
2. Backup important data: It’s always a good idea to back up any important data on your computer before making any system updates. This can help protect your files in case anything goes wrong during the update process.
3. Close unnecessary applications: To ensure a smooth update, it’s recommended to close any unnecessary applications or programs running in the background. This can help free up system resources and minimize any potential conflicts during the update.
4. Disable antivirus software: Antivirus or security software can sometimes interfere with the update process. To prevent any conflicts, temporarily disable your antivirus software before proceeding with the update. Just be sure to re-enable it once the update is complete.
5. Stable internet connection: Having a stable and reliable internet connection is crucial when updating your Oculus Rift runtime. Ensure that your internet connection is working properly and has sufficient bandwidth to download the necessary files.
6. Remove any incompatible software: Some software applications may not be compatible with the updated Oculus Rift runtime. Check with the Oculus support website for a list of known incompatible software and uninstall them if necessary.
By following these preparation steps, you can help ensure a smooth and successful update process for your Oculus Rift runtime. Now that you’re ready, let’s move on to connecting your Oculus Rift to the computer.
Connecting Oculus Rift to the Computer
Before you begin the update process, make sure your Oculus Rift is properly connected to your computer. Follow these steps to establish a secure connection:
1. Check the cables: Ensure that all the necessary cables are securely plugged into your Oculus Rift headset and your computer. This includes the HDMI cable, USB cable, and the power adapter if applicable.
2. Position the sensors: Place the sensors in optimal positions to track your movements accurately. Consider placing them at opposite corners of the room or on either side of your computer monitor.
3. USB ports: Connect the USB cable from your Rift headset to an available USB port on your computer. Be sure to use a USB 3.0 port if available for the best performance.
4. HDMI connection: Connect the HDMI cable from your Rift headset to the HDMI output on your computer’s graphics card. Ensure that the connection is secure and that the cable is not damaged.
5. Power on the headset: Power on your Oculus Rift headset using the designated power button. If you have a wireless adapter, make sure it’s properly connected and powered on as well.
6. Check for detection: Once everything is connected, check if your computer detects the Oculus Rift headset. You should see a notification or prompt indicating that the headset has been recognized.
7. Adjust headset fit: Put on the Rift headset and adjust the straps for comfortable and secure fit. Make sure the lenses are aligned with your eyes to ensure clear and immersive visuals.
8. Test audio and controllers: Verify that the audio is working and the controllers are functioning properly. Test the buttons and movements to ensure everything is in working order.
Once your Oculus Rift is connected and functioning correctly, you’re ready to proceed with the update process. In the next section, we will explore how to check for updates to ensure you have the latest runtime installed.
Checking for Updates
Before updating your Oculus Rift runtime, it’s important to check if there are any available updates. Follow these steps to check for updates:
1. Open the Oculus app: Launch the Oculus app on your computer. This is the main hub where you can manage all aspects of your Oculus Rift experience.
2. Navigate to the settings: Click on the gear icon at the top right corner of the Oculus app to access the settings menu. This is where you can customize various settings and perform software updates.
3. Check for software updates: In the settings menu, click on the “General” tab. Look for the “Software Update” section and click on the “Check for Updates” button. The Oculus app will now search for any available updates for your Oculus Rift runtime.
4. Wait for the app to update: If an update is available, the Oculus app will download and install it automatically. The duration of the update process may vary depending on the size of the update and your internet connection speed. It’s important not to interrupt the update process to avoid any potential issues.
5. Restart the Oculus app: Once the update is complete, it’s recommended to restart the Oculus app to ensure that all changes take effect. Close the app and relaunch it to start using the updated runtime.
6. Confirm the update: To verify that the update was successful, go back to the settings menu and check the “Software Update” section again. It should indicate that you have the latest version of the Oculus Rift runtime installed.
By regularly checking for updates, you can ensure that your Oculus Rift runtime is up to date with the latest features and bug fixes. In the next section, we will discuss how to download and install the new runtime if an update is available.
Downloading the Latest Runtime
If an update is available for your Oculus Rift runtime, you will need to download the latest version from the Oculus website. Follow these steps to download the latest runtime:
1. Visit the Oculus website: Open your web browser and go to the official Oculus website at www.oculus.com.
2. Go to the downloads section: Navigate to the downloads section of the website. Look for the “Downloads” or “Software” tab, usually located in the top menu or on the homepage.
3. Search for the Oculus Rift runtime: In the downloads section, search for the Oculus Rift runtime or look for the latest software update specifically for the Oculus Rift.
4. Select your operating system: Choose the appropriate version of the Oculus Rift runtime for your operating system. Make sure to select the correct version to ensure compatibility.
5. Start the download: Click on the download button or link to start the download process. The runtime file may be quite large, so it may take some time depending on your internet connection speed.
6. Monitor the download: Keep an eye on the progress of the download to ensure it completes successfully. You may see a progress bar or percentage indicating how much of the file has been downloaded.
7. Save the file: Once the download is complete, choose a location on your computer to save the downloaded runtime file. You can create a new folder or save it to a location of your choice for easy access during the installation process.
By following these steps, you can successfully download the latest runtime for your Oculus Rift. In the next section, we will guide you through the installation process to ensure that the new runtime is properly installed on your computer.
Installing the New Runtime
Once you have downloaded the latest Oculus Rift runtime, you can proceed with the installation process. Follow these steps to install the new runtime:
1. Locate the downloaded file: Navigate to the location where you saved the downloaded Oculus Rift runtime file. It may be in your Downloads folder or the folder you designated during the download process.
2. Double-click the installation file: Double-click on the installation file to start the installation process. This will prompt the installer to open and begin preparing for installation.
3. Follow the on-screen instructions: The installer will guide you through the installation process with on-screen instructions. Read and follow each step carefully to ensure a successful installation.
4. Agree to the terms and conditions: During the installation process, you may be prompted to accept the terms and conditions of the Oculus Rift runtime. Read the terms and conditions and click on the “Agree” or “Accept” button to proceed with the installation.
5. Choose the installation location: The installer may provide you with an option to choose the destination folder for the installation. You can either stick with the default location or choose a different folder if desired.
6. Start the installation: Once you have confirmed the installation location, click on the “Install” or “Next” button to initiate the installation process. The installer will begin unpacking the necessary files and installing the new runtime on your computer.
7. Wait for the installation to complete: The installation process may take a few minutes to complete, depending on the speed of your computer. Avoid interrupting the installation or shutting down your computer during this time.
8. Complete the installation: Once the installation is finished, you may be prompted to restart your computer. Follow any additional on-screen instructions to complete the installation process.
After restarting your computer, the new Oculus Rift runtime should be successfully installed and ready to use. In the next section, we will discuss how to configure the updated runtime to ensure optimal performance and compatibility.
Configuring the Updated Runtime
After installing the updated Oculus Rift runtime, it’s important to configure the settings to ensure optimal performance and compatibility. Follow these steps to configure the new runtime:
1. Launch the Oculus app: Open the Oculus app on your computer if it’s not already open. This is the central hub where you can access and manage your Oculus Rift settings.
2. Access the settings: Click on the gear icon at the top right corner of the Oculus app to open the settings menu. Here, you can access various options to customize your Oculus Rift experience.
3. Check general settings: Navigate to the “General” tab in the settings menu and review the general settings. You can adjust options such as home environment, notifications, and privacy settings according to your preferences.
4. Configure guardian boundaries: Go to the “Guardian” tab in the settings menu. Here, you can set up and customize your guardian boundaries, which help you define a safe play area to avoid obstacles while using your Oculus Rift.
5. Check audio and microphone settings: Navigate to the “Audio” tab in the settings menu. Verify that the correct audio devices are selected for playback and microphone input. Adjust the volume settings as needed.
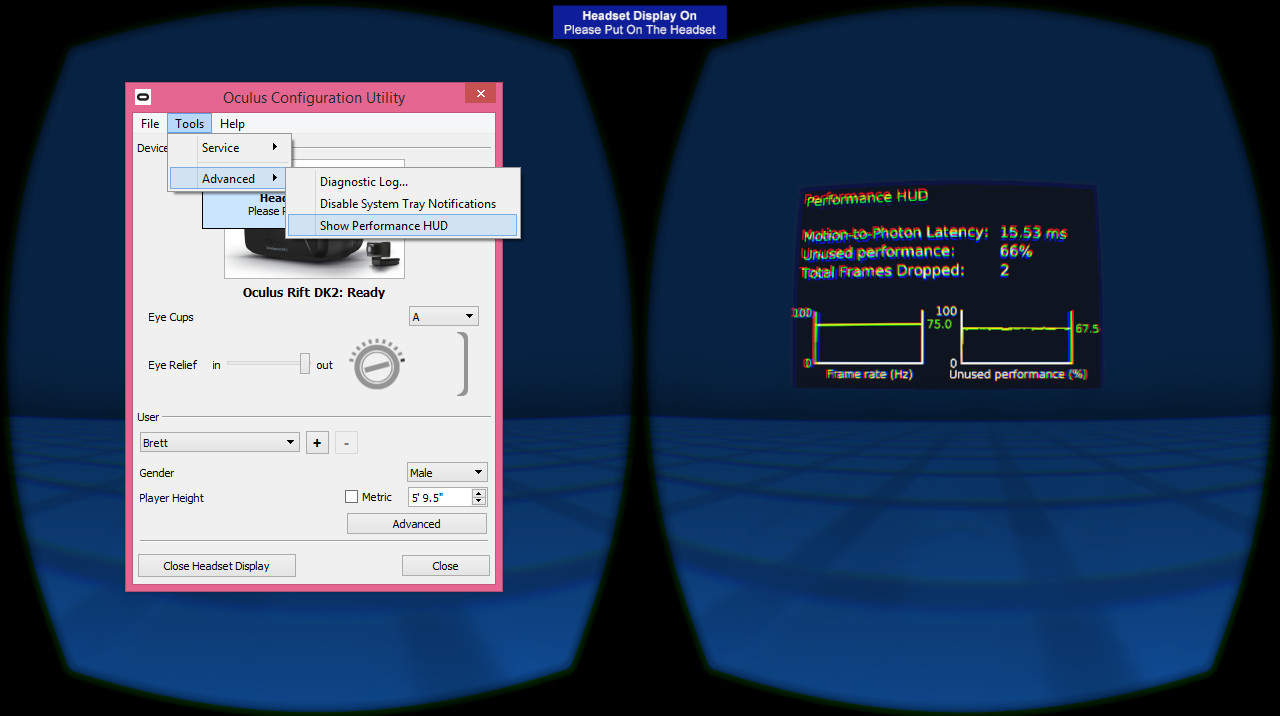
6. Explore advanced settings: If you’re comfortable with advanced settings, navigate to the “Advanced” tab in the settings menu. Here, you can access additional options like performance settings, experimental features, and developer options.
7. Enable or disable features: Depending on your preferences and needs, you can enable or disable specific features or options in the settings menu. Explore the available options and make adjustments based on your requirements.
8. Apply changes: After making any configuration changes, click on the appropriate buttons or save options to apply the changes. The Oculus app will update the settings and ensure they are in effect for the updated runtime.
By properly configuring the settings, you can enhance your Oculus Rift experience and tailor it to your specific needs. In the next section, we will discuss some common issues that you may encounter during the update process and provide troubleshooting tips to resolve them.
Troubleshooting Common Issues
While updating your Oculus Rift runtime, you may encounter some common issues. Here are some troubleshooting tips to help resolve these issues:
1. Update errors: If you encounter errors during the update process, try restarting your computer and the Oculus app. Ensure that your internet connection is stable and try updating again. If the issue persists, check the Oculus support website for any known issues or contact their support team for assistance.
2. Device not detected: If your Oculus Rift headset is not being detected by your computer, check the cables and connections. Reconnect the USB and HDMI cables, and ensure that they are securely plugged in. Try using different USB ports on your computer as well. If the problem continues, try restarting your computer and the Oculus app.
3. Graphics issues: If you experience graphics issues, such as graphical glitches or low frame rates, make sure your graphics card drivers are up to date. Visit the manufacturer’s website to download and install the latest drivers for your graphics card. Additionally, ensure that your computer meets the minimum system requirements for the Oculus Rift and that your graphics card is compatible.
4. Tracking issues: If there are tracking issues with your Oculus Rift, ensure that the sensors are properly positioned and securely mounted. Check for any obstructions or reflective surfaces that may interfere with the tracking. It’s also a good idea to clean the sensors and the headset lenses with a microfiber cloth to remove any smudges or dust that could affect tracking performance.
5. Software conflicts: If you encounter conflicts with other software applications, try closing or disabling any unnecessary background programs. Some third-party software, such as antivirus or firewall programs, may interfere with the Oculus Rift runtime. Temporarily disabling these programs during the update process can help resolve any conflicts.
6. Reinstalling the Oculus app: If all else fails, you may need to uninstall and reinstall the Oculus app. This can help resolve any software-related issues that may be causing problems with the Oculus Rift runtime. Make sure to back up any important data before uninstalling, as it may be removed during the process.
If you continue to experience issues with your Oculus Rift after trying these troubleshooting tips, it’s recommended to visit the Oculus support website or contact their support team for further assistance. They will be able to provide you with more in-depth troubleshooting steps and guide you through resolving any complex issues.
Now that we’ve covered common troubleshooting techniques, let’s move on to some additional tips and recommendations to enhance your experience with the Oculus Rift runtime.
Additional Tips and Recommendations
Now that you have successfully updated and configured your Oculus Rift runtime, here are some additional tips and recommendations to enhance your experience:
1. Keep your drivers updated: Regularly update your graphics card drivers, as well as other essential drivers on your computer. This can help ensure optimal performance and compatibility with the Oculus Rift runtime.
2. Take regular breaks: Virtual reality can be immersive and intense on your eyes and body. Remember to take regular breaks to rest your eyes and avoid motion sickness. Follow the recommended guidelines for usage duration to prevent discomfort.
3. Explore VR experiences: The Oculus Rift offers a wide range of virtual reality experiences, from games to educational apps and more. Take the time to explore and discover new experiences that interest you.
4. Engage with the Oculus community: Join the Oculus community forums or social media groups to connect with other Rift users. You can learn from their experiences, get recommendations, and even find answers to any lingering questions.
5. Consider additional accessories: Depending on your preferences, you may want to consider purchasing additional accessories, such as VR controllers or a VR cover for added comfort and immersion during your VR sessions.
6. Update third-party software: If you use any third-party software or applications with your Oculus Rift, ensure that you update them regularly. This can help prevent any compatibility issues and improve your overall experience.
7. Stay informed with Oculus updates: Keep an eye out for updates and announcements from Oculus. They often release new features, improvements, and compatibility updates for the Rift. Staying informed will ensure that you have the latest enhancements for your VR experience.
8. Share your experiences: If you’re enjoying your Oculus Rift, consider sharing your experiences with friends and family. Let them try out the VR experience and share in the excitement of virtual reality.
By following these tips and recommendations, you can make the most out of your Oculus Rift runtime and enjoy a truly immersive virtual reality experience. Remember to stay updated and embrace the ever-evolving world of virtual reality. Now, go forth and dive into the exciting realm of VR!