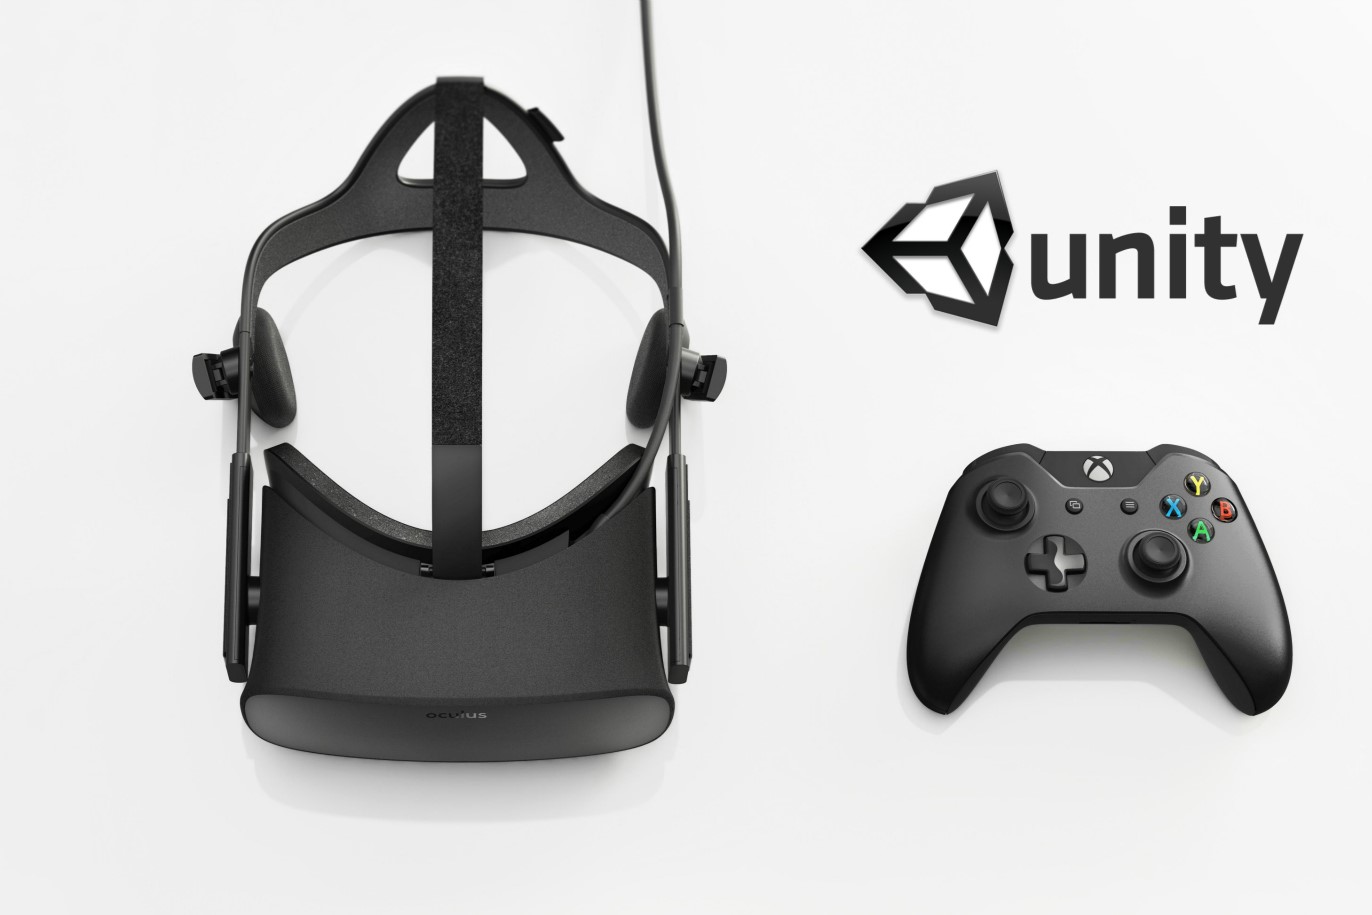
Preparing Your Environment
Before diving into setting up your Oculus Rift with Unity, it’s essential to ensure that your environment is properly configured. This will help streamline the installation process and minimize any potential issues. Here are a few steps to follow before getting started:
- Check Your Computer Specifications: Make sure your computer meets the minimum requirements for running Oculus Rift and Unity. This includes having a compatible operating system, sufficient RAM, and a capable graphics card.
- Install Oculus App: Visit the Oculus website and download the Oculus app. Follow the instructions to install it on your computer. This app will serve as the central hub for managing your Rift device.
- Update Graphics Drivers: To ensure optimal performance, download and install the latest drivers for your graphics card. Check the website of the manufacturer (e.g., NVIDIA or AMD) for the most up-to-date drivers.
- Connect Oculus Rift: Connect your Oculus Rift headset to your computer using the included USB and HDMI cables. Make sure the headset is properly plugged in and the cables are securely connected.
- Set Up Oculus Sensors: Place the Oculus sensors in your desired location. These sensors track the movement of your headset and controllers. Follow the instructions provided by Oculus to correctly position and set up the sensors.
- Clear Play Area: Clear an area where you can comfortably move around while wearing the headset. Ensure there are no obstacles or fragile objects that could be accidentally knocked over during gameplay.
By following these steps, you will have a solid foundation for setting up your Oculus Rift and Unity environment. This will help ensure a smooth and enjoyable experience as you dive into creating virtual reality experiences. Now that the environment is ready, let’s move on to the next steps of the setup process.
Setting Up Oculus Rift
Once you have prepared your environment, the next step is to set up your Oculus Rift headset. This involves completing a few necessary configurations to ensure your device is ready for use. Here are the steps to get your Oculus Rift up and running:
- Run Oculus App: Launch the Oculus app on your computer. If it’s your first time using the app, you will need to create an Oculus account and go through the initial setup process.
- Configure Your Headset: In the Oculus app, navigate to the Devices section and follow the on-screen instructions to configure your headset. This usually involves adjusting the fit, IPD (interpupillary distance), and audio settings.
- Set Up Controllers: If you have Oculus Touch controllers, pair them with your headset by following the instructions in the Oculus app. Make sure the controllers are fully charged and turned on before attempting to pair them.
- Calibrate the Sensors: In the Oculus app, go to the Devices section and select the option to calibrate the sensors. Follow the instructions to ensure accurate tracking of your headset and controllers.
- Adjust Guardian System: The Guardian system helps create a virtual boundary to prevent you from bumping into objects while immersed in VR. Set up your Guardian system by following the prompts in the Oculus app and defining your play area.
- Test Your Setup: Once your Oculus Rift is configured, you can run a quick setup test to ensure everything is functioning correctly. Put on your headset and follow the on-screen instructions to complete the test.
With these steps, you will have successfully set up your Oculus Rift headset. Ensure that all the components are working properly before proceeding to the next steps. Once your Oculus Rift is ready, it’s time to install Unity and the Oculus Integration assets to start building your VR experiences.
Installing Unity and Oculus Integration
To develop VR experiences for Oculus Rift, you will need to install Unity, a powerful game development platform, and the Oculus Integration assets. These assets provide the necessary tools and functionality to create immersive VR applications. Follow these steps to get started:
- Download Unity: Visit the Unity website and download the latest version of Unity Hub. Unity Hub is a unified launcher that allows you to manage different versions of Unity and access additional features.
- Install Unity: Once Unity Hub is downloaded, run the installer and follow the instructions to install Unity on your computer. Make sure to select the desired components and modules required for VR development.
- Create a Unity ID: If you don’t already have one, create a Unity ID on the Unity website. This will enable you to access Unity’s vast library of resources, tutorials, and community forums.
- Launch Unity Hub: Open Unity Hub and sign in with your Unity ID. This will allow you to manage Unity projects and access the Unity Asset Store.
- Create a New Project: Click on the “New” button in Unity Hub to create a new project. Specify a name and location for your project, and select the appropriate 3D template.
- Import Oculus Integration Assets: In the Unity Editor, navigate to the Asset Store window. Search for “Oculus Integration” and download the Oculus Integration package. Import the package into your Unity project.
By following these steps, you have installed Unity and imported the necessary Oculus Integration assets. This lays the foundation for building VR experiences specifically designed for Oculus Rift. Now that everything is set up correctly, you can proceed to create a new project in Unity and start developing your virtual reality application.
Creating a New Project in Unity
With Unity and the Oculus Integration assets installed, it’s time to create a new project to start developing your VR experience. This section will guide you through the process of setting up a new Unity project:
- Launch Unity: Open Unity Hub and ensure that you are signed in with your Unity ID. On the Projects tab, click on the “New” button.
- Project Name and Location: In the New Project window, enter a name for your project and specify the location where you want to save it. Consider choosing a descriptive name that reflects the nature of your VR experience.
- Template Selection: Select the appropriate template for your project. Since you are building a VR experience for Oculus Rift, choose a 3D template to provide a starting point focused on three-dimensional interactions.
- Unity Version: Choose the Unity version that you installed with Unity Hub. It is recommended to use the latest stable version for the best compatibility with the Oculus Integration assets.
- Create the Project: Hit the “Create” button to generate the new Unity project. Unity will set up the necessary files and folders based on your choices.
By following these steps, you have successfully created a new project in Unity specifically tailored for your Oculus Rift VR experience. You are now ready to import and configure the Oculus Integration assets in the Unity Editor, which will enable you to harness the full potential of the Oculus Rift hardware and SDK. In the next section, we will explore the process of importing the Oculus Integration assets into your Unity project.
Importing Oculus Integration Assets
With your new Unity project set up, the next step is to import the Oculus Integration assets. These assets provide the necessary tools and functionality to seamlessly integrate your project with the Oculus Rift hardware and software. Here’s how you can import the Oculus Integration assets into your Unity project:
- Open Unity Editor: Launch the Unity Editor by opening your newly created Unity project.
- Navigate to Asset Store: In the Unity Editor, go to the Window menu and select “Asset Store.” This will open the Asset Store window.
- Search for Oculus Integration: In the Asset Store window, enter “Oculus Integration” into the search bar. The Oculus Integration package should appear as one of the search results.
- Import the Package: Click on the Oculus Integration package to open its details. Then, click on the “Import” button to begin the import process.
- Select Import Options: In the import dialog, make sure all the desired assets are selected for import. By default, all necessary assets should be checked. Leave the settings as they are and click on “Import” to start importing the package.
- Wait for Import to Complete: Unity will now import the Oculus Integration assets into your project. This may take some time depending on the size of the package and your computer’s performance. Once the import is complete, you can access the Oculus Integration assets in the Unity Editor.
By following these steps, you have successfully imported the Oculus Integration assets into your Unity project. These assets provide a wide range of tools, scripts, and prefabs specifically designed to facilitate development for Oculus Rift. In the next section, we will explore how to configure the player settings in Unity to optimize your VR experience.
Configuring Player Settings
Once you have imported the Oculus Integration assets into your Unity project, the next step is to configure the player settings. These settings define various aspects of your VR experience and ensure compatibility with the Oculus Rift hardware and software. Here’s how you can configure the player settings in Unity:
- Open Player Settings: In the Unity Editor, go to the “File” menu and select “Build Settings.” This will open the Build Settings window.
- Select Platform: In the Build Settings window, select the platform “PC, Mac & Linux Standalone.” This platform allows you to build and run your VR experience on the Oculus Rift.
- Configure XR Settings: Click on the “Player Settings” button to open the Player Settings window. In the XR Settings section, make sure “Virtual Reality Supported” is checked. This enables VR functionality in your project.
- Add Oculus Rift Support: Scroll down to the “Virtual Reality SDKs” section in the Player Settings window. Click on the “+” button and select “Oculus” from the drop-down menu. This adds Oculus Rift support to your project.
- Set Oculus as Default: Drag the newly added “Oculus” SDK to the top of the VR SDKs list. This ensures that Oculus is the default VR platform and will be used when running your project.
- Configure Other Settings: Go through the various player settings and adjust them according to your project’s requirements. This may include graphics settings, audio configurations, input settings, and more.
- Save Player Settings: Once you have configured the desired player settings, click on the “Build” button in the Build Settings window to save the changes and close the player settings.
By following these steps, you have successfully configured the player settings in Unity for your Oculus Rift VR experience. These settings ensure proper compatibility and functionality when running your project on the Oculus Rift headset. In the next section, we will explore how to set up the Oculus Rift SDK to establish communication between Unity and the Oculus hardware.
Setting Up Oculus Rift SDK
To establish communication between Unity and the Oculus Rift hardware, you need to set up the Oculus Rift SDK in your Unity project. The Oculus Rift SDK provides the necessary tools and libraries for seamless integration with the headset and its features. Follow these steps to set up the Oculus Rift SDK in Unity:
- Download Oculus Rift SDK: Visit the Oculus developer website and download the Oculus Rift SDK that matches your Unity version. Make sure to choose the correct version to ensure compatibility.
- Import Oculus Rift SDK: In the Unity Editor, go to the Assets menu and select “Import Package” > “Custom Package.” Browse to the location where you downloaded the Oculus Rift SDK and select the package file to import it into your project.
- Import the Necessary Files: In the import dialog, make sure all the required files are selected for import. These files should include the necessary scripts, prefabs, and other assets that are part of the Oculus Rift SDK.
- Wait for Import to Complete: Unity will now import the Oculus Rift SDK assets into your project. This process may take some time depending on the size of the package and your computer’s performance.
- Verify Import: Once the import is complete, navigate to the Project window and ensure that the Oculus Rift SDK assets are visible. You should see scripts, prefabs, and other resources related to the Oculus Rift integration.
- Refer to Documentation: It is highly recommended to refer to the Oculus Rift SDK documentation to understand how to utilize the provided assets and scripts in your project. The documentation will help you leverage the full capabilities of the Oculus Rift hardware in your VR experience.
By following these steps, you have successfully set up the Oculus Rift SDK in your Unity project. This integration allows Unity to communicate with the Oculus Rift hardware and utilize its features to create immersive VR experiences. Now that the Oculus Rift SDK is set up, you can proceed to create a basic scene in Unity for your VR application.
Creating a Basic Scene
Now that you have set up the Oculus Rift SDK in your Unity project, it’s time to create a basic scene for your virtual reality (VR) application. A scene in Unity consists of various objects, environments, and interactive elements that make up the virtual world that users can experience through the Oculus Rift headset. Follow these steps to create a basic scene in Unity:
- Open Unity Editor: Launch the Unity Editor and open your project.
- Create a New Scene: In the Project window, right-click and select “Create” > “Scene.” Give your scene an appropriate name.
- Add Objects: In the Hierarchy window, right-click and select “3D Object” to add objects such as cubes, spheres, or other primitive shapes to your scene. You can also import custom 3D models if desired.
- Position and Scale Objects: Select the objects in the Scene or Hierarchy window and use the Transform component to position and scale them according to your desired layout.
- Add Environment: To enhance the visual appeal of your scene, you can add environments such as skyboxes, terrains, or imported 3D environments.
- Set Up Lighting: Adjust the lighting in your scene by adding directional, point, or spotlights to achieve the desired visual atmosphere.
- Configure Physics: If your scene requires physics interactions, you can add colliders and rigidbodies to objects to enable realistic interactions and movements.
- Optimize Performance: To ensure smooth performance on the Oculus Rift, optimize your scene by reducing unnecessary polygons, batching objects, and using occlusion culling where needed.
By following these steps, you have created a basic scene in Unity for your VR application. This scene serves as the canvas for building immersive experiences that users can explore using the Oculus Rift headset. Keep in mind that the complexity of your scene will depend on the nature of your VR application and its intended functionalities. In the next section, we will explore how to add the VR Camera Rig to your scene, enabling users to view and interact with the virtual environment.
Adding VR Camera Rig
In order to enable users to view and interact with your virtual reality (VR) scene using the Oculus Rift headset, you need to add a VR camera rig to your scene. The VR camera rig acts as the user’s virtual eyes, providing the necessary perspective and immersion. Follow these steps to add the VR camera rig to your Unity scene:
- Select GameObject: In the Hierarchy window, right-click and select “VR” > “VR Camera” to add the VR camera rig to your scene.
- Position and Scale the VR Camera Rig: Use the Transform component to position and scale the VR camera rig object to ensure it is appropriately sized and aligned for your scene. It is crucial to keep in mind the user’s field of view and comfortable viewing angles.
- Add Tracking Space: The VR camera rig requires a tracking space, which determines the user’s position and movement within the VR scene. Select the VR camera rig object in the Hierarchy window and click on “Add Component” to add the “OVR Player Tracker” component.
- Configure Tracking Space: In the Inspector window, you can configure various settings for the tracking space. This includes choosing between stationary or room scale tracking, adjusting tracking sensitivity, and enabling or disabling head tracking options.
- Set Up Player Controller: The VR camera rig also includes a player controller that enables movement within the scene. Select the VR camera rig object in the Hierarchy window and click on “Add Component” to add the “OVR Player Controller” component.
- Configure Player Controller: In the Inspector window, you can adjust settings related to player movement, such as walking speed, jumping, and gravity. Experiment with these settings to achieve the desired locomotion mechanics for your VR experience.
- Test in Play Mode: Enter Play Mode in the Unity Editor to test your scene with the VR camera rig. Make sure to have your Oculus Rift headset connected and properly configured, and ensure that the VR camera rig behaves as expected within the scene.
By following these steps, you have successfully added a VR camera rig to your Unity scene, allowing users to experience the virtual environment through the Oculus Rift headset. Make sure to test the VR camera rig in different scenarios and iterate on the settings and configurations to optimize the user experience. In the next section, we will explore how to configure VR settings to further enhance your VR application.
Configuring VR Settings
After adding the VR camera rig to your Unity scene, it’s essential to configure the virtual reality (VR) settings to optimize the user experience with the Oculus Rift headset. These settings allow you to fine-tune various aspects of the VR environment, including graphics, locomotion, input, and comfort options. Here’s how you can configure VR settings in Unity:
- Open Unity Editor: Launch the Unity Editor and open your project.
- Select VR Camera Rig: In the Hierarchy window, select the VR camera rig object you added to your scene.
- Configure Field of View (FOV): In the Inspector window, adjust the field of view (FOV) settings to determine the extent of the user’s peripheral vision. Consider the comfort and performance balance while setting the FOV.
- Set Stereo Rendering Mode: In the Inspector window, select the appropriate stereo rendering mode. The options include “Multi-Pass” or “Single-Pass” depending on which version of Unity you are using. Consult the Oculus documentation for recommendations based on your specific Unity version.
- Configure Locomotion: Modify locomotion settings to suit your VR experience. Adjust parameters related to walking speed, jumping, gravity, and any other player movement mechanics you have implemented. Consider comfort and realism when fine-tuning these settings.
- Customize Input Mapping: Utilize Unity’s input system or the Oculus Integration input mechanisms to map controller input to specific in-game actions. Create custom input schemes to ensure users can interact naturally with your VR application.
- Optimize Performance: Optimize your VR settings to ensure smooth performance on the Oculus Rift. Use techniques like culling, level of detail (LOD), and draw calls reduction to maintain a high frame rate and minimize latency. Refer to Unity’s performance optimization guidelines for additional suggestions.
- Test and Iterate: Regularly test and iterate on your VR settings to refine the user experience. Take user feedback into account and fine-tune settings based on usability and comfort.
By following these steps, you have successfully configured the VR settings for your Unity scene, ensuring a more immersive and enjoyable experience for users with the Oculus Rift headset. Remember to consider factors like comfort, performance, and usability when adjusting these settings. In the next section, we will explore how to test your VR application using the Oculus Rift headset.
Testing in Oculus Rift
After setting up and configuring your VR application in Unity, it’s crucial to test your project directly on the Oculus Rift headset to ensure that everything works as intended. Testing your project in the Oculus Rift provides an accurate representation of the user experience and allows you to identify and address any issues. Here’s how you can test your VR application using the Oculus Rift headset:
- Prepare Oculus Rift: Ensure that your Oculus Rift headset is connected to your computer and properly configured. Make sure the headset is positioned correctly and that the sensors are positioned for optimal tracking.
- Build and Run: In the Unity Editor, go to the “File” menu and select “Build Settings.” Choose your target platform as “PC, Mac & Linux Standalone” and click on the “Build and Run” button. This will compile your VR application and automatically launch it on the Oculus Rift headset.
- Put on the Oculus Rift: Wear the Oculus Rift headset and adjust it to fit comfortably. Ensure that the headset is properly positioned and that the lenses align with your eyes.
- Test Interactions: Move around in your VR scene and interact with the objects or elements you have implemented. Test locomotion mechanics, object interactions, and any other core features of your VR experience to ensure they function correctly.
- Assess Performance: Monitor the performance of your VR application while running on the Oculus Rift. Pay attention to frame rate, latency, and any performance bottlenecks that might affect the user experience. Make adjustments as necessary to optimize performance.
- Take User Feedback: Consider gathering feedback from test users who have tried your VR application on the Oculus Rift. Listen to their experiences and take note of any concerns or suggestions they may provide. Use this feedback to improve and iterate on your VR application.
- Iterate and Refine: Based on the test results and user feedback, make necessary improvements to your VR application. Iterate on the design, mechanics, and performance to ensure a polished and enjoyable experience on the Oculus Rift.
By following these steps, you can effectively test your VR application on the Oculus Rift headset. Testing on the actual hardware provides valuable insights and helps you fine-tune your VR experience for optimal performance and user satisfaction. Regular testing and iteration are crucial to create a high-quality and immersive VR application. In the next section, we will explore how to implement interactive elements and interactions with controllers in your VR scene.
Implementing Interactive Elements
To enhance user engagement and immersion in your virtual reality (VR) application built for the Oculus Rift, it’s essential to implement interactive elements that allow users to interact with and manipulate objects within the virtual environment. These interactive elements enable a more dynamic and engaging experience. Here’s how you can implement interactive elements in your VR scene:
- Create Interactive Objects: Identify the objects in your scene that should be interactive. These objects can be anything from buttons, doors, or levers to puzzle elements or tools.
- Add Interactive Components: Select the interactive objects in the Hierarchy window and add appropriate components to enable interaction. This can include colliders, rigidbodies, and scripts that handle the interaction logic.
- Implement Interaction Scripts: Write or modify scripts to control the behavior of interactive objects. For example, you can use scripts to handle object grabbing, rotation, scaling, or triggering animations based on user interactions.
- Set Up Interactions: Define how users can interact with the objects. This can involve using the Oculus Rift controllers to grab objects, push buttons, or trigger specific actions.
- Audio and Visual Feedback: Provide feedback to users when they interact with objects. Use visual cues like highlighting or changing the color of interactive objects, along with audio feedback such as sound effects or haptic feedback through the Oculus Touch controllers.
- Test and Refine Interactions: Regularly test your interactive elements to ensure they function as intended. Make adjustments based on user feedback and fine-tune the interaction mechanics to enhance user experience and usability.
- Implement Game Logic: If your VR application involves game mechanics or specific objectives, implement the associated logic to track progress, scoring, or the completion of tasks based on user interactions.
By following these steps, you can implement interactive elements in your VR scene that provide users with the ability to interact with and manipulate objects within the virtual environment. This interactivity significantly enhances user engagement and immersion, making the VR experience more captivating and enjoyable. Regular testing and refinement are key to ensuring that the interactive elements in your VR application are responsive, intuitive, and align with your desired user experience. In the next section, we will explore how to add interactions with Oculus Rift controllers in your VR scene.
Adding Interactions with Controllers
To further enhance user interaction in your virtual reality (VR) application for the Oculus Rift, it’s crucial to add interactions with the Oculus Rift controllers. These controllers allow users to have precise and intuitive control within the virtual environment. Here’s how you can add interactions with Oculus Rift controllers in your VR scene:
- Identify Interaction Points: Determine the objects or elements in your scene that users should be able to interact with using the Oculus Rift controllers. This can include buttons, levers, objects to pick up, or any other interactive elements.
- Attach Collider Components: Add colliders to the interactive objects so that the Oculus Rift controllers can detect collisions and interact with them accurately.
- Implement Controller Input Handlers: Write scripts that handle input from the Oculus Rift controllers. This can involve capturing button presses, joystick movement, or gestures, and mapping them to specific actions within your scene.
- Interact with Objects: Use the Oculus Integration assets and scripts to interact with the objects in your scene. This can include grabbing, manipulating, or activating objects based on user input and gestures.
- Enable Collision Detection: Ensure that the interactive objects have collision detection enabled so that users can interact with them physically. Use the Oculus Integration scripts and components to detect collisions and perform the desired interactions.
- Provide Feedback: Give users visual and auditory feedback to indicate successful interactions. This can involve highlighting selected objects, playing sound effects, or providing haptic feedback through the Oculus Rift controllers.
- Test and Iterate: Regularly test the interactions with Oculus Rift controllers in your VR scene and gather user feedback. Make necessary adjustments and iterate on the input handling and object interactions to optimize the user experience.
By following these steps, you can add interactions with Oculus Rift controllers in your VR scene, allowing users to interact with objects and elements naturally and intuitively. These interactions enhance the sense of presence and immersion in your VR application. Remember to test and iterate on your implementations to ensure that the interactions are responsive, smooth, and aligned with the desired user experience. In the next section, we will explore how to incorporate teleportation as a locomotion method in your VR scene.
Implementing Teleportation
To provide users with seamless navigation and locomotion within your virtual reality (VR) scene built for the Oculus Rift, implementing teleportation as a movement method can offer a comfortable and intuitive way to explore the environment. Teleportation allows users to move to different locations within the VR scene without the risk of motion sickness or disorientation. Here’s how you can implement teleportation in your VR scene:
- Identify Teleportation Points: Determine the locations within your VR scene where users can teleport to. These can be pre-defined points of interest or areas defined by gameplay or exploration objectives.
- Add Teleportation Markers: Place teleportation markers or target points at the identified teleportation locations. These markers can be visible objects, particles, or UI elements that indicate where users can teleport.
- Implement Teleportation Scripts: Write or modify scripts that handle the teleportation logic. This usually involves capturing user input, calculating the destination point, and teleporting the user to the desired location.
- Activate Teleportation: Determine the action or input method that triggers the teleportation. This can be a button press, gesture, or a combination of controller inputs.
- Calculate Teleportation Destination: Calculate the destination point based on the user’s input and the teleportation markers in the scene. Ensure that the destination is a valid and accessible location within the bounds of your VR environment.
- Smooth Transition: Enable a smooth transition during the teleportation process to avoid abrupt changes. This can include fading the visuals or using particle effects to create a more immersive experience.
- Provide Feedback: Give users visual or auditory feedback when they successfully teleport to a new location. This can involve playing sound effects, displaying animation, or providing haptic feedback through the Oculus Rift controllers.
- Test and Refine: Regularly test the teleportation mechanics in your VR scene and gather user feedback. Make adjustments as necessary to ensure that the teleportation feels natural, intuitive, and aligned with the desired user experience.
By following these steps, you can successfully implement teleportation as a movement method in your Oculus Rift VR scene. Teleportation provides a comfortable and immersive way for users to navigate and explore the virtual environment, enhancing the overall user experience. Remember to test and refine your teleportation implementation to ensure smooth transitions and user satisfaction. In the next section, we will explore how to implement object interaction in your VR scene, allowing users to interact with virtual objects using the Oculus Rift controllers.
Implementing Object Interaction
To further enhance user engagement and immersion in your virtual reality (VR) application built for the Oculus Rift, implementing object interaction allows users to interact with virtual objects using the Oculus Rift controllers. This enables users to manipulate, grab, and interact with objects within the VR environment. Here’s how you can implement object interaction in your VR scene:
- Identify Interactive Objects: Determine the objects in your scene that users can interact with. These can be buttons, levers, puzzle elements, or any other objects that respond to user input.
- Add Interactive Components: Attach appropriate components, such as colliders and rigidbodies, to the interactive objects to enable physics-based interactions and collisions.
- Implement Grabbing Scripts: Write or modify scripts to handle object grabbing and manipulation. These scripts should capture user input from the Oculus Rift controllers and enable users to pick up, move, and release objects.
- Implement Object Interactions: Write additional scripts to handle specific interactions with objects, such as button presses, switches, or triggers. These scripts should define the behavior of the objects based on user input.
- Provide Visual and Auditory Feedback: Add visual and auditory feedback to indicate successful interactions. This can include highlighting selected objects, playing sound effects, or providing haptic feedback through the Oculus Rift controllers.
- Enable Realistic Physics: Adjust the physics settings of the interactive objects to ensure realistic and responsive interactions. Use parameters like mass, friction, and gravity to create a satisfying physics-based interaction experience.
- Test and Refine Interactions: Regularly test your object interaction mechanics in the VR scene and gather user feedback. Make adjustments based on the feedback received to improve the responsiveness, realism, and overall user experience.
- Consider Additional Interactions: Explore other forms of object interaction, such as object scaling, rotation, or complex interactions based on hand gestures. These additional interactions can further enhance the realism and interactivity of your VR application.
By following these steps, you can implement object interaction in your Oculus Rift VR scene, allowing users to interact with and manipulate virtual objects using the Oculus Rift controllers. Object interaction adds a layer of interactivity and realism to your VR experience, making it more engaging and immersive for users. Remember to test and refine your object interaction implementation to ensure smooth interactions and user satisfaction. In the next section, we will explore ways to optimize the performance of your VR application for a smoother and more enjoyable experience on the Oculus Rift.
Optimizing Performance
To ensure a smooth and enjoyable virtual reality (VR) experience on the Oculus Rift, it’s essential to optimize the performance of your VR application. Optimizing performance ensures that the application runs smoothly, reduces latency, and maintains a high frame rate, ultimately enhancing user immersion. Here are some key strategies to optimize the performance of your VR application:
- Optimize Graphics: Use efficient rendering techniques such as level of detail (LOD), occlusion culling, and texture compression to reduce the rendering workload. Keep polygon counts and draw calls as low as possible, and utilize shader optimization techniques to improve performance.
- Streamline Physics: Optimize physics calculations by using simplified colliders, minimizing unnecessary physics interactions, and optimizing rigidbody settings. Consider using more performant collision detection algorithms, such as mesh simplification or pre-calculated collision meshes, to reduce computational overhead.
- Manage Assets: Compress textures and audio files to reduce memory usage. Unload and load assets dynamically as needed to minimize memory footprint during runtime.
- Implement Level Streaming: Divide large scenes into smaller manageable chunks and stream them in and out based on the user’s position and line of sight. This helps reduce the overall memory and processing demands of your VR application.
- Minimize Post-Processing Effects: Limit the use of post-processing effects, such as blurs, ambient occlusion, or motion blur, as they can be computationally expensive. Use them sparingly and consider optimizing or simplifying them to achieve desired visual quality.
- Optimize Scripting: Identify performance bottlenecks in your Unity scripts and optimize critical sections. Reduce excessive use of Update() functions, leverage object pooling for frequent instantiations, and use coroutines instead of Update() for long-running tasks.
- Profile and Monitor Performance: Use Unity’s built-in profiling tools and the Oculus performance profiler to identify and address performance issues. Monitor key metrics, such as frame rate, CPU usage, GPU usage, and memory consumption, to identify areas that need optimization.
- Test on Target Hardware: Regularly test your VR application on the Oculus Rift hardware to evaluate performance and ensure optimal user experience. Hardware performance may differ from your development machine, so testing and optimizing on the target hardware is crucial.
- Iterate and Improve: Continuously iterate on your optimization efforts based on feedback and testing. Monitor user performance metrics and address specific areas of concern to further enhance the performance of your VR application.
By following these optimization strategies, you can significantly improve the performance of your VR application on the Oculus Rift. Remember that performance optimization is an ongoing process, and it’s crucial to regularly assess and fine-tune your application to provide users with a smooth, immersive, and comfortable VR experience.
Building and Deploying the Project
Once you have completed the development and optimization of your virtual reality (VR) application for the Oculus Rift, the next step is to build and deploy the project. This process allows you to create a standalone executable file that can be shared and experienced by others. Here’s how you can build and deploy your project for the Oculus Rift:
- Select Build Settings: In the Unity Editor, go to the “File” menu and select “Build Settings.” This will open the Build Settings window.
- Choose Target Platform: In the Build Settings window, select the target platform as “PC, Mac & Linux Standalone.” Ensure that the architecture matches the Oculus Rift’s required specifications.
- Define Build Options: Set any necessary build options such as the output directory, build name, and development or release configurations.
- Build the Project: Click on the “Build” button to generate the standalone executable file. Choose the desired location to save the build.
- Wait for the Build Process: Unity will now compile your project, gather all necessary assets, and create the build. This process may take some time, depending on the complexity of your project and the performance of your computer.
- Test the Build: Once the build is complete, navigate to the build folder and locate the executable file. Double-click on the file to launch the application. Test the build to ensure that it functions correctly and that all interactions and features are working as intended.
- Distribute the Build: Once the build is validated and tested, you can distribute it to others who can experience your VR application on their own Oculus Rift headsets. Share the build file through appropriate channels such as file-sharing platforms, Oculus Store, or your own distribution channels.
- Provide Documentation: Include any necessary documentation or instructions with the build, such as installation requirements, set-up instructions, and troubleshooting guidance, to ensure a smooth experience for users.
By following these steps, you can successfully build and deploy your VR project for the Oculus Rift headset. Distributing your application allows others to experience and enjoy the immersive virtual reality environment you have created. Remember to regularly update and improve your project based on user feedback and further developments in the Oculus Rift ecosystem.
Troubleshooting Common Issues
While developing virtual reality (VR) applications for the Oculus Rift, you may encounter common issues that can affect the performance or functionality of your project. Here are some troubleshooting tips to help resolve these issues and ensure a smooth VR experience:
- Performance Problems: If you’re experiencing performance issues, optimize your project by reducing polygon counts, optimizing shaders, and using efficient rendering techniques. Additionally, disable unnecessary post-processing effects and manage asset streaming to minimize memory usage.
- Tracking Issues: If the Oculus Rift sensors are not tracking properly, ensure that the sensors are securely placed in the correct position and angle. Calibrate the sensors through the Oculus app and ensure that the room is well-lit with no obstructions.
- Controller Connectivity: If the Oculus Rift controllers are not connecting or responding, check the batteries and ensure they are properly inserted. Restart the Oculus app, re-pair the controllers, and make sure there are no obstructions blocking the line of sight between the controllers and the sensors.
- Black Screen or No Display: If you’re encountering a black screen or no display on the Oculus Rift headset, check the HDMI and USB connections to ensure they are securely connected. Restart the Oculus app and try unplugging and re-plugging the headset cables.
- Audio Issues: If you’re experiencing audio problems, make sure that the Oculus Rift headset is set as the default audio output device in the Windows settings. Check the audio cable connections and ensure they are securely connected to the PC and headset.
- Input Mapping: If the input from the Oculus Rift controllers is not being registered correctly, ensure that you have configured the input mapping correctly in Unity. Double-check the button mappings and input axes to ensure they align with the Oculus Integration assets.
- Software and SDK Updates: If you encounter compatibility issues between Unity, Oculus Integration, and the Oculus Rift SDK, make sure you are using the latest versions of each software component. Update any outdated software or SDKs to ensure compatibility.
By following these troubleshooting tips, you can address common issues that may arise during the development of your Oculus Rift VR application. If the issue persists, consult the Oculus developer documentation, Unity forums, or reach out to the Oculus developer support for further assistance. Identifying and resolving these issues will enhance the overall quality and performance of your VR application.