
Check the HDMI Cable
One of the most common causes of HDMI connection problems is a faulty or damaged HDMI cable. To troubleshoot this issue, follow the steps outlined below.
- First, check both ends of the HDMI cable to ensure they are securely connected to the respective devices. Sometimes, loose connections can cause a loss of signal or a distorted image.
- Inspect the cable for any signs of physical damage, such as frayed or bent connectors. If you notice any damage, it’s best to replace the cable with a new one.
- If you have another HDMI cable available, try using it to connect the devices. This will help determine whether the issue is with the cable or another component.
- Make sure that the HDMI cable you are using is compatible with both the source device (e.g., DVD player, gaming console) and the display device (e.g., TV, monitor). Check the specifications of both devices to ensure they support the same HDMI version (e.g., HDMI 1.4, HDMI 2.0).
After performing these steps, check if the HDMI connection problem persists. If the issue is resolved, it was likely caused by a faulty cable. However, if the problem continues, you may need to explore other troubleshooting steps.
Ensure the Devices are Powered On
When experiencing HDMI connection problems, one of the first things to check is whether the devices are powered on. Many times, a simple oversight can cause the HDMI connection to fail. Follow the steps below to troubleshoot this issue.
- Check that both the source device (e.g., laptop, Blu-ray player) and the display device (e.g., TV, projector) are turned on. Ensure that they are plugged into a power source and that the power indicator lights are illuminated.
- If the devices are powered on but there is still no HDMI signal, try turning them off and then back on again. This can help to reset any minor glitches or software issues that may be causing the problem.
- Verify that the HDMI cable is firmly connected to both devices. Sometimes, the connection might become loose or partially disconnected, resulting in a loss of signal.
- Ensure that the correct input source is selected on the display device. Most TVs and monitors have multiple HDMI inputs, so it’s important to choose the one that corresponds to the device you’re trying to connect.
By following these steps, you can verify that the devices are powered on correctly and eliminate any simple oversights that may be causing the HDMI connection problem. If the issue persists, proceed to the next troubleshooting steps.
Verify the HDMI Input Source
If you are experiencing HDMI connection problems, it is essential to confirm that the correct input source is selected on the display device. This step is crucial because displays often have multiple input options, and selecting the wrong one can result in no signal or a distorted image. Follow the steps below to troubleshoot this issue effectively.
- On your TV or monitor, locate the input selection button on the remote control or the display’s control panel. Press this button to access the input/source menu.
- Navigate through the input/source menu to find the HDMI input options. The label of the HDMI input ports may vary depending on the make and model of your display device.
- Select the HDMI input that corresponds to the port to which your source device (e.g., gaming console, cable box) is connected.
- After selecting the correct HDMI input, wait for a few seconds to allow the devices to establish a connection. In some cases, the display device may take a moment to recognize the signal and adjust accordingly.
If you have verified the HDMI input source and still have no signal or a distorted image, it’s recommended to try different HDMI inputs on the display device. This will help determine if the issue lies with a specific HDMI input port rather than the connection itself. Additionally, ensure that the HDMI cable is securely connected to both the source device and the display device.
By following these steps, you can ensure that the correct HDMI input source is selected, enabling a proper connection between your source device and the display. If you continue to experience HDMI connection problems, proceed to the next troubleshooting steps.
Try a Different HDMI Port
If you’re encountering HDMI connection problems, it’s worth considering the possibility that the HDMI port you’re currently using on your display device may be faulty or malfunctioning. By trying a different HDMI port, you can determine if the issue is specific to one port or if it persists across multiple ports. Follow the steps below to troubleshoot this potential problem effectively.
- Take a careful look at your display device and locate the HDMI ports. Depending on the make and model, there may be multiple HDMI ports available.
- Disconnect the HDMI cable currently connected to the display device and remove it from the current HDMI port. Ensure that you handle the cable gently and avoid forcefully pulling or twisting it.
- Insert the HDMI cable into a different HDMI port on your display device. Make sure it is securely plugged in to establish a proper connection.
- Adjust the input/source settings on your display device accordingly. Navigate to the source menu and select the new HDMI port that you have just connected the cable to.
Allow a few seconds for the display device to recognize the new HDMI port and establish a connection with the source device. Monitor the display to see if the HDMI connection problem has been resolved or if you continue to encounter issues.
If the HDMI connection functions properly with the new HDMI port, it suggests that the previous port may be defective. However, if you still experience the same problem despite changing ports, it indicates that the issue lies elsewhere and further troubleshooting steps are necessary.
Test with a Different HDMI Cable
If you’re facing HDMI connection problems, there’s a possibility that the HDMI cable you’re currently using is faulty or incompatible. Testing with a different HDMI cable allows you to determine if the issue lies with the cable itself. Follow the steps below to troubleshoot this potential problem effectively.
- Disconnect the current HDMI cable from both the source device and the display device. Handle the cable gently and avoid any unnecessary twisting or yanking.
- Obtain another HDMI cable that you know is functioning properly or borrow one from a trusted source.
- Connect the different HDMI cable between the source device and the display device. Ensure that it is securely plugged into both devices to establish a stable connection.
- Adjust the input/source settings on your display device, selecting the appropriate HDMI input that the new cable is connected to.
Allow a few seconds for the devices to recognize the new HDMI cable and establish a connection. Monitor the display to see if the HDMI connection problem has been resolved or if the issue persists.
If the HDMI connection is now working correctly with the new cable, it indicates that the previous cable was either damaged or incompatible with your devices. Consider replacing the faulty cable with a new one that meets the necessary specifications for your source and display devices.
However, if the problem persists even after testing with a different HDMI cable, it suggests that the issue lies elsewhere and further troubleshooting steps are required to resolve the HDMI connection problem.
Check the Display Settings
If you’re experiencing HDMI connection problems, it’s important to ensure that the display settings on your source device and display device are properly configured. Incorrect display settings can result in a loss of signal or an incompatible display resolution. Follow the steps below to troubleshoot this potential issue effectively.
- On your source device (e.g., computer, gaming console), navigate to the display settings. This can usually be found in the system settings or control panel.
- Check the display resolution settings. Make sure that the resolution is compatible with your display device. Choosing an unsupported resolution can result in a blank or distorted screen.
- If the display on your source device is set to an extended mode, select the duplicate or clone mode instead. This ensures that the display signal is properly transmitted to the external display device via HDMI.
- Verify the refresh rate settings. Some displays have specific refresh rate requirements, and setting a higher refresh rate than supported can cause issues with the HDMI connection.
- On your display device (e.g., TV, monitor), access the menu options and check for any specific HDMI settings. Some displays have HDMI-specific settings that need to be adjusted to ensure a proper connection.
- Make sure that any HDMI-CEC (Consumer Electronics Control) settings are enabled if you want to control multiple HDMI-connected devices with a single remote control. This setting may have different names depending on the manufacturer, such as Bravia Sync, Anynet+, or Simplink.
After adjusting the display settings on both your source device and display device, test the HDMI connection to see if the issue has been resolved. If you continue to experience problems, proceed to the next troubleshooting steps to further diagnose and resolve the HDMI connection issue.
Update the Device and HDMI Firmware/Software
If you’re encountering HDMI connection problems, it’s possible that outdated device firmware or software could be the root cause. Keeping your devices and HDMI firmware/software up to date can help resolve compatibility issues and ensure optimal performance. Follow the steps below to troubleshoot this potential problem effectively.
- Start by checking for any available firmware or software updates for your source device (e.g., Blu-ray player, streaming device) and display device (e.g., TV, projector). This information can usually be found in the system settings or through the manufacturer’s support website.
- If updates are available, download and install them according to the provided instructions. Make sure to follow any specific update procedures recommended by the manufacturer to avoid any potential issues.
- For HDMI firmware or software updates, consult the user manual or the manufacturer’s website for instructions and available resources. Some devices require a specific update process, such as using a USB flash drive or connecting to a computer.
- Follow the provided instructions to update the HDMI firmware or software. This update may address compatibility issues or improve the overall HDMI connection performance.
- If multiple HDMI devices are connected in a chain (e.g., HDMI splitter, AV receiver), ensure that each device in the chain is running the latest firmware or software version. Sometimes, compatibility issues can arise between different firmware or software versions.
After updating the firmware or software on your devices and HDMI components, test the HDMI connection to see if the issue has been resolved. If you continue to experience problems, proceed to the next troubleshooting steps to further diagnose and resolve the HDMI connection issue.
Restart the Devices
If you’re facing HDMI connection problems, a simple restart of your devices can sometimes resolve the issue. Restarting the devices can help clear any temporary glitches or software errors that may be causing the HDMI connection problem. Follow the steps below to troubleshoot this potential issue effectively.
- Begin by turning off both your source device (e.g., gaming console, Blu-ray player) and your display device (e.g., TV, monitor). Use the power buttons on the devices or their respective remotes to shut them down.
- Once both devices are turned off, unplug their power cords from the wall outlet or power strip. Wait for approximately 30 seconds to a minute.
- After the waiting period, plug the power cords back into the respective power sources. Ensure that both devices are securely connected to the power supply.
- Turn on your display device first, followed by your source device. Use the power buttons or the respective remotes to power up the devices.
- Allow the devices to start up fully and establish a connection. This may take a few moments, so be patient and monitor the display to check if the HDMI connection problem has been resolved.
By restarting both your source device and display device, you can refresh their software and potentially resolve any software-related issues affecting the HDMI connection. In some cases, this simple troubleshooting step can restore the functionality of the HDMI connection without the need for further troubleshooting.
If the HDMI connection problem persists even after restarting the devices, proceed to the next troubleshooting steps to further diagnose and resolve the issue.
Reset the Devices to Factory Settings
If you’re still experiencing HDMI connection problems, resetting your devices to factory settings can help resolve any persistent issues. This step will restore your devices to their original state, removing any customized settings or configurations that could be causing the HDMI connection problem. Follow the steps below to troubleshoot this potential problem effectively.
- Make sure to backup any important data or settings before proceeding with the reset, as it will erase all personalized configurations.
- Refer to the user manual or the manufacturer’s support website for instructions on how to perform a factory reset for your source device (e.g., gaming console, streaming device) and display device (e.g., TV, projector).
- Follow the provided instructions to initiate the factory reset process on each device. This may involve accessing the system settings, security settings, or advanced options on your devices.
- Once the factory reset is initiated, follow the prompts and confirm your decision to reset the devices. It may take a few minutes for the reset process to complete.
- After the reset is complete, the devices will reboot and return to their original factory settings.
Please note that performing a factory reset will erase all data and settings on your devices. Make sure to backup any important files or settings before proceeding. Once the devices have been reset, you will need to reconfigure them, including HDMI settings, network settings, and any personalized preferences.
Test the HDMI connection again to see if the issue has been resolved. If you continue to experience problems, there may be underlying hardware issues or compatibility concerns that require further troubleshooting or professional assistance.
Check for Physical Damage or Loose Connections
Physical damage or loose connections can often be the cause of HDMI connection problems. It’s important to inspect your devices and cables for any signs of damage and ensure that all connections are secure. Follow the steps below to troubleshoot this potential issue effectively.
- Examine the HDMI cable for any visible signs of damage or wear. Look for frayed or bent connectors, kinks, or cuts in the cable. If you notice any damage, it’s best to replace the cable with a new one.
- Check that both ends of the HDMI cable are securely plugged into the respective ports on your source device (e.g., DVD player, gaming console) and display device (e.g., TV, monitor). Ensure that the connectors are inserted straight and fully into the ports.
- If there are any adapters or converters used in the HDMI connection, inspect them for damage or loose connections. Make sure that all connections are secure and that the adapters are compatible with your devices.
- Try gently wiggling the HDMI cable at both ends while the devices are powered on. If this causes the image to flicker or the connection to drop, it may indicate a loose connection. In such cases, firmly plug in the HDMI cable to establish a more secure connection.
- If you’re using an HDMI wall plate or cable management system, check the connections to ensure they are secure. Loose connections or poorly connected wall plates can cause disruptions in the HDMI signal.
- Inspect the HDMI ports on your source device and display device for any physical damage or debris. Use a flashlight to check for bent or broken pins in the HDMI ports. If you notice any damage, consult the manufacturer’s support for further assistance.
By checking for physical damage and ensuring all connections are secure, you can eliminate any issues caused by faulty cables or poorly connected devices. If the HDMI connection problem persists, proceed to the next troubleshooting steps to further diagnose and resolve the issue.
Adjust the Display and Resolution Settings
Sometimes, HDMI connection problems can stem from incorrect display and resolution settings on your source and display devices. Incompatible display settings can result in a distorted image or no signal at all. Follow the steps below to troubleshoot this potential issue effectively.
- Access the display settings on your source device (e.g., computer, gaming console) and navigate to the resolution settings. Ensure that the resolution selected matches the supported resolution of your display device (e.g., TV, monitor).
- If the current resolution setting is not compatible, switch to a lower resolution temporarily and check if the HDMI connection stabilizes. You can gradually increase the resolution until you find the optimal setting that works with your display.
- Experiment with different aspect ratio settings (e.g., 16:9, 4:3) to see if it affects the HDMI connection. Some displays and source devices have specific aspect ratio requirements, so adjusting this setting may resolve compatibility issues.
- Try disabling any advanced display features or image enhancement settings, such as motion smoothing or dynamic contrast. These features may interfere with the HDMI signal and result in connection problems.
- On your display device (e.g., TV, monitor), access the picture settings or display options. Look for any specific HDMI-related settings, such as HDMI-CEC, and ensure they are enabled if required for proper connection and functionality.
- Restart your source device and display device after adjusting the display and resolution settings. This allows the devices to properly recognize and establish the HDMI connection with the new settings.
By adjusting the display and resolution settings on both your source and display devices, you can ensure compatibility and improve the stability of the HDMI connection. Test the HDMI connection again to see if the issue has been resolved. If you continue to experience problems, proceed to the next troubleshooting steps to further diagnose and resolve the HDMI connection issue.
Try a Different Display or Display Mode
If you’re encountering HDMI connection problems, it’s worth exploring the possibility that the issue lies with your current display device or display mode. Trying a different display or display mode can help determine if the problem is specific to your current setup. Follow the steps below to troubleshoot this potential problem effectively.
- Connect your source device (e.g., gaming console, laptop) to a different display device, such as another TV or monitor. This will help determine if the HDMI connection problem is related to the source device or the original display device.
- If available, try using a different type of display connection, such as VGA or DisplayPort, to see if it establishes a more stable connection. This will help identify if the HDMI port on either device is causing the issue.
- Switch the display mode on your source device, if applicable. For example, if you have been using an “Extended” display mode, try switching to “Duplicate” or “Second Screen Only” mode. This may help establish a better connection between the devices.
- Check the settings and capabilities of the alternate display device. Ensure that it supports the same HDMI version as your source device and that the appropriate HDMI input is selected.
- When testing with a different display, use the same HDMI cable to connect your source device. This helps eliminate the cable as a potential cause of the HDMI connection problem.
- If the HDMI connection works fine with a different display device or display mode, it suggests that the issue may be specific to your original display device or its settings. Consider further troubleshooting or consulting the manufacturer’s support for assistance.
By trying a different display or display mode, you can determine if the HDMI connection problem is related to your current display device or setup. This troubleshooting step helps narrow down the source of the issue and points toward potential solutions. If the problem persists, proceed to the next troubleshooting steps to further diagnose and resolve the HDMI connection issue.
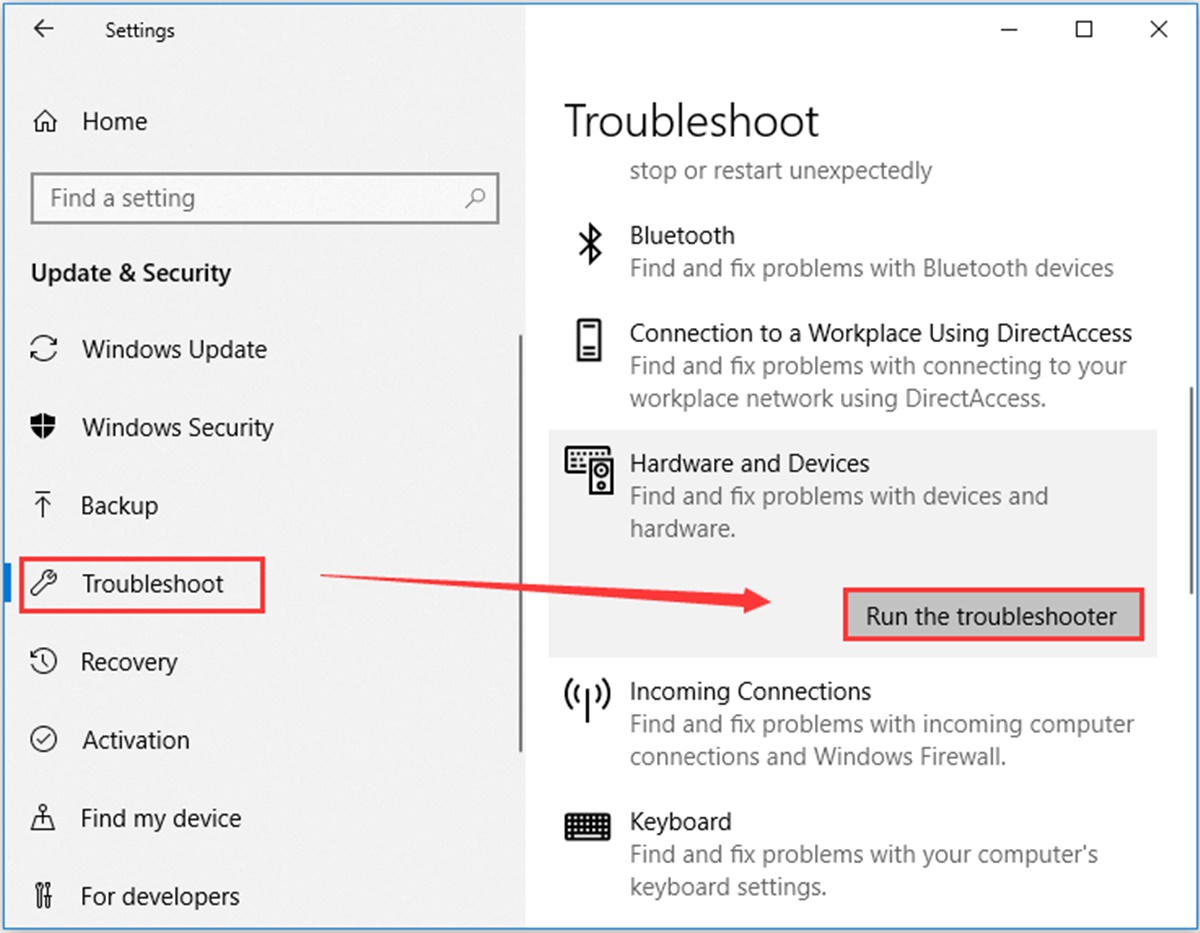
Update or Reinstall Graphics Drivers
Outdated or incompatible graphics drivers can often lead to HDMI connection problems. Keeping your graphics drivers up to date is crucial for ensuring a stable and reliable HDMI connection. Follow the steps below to troubleshoot this potential issue effectively.
- Identify the make and model of your graphics card or integrated graphics chipset. This information can typically be found in the specifications or system information of your computer.
- Visit the manufacturer’s website for your graphics card (e.g., NVIDIA, AMD, Intel) and navigate to the support or driver section.
- Search for the latest graphics drivers specific to your graphics card and operating system. Download the appropriate driver package and make a note of where the file is saved.
- Before installing the new driver, consider uninstalling the current graphics driver. This can help ensure a clean installation and prevent any conflicts or issues.
- Access the Device Manager on your computer by right-clicking on the Start button and selecting “Device Manager,” or by searching for “Device Manager” in the Windows search bar.
- Expand the “Display Adapters” section and identify your graphics card or integrated graphics chipset. Right-click on it and select “Uninstall device.” Follow the on-screen prompts to complete the uninstallation process.
- Once the old driver is uninstalled, locate the downloaded driver package and run the installation wizard. Follow the prompts to install the updated graphics driver on your computer.
- Restart your computer after the driver installation is complete. This allows the changes to take effect and ensures proper functionality of the updated graphics driver.
By updating or reinstalling the graphics drivers, you can address any compatibility issues that may be causing HDMI connection problems. Test the HDMI connection again to see if the issue has been resolved. If you continue to experience problems, proceed to the next troubleshooting steps to further diagnose and resolve the HDMI connection issue.
Disable HDCP on the Source Device
HDCP (High-bandwidth Digital Content Protection) is a form of digital copy protection that can sometimes cause HDMI connection issues. Disabling HDCP on your source device may help resolve compatibility problems and establish a successful HDMI connection. Follow the steps below to troubleshoot this potential issue effectively.
- Access the settings menu or control panel on your source device (e.g., Blu-ray player, streaming device).
- Look for a section related to HDCP or content protection in the settings menu. Depending on the device, it may be located in different areas such as display settings or video playback settings.
- Disable HDCP by toggling off the switch or selecting the option to turn it off. The wording and location may vary depending on the device and its user interface.
After disabling HDCP on your source device, test the HDMI connection again to see if the issue has been resolved. If HDMI connection problems persist, try re-enabling HDCP to ensure compatibility with protected content. It’s worth noting that disabling HDCP may prevent the playback of some copyrighted content on your source device.
If disabling HDCP on the source device does not resolve the HDMI connection issue, consider enabling HDCP again and proceed to the next troubleshooting steps to further diagnose and resolve the HDMI connection issue.
Test with a Different Source Device
If you’re still facing HDMI connection problems, it’s important to rule out any issues with your current source device. Testing with a different source device can help determine whether the problem lies with the original device or if it’s specific to the connection or display device. Follow the steps below to troubleshoot this potential issue effectively.
- Connect a different source device (e.g., another laptop, DVD player) to your display device using the same HDMI cable and port.
- Ensure that the new source device is powered on and that the HDMI output is activated.
- Select the appropriate HDMI input on your display device to receive the signal from the new source device.
- Observe if the HDMI connection with the new source device is stable and displays the content correctly on the screen.
If the HDMI connection with the new source device works fine, it suggests that the issue may be specific to your original source device. Consider further troubleshooting or consulting the manufacturer’s support for assistance with the problematic device.
However, if the HDMI connection problem persists even with a different source device, it indicates that the issue may lie with either the HDMI cable, the HDMI port on your display device, or some other factor unrelated to the source device. Proceed with other troubleshooting steps to further diagnose and resolve the HDMI connection issue.
Consult the User Manual or Manufacturer’s Support
If you’ve tried the previous troubleshooting steps and are still experiencing HDMI connection problems, it may be time to consult the user manual or seek support directly from the manufacturer. The user manual provides valuable information about your devices’ features, settings, and troubleshooting steps specific to your model. Follow the steps below to troubleshoot this potential issue effectively.
- Locate the user manual for your source device and display device. The user manual is often included in the product packaging or can be downloaded from the manufacturer’s website.
- Refer to the troubleshooting section of the user manual and look for any specific HDMI connection issues or error codes mentioned.
- Follow the recommended troubleshooting steps outlined in the user manual to address the HDMI connection problem.
- If the troubleshooting steps provided in the user manual do not resolve the issue, visit the manufacturer’s website for further support options.
- On the manufacturer’s support website, look for a support section or a knowledge base where you can search for FAQs, troubleshooting guides, and software updates related to HDMI connection problems.
- If necessary, contact the manufacturer’s customer support directly via phone, email, or live chat. Provide them with detailed information about the HDMI connection problem, the devices involved, and the troubleshooting steps you have already tried.
The user manual and manufacturer’s support resources are valuable tools that can provide specific guidance and solutions for HDMI connection problems. The manufacturer’s support team is also trained to assist with resolving technical issues related to their products.
By consulting the user manual or seeking support from the manufacturer, you can access expert advice and solutions tailored to your specific devices. This can help you effectively diagnose and resolve the HDMI connection problem when other troubleshooting steps have not been successful.