
Preparing Your Samsung Device
Before transferring your data from your Samsung device to your new iPhone, you need to take a few essential steps to ensure a smooth and hassle-free transfer process. Follow these guidelines to prepare your Samsung device:
1. Charge your Samsung device: Firstly, make sure that your Samsung device is sufficiently charged. This will prevent any interruption during the data transfer process.
2. Update your Samsung device: Check for any available software updates on your Samsung device and install them if necessary. Updating your device ensures that you have the latest features and improvements.
3. Check your storage space: Verify that you have enough free storage space on your Samsung device to accommodate the data you want to transfer. Delete unnecessary files or move them to an external storage device to free up space.
4. Organize your data: Take some time to organize your data on your Samsung device. This includes organizing contacts, grouping photos into albums, and categorizing files. This will make it easier to locate and transfer specific data later on.
5. Sync your data: Sync your Samsung device with your Google account or Samsung account to ensure that your contacts, calendar events, and other important data are backed up in the cloud. This will make it easier to transfer this data to your new iPhone.
6. Backup your data: It is crucial to create a backup of your Samsung device before initiating the transfer process. This will serve as a safety net in case anything goes wrong during the transfer. You can backup your Samsung device using Samsung’s Smart Switch app or by connecting it to a computer and using Samsung Kies software.
By following these preparatory steps, you will be well-equipped to smoothly transfer your data from your Samsung device to your new iPhone. It is crucial to have a properly prepared Samsung device to ensure a successful and seamless data transfer process.
Backing Up Your Samsung Device
Creating a backup of your Samsung device is an essential step before transferring your data to a new iPhone. This backup will serve as a safety net in case anything goes wrong during the transfer process. Follow these steps to back up your Samsung device:
1. Samsung Smart Switch: Samsung provides a convenient and user-friendly solution for backing up your device called Smart Switch. Download the Smart Switch app from the Google Play Store and install it on your Samsung device. Open the app and follow the on-screen prompts to create a backup of your data. You can choose to back up your contacts, messages, photos, videos, music, and more.
2. Samsung Kies: Another option to back up your Samsung device is by using Samsung Kies software on your computer. Connect your Samsung device to your computer using a USB cable, then launch Samsung Kies. The software will detect your device and provide an option to back up your data. Select the data you want to include in the backup and initiate the backup process.
3. Cloud Backup: If you have synced your Samsung device with a Google account or Samsung account, your contacts, calendar events, and other important data may already be backed up in the cloud. Double-check your account settings to ensure that syncing is enabled and your data is up to date. This will make it easier to retrieve this data during the data transfer process.
4. External Storage: Another backup option is to manually copy your files, photos, and videos to an external storage device, such as an SD card or external hard drive. Connect the external storage device to your Samsung device and transfer the desired files manually. This method gives you full control over which files to back up and allows you to keep them separate from your device.
Remember to verify the integrity of your backup by accessing the files and confirming that they are complete and accessible. It is also recommended to store your backup in a secure location to safeguard against data loss or device damage.
By taking the time to back up your Samsung device, you can ensure the safety and security of your data during the transfer process. This backup will give you peace of mind and make the migration to your new iPhone a worry-free experience.
Preparing Your iPhone
Before you start transferring your data from your Samsung device to your new iPhone, there are a few important steps you need to take to prepare your iPhone. Follow these guidelines to ensure a smooth and successful transfer process:
1. Update iOS: It is crucial to update your iPhone to the latest version of iOS. This ensures that you have the most up-to-date features and compatibility improvements. To check for updates, go to Settings > General > Software Update and install any available updates.
2. Check storage space: Verify that your iPhone has sufficient storage space to accommodate the data you plan to transfer. You can check your storage usage by going to Settings > General > iPhone Storage. If you are running low on space, consider deleting unnecessary apps or files to free up space.
3. Sign in to your Apple ID: Ensure that you are signed in to your Apple ID on your iPhone. This will enable the seamless transfer of your purchased apps and content from the App Store and iTunes Store. To sign in, go to Settings > [Your Name] and tap Sign In.
4. Set up iCloud: Enable iCloud on your iPhone to backup your device settings, app data, photos, and more. This will make it easier to restore your data during the transfer process. To set up iCloud, go to Settings > [Your Name] > iCloud and enable the desired options, such as Photos, Contacts, and Notes.
5. Disable iMessage: If you are coming from an Android device and have been using iMessage, it is important to disable it to ensure a seamless transfer of text messages. Go to Settings > Messages and toggle off the iMessage option.
6. Check network connection: Make sure that your iPhone is connected to a stable Wi-Fi network or has a reliable mobile data connection. This is crucial for the smooth and uninterrupted transfer of data from your Samsung device.
By following these preparatory steps, you can ensure that your iPhone is ready to receive the data from your Samsung device. Taking the time to prepare your iPhone will make the transfer process efficient and minimize any unexpected issues.
Using the Apple Migration Tool
When transitioning from a Samsung device to an iPhone, Apple provides a convenient tool called the Migration Tool to help you transfer your data seamlessly. The Migration Tool automates the process and ensures that your contacts, photos, messages, and more are effortlessly transferred to your new iPhone. Follow these steps to use the Apple Migration Tool:
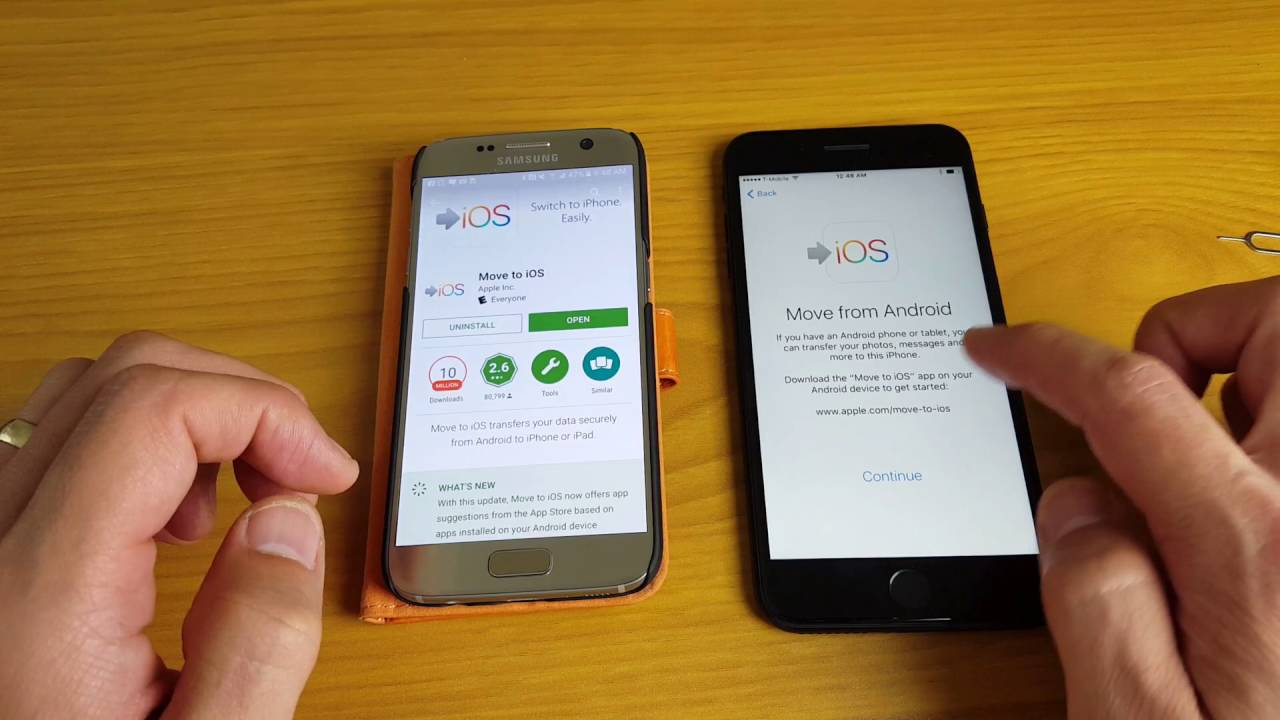
- Start the setup process: Power on your new iPhone and follow the on-screen prompts to set it up. When prompted to transfer data, select the “Move Data from Android” option.
- Download the app: On your Samsung device, go to the Google Play Store and download the “Move to iOS” app. This app will securely transfer your data to your new iPhone.
- Prepare your Samsung device: Ensure that your Samsung device is charged and connected to a stable Wi-Fi network. Make sure that both your Samsung device and your iPhone are in close proximity to each other.
- Choose what to transfer: On your iPhone, you will receive a unique code. Open the “Move to iOS” app on your Samsung device and enter the code. Select the data you want to transfer, such as contacts, photos, messages, and more.
- Start the transfer: Once you have selected the data, tap “Next” on your Samsung device. The Migration Tool will securely transfer your selected data from your Samsung device to your new iPhone.
- Wait for the transfer to complete: The transfer process may take some time, depending on the amount of data you are transferring. Ensure that both devices remain powered on and connected to their respective networks until the transfer is complete.
- Complete the setup: Once the transfer is complete, follow the on-screen prompts on your new iPhone to complete the setup process. You can now access your transferred data on your new iPhone.
The Apple Migration Tool simplifies the process of transferring your data from your Samsung device to your new iPhone. It ensures a seamless transition and eliminates the need for manual data transfer. By following these steps, you can effortlessly transfer your data and enjoy your new iPhone with all your important content at your fingertips.
Using a Third-Party App
If you prefer to use a third-party app to transfer your data from your Samsung device to your new iPhone, there are several options available in the app stores. These apps offer additional features and flexibility when it comes to transferring various types of data. Here are the general steps to use a third-party app for transferring your data:
- Research and choose an app: Explore the different third-party apps available in the App Store or Google Play Store that specialize in data transfer between Android and iOS devices. Read reviews, compare features, and choose an app that best suits your needs.
- Download and install the app: Once you have selected an app, download and install it on both your Samsung device and your new iPhone.
- Launch the app on both devices: Open the app on both your Samsung device and your iPhone. Follow the on-screen instructions to set up the app and establish a connection between the two devices. This may involve scanning a QR code or entering a code provided by the app.
- Select the data to transfer: Choose the types of data you want to transfer, such as contacts, messages, photos, videos, and more. Some apps may allow you to select specific files or folders for transfer.
- Initiate the transfer: Once you have selected the data, initiate the transfer process. This may involve tapping a “Start” or “Transfer” button within the app. The app will then begin transferring your selected data from your Samsung device to your new iPhone.
- Wait for the transfer to complete: The transfer process may take some time, depending on the amount of data you are transferring. Ensure that both devices remain powered on and connected to their respective networks until the transfer is complete.
- Verify the transferred data: Once the transfer is complete, verify that all your data has been successfully transferred to your new iPhone. Double-check your contacts, photos, messages, and any other data you transferred to ensure everything is intact.
Using a third-party app can offer more flexibility and customization options for transferring your data. However, it is important to research and choose a reputable app from a trusted developer to ensure the security and integrity of your data.
Keep in mind that different apps may have slightly different interfaces and features, so it is crucial to follow the instructions provided by the specific app you choose. By using a reliable third-party app, you can transfer your data conveniently and efficiently from your Samsung device to your new iPhone.
Transferring Contacts
Transferring your contacts from your Samsung device to your new iPhone is an important step to ensure that you have all your important contacts at your fingertips. There are multiple methods you can use to transfer your contacts, depending on your preferences and the available options. Here are three common methods:
- iCloud: If you have already set up iCloud on your iPhone, you can easily sync your contacts from your Samsung device to your iCloud account. On your Samsung device, go to Contacts and select the option to export contacts. Choose the vCard format and save the file. Then, on your iPhone, go to Settings > [Your Name] > iCloud and toggle on the Contacts option. Next, go to the iCloud website on a computer and sign in with your Apple ID. Click on Contacts, then import the vCard file you saved from your Samsung device. The contacts will then be synced to your iPhone.
- Google Account: If your contacts on your Samsung device are synced with a Google account, you can simply add the same Google account to your iPhone to transfer the contacts. On your iPhone, go to Settings > Mail > Accounts > Add Account. Select Google and enter your Google account credentials. Toggle on the Contacts option, and your contacts will be synced to your iPhone.
- Transfer App: There are several third-party apps available in the App Store and Google Play Store that specialize in contact transfer. One popular app is “Move to iOS” for Android devices. Download and install the app on your Samsung device, and follow the on-screen instructions to transfer your contacts to your iPhone. The app securely transfers your contacts over a Wi-Fi network, ensuring that they are safely transferred to your new iPhone.
Before transferring your contacts, make sure to clean up and organize your contact list on your Samsung device. Delete any duplicate, outdated, or irrelevant contacts to ensure that only the necessary contacts are transferred.
After transferring your contacts to your new iPhone, take a moment to verify that all your contacts are correctly transferred. Open the Contacts app on your iPhone and ensure that all the necessary contacts are present. You can also check for any missing or incorrect information and make any necessary edits.
By following these steps, you can easily transfer your contacts from your Samsung device to your new iPhone. Having all your contacts available on your iPhone will ensure that you can stay connected with ease and without any hassle.
Transferring Photos and Videos
Transferring your cherished photos and videos from your Samsung device to your new iPhone allows you to keep your precious memories intact. There are several methods you can use to transfer your photos and videos, depending on your preferences and the available options. Here are three common methods:
- iCloud Photo Library: If you have an iCloud account set up on both your Samsung device and your iPhone, you can use iCloud Photo Library to seamlessly sync your photos and videos across devices. On your Samsung device, download the Google Photos app from the Google Play Store and sign in with your Google account. Initiate a backup of your photos and videos to your Google Photos account. Then, on your iPhone, go to Settings > [Your Name] > iCloud and enable the Photos option. This will sync your photos and videos from your Google Photos account to your iPhone’s iCloud Photo Library.
- Google Photos: Another method is to use the Google Photos app to transfer your photos and videos. Download the Google Photos app on both your Samsung device and your iPhone. Sign in with the same Google account on both devices. On your Samsung device, back up your photos and videos to your Google Photos account. Then, on your iPhone, open the Google Photos app and all your photos and videos will be available for download. You can choose to download specific photos or all of them to your iPhone’s Camera Roll.
- Third-Party Transfer Apps: There are various third-party transfer apps available in the App Store and Google Play Store that specialize in transferring photos and videos. Install a reputable app on both your Samsung device and your iPhone, and follow the on-screen instructions to transfer your photos and videos. These apps usually establish a direct connection between the two devices and allow you to select the specific media files you want to transfer.
Regardless of the method you choose, it’s a good idea to organize your photos and videos on your Samsung device before transferring them. Delete any duplicates, blurry images, or unwanted files to ensure that only your best memories make it to your new iPhone.
After transferring your photos and videos, take a moment to browse through them on your iPhone and ensure that all your precious moments are successfully transferred. You can also classify and organize them into albums or folders to make them easier to navigate and locate in the future.
By following these methods, you can transfer your photos and videos from your Samsung device to your new iPhone, preserving your precious memories and allowing you to relive them on your new device.
Transferring Music and Playlists
Transferring your favorite music and playlists from your Samsung device to your new iPhone allows you to enjoy your beloved tunes on your new device without any interruption. There are several methods you can use to transfer your music and playlists, depending on your preferences and the available options. Here are three common methods:
- iTunes: If you have been using iTunes to manage your music library on your Samsung device, you can easily transfer your music and playlists to your new iPhone. Connect your Samsung device to your computer and open iTunes. Export your music library from your Samsung device to your computer. Then, connect your iPhone to the same computer and open iTunes. Import the exported music files into your iTunes library. Finally, sync your iPhone with iTunes to transfer your music and playlists to your new device.
- Streaming Services: If you are subscribed to a music streaming service like Spotify or Apple Music, you can easily access your favorite music and playlists on your new iPhone. Simply download the corresponding music streaming app from the App Store, sign in to your account, and all your saved music and playlists will be available on your new device. Make sure you have an active subscription to the streaming service to access your music library.
- Third-Party Transfer Apps: There are several third-party apps available in the App Store and Google Play Store that specialize in transferring music and playlists between devices. Install a reputable app on both your Samsung device and your iPhone, and follow the on-screen instructions to transfer your music and playlists. These apps usually establish a connection between the two devices and allow you to select the specific songs and playlists you want to transfer.
Before transferring your music and playlists, it’s essential to ensure that your music files are in a compatible format. If needed, convert your music files to a format that is compatible with iTunes or the music streaming service you are using.
After transferring your music and playlists to your new iPhone, take a moment to go through your music library and ensure that all your favorite songs and playlists are successfully transferred. You can organize your music into playlists or create new ones to make it easier to navigate and enjoy your music collection.
By following these methods, you can effortlessly transfer your music and playlists from your Samsung device to your new iPhone, ensuring that you can continue enjoying your favorite tunes on your new device without missing a beat.
Transferring Apps and App Data
Transferring your apps and app data from your Samsung device to your new iPhone allows you to seamlessly continue using your favorite apps and access your personalized settings. However, it’s important to note that transferring apps from one operating system to another is not always possible. Here are some guidelines to help you with the process:
- App Compatibility: Check the App Store on your new iPhone to see if the apps you used on your Samsung device are available for iOS. Some popular apps may have versions available for both Android and iOS, making it easy to transfer your apps. However, certain apps may only be exclusive to one operating system, meaning that you will need to search for alternative apps on your new device.
- App Data and Accounts: While app transfer may not always be possible, you can still recreate your app settings, preferences, and sign-in details on your new iPhone. Take note of any important information, such as app login credentials or data stored within apps, and manually set up and customize each app on your iPhone. Ensure that you have signed in to the respective accounts used within each app to restore any associated data or content.
- App Store Purchase History: If you have purchased apps on your Samsung device using the Google Play Store, unfortunately, those purchases cannot be transferred to your iPhone. However, some apps and services offer cross-platform compatibility, allowing you to sign in to your account and access your purchases on your new iPhone.
- Switching Apps: Explore the App Store on your new iPhone to discover alternative apps that provide similar functionality to the ones you used on your Samsung device. Read reviews and consider recommendations to find apps that suit your needs and preferences. This can be an opportunity to explore new apps and discover features that were not available on your previous device.
Even though you may not be able to transfer apps directly, this process presents an opportunity to declutter your app collection. Take this time to evaluate which apps you genuinely need and use regularly, and install them selectively on your new iPhone.
While transferring app data may not always be possible, make sure to back up any important data from your Samsung device. For example, you can manually export app data, such as documents or files, and transfer them to your new device using cloud storage services or file transfer methods.
By following these guidelines, you can effectively manage the transition of your apps and app data from your Samsung device to your new iPhone. Take the opportunity to explore new apps and ensure that you have a curated collection of apps that meet your needs on your new device.
Transferring Messages and Call Logs
Transferring your messages and call logs from your Samsung device to your new iPhone can be important for keeping a record of your conversations and call history. However, transferring these types of data can be more challenging compared to other data categories. Here are a few methods you can try to transfer your messages and call logs:
- iCloud Backup: If you have been using iCloud to back up your Samsung device, you may be able to transfer your messages and call logs to your new iPhone. Make sure that iCloud Backup is enabled on your Samsung device. On your iPhone, during the setup process, sign in with the same Apple ID used on your Samsung device and restore from the iCloud backup. This should include your messages and call logs in the transfer.
- Third-Party Apps: There are several third-party apps available in the App Store and Google Play Store that specialize in transferring messages and call logs. Research and choose a reputable app that supports message and call log transfers between Android and iOS devices. Follow the instructions provided by the specific app to transfer your messages and call logs securely to your new iPhone.
- Manual Transfer: If the above options are not feasible or do not meet your needs, you can manually transfer your messages and call logs to your new iPhone. Note that this process may be more time-consuming. On your Samsung device, use a messaging app that allows you to export conversations or call logs. Export the desired messages or call logs and save them on your computer. Then, refer to iPhone-compatible messaging apps in the App Store and install the one that you prefer. Follow the app’s instructions to import the exported messages or call logs into the new messaging app on your iPhone.
It’s important to note that not all messaging apps and call logs are transferable between different operating systems. Some messaging apps may only support transfers within the same platform, while others may require manual exporting and importing processes.
Regardless of the method you choose, it’s crucial to respect privacy and security throughout the transfer process. Ensure that you are using reputable apps or following trusted methods to transfer your messages and call logs securely.
After transferring your messages and call logs, take a moment to review and verify that all the important conversations and call history are successfully transferred to your new iPhone. You may also need to reorganize them or adjust the settings of the messaging app on your new device to fit your preferences.
By following these methods, you can attempt to transfer your messages and call logs from your Samsung device to your new iPhone, preserving important conversations and call history on your new device.
Transferring Email Accounts
Transferring your email accounts from your Samsung device to your new iPhone allows you to access your emails seamlessly and continue using the same email addresses. Here are the steps to transfer your email accounts:
- Email Service Providers: Most email service providers, such as Gmail, Yahoo Mail, or Outlook, offer their email apps for both Android and iOS. Install the corresponding email app for your email service on your new iPhone from the App Store.
- Automatic Setup: Open the email app on your new iPhone and choose the option to add an email account. Enter your email address and password for the account you want to transfer. In many cases, the app will automatically configure the settings and import your email account information.
- Manual Setup: If the automatic setup does not work or you prefer to set up your email account manually, choose the option for manual setup. You will need to provide the incoming mail server (IMAP or POP) information, the outgoing mail server (SMTP) information, and your login credentials. Refer to the help documentation or support pages of your email service provider to find the correct server settings.
- Importing Folders and Filters: After adding your email account, you may need to import specific folders or set up filters. In some cases, these options may not be available directly within the email app. Access your email account through a web browser on your iPhone and adjust the settings accordingly.
It’s important to note that some email services provide additional security measures, such as two-factor authentication. If you have enabled two-factor authentication on your Samsung device, you will need to set it up again for your email accounts on your new iPhone.
After setting up your email accounts on your new iPhone, take some time to explore the settings and customization options within the email app. You can adjust the notification preferences, signature, and other settings according to your preferences.
While setting up your email accounts on your new iPhone, keep your Samsung device accessible or make a note of any important emails or folders that are not synchronized automatically. You may need to manually transfer these emails or folders to your new iPhone using other methods, such as forwarding emails or exporting and importing folders.
By following these steps, you can smoothly transfer your email accounts from your Samsung device to your new iPhone, ensuring uninterrupted access to your emails and maintaining the same email addresses on your new device.
Transferring Calendar and Notes
Transferring your calendar events and notes from your Samsung device to your new iPhone ensures that you can continue accessing and managing your important schedules and personal information seamlessly. Here are the steps to transfer your calendar and notes:
- Calendar Events: If you have been using a cloud-based calendar service, such as Google Calendar or Outlook, the process of transferring your calendar events is relatively straightforward. On your Samsung device, ensure that your calendar events are synced with the corresponding cloud service. On your new iPhone, install the corresponding calendar app or access your calendar account through the built-in calendar app. Sign in with the same account and allow the app to sync your calendar events.
- Local Calendar/Events: In some cases, your calendar events may be stored locally on your Samsung device. To transfer these events, you will need to export them from your Samsung device and import them into your new iPhone. On your Samsung device, go to your calendar app and look for an option to export or share the calendar events. Save the exported file, such as a .ics or .csv file, on your computer. Then, on your iPhone, use a compatible calendar app or the built-in calendar app to import the exported file and add the events to your new device.
- Notes: If you have been using a note-taking app, such as Google Keep or Evernote, sign in to the same app on your new iPhone. Allow the app to sync your notes, and they will be available on your new device. If your notes are stored locally on your Samsung device, many note-taking apps provide options for exporting and importing notes. Export your notes from your Samsung device and import them into the corresponding app on your new iPhone. Alternatively, you can manually copy and paste the content of your notes from your Samsung device to your new iPhone.
After transferring your calendar events and notes, take a moment to review and verify that all your important schedules and personal information are successfully transferred to your new iPhone. Make sure to browse through your calendar app and notes app to ensure everything is intact.
While transferring your calendar events and notes, keep in mind that some features or formatting may not be fully compatible across different apps or platforms. It’s advisable to review and update any specific settings or preferences according to the new app or device you are using.
By following these steps, you can easily transfer your calendar events and notes from your Samsung device to your new iPhone, ensuring that you can continue managing your schedules and personal information seamlessly on your new device.
Transferring Settings and Preferences
Transferring your settings and preferences from your Samsung device to your new iPhone allows you to carry over your personalized configurations and preferences. While it may not be possible to transfer all settings directly, you can replicate them manually on your new device. Here are a few steps to help you transfer your settings and preferences:
- Screen Settings: Start by adjusting your screen brightness, wallpaper, and display settings on your new iPhone to match your preferences. Explore the Display & Brightness section in the Settings app to customize these settings.
- Notification Settings: Go through your app-specific notification settings on your Samsung device and replicate them on your new iPhone. Visit the Notifications section in the Settings app to configure notification preferences for individual apps.
- Keyboard Settings: Set up your preferred keyboard layout, autocorrect, and other keyboard settings on your new iPhone. You can find these options under the Keyboard section in the Settings app.
- Home Screen Layout: Organize your home screen by arranging the app icons and widgets to match your previous setup. You can move and rearrange app icons by tapping and holding on an app icon until they start to wiggle, then dragging them to the desired location.
- Accounts and Passwords: Add and configure your email accounts, social media accounts, and other online accounts on your new iPhone to replicate the account settings from your Samsung device. Visit the Accounts & Passwords section in the Settings app to add and manage accounts.
- Accessibility Settings: If you had any accessibility settings customized on your Samsung device, explore the Accessibility section in the Settings app on your new iPhone to replicate those settings. Adjust settings such as Display & Text Size, VoiceOver, or Zoom to meet your accessibility needs.
While transferring settings and preferences, take this opportunity to explore additional features or settings available on your new iPhone that were not present on your Samsung device. Familiarize yourself with the device and customize it to suit your preferences.
It’s important to note that some settings may not be directly transferable, especially if they are specific to the operating system or app version. In such cases, take note of your customized settings on your Samsung device and configure them manually on your new iPhone.
By following these steps, you can replicate your settings and preferences from your Samsung device to your new iPhone, ensuring a familiar and personalized experience on your new device.
Troubleshooting Common Issues
While transferring data from your Samsung device to your new iPhone, you may encounter some common issues. Here are some troubleshooting steps to help resolve these issues:
1. Connection Problems: If you’re experiencing connection issues between your Samsung device and your new iPhone during the transfer process, ensure that both devices are connected to a stable Wi-Fi network. Restart both devices and try again. If the issue persists, consider using a different transfer method or contacting customer support for assistance.
2. Incompatibility: Some data, such as certain apps, app data, or media files, may not be directly transferable between different operating systems. In such cases, consider alternative methods or apps that support cross-platform transfers. If specific data cannot be transferred, explore equivalent apps or platforms available on your new iPhone.
3. Data Loss or Corruption: It’s crucial to create backups of your important data before initiating the transfer process. In the event of data loss or corruption during the transfer, restore from the backups you created. If you encounter difficulties, seek assistance from customer support or consult online resources for data recovery methods.
4. Syncing Issues: If you’re experiencing problems with syncing your data, such as contacts or calendar events, between devices, double-check your sync settings on both devices. Ensure that your accounts are properly set up and synced with the respective services (e.g., Google account for contacts and events). Verify that you have a stable internet connection and try syncing again.
5. App-Specific Problems: If you encounter issues with specific apps during or after the transfer, try reinstalling the apps on your new iPhone. Make sure to sign in to your accounts and ensure that relevant settings and preferences carry over. If a particular app is not available for your new iPhone, search for equivalent apps on the App Store that provide similar functionality.
6. Battery Drain or Overheating: During the transfer process, both devices may experience increased battery usage or heating. To mitigate these issues, ensure that your devices are sufficiently charged before starting the transfer. Consider disconnecting unnecessary peripherals or apps running in the background. If excessive heating or battery drain persists, consider taking short breaks during the transfer process or contacting customer support.
Remember, if you encounter any issues during the transfer process, don’t panic. Take your time to identify and troubleshoot the problem. Explore support resources, forums, or contact customer support for assistance if needed. With patience and troubleshooting, you can overcome common issues and successfully transfer your data from your Samsung device to your new iPhone.
Final Checks and Post-Transfer Steps
After transferring your data from your Samsung device to your new iPhone, there are a few final checks and post-transfer steps to ensure a smooth transition and make the most out of your new device:
1. Data Verification: Take some time to go through your transferred data and ensure that everything has been successfully transferred. Check your contacts, photos, videos, messages, and other important data to make sure nothing is missing or corrupted. If you notice any discrepancies, refer to the backups you created or follow the appropriate troubleshooting steps to resolve the issue.
2. App Installation: Visit the App Store and explore the wide range of apps available for your new iPhone. Install your essential apps and any new apps you may need. Remember to sign in to your accounts within individual apps to access your data, settings, and preferences. Customize your home screen and organize your apps according to your preferences for a personalized experience.
3. Account Security: As you set up accounts on your new iPhone, pay attention to security measures such as two-factor authentication. Enable this feature for your accounts to ensure an extra layer of protection. Update your passwords for important accounts and consider using a password manager to securely store and generate unique passwords for additional security.
4. Battery Optimization: Optimize your iPhone’s battery life by adjusting settings such as screen brightness, background app refresh, and push notifications. Consider enabling Low Power Mode when your battery is running low to conserve power. Familiarize yourself with the battery usage section in the Settings app to identify any apps or settings that may be draining your battery excessively.
5. Data Cleanup: Take this opportunity to declutter your new iPhone and free up storage space. Remove any unnecessary apps, files, or photos that you no longer need. Regularly review and manage your storage usage to keep your device running smoothly and efficiently.
6. Explore New Features: Your new iPhone may come with additional features and capabilities that were not available on your Samsung device. Take the time to explore and familiarize yourself with these new features. Read the user guide or look for online tutorials and tips to get the most out of your new device.
7. Device Maintenance: Set up regular backups and software updates to keep your iPhone secure and up to date. Clean the device regularly, both internally by removing unnecessary files and apps, and externally by using a soft cloth to wipe the screen and body. Consider using a protective case and screen protector to preserve the integrity of your new iPhone.
By performing these final checks and post-transfer steps, you can ensure a smooth transition to your new iPhone and optimize your experience. Remember to explore new features and enjoy the extensive capabilities of your new device. If you encounter any issues or have questions, refer to the user guide, online resources, or contact customer support for assistance.