Windows
If you’re using a PC running on Windows, capturing screenshots is a breeze. Windows offers several built-in methods to help you easily snap and save screenshots.
Windows 10 Game Bar: One way to capture screenshots is by using the Windows 10 Game Bar. Simply press the Windows key + G to open the Game Bar, then click on the camera icon to take a screenshot. The screenshot will be saved in the Captures folder in your Videos library.
Windows Snipping Tool: Another option is the Snipping Tool. Search for it in the Windows Start menu, open the tool, and click on the New button to capture a screenshot. You can choose between capturing the entire screen, a specific window, or a selected area. After capturing, you can save the screenshot to your preferred location.
Windows Keyboard Shortcut: Windows also provides a keyboard shortcut for taking quick screenshots. Press the Windows key + Print Screen (PrtScn) to instantly capture the entire screen. The screenshot will be automatically saved in the Screenshots folder of your Pictures library.
With these methods, capturing screenshots on Windows is a breeze. Whether you prefer using the Game Bar, Snipping Tool, or keyboard shortcuts, you’ll have the flexibility to choose the most convenient option based on your needs.
Mac
If you’re using a Mac, taking screenshots is just as simple as on Windows. Mac offers several built-in options to help you capture and save screenshots effortlessly.
Using the Keyboard Shortcut: The quickest way to capture a screenshot on a Mac is by using keyboard shortcuts. Pressing Command + Shift + 3 will capture the entire screen and save it as a file on your desktop. Alternatively, you can use Command + Shift + 4 to capture a selected portion of the screen. With this shortcut, your cursor will turn into a crosshair, allowing you to click and drag to select the area you want to capture. The screenshot will be saved as a file on your desktop.
Using the Snipping Tool: Mac also has a built-in snipping tool called Grab. You can find it in the Utilities folder under Applications. Open Grab and choose the type of screenshot you want to capture from the Capture menu. You can choose between capturing the entire screen, a specific window, or a selected portion. After capturing, the screenshot will appear in a new window, and you can save it to the desired location.
Using the Preview App: Another option is to use the Preview app, which is pre-installed on every Mac. Open the app and go to File > Take Screenshot. From there, you can choose to capture the entire screen, a specific window, or a selected portion. The screenshot will open in a new window within Preview, allowing you to make edits or save it to your desired location.
With these built-in options, capturing screenshots on a Mac is a breeze. Whether you prefer using keyboard shortcuts, the Grab tool, or the Preview app, you’ll have the flexibility to choose the most convenient option based on your needs.
Chromebook
If you’re using a Chromebook, you’ll be pleased to know that capturing screenshots is just as easy as on Windows and Mac. Chrome OS offers a few different methods to help you quickly snap and save screenshots.
Chromebook Keyboard Shortcut: The simplest way to take a screenshot on a Chromebook is by using the keyboard shortcut. Press Ctrl + Shift + Switch Window to capture the entire screen. The screenshot will be saved in the Downloads folder of your Chromebook.
Using the Snipping Tool: Chromebook also has a built-in snipping tool called Snipping Tool. To access it, click on the clock and select the square icon in the bottom right corner. From there, you can choose to capture the full screen, a specific window, or a selected portion. After capturing, the screenshot will be saved in the Downloads folder.
Using the Print Screen Key: Another way to capture a screenshot on a Chromebook is by using the Print Screen key. Simply press the key labeled Print Screen or PrtSc, and the screenshot will be saved in the Downloads folder.
These methods make capturing screenshots on a Chromebook quick and straightforward. Whether you prefer using keyboard shortcuts, the Snipping Tool, or the Print Screen key, you’ll have different options to choose from based on your preference and needs.
Windows 10 Game Bar
The Windows 10 Game Bar is a built-in feature that allows you to capture screenshots while gaming or using any other application. It provides a convenient way to take screenshots without interrupting your workflow.
To open the Game Bar, press the Windows key + G on your keyboard. A small overlay window will appear on your screen, displaying various options.
Click on the camera icon in the Game Bar or press the keyboard shortcut Windows key + Alt + PrtScn to capture a screenshot. You’ll see a notification confirming that the screenshot has been saved.
All screenshots taken with the Game Bar are automatically saved in the Captures folder within your Videos library. You can access this folder by opening File Explorer and navigating to “This PC” > “Videos” > “Captures”.
The Game Bar also offers additional features, such as recording gameplay, broadcasting, and controlling audio settings. To explore these features, click on the settings icon within the Game Bar overlay.
With the Windows 10 Game Bar, capturing screenshots has never been easier. Whether you’re playing a game or using any other application, you can quickly capture and save screenshots without any interruptions. It’s a valuable tool for anyone who wants to document their experiences or share their accomplishments with others.
Windows Snipping Tool
The Windows Snipping Tool is a handy built-in application that allows you to capture screenshots with precision. It offers several options for capturing different types of screen content.
To access the Snipping Tool, simply search for it in the Windows Start menu. Once you open the tool, you’ll see a small window with various snipping options.
Click on the “New” button in the Snipping Tool window to initiate a screenshot. You’ll have several options to choose from:
- Free-form Snip: This option allows you to draw a free-form shape around the desired area to capture.
- Rectangular Snip: With this option, you can capture a rectangular or square area on your screen.
- Window Snip: Use this option to capture an entire window, including the title bar and borders.
- Full-screen Snip: This option captures the entire screen, including all open windows and the taskbar.
After capturing the screenshot, you can add annotations, highlight specific areas, or make any necessary edits within the Snipping Tool itself. You can also save the screenshot to your preferred location by clicking on the “Save” or “Save As” button.
The Windows Snipping Tool offers a simple and intuitive way to capture screenshots with different shapes and sizes. Whether you need to capture a specific portion of the screen or the entire window, the Snipping Tool provides the flexibility you need to get the job done.
Windows Keyboard Shortcut
In addition to the built-in snipping tool and Game Bar, Windows also offers a keyboard shortcut that allows you to quickly capture screenshots without the need for any additional tools or applications.
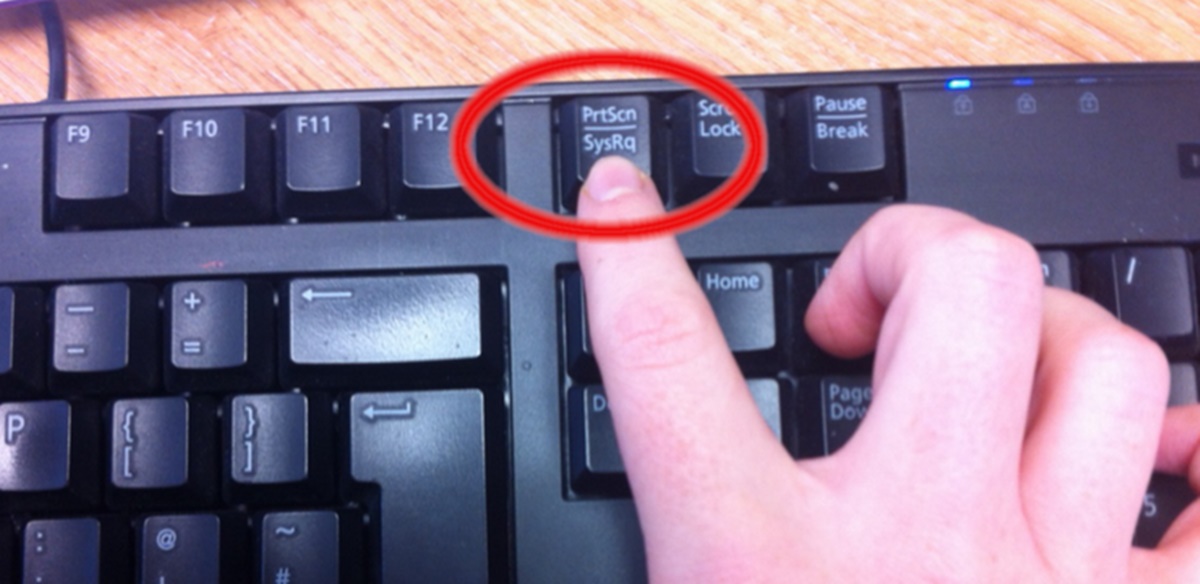
To take a screenshot using the Windows keyboard shortcut, simply press the Windows key + Print Screen (PrtScn) on your keyboard. There may be a slight variation in the name or placement of the Print Screen key depending on your keyboard layout, but it is usually located in the top row, near the function keys.
Once you press the keyboard shortcut, Windows will capture the entire screen and save the screenshot automatically. The screenshot will be saved in the Screenshots folder, which is located within the Pictures folder in your user directory.
You can access the Screenshots folder by opening File Explorer and navigating to “This PC” > “Pictures” > “Screenshots”. Alternatively, you can also paste the screenshot directly into an image-editing program or an email by pressing Ctrl + V.
Using the Windows keyboard shortcut is a convenient and quick way to capture screenshots on your PC. It eliminates the need for any extra steps or applications, allowing you to effortlessly save and share your screen content.
Mac Keyboard Shortcut
Mac users have the convenience of using keyboard shortcuts to easily capture screenshots without the need for any additional software or tools. These keyboard shortcuts are built-in features of macOS and provide a quick way to capture and save screen content.
To take a screenshot on a Mac using keyboard shortcuts, there are several options available:
- Command + Shift + 3: Pressing these three keys together captures the entire screen and saves the screenshot as a file on your desktop.
- Command + Shift + 4: This keyboard shortcut allows you to capture a selected portion of the screen. After pressing the keys, your cursor will turn into a crosshair, allowing you to click and drag to select the desired area. Once you release the mouse, the screenshot will be saved as a file on your desktop.
For both of these shortcuts, you will hear a camera shutter sound indicating that the screenshot has been successfully taken. Additionally, a thumbnail of the screenshot will appear in the corner of your screen. Clicking on this thumbnail will open it in the built-in Preview application, where you can make edits or save it to a different location if desired.
If you want even more control over your screenshots, you can use the Command + Shift + 5 keyboard shortcut. This opens the Screen Capture toolbar, which offers options to capture selected windows, specific portions of the screen, or record a video of the screen.
The keyboard shortcuts provided by macOS offer a convenient and efficient way to capture screenshots on your Mac. By simply remembering a few key combinations, you’ll be able to capture and save screen content with ease.
Chromebook Keyboard Shortcut
Chromebook users can take advantage of keyboard shortcuts to capture screenshots quickly and easily. These shortcuts are built into the Chrome OS and provide a convenient way to capture and save screen content without the need for any additional software.
The primary keyboard shortcut for taking a screenshot on a Chromebook is:
Ctrl + Shift + Switch Window: By pressing these three keys together, Chromebook users can capture a screenshot of the entire screen. The screenshot will be automatically saved in the Downloads folder on the device.
Once you have taken a screenshot, you can access it by opening the Files app and navigating to the Downloads folder. From there, you can view, edit, or share the screenshot as needed.
Additionally, Chromebooks also offer an alternative method to capture a screenshot of a specific area on the screen:
Ctrl + Shift + P: Pressing these three keys together activates the partial screenshot mode. You can then click and drag to select the desired portion of the screen to capture. The screenshot will be saved in the Downloads folder, just like the full-screen screenshot.
Using these keyboard shortcuts, Chromebook users can quickly and efficiently capture screenshots without the need for any external applications or tools. Whether you want to capture the entire screen or a specific area, these shortcuts provide a convenient way to document and save important information.
Windows 10 Snip & Sketch Tool
In addition to the Snipping Tool, Windows 10 also introduced the Snip & Sketch tool, which provides an improved and more user-friendly way to capture and annotate screenshots.
To open the Snip & Sketch tool, you can either search for it in the Windows Start menu or use the keyboard shortcut Windows key + Shift + S. This will bring up a small toolbar at the top of the screen with options for capturing various types of screenshots.
Once the Snip & Sketch tool is open, you have several options for capturing screenshots:
- Rectangular Snip: This option allows you to select a rectangular or square area to capture.
- Freeform Snip: With this option, you can capture a free-form shape by drawing around the desired area.
- Fullscreen Snip: Choose this option to capture the entire screen.
- Window Snip: This option captures a specific window or application.
Once you have captured a screenshot, it will open in the Snip & Sketch editor, where you can make annotations, add highlights, and use various editing tools. The editor allows you to easily crop, resize, and modify the screenshot to suit your needs.
After editing, you can save the screenshot to your preferred location or share it directly with others through email or other communication platforms.
The Snip & Sketch tool provides an enhanced and intuitive way to capture and edit screenshots on Windows 10. With its easy-to-use interface and a range of editing options, it’s a powerful tool for anyone who frequently works with screenshots and wants more control over their capturing and editing process.
Snipping Tool on Mac
While the Snipping Tool is a built-in application on Windows, Mac users have a similar feature called Grab. Grab is a lightweight and user-friendly tool that allows you to capture screenshots and make basic edits on your Mac.
To access Grab on your Mac, simply go to the “Applications” folder and open the “Utilities” folder. Inside, you’ll find the Grab application.
Once you open Grab, you’ll see a small window with four different capture options:
- Selection: This option allows you to capture a specific area on the screen by clicking and dragging to select the desired portion.
- Window: With this option, you can capture a specific window or application by clicking on the window after selecting this option.
- Screen: Selecting this option captures the entire screen.
- Timed Screen: This capture option gives you a 10-second delay before capturing the screen. It can be helpful in situations where you need to set up a specific scene before capturing the screenshot.
After selecting the capture option, Grab will capture the screenshot and display it in a new window. From there, you can make basic edits, such as adding text, drawing shapes, or highlighting certain areas. Once you’re done editing, you can save the screenshot to your preferred location.
While the Grab tool doesn’t provide as many editing features as some third-party applications, it is a simple and effective tool for capturing screenshots and making basic annotations or edits on your Mac.
So, if you’re a Mac user looking for a quick and straightforward way to capture and edit screenshots, give Grab a try. It’s a useful tool that can come in handy for various purposes, from documenting information to providing visual explanations.
Snipping Tool on Chromebook
While Chromebooks do not have a built-in tool called the Snipping Tool like Windows or a similar feature like Grab on Mac, you can still capture and edit screenshots with the help of various Chrome extensions available in the Chrome Web Store.
One popular extension is “Nimbus Screenshot & Screen Video Recorder.” This extension allows you to capture screenshots of your entire screen, a selected area, or a specific window. You can also choose to capture the entire page, even if it goes beyond what is visible on the screen. After capturing the screenshot, you can edit it by adding text, arrows, shapes, or blurring sensitive information before saving it.
Another extension worth considering is “Lightshot.” This extension provides similar functionality, allowing you to capture screenshots of the entire screen or a selected area. It also offers basic editing features, including adding text, lines, arrows, and various shapes to enhance your screenshots.
To install these extensions, simply visit the Chrome Web Store, search for their respective names, and click on the “Add to Chrome” button. Once added, you can access these extensions through their respective icons in the Chrome browser toolbar.
While not officially supported by Chrome OS itself, these extensions serve as reliable alternatives to the Snipping Tool. They allow you to capture and edit screenshots directly from your Chromebook browser, ensuring that you have the necessary tools to capture and annotate screenshots effectively.
So, if you’re a Chromebook user looking to capture and edit screenshots, consider installing these handy Chrome extensions to enhance your screenshot workflow and make it more efficient.
Using the Print Screen Key
One of the simplest and most widely used methods for capturing screenshots on Windows, Mac, and even some Chromebooks is by using the Print Screen key. This key is generally labeled as “PrtScn” or “Print Scr” and is located in the top row of the keyboard, usually near the function keys.
To capture a screenshot using the Print Screen key:
- Ensure that the content you want to capture is visible on your screen.
- Press the Print Screen key. On some keyboards, you may need to press the Fn key along with the Print Screen key.
- The screenshot is copied to your clipboard, which means it is temporarily stored in your computer’s memory.
- To save the screenshot, open an image editing software of your choice (e.g., Paint, Photoshop, or Preview) and press Ctrl + V to paste the screenshot. You can now save the image file as desired.
Using the Print Screen key is a quick and straightforward method to capture screenshots without the need for any additional tools or applications. However, keep in mind that this method captures the entire screen, including multiple monitors if you have them connected.
If you are using a multi-monitor setup and only want to capture the active window, you can use the Alt + Print Screen combination. This captures the currently active window and copies it to the clipboard, allowing you to paste and save it in an image editing software.
Whether you’re working on a Windows, Mac, or some Chromebooks, the Print Screen key provides a convenient and accessible method for capturing screenshots. It’s a useful tool for quickly saving and sharing images of your screen content.
Using the Alt + Print Screen Key Combination
In addition to the traditional Print Screen key, Windows users have another handy keyboard shortcut for capturing screenshots with more precision – the Alt + Print Screen key combination. While the Print Screen key captures the entire screen, the Alt + Print Screen combination allows you to capture only the active window.
To capture a screenshot of the active window using the Alt + Print Screen key combination:
- Make sure the window you want to capture is in focus and on top of other windows.
- Press the Alt key on your keyboard and then press the Print Screen key. Some keyboards may require you to press the Fn key along with the Alt and Print Screen keys.
- The screenshot of the active window is saved to your clipboard.
- To save the screenshot, open an image editing software like Paint, Photoshop, or Preview, and press Ctrl + V to paste the screenshot. From there, you can save the image file as desired.
Using the Alt + Print Screen key combination is especially useful when you only want to capture a specific window or application, rather than the entire screen. This can be handy when you want to share information from a particular program or focus on a specific part of your screen.
It’s important to note that the Alt + Print Screen method captures the content of the active window, including the title bar and border. If you only want to capture the content within the window without the surrounding elements, you can use image editing software to crop the screenshot after it’s been captured.
By utilizing the Alt + Print Screen combination, you can streamline your screenshot capturing process and quickly obtain screenshots of specific windows or applications without the need for any additional tools or applications.
Using the Windows Key + Print Screen Key Combination
Windows users have another convenient keyboard shortcut to capture screenshots quickly and easily – the Windows key + Print Screen key combination. This combination provides a simplified method for capturing the entire screen without the need to paste and save the screenshot separately.
To capture a screenshot using the Windows key + Print Screen key combination:
- Ensure the content you want to capture is displayed on your screen.
- Press the Windows key and the Print Screen key simultaneously. On some keyboards, you may need to press the Fn key along with the Windows and Print Screen keys.
- The screen dims momentarily to indicate a successful screenshot, and the captured image is automatically saved to your computer.
The screenshot is saved in the Screenshots folder, which is typically located within the Pictures folder in your user directory. To access the Screenshots folder, open File Explorer, navigate to “This PC” > “Pictures” > “Screenshots”.
Using the Windows key + Print Screen key combination provides a seamless and efficient way to capture and save screenshots. It eliminates the need to paste the screenshot into an image editing software and simplifies the overall process.
It’s important to note that each time you use the Windows key + Print Screen combination, a new screenshot is saved. Therefore, if you use this combination multiple times, each screenshot is sequentially numbered to avoid overwriting previous captures.
This keyboard shortcut is especially useful when you want to capture the entire screen quickly, such as when documenting information or troubleshooting issues. It’s a valuable tool for both casual users and professionals who regularly need to capture and save screenshots.
Using the Command + Shift + 3 Keyboard Shortcuts
Mac users have a powerful and straightforward keyboard shortcut to capture screenshots of the entire screen – the Command + Shift + 3 combination. This shortcut allows you to quickly and effortlessly capture the entire contents of your Mac’s display.
To capture a screenshot using the Command + Shift + 3 keyboard shortcut:
- Ensure the screen you want to capture is visible on your Mac.
- Press the Command, Shift, and 3 keys simultaneously.
- You’ll hear a camera shutter sound, and the screenshot will be saved as a file on your desktop.
The screenshot’s file name begins with “Screen Shot” and is followed by the date and time of the capture.
Mac’s Command + Shift + 3 shortcut is incredibly useful when you need to capture the entire screen quickly without making any additional adjustments. Whether you want to document something for personal use or share information with others, this keyboard shortcut ensures you can capture a comprehensive image promptly.
It’s important to note that the Command + Shift + 3 shortcut captures everything visible on your screen, including multiple displays if you have them connected to your Mac. If you only want to capture a portion of the screen or a specific window, you can use alternative keyboard shortcuts like Command + Shift + 4.
The Command + Shift + 3 combination is a valuable tool in your screenshot arsenal, providing a convenient and efficient way to capture the entire screen on your Mac. It’s a feature that streamlines the process of capturing screen content, whether for personal or professional use.
Using the Command + Shift + 4 Keyboard Shortcuts
Mac users have a versatile and powerful keyboard shortcut for capturing specific portions of their screen – the Command + Shift + 4 combination. This shortcut allows you to select and capture a customized area of your Mac’s display.
To capture a screenshot using the Command + Shift + 4 keyboard shortcut:
- Press the Command, Shift, and 4 keys simultaneously.
- Your cursor will turn into a crosshair.
- Click and drag the crosshair to select the area you want to capture. As you drag the cursor, you’ll see the dimensions of the selected area.
- Release the mouse button to capture the selected area as a screenshot.
After releasing the mouse button, you’ll hear a camera shutter sound, indicating that the screenshot has been successfully captured. The screenshot will be saved as a file on your desktop. The filename begins with “Screen Shot” and is followed by the date and time of the capture.
The Command + Shift + 4 combination provides you with greater control over your screenshots by allowing you to capture specific portions of your screen. Whether you want to highlight a specific section of a webpage, capture a particular window, or focus on a specific part of an image, this shortcut gives you the flexibility to do so.
It’s worth mentioning that along with the crosshair, macOS also displays the coordinates and dimensions of the selected area, helping you precisely capture the desired content. If you need to adjust or refine your selection, you can press the Esc key to cancel the capture and start again.
The Command + Shift + 4 keyboard shortcut is an invaluable tool for capturing customized areas of your screen on a Mac. Whether you need to capture a portion of an application, create visual tutorials, or provide specific highlights, this shortcut empowers you with precision and control over your screenshots.
Using the Command + Shift + 5 Keyboard Shortcuts
Mac users have a powerful and feature-rich screenshot-capturing tool at their disposal – the Command + Shift + 5 keyboard shortcut. Introduced in macOS Mojave, this shortcut opens the built-in Screen Capture tool, providing a range of options for capturing screenshots and screen recordings.
To use the Command + Shift + 5 keyboard shortcut:
- Press the Command, Shift, and 5 keys simultaneously.
- The Screen Capture toolbar will appear at the bottom of the screen.
- To capture the entire screen, click on the “Capture Entire Screen” button, which looks like a square filled with solid lines.
- To capture a selected portion of the screen, click on the “Capture Selected Window” button, which looks like a square with a dashed outline. Your cursor will turn into a crosshair, allowing you to click and drag to select the desired area.
- To capture a specific area or document, click on the “Capture Selected Portion” button, which looks like a square with a dashed outline and handles on each corner. Again, your cursor will turn into a crosshair, enabling you to click and drag to select the desired area.
Upon capturing a screenshot, a thumbnail preview will briefly appear in the corner of the screen. Clicking on the thumbnail will open it in the screen capture editor, where you can make annotations, crop the image, or adjust other settings. Once you’re satisfied with the edits, you can save the screenshot to the desired location.
In addition to capturing screenshots, the Command + Shift + 5 keyboard shortcut also provides options for screen recordings. By clicking on the “Record Entire Screen” or “Record Selected Portion” buttons in the toolbar, you can capture live screen activity with audio, making it convenient for creating tutorials, presentations, or sharing dynamic content.
The Command + Shift + 5 shortcut is a versatile and powerful tool for capturing screenshots and recordings on a Mac. It offers a range of options and editing capabilities, allowing you to create and customize high-quality visuals effortlessly.