
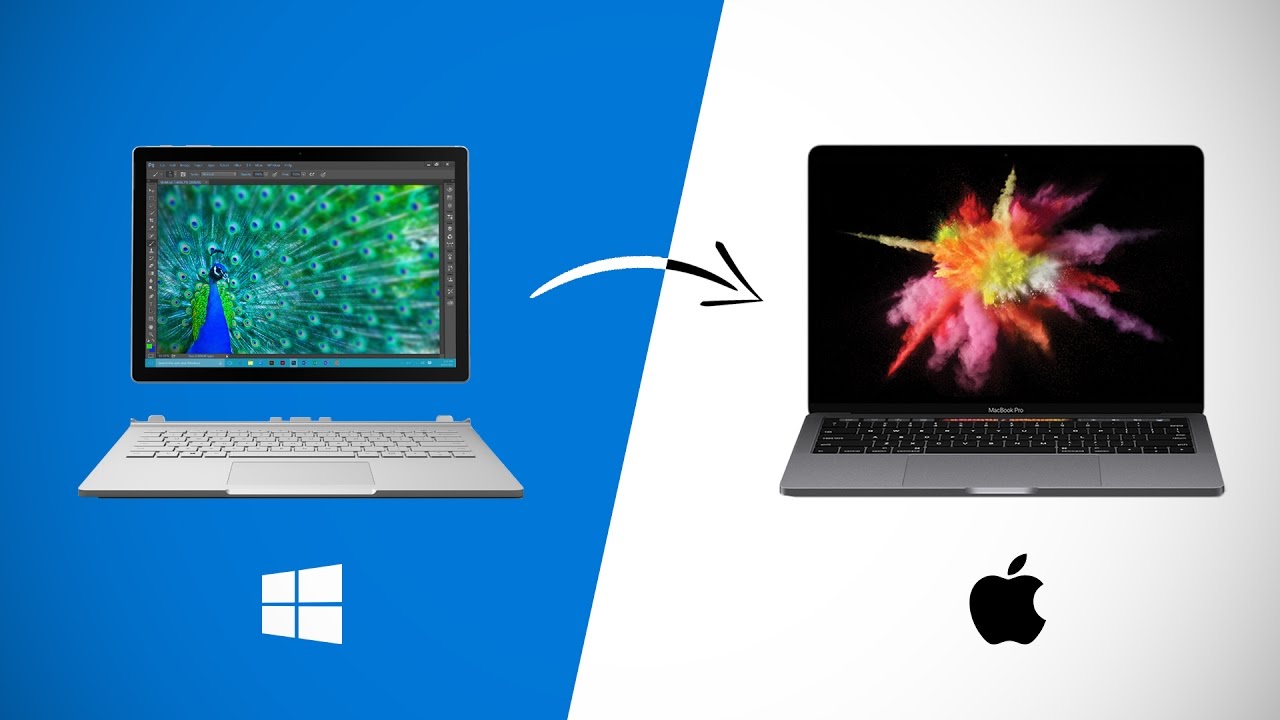
Uninstalling Windows Programs
When making the switch from Windows to Mac, one of the first things you’ll need to do is uninstall the programs that you no longer need. While the uninstallation process may vary slightly depending on the program, here is a general guide to help you through the process:
1. Locate the program: Start by identifying the program or software you want to uninstall. You can usually find it in the “Program Files” or “Applications” folder on your Windows computer.
2. Use the built-in uninstaller: Many programs come with their own uninstaller, which you can find in the program’s folder or through the Control Panel. Open the uninstaller and follow the instructions to remove the program from your system.
3. Drag to the Trash: For some programs, especially those downloaded from the internet, you can simply drag the program’s icon from the Applications folder to the Trash bin in the dock. This will uninstall the program from your Mac.
4. Remove additional files: Some programs may leave behind files or folders even after being uninstalled. To ensure a clean uninstallation, use a tool like AppCleaner to search for and delete any leftover files associated with the program you just uninstalled.
5. Repeat for all programs: Go through your list of installed programs on Windows and repeat the uninstallation process for each one you wish to remove.
It’s important to note that not all Windows programs will have a Mac equivalent. In this case, you may need to find alternative software that performs a similar function on your Mac. Research and read reviews to find the best alternatives available.
By uninstalling unnecessary programs, you can free up valuable disk space on your Mac and ensure a smoother transition to the new operating system.
Finding Mac Alternatives to Windows Programs
As you switch from Windows to Mac, you may find that some of the programs you used on your Windows computer are not compatible with macOS. However, the good news is that there are plenty of alternatives available for almost every Windows program. Here are some tips to help you find Mac alternatives:
1. Research online: Start by conducting a simple search online for “Mac alternative to [name of the Windows program].” You will often find articles and forums recommending alternative software that offers similar functionality on a Mac. Take note of the recommended options and read user reviews to get an idea of their performance and user experience.
2. Visit the Mac App Store: The Mac App Store is a great resource for finding Mac-specific software. Browse through different categories or use the search function to look for alternatives to the Windows programs you used. The Mac App Store provides user ratings and reviews, making it easier to evaluate the quality and suitability of different applications.
3. Check software developer websites: Visit the websites of popular software developers to see if they offer Mac versions of their programs. Many software companies now create versions that are compatible with both Windows and macOS. Look for a “Mac” or “Download for macOS” option on their website. If your preferred software developer doesn’t provide a Mac version, consider reaching out to them and asking if they have plans to develop one.
4. Seek recommendations from Mac users: Connect with other Mac users through online forums or social media groups and ask for their suggestions. Mac users can offer valuable insights and recommendations based on their own experiences with alternative software.
5. Test trial versions: Before committing to a new software program, consider downloading trial versions to see if they meet your needs. Many software developers offer free trials that allow you to test the software’s features and compatibility with your workflow.
Remember, while finding alternatives is important, be open to exploring new software options. Mac programs might have different names and interfaces, but they can often offer similar or even better features compared to their Windows counterparts.
By taking the time to research and find suitable alternatives, you can ensure a smooth transition from Windows to Mac without compromising on the functionality and productivity of your favorite programs.
Moving Files from Windows to Mac
When switching from Windows to Mac, you’ll likely want to transfer your important files, such as documents, photos, and music, from your Windows computer to your new Mac. Fortunately, there are several methods you can use to accomplish this:
1. External storage device: One of the simplest ways to transfer files is by using an external storage device, such as a USB flash drive or an external hard drive. On your Windows computer, copy the files you want to transfer to the external device. Then, connect the device to your Mac and copy the files from the external storage to your Mac’s internal storage.
2. Cloud storage services: If you have a stable internet connection, using cloud storage services like Dropbox, Google Drive, or Microsoft OneDrive can be a convenient option. Upload your files to your cloud storage account from your Windows computer, and then download them to your Mac. This method allows you to access your files from any device with internet connectivity.
3. Local network transfer: If both your Windows computer and Mac are connected to the same local network, you can transfer files wirelessly using file sharing. Enable file sharing on both computers and connect to the shared folders from your Mac. You can then copy and paste files directly between the two systems.
4. Migration Assistant: Apple provides a built-in tool called Migration Assistant that helps you transfer files, applications, user accounts, and settings from your Windows computer to your Mac. Connect your Windows computer and Mac using a network cable or Wi-Fi, and follow the on-screen instructions to transfer your files and settings.
Regardless of the method you choose, it’s essential to organize your files before transferring them to your Mac. Ensure that you have a clear folder structure and remove any unnecessary files or duplicates to avoid clutter on your new system.
While transferring files, it’s worth noting that some file formats may not be compatible with Mac applications. For example, if you have specific Windows-only file types, you may need to find alternative Mac applications or use conversion tools to open and work with those files.
Remember to keep a backup of your files on your Windows computer until you have confirmed that everything has transferred successfully to your Mac. This way, you can always go back to your Windows computer if needed.
By following these methods and taking the time to transfer your files properly, you can ensure a seamless transition from Windows to Mac without losing any important data.
Setting Up Email and Calendar Accounts
As you make the transition from Windows to Mac, setting up email and calendar accounts on your new Mac is an essential step. Here’s a guide to help you get started:
1. Apple Mail: The built-in Apple Mail application on Mac makes it easy to set up and manage your email accounts. Open the Mail app and follow the setup prompts to add your email account. You will need to provide your email address, password, and other necessary details. The Mail app supports popular email services like Gmail, Outlook, and Yahoo, as well as custom IMAP and POP accounts.
2. Calendar: The Calendar app on Mac syncs with various cloud-based calendar services, including iCloud, Google Calendar, and Microsoft Exchange. Open the Calendar app and click on “Calendar” in the top left corner of your screen. From there, choose “Preferences” and click on “Accounts” to add your calendar accounts. Enter your account credentials, and the Calendar app will sync your events and appointments.
3. Third-party email and calendar apps: If you prefer using third-party applications for your email and calendar needs, there are several options available on the Mac App Store. Popular third-party email clients include Spark, Airmail, and Thunderbird, while Fantastical and BusyCal are well-regarded calendar apps.
When setting up your email and calendar accounts, make sure to enable two-factor authentication (2FA) whenever possible to enhance security.
If you have multiple email accounts or calendars, you can manage them all within the respective applications. This allows you to access and organize your emails and appointments from different accounts in one convenient location.
It’s worth noting that if you were using Microsoft Outlook on your Windows computer, there is a Mac version available that provides a similar user experience. You can download and set up Microsoft Outlook on your Mac to continue using the same email and calendar application.
By setting up your email and calendar accounts on your Mac, you can stay connected, manage your appointments, and stay organized in your transition from Windows to Mac.
Customizing System Preferences
One of the great advantages of using a Mac is the ability to customize your system preferences according to your preferences and needs. As you switch from Windows to Mac, here are some key areas to consider when customizing your Mac’s system preferences:
1. Appearance: macOS allows you to personalize the look and feel of your system. You can customize the desktop background, screensaver, and choose between light and dark mode. To access these options, go to “System Preferences” and click on “General.”
2. Dock: The Dock is a central component of the macOS interface. You can customize its appearance and behavior to suit your workflow. Right-click on the Dock, go to “Dock Preferences,” and adjust settings such as the size, position, and animation of the Dock. You can also add or remove apps from the Dock for easy access to your favorite applications.
3. Trackpad and mouse settings: macOS offers extensive customization options for trackpad and mouse settings. Navigate to “System Preferences” and click on “Trackpad” or “Mouse” to adjust options such as scrolling direction, gesture controls, and pointer speed. Experiment with these settings to find what works best for you.
4. Keyboard shortcuts: Macs have a range of keyboard shortcuts that can help boost your productivity. You can customize or create new shortcuts for various system actions and applications. Go to “System Preferences” and click on “Keyboard” to access the keyboard settings. From there, click on “Shortcuts” to view and modify existing shortcuts or add your own.
5. Security and privacy: Protecting your Mac and your data is crucial. Customize your security and privacy settings by going to “System Preferences” and clicking on “Security & Privacy.” Here you can control various aspects such as application permissions, file access, and privacy settings.
6. Energy settings: Adjusting energy settings can help optimize the battery life of your Mac laptop or the power consumption of your desktop. Go to “System Preferences” and click on “Energy Saver” to modify settings such as display sleep, computer sleep, and power management.
Remember, customization is a personal preference, and what works for one person may not suit another. Take the time to explore and experiment with different settings to create a Mac experience that feels tailored to your needs and preferences.
By customizing your system preferences, you can enhance your user experience, increase productivity, and make your Mac truly feel like your own.
Getting Familiar with the Finder
The Finder is the file management system on macOS, and it serves as the central hub for accessing and organizing your files and folders. As you switch from Windows to Mac, it’s essential to get familiar with the Finder and its features. Here are some key aspects to help you navigate and utilize the Finder effectively:
1. Finder Window: The Finder window is where you’ll perform most of your file management tasks. You can open a Finder window by clicking on the Finder icon in the dock or by pressing Command + N. Take some time to explore the various sections of the Finder window, such as the sidebar, toolbar, and the main file area.
2. Navigating Folders: Use the sidebar or the toolbar to navigate through your folders and drives. The sidebar contains shortcuts to frequently accessed locations like your Documents, Downloads, and Applications folders. You can also customize the sidebar by adding or removing locations according to your preference.
3. View Options: The Finder provides various ways to view your files. Click on the “View” icon in the toolbar or use the View options in the menu bar to switch between Icon view, List view, Column view, or Gallery view. Experiment with these different views to find the one that suits your workflow.
4. Search: The Finder offers a powerful search feature that allows you to quickly find files based on their names, content, or specific criteria. Use the search bar in the top-right corner of the Finder window to initiate a search. You can refine your search by using filters and search operators.
5. Drag and Drop: One of the most convenient features of the Finder is the ability to drag and drop files or folders. You can drag files between folders, drag files onto applications to open them, or even drag files onto emails or messages to attach them. This makes moving and organizing files a breeze.
6. Quick Actions: macOS provides built-in Quick Actions that allow you to perform various actions on files without opening an application. Select a file, and the Quick Actions panel will appear in the preview pane of the Finder window. From there, you can perform actions such as rotating an image, creating a PDF, or trimming a video.
7. Tags: Tags are a powerful way to organize and categorize your files. You can apply custom tags to files or use predefined tags such as “Important,” “Work,” or “Personal.” Tags make it easier to locate files across different folders and provide a flexible organizational system.
Take some time to explore the various features and capabilities of the Finder. The more you familiarize yourself with its functionalities, the easier it will be to navigate and manage your files on your new Mac system.
By getting comfortable with the Finder, you’ll be able to efficiently organize, search, and work with your files, making your transition from Windows to Mac a seamless experience.
Understanding the Dock
The Dock is a fundamental part of the macOS interface that provides quick access to your most-used applications, documents, and utilities. Understanding how the Dock works will greatly enhance your efficiency and productivity on your new Mac. Here’s what you need to know about the Dock:
1. Dock Location: By default, the Dock is located at the bottom of the screen. However, you can customize its position to the left or right side if you prefer. To change the Dock’s location, go to “System Preferences,” click on “Dock,” and choose your preferred position from the drop-down menu.
2. App Icons: The Dock primarily displays application icons. These icons represent the applications you have open or those that you frequently use. They serve as shortcuts for launching and switching between apps. When an application is open, a small dot appears below its icon in the Dock.
3. Adding and Removing Apps: You can add your favorite applications to the Dock by simply dragging their icons from the Applications folder or the Launchpad and dropping them onto the Dock. To remove an app from the Dock, click and drag its icon out of the Dock until the “Remove” label appears, then release the mouse button.
4. Document and Folder Stacks: Besides applications, the Dock can also hold documents and folder stacks. Dragging a document onto an application’s icon in the Dock will open the document in that application. Folder stacks help organize and access specific folders quickly. To create a folder stack, drag a folder to the right side of the Dock, and it will group into a stack.
5. Dock Preferences: You can customize the appearance and behavior of the Dock through the Dock preferences. Access it by right-clicking on the Dock and selecting “Dock Preferences.” From there, you can adjust the size, hiding behavior, magnification, and more.
6. Running Indicator Lights: The Dock features indicator lights below the icons of running applications. These lights indicate that the applications are currently open and running in the background. Clicking on an app’s icon in the Dock will bring the corresponding window forward.
7. Accessing Additional Functions: Many apps offer additional functions or options when right-clicking on their Dock icon. Experiment with right-clicking on different app icons in the Dock to discover additional contextual options.
The Dock is designed to provide easy access to your frequently used apps and documents, offering a convenient way to multitask and switch between applications on your Mac. Take some time to personalize your Dock by adding your preferred applications and organizing them to suit your workflow.
By understanding and leveraging the capabilities of the Dock, you can streamline your daily tasks, boost productivity, and navigate your Mac system with ease.
Learning Keyboard Shortcuts
Keyboard shortcuts are a powerful asset when it comes to navigating and maximizing the efficiency of your Mac. By learning and using keyboard shortcuts, you can accomplish tasks faster and streamline your workflow. Here are some essential keyboard shortcuts to help you get started:
1. Command Key: The Command key (⌘) is a key specific to Mac keyboards and is used extensively for shortcuts. Many keyboard shortcuts involve combining the Command key with other keys to perform various actions.
2. Application and System Shortcuts: Each application and macOS itself has its own set of keyboard shortcuts. You can find these shortcuts by navigating to the application menu and looking for the corresponding commands. For example, Command + S is commonly used to save a file, and Command + C is used to copy selected text or files.
3. System-Wide Shortcuts: macOS offers a range of system-wide shortcuts that work regardless of the active application. Some common ones include Command + Space for opening Spotlight Search, Command + Tab for switching between open applications, and Command + ` (backtick) for switching between windows of the same application.
4. Take Screenshots: Capturing screenshots is a frequently used feature. To capture the entire screen, use Command + Shift + 3. If you only want to capture a specific portion of the screen, use Command + Shift + 4 and drag the crosshair over the desired area. To capture a specific window, press Command + Shift + 4, then press the Spacebar, and click on the window.
5. Text Editing Shortcuts: Like any other operating system, macOS provides a range of text editing shortcuts. For example, Command + X is used to cut, Command + V to paste, and Command + Z to undo. You can also use Command + A to select all text, Command + B to bold text, and Command + I to italicize text.
6. Mission Control and Spaces: Use Mission Control to get an overview of your open windows and running applications. The shortcut for Mission Control is usually set to F3 or Control + Up Arrow. You can also create and switch between different desktop Spaces using shortcuts like Control + Right Arrow and Control + Left Arrow.
7. Modifier Keys: Modifier keys like Shift, Option, and Control often enhance the functionality of keyboard shortcuts. For example, holding down the Shift key while minimizing a window will perform a slow animation, and using Option + Shift with volume or brightness keys adjusts the increment/decrement rate.
Learning and incorporating keyboard shortcuts into your workflow can significantly expedite your tasks and increase productivity on your Mac. Take the time to practice and memorize the shortcuts that you find most useful, and gradually incorporate them into your daily routine.
By mastering keyboard shortcuts, you can navigate your Mac with speed and efficiency, saving valuable time and effort in your transition from Windows to Mac.
Installing and Updating Apps on Mac
Installing and updating apps on your Mac is essential for adding new functionality and ensuring that your software is up to date. Here’s a guide on how to install and update apps on your Mac:
1. Mac App Store: The Mac App Store is the official marketplace for Mac applications. It provides a convenient and secure way to find, download, and install apps. To access the Mac App Store, click on the App Store icon in the Dock. From there, you can browse through different categories, search for specific apps, and read user reviews. Once you find an app you want, click on the “Get” or “Buy” button to start the installation.
2. Third-Party Websites: While the Mac App Store offers a wide range of applications, some apps may not be available or may be distributed outside of the Mac App Store. In such cases, you can visit the official website of the app developer to download and install the application directly. Make sure to download the app from trusted sources to ensure your Mac’s security.
3. Installation Process: The installation process may vary depending on the app. In most cases, downloading an app from the Mac App Store will automatically initiate the installation process. For apps downloaded from third-party websites, you usually need to double-click on the downloaded file or package, and follow the on-screen instructions to complete the installation.
4. App Updates: Keeping your apps updated is crucial for security, bug fixes, and accessing new features. The Mac App Store provides automatic updates for apps downloaded from the store. To enable automatic updates, go to “System Preferences,” click on “App Store,” and check the box next to “Automatically check for updates” and “Download newly available updates in the background.” For apps installed from third-party websites, you may need to manually check for updates by visiting the developer’s website or using built-in update features within the app itself.
5. Uninstalling Apps: If you no longer need an app, it’s good practice to uninstall it to free up disk space. To uninstall apps downloaded from the Mac App Store, locate the app in the Launchpad (by pressing F4 or searching for Launchpad in Spotlight) and then click and hold the app icon until it starts shaking. Click the “x” button that appears on the app’s icon to uninstall it. For apps downloaded from third-party websites, you can usually uninstall them by dragging the app icon to the Trash bin in the Dock.
Installing and updating apps on your Mac allows you to customize your system, add new capabilities, and stay up to date with the latest features and security updates. Always remember to download apps from trusted sources and keep your apps updated to ensure a smooth and secure Mac experience.
Troubleshooting Common Mac Issues
While Macs are known for their stability and reliability, they are not immune to occasional issues. If you encounter any problems with your Mac, here are some common troubleshooting steps to help you resolve them:
1. Restart your Mac: One of the simplest yet most effective troubleshooting steps is to restart your Mac. This can help resolve temporary glitches and clear out any processes that may be causing issues. Click on the Apple menu in the top left corner, and select “Restart” to initiate a restart.
2. Update macOS: Keeping your macOS up to date is crucial for stability and security. Check for any available system updates by going to “System Preferences” and clicking on “Software Update.” If updates are available, click “Update Now” to install them.
3. Troubleshoot Wi-Fi: If you’re experiencing Wi-Fi connectivity issues, there are a few steps you can take. First, check if other devices are able to connect to the Wi-Fi network to rule out any router problems. Try turning Wi-Fi off and on again or selecting “Turn Wi-Fi Off” from the Wi-Fi menu, then reconnecting. If the issue persists, you can try resetting the network settings by going to “System Preferences,” selecting “Network,” and choosing the Wi-Fi option on the left. Click on the “Advanced” button and then choose “Reset Wi-Fi” or “Renew DHCP Lease.”
4. Clear Cache and Temporary Files: Over time, your Mac can accumulate temporary files and cache, which can slow down performance and cause issues. You can use third-party apps like CleanMyMac or manually clear cache and temporary files by going into the Library folder in your user directory. Delete the contents of the Caches folder and the Temporary Items folder.
5. Safe Mode: If your Mac is experiencing persistent issues or won’t start up properly, you can try booting it into Safe Mode. To do this, restart your Mac and hold down the Shift key until the Apple logo appears. Safe Mode disables unnecessary extensions and performs a basic check of your Mac’s storage. Use this mode to diagnose and troubleshoot the issue.
6. Reset PRAM/NVRAM and SMC: Resetting the PRAM (Parameter Random Access Memory) or NVRAM (Non-Volatile Random Access Memory) and SMC (System Management Controller) can help resolve certain hardware-related issues. The process to reset these depends on the Mac model, so refer to Apple’s official documentation or support website for specific instructions.
7. Seek professional assistance: If you’ve tried the above troubleshooting steps and continue to experience issues, it may be time to seek help from an authorized Apple service provider or Apple Support. They can provide specialized assistance and diagnose and resolve complex problems.
Remember to always back up your important files and data regularly. It’s also important to be cautious when downloading and installing third-party software to avoid malware or compatibility issues.
By following these troubleshooting steps, you can often resolve common Mac issues and get your system back to optimal performance.