
Basic Editing Tools on the iPad
Editing videos on the iPad has become easier than ever before, thanks to the wide range of powerful editing tools available on the device. Whether you are a beginner or an experienced video editor, the iPad offers a multitude of features that can help you create professional-looking videos. In this section, we will explore some of the basic editing tools available on the iPad and how you can use them to enhance your videos.
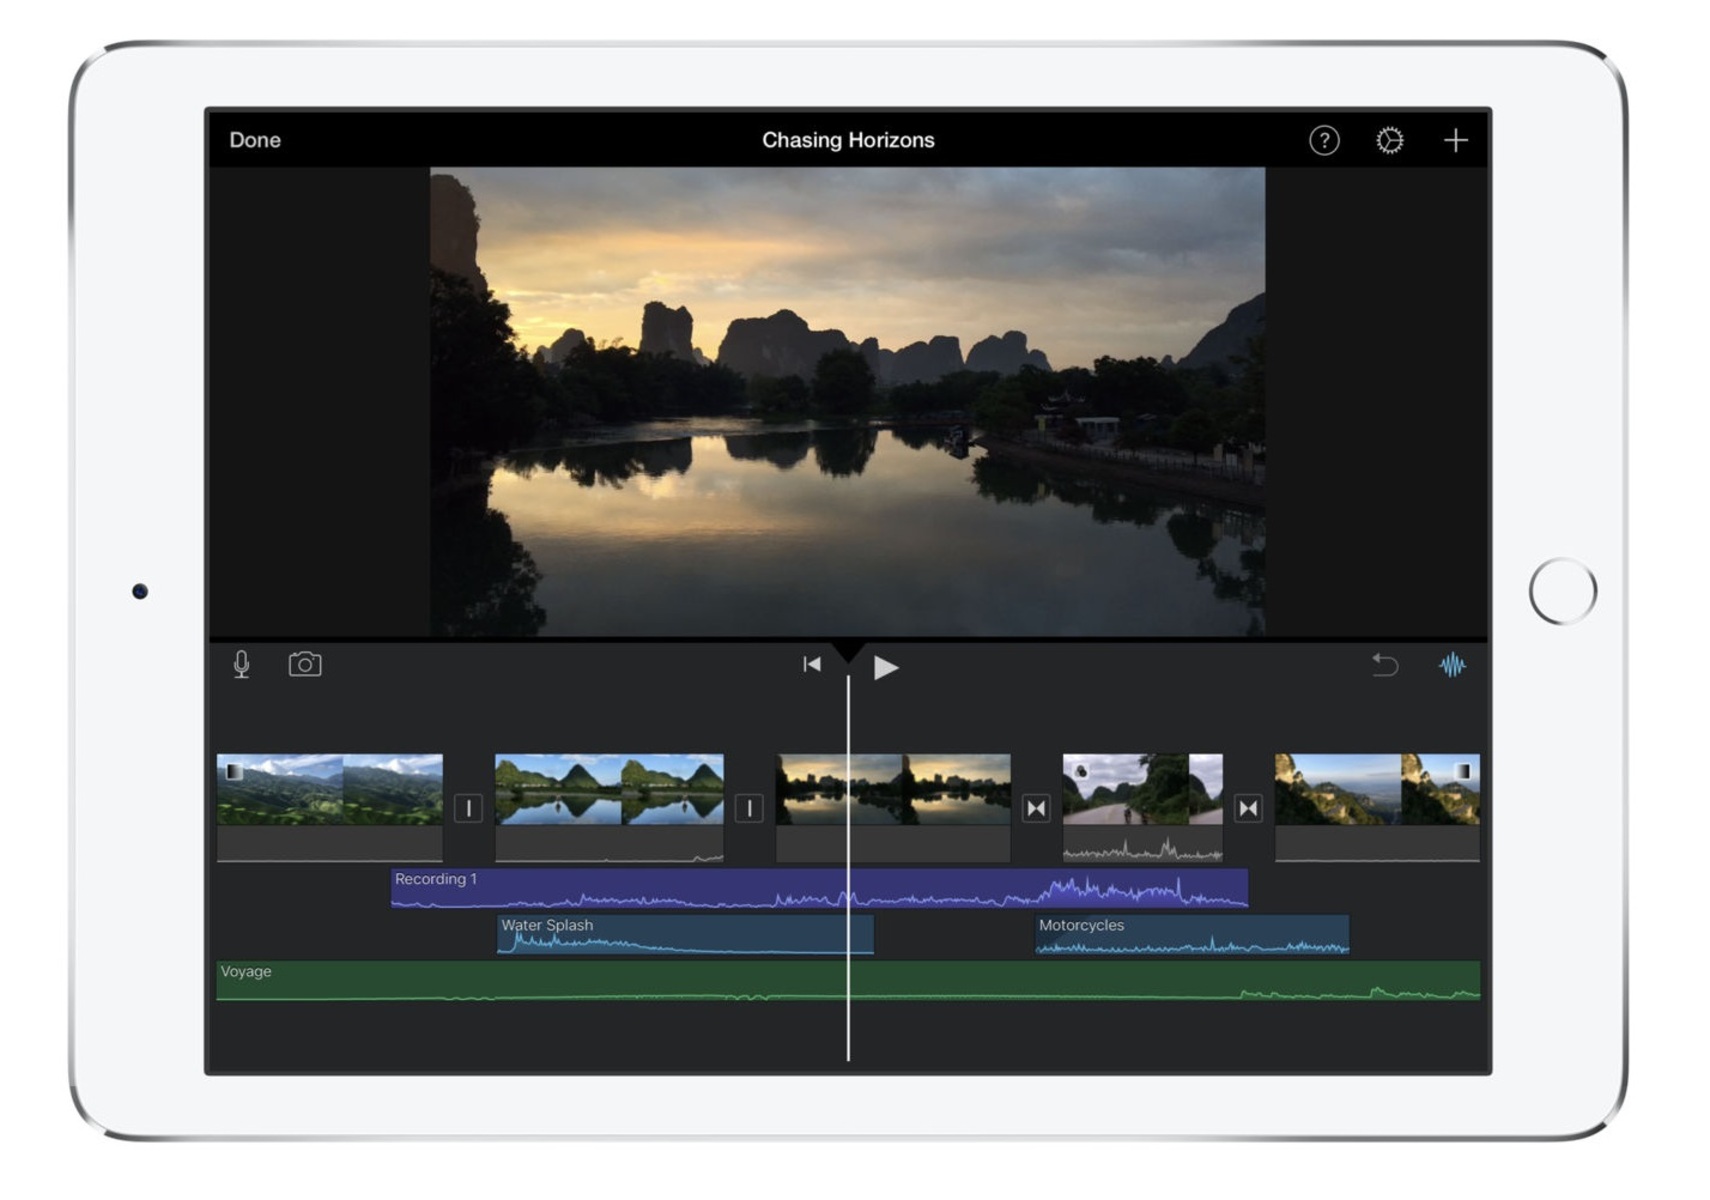
One of the fundamental editing tools on the iPad is the timeline editor. This allows you to arrange and trim your video clips, ensuring a seamless flow in your final product. By simply dragging and dropping your clips onto the timeline, you can easily rearrange their order and remove any unnecessary portions.
The iPad also offers a wide range of transitions that can be applied between video clips. These transitions add a polished touch to your videos and make the transition from one scene to another smooth and visually appealing. From basic fades to more dynamic effects, the iPad provides you with a variety of options to choose from.
Another essential tool for video editing on the iPad is the ability to add text and titles. Whether you want to include captions, subtitles, or simply introduce a new segment, the iPad allows you to easily insert text onto your videos. You can customize the font, size, color, and position of the text to match your desired style.
To enhance the overall look of your videos, the iPad provides a range of filters and effects that can be applied. These effects can help you adjust the color, brightness, and contrast of your videos, giving them a more professional and visually appealing appearance.
Furthermore, the iPad offers advanced audio editing capabilities. You can easily adjust the volume of your video clips, add background music, and even apply audio effects to enhance the overall audio quality of your videos.
Additionally, the iPad provides the capability to crop your videos, allowing you to remove unwanted parts or focus on a specific area. This can be particularly useful if you want to highlight a particular subject or remove any distractions from your footage.
Step-by-Step Guide to Splicing Videos on the iPad
Splicing videos refers to the process of combining multiple video clips into one cohesive video. If you’re looking to create a seamless and professional-looking video montage on your iPad, follow this step-by-step guide to splice videos with ease:
- Import your video clips: Open your preferred video editing app on your iPad and import the video clips you want to splice. You can import them from your photo library or directly from your camera roll.
- Arrange the clips on the timeline: Once your video clips are imported, arrange them in the desired order on the timeline. Simply drag and drop each clip to the desired position.
- Trim the clips: Use the trimming tool to remove any unwanted portions of the video clips. This allows you to focus on the most relevant parts of each clip and create a smooth transition between them.
- Add transitions: To create a seamless transition between video clips, add transitions. Choose from cross-fades, wipes, or other transition effects available in your editing app. Apply the selected transition between each clip to create a visually pleasing flow.
- Apply effects and filters: If desired, enhance your video by applying effects and filters. Adjust the color, brightness, contrast, or add a specific visual style to maintain consistency throughout your video.
- Add music and audio: To make your video more engaging, consider adding background music or audio effects. Import the audio file into your editing app and adjust its volume levels to create the desired mix with the video clips.
- Include text and titles: If you want to provide additional context or captions, add text and titles to your video. Choose the desired font, size, and position for your text to match the overall style and theme of your video.
- Review and make adjustments: Once you have edited your video, watch it from start to finish to ensure all the transitions, effects, and audio are as intended. Make any necessary adjustments or edits as needed to perfect your video.
- Export and share: When you are satisfied with your spliced video, export it in the desired format and resolution. You can save it to your photo library, share it on social media, or upload it to a video hosting platform.
By following these step-by-step instructions, you can easily splice videos on your iPad and create impressive video content. Take advantage of the editing tools available on the iPad to unleash your creativity and produce professional-looking videos right from your portable device.
Adding Transitions and Effects to Your Videos
Adding transitions and effects to your videos can greatly enhance the visual appeal and flow of your footage. With the wide array of editing apps available on the iPad, you have numerous options to choose from when it comes to adding these creative elements to your videos. Here’s a step-by-step guide on how to add transitions and effects to your videos on the iPad:
- Select your video editing app: Choose a video editing app that offers a variety of transitions and effects. Some popular options include iMovie, Adobe Premiere Rush, and LumaFusion.
- Import your video clip: Open your chosen editing app and import the video clip you want to edit. This can be done by selecting the import or add media button and locating the video clip in your device’s storage.
- Access the transitions/effects library: Look for the transitions/effects library within your editing app. This is where you’ll find a wide range of options to choose from.
- Choose a transition: Browse through the available transitions and select the one that best fits your video’s style and tone. Common transitions include fade in/fade out, crossfade, dissolve, wipe, and slide.
- Apply the transition: Once you’ve chosen a transition, drag and drop it onto the timeline at the point where you want the transition to occur. You can adjust the duration of the transition by dragging its edges on the timeline.
- Add effects: To add effects to your video, browse through the effects library on your editing app. Popular effects include color correction, filters, text overlays, and motion effects.
- Choose and apply effects: Select the desired effect and apply it to your video clip. You can adjust the intensity or customize the effect settings according to your preferences.
- Preview and adjust: After applying transitions and effects, preview your video to see if it flows smoothly and the effects are applied as desired. Make any necessary adjustments by tweaking the transition timings or effect settings.
- Export and share: Once you’re satisfied with the transitions and effects, export your edited video in your preferred format and resolution. You can save it to your photo library or share it on social media platforms, video-sharing websites, or with friends and family.
By following these steps, you can easily add transitions and effects to your videos on the iPad. Experiment with different options and combinations to create visually captivating videos that engage your audience and make your content stand out.
Adjusting Audio Levels on the iPad
Audio plays a crucial role in creating a compelling video. To ensure your videos have clear and balanced audio, it’s important to know how to adjust the audio levels on your iPad. Whether you’re adding background music or working with recorded audio, here’s a step-by-step guide on how to adjust the audio levels on your iPad:
- Select your video editing app: Choose a video editing app that allows you to adjust audio levels. Popular options include iMovie, Adobe Premiere Rush, and LumaFusion.
- Import your video clip: Open your chosen editing app and import the video clip you want to adjust the audio levels for. This can be done by selecting the import or add media button and locating the video clip in your device’s storage.
- Access the audio editing options: Look for the audio editing options or mixer within your editing app. This is where you’ll find the controls to adjust the audio levels of your video clip.
- Separate audio from video (if needed): If your editing app allows it, you may choose to separate the audio from the video clip. This can give you more control over the audio levels and allow you to make precise adjustments.
- Adjust the audio levels: Using the audio level controls, increase or decrease the volume of the audio to achieve the desired balance. Most editing apps offer a visual representation of the audio levels, allowing you to see the changes in real-time.
- Apply keyframe adjustments (if available): Some advanced editing apps allow you to apply keyframes to the audio levels. With keyframes, you can adjust the volume at specific points in the video clip, creating smooth transitions and controlling the audio dynamics.
- Preview and make adjustments: After making the initial adjustments, preview your video to ensure the audio levels sound balanced and clear. If necessary, go back and fine-tune the audio levels until you achieve the desired outcome.
- Export and share: Once you’re satisfied with the audio levels, export your edited video in your preferred format and resolution. The audio levels will be maintained in the final version of your video.
By following these steps, you can easily adjust the audio levels on your iPad and ensure your videos have high-quality and well-balanced audio. Take the time to listen to your videos carefully and make the necessary adjustments to deliver an engaging and enjoyable audio experience for your audience.
Tips for Enhancing Video Quality on the iPad
Creating high-quality videos on the iPad is possible with the right techniques and tools. If you want to enhance the overall video quality and make your content more visually appealing, consider following these tips:
- Shoot in good lighting: Proper lighting is essential for capturing high-quality videos. Whenever possible, film in well-lit environments or use additional lighting equipment to avoid dark or grainy footage.
- Stabilize your iPad: Shaky footage can detract from the overall video quality. Use a tripod or a stabilizing device to ensure smooth and steady shots, especially when filming in motion or capturing handheld footage.
- Frame your shots: Pay attention to composition and framing when shooting videos. Consider the rule of thirds, leading lines, and the visual balance of your shots. This can greatly enhance the aesthetic appeal of your videos.
- Use the best resolution and settings: Adjust the camera settings on your iPad to shoot videos in the highest resolution possible. This ensures the clarity and detail of your footage, even when played on larger screens.
- Minimize background noise: Background noise can be distracting and negatively impact the overall video quality. When recording audio for your videos, try to minimize background noise by choosing quieter locations or using external microphones.
- Edit for consistency: During the editing process, ensure visual consistency by color correcting your clips. Adjust the color balance, saturation, and contrast to create a cohesive look throughout your video.
- Apply filters and effects selectively: While effects can enhance your videos, use them sparingly and tastefully. Overusing filters and effects can make your videos look overly processed or artificial.
- Consider video transitions: Smooth video transitions can give your videos a professional touch. Use transitions like fades and cuts to create seamless transitions between shots, enhancing the overall flow and visual appeal of your videos.
- Optimize video export settings: When exporting your edited video, make sure to choose the appropriate file format and resolution. Consider the platforms or devices on which your video will be viewed to ensure optimal playback quality.
- Regularly update your iPad: Keeping your iPad’s software up to date can help optimize its performance for video editing. Regular software updates often include improvements and bug fixes that can enhance the overall editing and video quality experience.
By incorporating these tips into your video creation process, you can enhance the video quality on your iPad and create visually stunning content that engages your audience.
Common Mistakes to Avoid While Editing Videos on the iPad
Editing videos on the iPad can be an exciting and convenient way to create stunning visual content. However, there are common mistakes that can diminish the quality of your edited videos. To ensure your video editing process is smooth and your final product is of the highest quality, avoid the following mistakes:
- Overediting: Going overboard with effects, transitions, or filters can make your video look unnatural and distracting. Keep your edits subtle and only use them when they enhance the overall storytelling or visual appeal of the video.
- Ignoring audio: Audio is just as important as visuals in video editing. Neglecting audio quality, not adjusting volume levels, or using background music that clashes with the content can negatively impact the viewer’s experience.
- Disregarding continuity: Inconsistent color grading, abrupt cuts, or mismatched shots can disrupt the flow and cohesiveness of your video. Pay attention to continuity to ensure a smooth viewing experience.
- Skipping color correction: Failing to color correct your footage can result in dull or inconsistent visuals. Take the time to adjust brightness, contrast, and color balance to enhance the overall look of your video.
- Not organizing your project: Lack of organization can lead to confusion and errors when editing. Create a clear folder structure for your project files and use naming conventions to keep track of your assets.
- Using low-resolution footage: Starting with low-resolution footage limits the quality of your final video. Whenever possible, use high-quality footage to ensure crisp and clear visuals in your edited videos.
- Forgetting to backup your work: Accidents happen, and losing your progress due to a technical glitch or device failure can be devastating. Regularly backup your project files to external storage or cloud services to safeguard your work.
- Rushing the editing process: Editing takes time and attention to detail. Avoid rushing through the process and take the time to review, fine-tune, and polish your video to ensure its quality.
- Not adjusting video export settings: Incorrectly exporting your video with the wrong settings can result in reduced quality or compatibility issues. Take the time to select the appropriate resolution, format, and compression settings for your intended audience and platform.
- Ignoring feedback from others: Seeking feedback from others, such as peers or target audience members, can provide valuable insights and help you identify areas for improvement in your edited videos. Avoid dismissing feedback and be open to constructive criticism.
By being mindful of these common mistakes, you can elevate the quality of your edited videos on the iPad and produce professional-looking content that captivates your audience.
Exporting and Sharing Your Edited Videos
Once you have finished editing your videos on the iPad, the final step is to export and share your edited masterpiece. Fortunately, the iPad provides various options to export and share your videos in different formats and platforms. Here’s a step-by-step guide on how to export and share your edited videos:
- Select your desired video format: Before exporting, choose the appropriate video format based on your intended use and target platform. Common options include MP4, MOV, or AVI.
- Adjust export settings: Some video editing apps allow you to customize settings such as resolution, frame rate, and bitrate. Consider the desired quality and file size of your video when adjusting these settings.
- Trim the video (if needed): If there are any unwanted portions at the beginning or end of your edited video, you can trim it before exporting. This ensures that only the essential parts are included in the final version.
- Choose export destination: Select your desired export destination, such as your device’s media gallery or a cloud storage service. Ensure that you have sufficient storage space to accommodate the exported video.
- Start the export process: Initiate the export process by tapping on the export or share button in your video editing app. This will begin rendering and encoding your video according to your selected format and settings.
- Wait for the export to complete: The export process may take some time, depending on the length and complexity of your video. Be patient and allow your iPad to complete the export without interruption.
- Verify the exported video: Once the export process is complete, verify that the exported video appears as expected. Playback the video on your iPad to ensure that it matches your edited version and that the quality is satisfactory.
- Choose sharing options: Depending on your desired sharing method, select the appropriate option. You can share your video directly to social media platforms, messaging apps, email, or file-sharing services.
- Follow sharing instructions: Depending on the chosen sharing method, you may need to follow additional instructions. For example, if sharing to a social media platform, you may need to log in, write a description, or select the target audience.
- Monitor the upload process: If you are sharing your video online, keep an eye on the upload progress. Ensure a stable internet connection and be patient while your video is being uploaded to the chosen platform.
By following these steps, you can successfully export and share your edited videos from your iPad. Whether you’re sharing with friends and family or showcasing your work online, make sure to tailor your sharing options to reach your desired audience effectively.