
Why Set a Schedule for Your Nest Thermostat
Setting a schedule for your Nest thermostat can bring numerous benefits to your home comfort and energy efficiency. By programming specific temperature settings at different times of the day, you can ensure that your home is always at the perfect temperature without any manual adjustments.
The main advantage of setting a schedule is convenience. Rather than manually adjusting the thermostat every time you want to change the temperature, a schedule allows you to automate the process. This is especially useful if you have a regular daily routine. For example, you can program your Nest thermostat to lower the temperature during the day when you are not at home and raise it back up before you arrive. This way, your home will always be comfortable when you enter, without wasting energy to cool or heat an empty house.
Another advantage of scheduling is energy savings. By optimizing your thermostat settings, you can reduce energy consumption and lower your utility bills. For instance, you can program your Nest thermostat to lower the temperature during the night when you are typically sleeping and raise it in the morning before you wake up. This can help you save on both cooling and heating costs by only using energy when necessary.
Furthermore, a scheduled thermostat can enhance your overall comfort. You can set different temperatures for different times of the day to accommodate your preferences and activities. For example, you may want a cooler temperature during the night for better sleep, a warmer temperature in the morning for a comfortable wake-up, and a moderate temperature during the day for optimal productivity. By creating a schedule that aligns with your daily routine, you can ensure that your home is always at the right temperature for your needs.
Lastly, a scheduled thermostat can contribute to a more sustainable lifestyle. By conserving energy, you not only save money but also reduce your environmental impact. Your Nest thermostat can help you play your part in fighting climate change by efficiently managing your home’s heating and cooling systems.
Getting Started: Setting Up Your Nest Thermostat
Before you can start enjoying the benefits of a scheduled Nest thermostat, you need to go through the initial setup process. Here are the steps to get you started:
- Check compatibility: Ensure that your current HVAC system is compatible with the Nest thermostat. You can refer to the Nest website or consult a professional if you are uncertain.
- Turn off power: Before installing your Nest thermostat, turn off the power to your HVAC system to ensure your safety.
- Mount the thermostat: Choose an appropriate location on a wall that is easily accessible and away from direct sunlight or drafts. Use the provided mounting plate and screws to secure the Nest thermostat in place.
- Connect the wires: Follow the wiring instructions provided with your Nest thermostat to connect the wires from your HVAC system to the corresponding terminals on the thermostat.
- Connect to Wi-Fi: Turn on the power to your HVAC system and follow the on-screen prompts on your Nest thermostat to connect it to your Wi-Fi network. This will enable you to control your thermostat remotely using your smartphone.
- Set up your account: Download the Nest app on your smartphone and create a Nest account. Follow the app’s instructions to add your new thermostat to your account.
- Configure basic settings: Once your Nest thermostat is connected, you can customize basic settings such as temperature units, time, and language preferences through the app or directly on the device.
- Calibrate your thermostat: It is recommended to calibrate your Nest thermostat to ensure accurate temperature readings. This can be done through the app by following the provided instructions.
Once you have completed these setup steps, you are ready to start creating a schedule for your Nest thermostat. The next section will guide you through the process of syncing your thermostat with your smartphone and understanding the different modes available.
Syncing Your Nest Thermostat with Your Smartphone
One of the key features of the Nest thermostat is its ability to sync with your smartphone, allowing you to control and monitor your thermostat remotely. Here’s how to get your Nest thermostat connected to your smartphone:
- Download the Nest app: Start by downloading the Nest app from the App Store or Google Play Store onto your smartphone. The app is available for both iOS and Android devices.
- Create a Nest account: If you haven’t done so during the initial setup, create a Nest account through the app. This will enable you to access and control your thermostat from anywhere.
- Add your thermostat: Launch the Nest app and follow the on-screen instructions to add your thermostat to the app. This involves scanning the QR code on the back of your thermostat or manually entering the device’s identification code.
- Connect to Wi-Fi: Ensure that your smartphone is connected to the same Wi-Fi network as your Nest thermostat. The app will guide you through the process of connecting your thermostat to your home’s Wi-Fi network.
- Pair the devices: Once your Nest thermostat is connected to Wi-Fi, the app will automatically detect it. Confirm the pairing process, and your smartphone will be synced with your thermostat.
- Customize settings: With your thermostat successfully synced, you can now customize various settings through the app. This includes setting up a schedule, adjusting temperature settings, and accessing energy usage reports.
- Enjoy remote control: Now that your smartphone and Nest thermostat are synchronized, you can control your thermostat from anywhere. Whether you’re at home, at work, or on vacation, you can effortlessly adjust the temperature to your liking.
Syncing your Nest thermostat with your smartphone provides you with the convenience of always having control over your home’s temperature. It allows you to make adjustments, set schedules, and monitor energy usage even when you’re not physically present.
Furthermore, the Nest app provides valuable insights into your energy consumption patterns, helping you make informed decisions to optimize efficiency and reduce your carbon footprint.
Next, we will explore the different modes available on your Nest thermostat and how to effectively use them to create a personalized and efficient schedule.
Understanding the Different Modes on Your Nest Thermostat
When it comes to programming your Nest thermostat, understanding the different modes available is essential. These modes allow you to customize the behavior of your thermostat throughout the day. Here are the main modes you’ll find on your Nest thermostat:
- Heat Mode: This mode is used when you want your thermostat to only provide heating. When the temperature drops below your set target, the thermostat will activate your heating system to warm your home.
- Cool Mode: On the other hand, this mode is used when you want your thermostat to only provide cooling. When the temperature rises above your target, the thermostat will activate your air conditioning system to cool your home.
- Heat-Cool Mode: This mode allows your thermostat to provide both heating and cooling as needed. If the temperature is below your heating target, the heating system will turn on. If the temperature is above your cooling target, the cooling system will be activated.
- Off Mode: As the name suggests, this mode turns off both heating and cooling systems. It is useful for times when you want to manually control the temperature or when you’re away from home for an extended period.
- Eco Mode: Enabling Eco Mode puts your thermostat in an energy-saving state. It aims to reduce energy consumption by adjusting the temperature slightly to save on heating or cooling costs. The specific settings for Eco Mode can be customized to your preferences.
- Away Mode: This mode is designed for when you are not at home. When your thermostat is set to Away Mode, it will adjust the temperature to save energy while maintaining a comfortable level for pets or plants. You can also enable geofencing to automatically activate Away Mode when you leave your home.
Understanding these modes allows you to create a schedule that aligns with your lifestyle and preferences. For example, during the winter, you can program your thermostat to switch to Heat Mode in the mornings and evenings when you need the heating system the most. In the summer, you can switch to Cool Mode to keep your home cool during the hottest parts of the day.
Experimenting with different modes can help you find the right balance of comfort and energy efficiency for your home. Additionally, using the Eco Mode and Away Mode intelligently can lead to significant energy savings, reducing both your carbon footprint and utility bills.
Now that you have a good understanding of the different modes, let’s explore how to manually adjust the temperature on your Nest thermostat when you need to make changes on the go.
Manually Adjusting the Temperature on Your Nest Thermostat
While creating a schedule for your Nest thermostat is convenient, there may be times when you need to make manual temperature adjustments. Whether you want to temporarily override the schedule or make on-the-fly changes, here’s how you can manually adjust the temperature on your Nest thermostat:
1. Use the thermostat itself: The most straightforward way to manually adjust the temperature is by using the thermostat’s display. Simply press the thermostat to wake it up, and then turn the outer ring clockwise to increase the temperature or counterclockwise to decrease it. This will change the temperature temporarily without affecting your programmed schedule.
2. Use the Nest app: If you have connected your Nest thermostat to your smartphone, you can easily adjust the temperature using the Nest app. Open the app and select the thermostat you wish to control. From there, you can tap on the temperature setting and adjust it to your desired level. The app will update the thermostat accordingly. This method is especially convenient when you’re away from home and want to make changes remotely.
3. Use voice commands: If you have integrated your Nest thermostat with a compatible smart speaker or assistant, such as Google Assistant or Amazon Alexa, you can use voice commands to control the temperature. Simply say the designated voice command and specify the desired temperature adjustment. The smart speaker or assistant will communicate the change to your Nest thermostat, and it will update accordingly.
It’s important to note that any manual adjustments you make will override the scheduled settings for a temporary period. After a set period of time, the thermostat will revert back to its programmed schedule unless you make additional manual adjustments or changes to the schedule itself.
Manually adjusting the temperature can be useful in situations where you want to make a quick adjustment without modifying the entire schedule. For example, if you suddenly feel too warm or too cool and want immediate comfort, manual adjustment allows you to achieve that instantly.
Remember, while manual adjustments are convenient, consider using them sparingly to ensure that your Nest thermostat continues to operate efficiently and according to your desired energy-saving settings.
Next, we’ll cover how to create a basic schedule on your Nest thermostat to automatically regulate the temperature throughout the day.
Creating a Basic Schedule
One of the key features of the Nest thermostat is its ability to create a schedule that suits your daily routine. By programming specific temperature settings for different times of the day, you can ensure optimal comfort and energy efficiency. Here’s how to create a basic schedule on your Nest thermostat:
1. Open the Nest app: Start by opening the Nest app on your smartphone or tablet. Ensure that your Nest thermostat is connected to the app and linked to your account.
2. Go to the Schedule tab: Navigate to the Schedule tab within the app. This is where you’ll find the options to create and customize your thermostat’s schedule.
3. Choose a preset schedule or create a custom schedule: Depending on your preference, you can either choose from preset schedules provided by Nest or create a custom schedule. The preset schedules offer options such as “Wake,” “Leave,” “Return,” and “Sleep” that align with typical daily routines. If you prefer a more personalized schedule, you can create one from scratch.
4. Set temperature targets for each time block: Once you’ve selected a preset schedule or created a custom one, you can start setting temperature targets for each time block. Simply tap on a time block and adjust the temperature setting using the on-screen controls. You can specify different temperatures for weekdays and weekends as well.
5. Fine-tune your schedule: After setting the temperature targets for each time block, you can fine-tune your schedule further. You can add or remove time blocks, adjust the duration of each block, or modify the temperature settings to your liking.
6. Preview and save your schedule: Once you’re satisfied with your schedule, take a moment to preview it to ensure it matches your desired settings. Once you’re confident, save the schedule and activate it on your Nest thermostat.
By creating a basic schedule, your Nest thermostat will automatically adjust the temperature at different times of the day, providing you with optimal comfort and energy efficiency. You no longer need to manually make temperature adjustments—your thermostat will do it for you, ensuring that your home is always at the desired temperature when you need it.
Remember, the schedule you create is not set in stone. You can easily modify and update it as your daily routine changes. Whether you have a predictable schedule or a more dynamic one, customizing your Nest thermostat’s schedule will enhance the comfort and convenience of your home.
In the next section, we’ll explore how the learning feature of your Nest thermostat can further optimize your schedule based on your preferences and behavior.
Using the Learning Feature of Your Nest Thermostat
One of the standout features of the Nest thermostat is its learning capability. The Nest Learning Thermostat is designed to observe your temperature preferences and behavior patterns and automatically adjust the schedule to maximize comfort and energy efficiency. Here’s how to make the most of the learning feature of your Nest thermostat:
1. Give it time to learn: When you first install your Nest thermostat, it may take some time for it to learn your preferences. During this period, manually adjust the temperature as needed, and the thermostat will start picking up on your patterns.
2. Let it observe your behavior: The Nest thermostat uses built-in sensors and machine learning algorithms to monitor your activity and adjust the schedule accordingly. It will learn when you are typically home, when you sleep, and when you leave, making automatic temperature adjustments to suit your routine.
3. Provide feedback: If the Nest thermostat doesn’t capture your preferences accurately, you can provide feedback to help it learn better. For example, if it sets the temperature too high or too low for your liking, manually adjust it to the desired level, and the thermostat will take note for future reference.
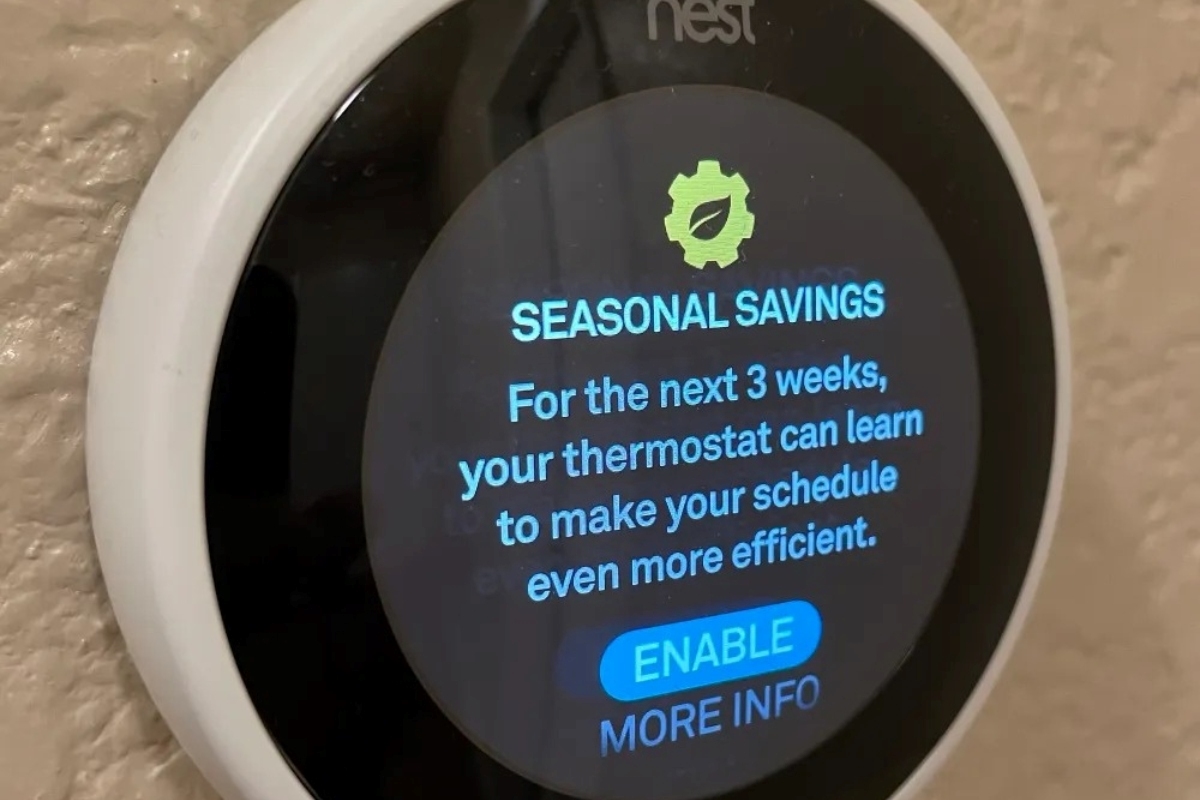
4. Take advantage of the Seasonal Savings feature: With the learning feature, your Nest thermostat can also take into account the changing seasons and adjust the schedule accordingly. By enabling the Seasonal Savings feature, the thermostat will fine-tune the schedule to optimize energy savings without sacrificing comfort.
5. Monitor and make adjustments: Even though the Nest thermostat is designed to learn and adapt, it’s a good practice to periodically review and make adjustments to the schedule. Your routine may change, or you may prefer different temperature settings at certain times. By actively monitoring and refining the schedule, you can ensure it aligns perfectly with your lifestyle.
6. Override the schedule when needed: While the learning feature can be incredibly helpful, there may be times when you want to override the schedule. Whether it’s a special occasion or a change in routine, you can manually adjust the temperature using the thermostat or the Nest app. These manual adjustments won’t affect the learned schedule but will provide you with immediate control when necessary.
The learning feature of the Nest thermostat offers a personalized and adaptive approach to temperature control in your home. Over time, it eliminates the need for manual adjustments and ensures optimal comfort and energy efficiency based on your preferences and behavior.
In the next section, we’ll explore how you can fine-tune your schedule for even more precise control over your Nest thermostat.
Fine-Tuning Your Schedule
While the learning feature of your Nest thermostat can automatically adjust the schedule based on your preferences and behavior, there may be times when you want to make specific tweaks or customizations. Fine-tuning your schedule allows you to have more precise control over the temperature settings throughout the day. Here’s how you can fine-tune your schedule on your Nest thermostat:
1. Review and assess your current schedule: Start by reviewing your existing schedule and assessing how well it aligns with your needs and preferences. Take note of any specific time blocks or temperature settings that you want to modify.
2. Add or remove time blocks: If you notice gaps or overlaps in your schedule, you can add or remove time blocks to ensure a more seamless and efficient schedule. Consider the different activities and temperature preferences during different parts of the day and make necessary adjustments.
3. Adjust temperature settings: Fine-tuning also involves making precise adjustments to the temperature settings for each time block. Evaluate whether the current settings provide the desired level of comfort or if they need to be fine-tuned for specific times or days of the week.
4. Customize settings for individual days: Your schedule doesn’t have to be the same every day. You may have different routines or temperature preferences on weekends or certain weekdays. Customize the schedule to reflect these variations, ensuring that your Nest thermostat adapts to your unique lifestyle.
5. Leverage manual overrides: While the Nest thermostat’s learning feature is powerful, there may be instances when you want immediate control over the temperature. Utilize the manual override feature to make temporary adjustments without affecting the overall schedule. This gives you flexibility and control when you need it.
6. Use vacation mode: If you’re planning to be away from home for an extended period, activate vacation mode on your Nest thermostat. This allows you to set a temperature that will be maintained throughout your absence, helping to conserve energy while preventing extreme temperature fluctuations in your home.
Fine-tuning your schedule ensures that your Nest thermostat provides precise temperature control that aligns with your lifestyle and preferences. By making small adjustments, you can optimize comfort and energy efficiency, adapting your thermostat to your changing needs.
Regularly evaluating and fine-tuning your schedule is an important part of maximizing the benefits of your Nest thermostat. It allows you to continuously optimize the temperature settings and maintain a comfortable and efficient home environment.
In the next section, we’ll explore how you can set different temperatures for different rooms using additional sensors or smart devices.
Setting Different Temperatures for Different Rooms
The ability to set different temperatures for different rooms in your home is a valuable feature that can enhance comfort and energy efficiency. With the help of additional sensors or smart devices, you can create customized temperature zones throughout your home. Here’s how you can set different temperatures for different rooms using your Nest thermostat:
1. Install additional sensors: Consider installing additional temperature sensors in rooms where you want individual temperature control. These sensors can communicate with your Nest thermostat and provide real-time temperature readings for each room.
2. Create temperature zones: Once you have installed the additional sensors, you can create temperature zones within your home. Each zone represents a specific area or room that you want to control separately. Assign the sensors to their respective zones using the Nest app.
3. Set temperature targets for each zone: With the temperature zones established, you can set individual temperature targets for each zone. Determine the desired temperature for each room or area and program it accordingly in the Nest app. This allows you to customize the comfort level based on individual preferences or specific room requirements.
4. Adjust the schedule for each zone: To further optimize control, you can create a separate schedule for each temperature zone. This enables you to tailor temperature settings based on the activities and usage patterns specific to each room. Adjust the start and end times for each zone’s schedule accordingly.
5. Utilize remote sensors or smart devices: Some smart thermostats, including certain Nest models, offer compatibility with remote sensors or smart devices. These devices can detect occupancy or monitor temperature in specific rooms, allowing your thermostat to adjust the temperature based on this information. Integrate these devices into your system and configure them to sync with your Nest thermostat.
6. Monitor and make adjustments: Regularly monitor the performance of the temperature zones and make adjustments as needed. Assess whether the temperature in each room matches your desired settings and make modifications to the schedule or temperature targets accordingly. Fine-tuning the zones ensures that each room remains comfortable and energy-efficient.
Setting different temperatures for different rooms using your Nest thermostat provides individualized comfort and energy control throughout your home. It allows for temperature customization based on room usage, personal preferences, or specific requirements. By creating temperature zones, you can optimize energy usage and tailor the climate in each room to the occupants’ needs.
In the next section, we’ll explore how you can use geofencing to automate your Nest thermostat schedule and enhance convenience and energy savings.
Using Geofencing to Automate Your Nest Thermostat Schedule
Geofencing is a powerful feature that can automate your Nest thermostat schedule based on your location. By leveraging the GPS capabilities of your smartphone, the Nest app can detect when you leave or return home. This technology allows your thermostat to adjust the temperature accordingly, providing convenience and energy savings. Here’s how you can use geofencing to automate your Nest thermostat schedule:
1. Enable geofencing: In the Nest app settings, locate the geofencing feature and ensure it is enabled. You may need to grant permission for the app to access your location information for this feature to work.
2. Set your home location: Specify your home location within the app. This tells the geofencing feature where your home is and helps the app determine when you’re entering or leaving the area.
3. Define the “home” radius: Customize the radius around your home that triggers the change in temperature setting. You can set it to a distance that suits your needs, such as 500 meters or 1 kilometer.
4. Configure the temperature settings: Determine the temperature adjustments you want the Nest thermostat to make when you leave or return home. For example, you can have it set to an energy-saving temperature when you’re away and a comfortable temperature when you’re close to home.
5. Test the geofencing feature: After configuring the settings, test the geofencing feature by leaving your home area and observing how the Nest thermostat adjusts the temperature. Similarly, return home and check if the thermostat switches back to your desired comfort temperature.
6. Fine-tune the settings: Based on your experience and preferences, fine-tune the geofencing settings. You may want to adjust the “away” and “home” temperatures or the radius to better suit your needs and optimize energy savings.
Using geofencing with your Nest thermostat offers several benefits. It eliminates the need to manually adjust the temperature when you leave or return home, ensuring a comfortable environment without wasting energy. Additionally, it provides convenience by automating your thermostat schedule based on your daily comings and goings.
It’s important to note that geofencing relies on the location information from your smartphone. Ensure that location services are enabled for the Nest app and that your smartphone’s GPS is functioning properly for accurate geofencing control.
In the next section, we’ll share some tips and tricks for optimizing your Nest thermostat schedule to maximize energy efficiency and comfort.
Tips and Tricks for Optimizing Your Nest Thermostat Schedule
Optimizing your Nest thermostat schedule can help you maximize energy efficiency, comfort, and convenience. Here are some tips and tricks to consider when fine-tuning and managing your Nest thermostat schedule:
1. Take advantage of temperature setbacks: Setting slightly lower or higher temperature targets during periods when you’re away or asleep can significantly reduce energy consumption. Experiment with temperature setbacks to find the right balance between energy savings and comfort.
2. Utilize the preheat or precool feature: The preheat or precool feature allows you to specify a target temperature to be achieved by a specific time. This can ensure a comfortable environment when you wake up or return home without wasting energy by keeping the temperature elevated during prolonged periods of absence.
3. Embrace the learning feature: Allow your Nest thermostat’s learning feature to adapt to your routine and preferences over time. The more you use it, the better it becomes at predicting and adjusting the temperature to suit your needs, leading to increased energy savings and comfort.
4. Regularly review and update your schedule: Life changes, routines evolve, and seasons shift. Plan to review and update your Nest thermostat schedule periodically to ensure it continues to meet your requirements. Make adjustments as needed to reflect changes in your routine or temperature preferences.
5. Leverage smart home automation integration: If you have other smart home devices, consider integrating them with your Nest thermostat. This can allow for more seamless automation and optimize energy efficiency. For example, connecting your thermostat to smart blinds can help regulate the amount of sunlight entering your home, reducing the need for heating or cooling.
6. Monitor and analyze energy usage: Take advantage of the energy usage reports provided by your Nest thermostat. Monitor your energy consumption trends and identify areas where further adjustments can be made to optimize energy efficiency and reduce costs.
7. Explore additional features and settings: Dive deeper into the settings and features of your Nest thermostat. Familiarize yourself with options such as fan control, humidity settings, and filter reminders. Each feature can contribute to enhanced comfort and energy optimization.
8. Stay informed about software updates: Keep your Nest thermostat up to date by installing any available software updates. These updates often include bug fixes, performance enhancements, and new features that can further improve energy efficiency and user experience.
Applying these tips and tricks will help you make the most of your Nest thermostat’s capabilities. By optimizing your schedule and exploring the various settings and features, you can achieve the perfect balance of comfort, convenience, and energy efficiency in your home.
In the next section, we’ll address common issues and offer troubleshooting tips to help you resolve any schedule-related challenges with your Nest thermostat.
Troubleshooting Common Schedule Issues
While operating your Nest thermostat and managing the schedule, you may encounter some common issues. Here are some troubleshooting tips to help you address and resolve schedule-related challenges:
1. Incorrect temperature adjustments: If you notice that the temperature is not adjusting according to your schedule, check that your schedule is correctly programmed. Ensure that you have set the desired temperature targets for each time block and that the schedule is active and not overridden by manual adjustments.
2. Schedule not following changes in routine: If your schedule is not adapting to changes in your routine, consider reevaluating and updating your schedule. Make adjustments to reflect any recent changes in your daily activities or preferences. Also, ensure that the learning feature of your Nest thermostat is enabled and has enough time to adapt to changes.
3. Unwanted temperature fluctuations: If you’re experiencing unexpected temperature fluctuations, check for any conflicting or overlapping time blocks in your schedule. Ensure that there are no periods where different temperature settings are conflicting, causing inconsistent temperatures. Also, verify that your Nest thermostat is placed away from heat sources or drafts that may affect temperature readings.
4. Geofencing not working correctly: If geofencing is not triggering the expected temperature adjustments, confirm that your smartphone’s location services are enabled and that the Nest app has the necessary permissions. Check that the home location and geofencing radius are properly set and that your smartphone is within the specified range when expected temperature changes should occur.
5. Wi-Fi connectivity issues: If your Nest thermostat is not syncing with the app or not updating the schedule, check your Wi-Fi connection. Ensure that your Wi-Fi network is working correctly and that your Nest thermostat has a stable connection. Restarting your Wi-Fi router and performing a reset on the thermostat can often resolve connectivity issues.
6. Inaccurate temperature readings: If you suspect that your Nest thermostat is providing inaccurate temperature readings, verify that it is installed correctly and away from any heat sources or drafts that may affect its accuracy. Also, consider calibrating the thermostat through the app settings to ensure precise temperature readings.
7. Battery-related issues: If your Nest thermostat appears to be causing schedule-related issues or not functioning as expected, double-check its battery level. Low battery levels can impact the performance of the thermostat. Replace the batteries if necessary or ensure that your thermostat is properly connected to a compatible power source.
8. Seek support from Nest: If you have tried troubleshooting steps for schedule-related issues and are still experiencing difficulties, don’t hesitate to reach out to Nest support. They can provide further assistance, address any underlying issues, and guide you through additional troubleshooting steps specific to your situation.
By following these troubleshooting tips, many common schedule issues with your Nest thermostat can be resolved. If you encounter persistent difficulties, remember that Nest support is available to help you diagnose and resolve more complex problems.
In the next section, we’ll wrap up with some closing remarks and tips for maintaining optimal performance and satisfaction with your Nest thermostat schedule.