
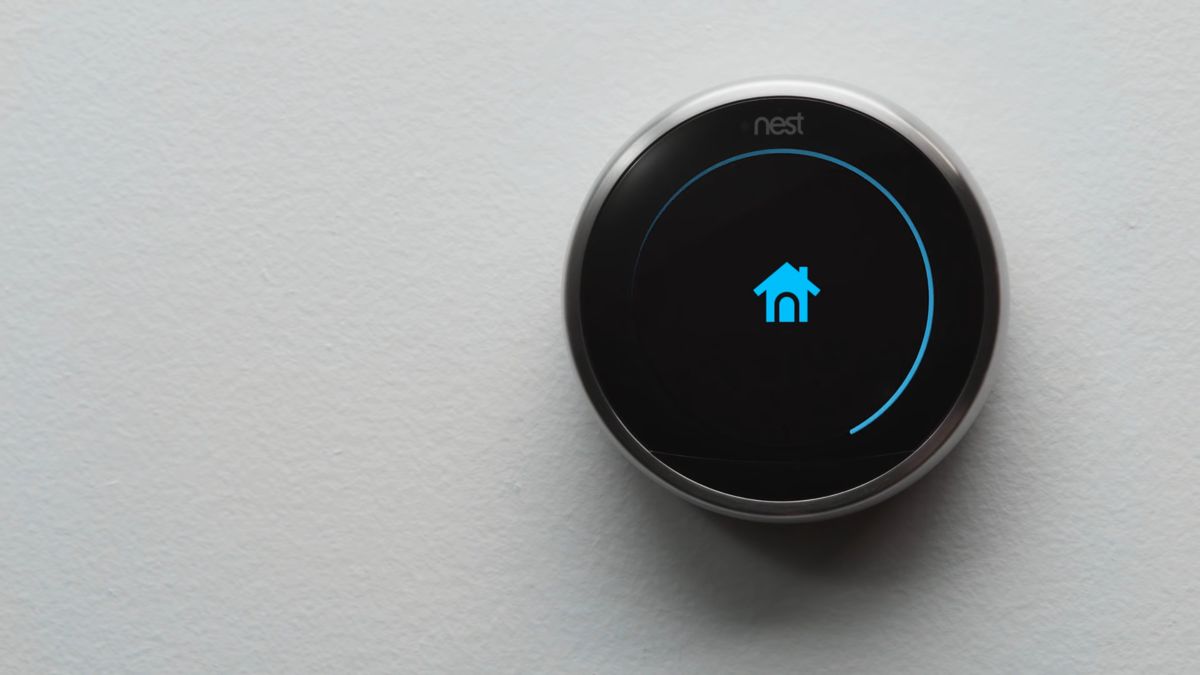
What is a Nest Thermostat
A Nest Thermostat is a smart home device that allows you to control and monitor the temperature in your home. It is designed to learn your preferences and create a customized heating and cooling schedule to maximize energy efficiency and comfort. With its sleek design and advanced features, the Nest Thermostat has become a popular choice among homeowners.
One of the standout features of the Nest Thermostat is its ability to learn your schedule and adjust the temperature accordingly. By analyzing your usage patterns over time, the thermostat can anticipate when you are home and when you are away, automatically adjusting the temperature to conserve energy when no one is present.
The Nest Thermostat also provides additional features such as remote access through a mobile app, energy usage reports, and compatibility with smart home systems like Google Home and Amazon Alexa. This means you can control your thermostat from anywhere, using your smartphone or voice commands.
Installing a Nest Thermostat is a straightforward process, and it can easily replace your existing thermostat. It connects to your home’s Wi-Fi network, allowing you to control it remotely and receive software updates to enhance its functionality.
Understanding the Schedule feature
The Schedule feature on the Nest Thermostat allows you to set specific temperature preferences for different times of the day and days of the week. It helps you maintain a comfortable indoor environment while also optimizing energy usage.
The Schedule feature works by dividing the day into time periods, such as morning, afternoon, evening, and night. You can customize the temperature settings for each time period based on your preferences. For example, you may want a cooler temperature during the night for a good night’s sleep, and a slightly higher temperature during the day when you are active.
The Schedule feature also allows you to set different temperature preferences for weekdays and weekends. This is useful if your routine varies on different days of the week. For instance, you may want a different schedule for weekdays when you are at work compared to weekends when you are at home.
When you first install your Nest Thermostat, it will create a default schedule based on patterns it detects in your temperature adjustments. However, you have the flexibility to customize this schedule to better suit your needs. You can easily make changes to the temperature settings for each time period through the thermostat or using the Nest app on your smartphone.
Another convenient aspect of the Schedule feature is that it allows for preheating or precooling your home before you arrive. For example, if you typically return home from work at 6:00 PM, you can set the schedule to start warming or cooling your home a few minutes before your arrival, ensuring a comfortable living environment when you walk through the door.
Overall, the Schedule feature on the Nest Thermostat provides a flexible and intuitive way to manage your home’s temperature settings. It helps you save energy, maintain comfort, and easily adapt to your daily routine.
Reasons to Turn Off Schedule
While the Schedule feature on the Nest Thermostat is convenient for maintaining a consistent temperature throughout the day, there are several reasons why you might want to turn it off at times:
1. Flexibility: One of the main reasons to turn off the Schedule feature is to have more flexibility in controlling the temperature. There may be days when your routine deviates from the usual schedule, such as holidays or vacations. By disabling the Schedule, you can manually adjust the temperature as needed without the thermostat automatically reverting to the set schedule.
2. Personal Preferences: You might prefer to have full control over the temperature settings without relying on a pre-set schedule. Some individuals have different temperature preferences based on their comfort levels or health conditions. By turning off the Schedule, you can manually set the temperature to your liking at any time.
3. Energy Efficiency: While the Schedule feature is designed to optimize energy usage, there may be instances when you want to conserve energy further. For example, if you plan to be away from home for an extended period, turning off the Schedule and manually adjusting the temperature to an energy-saving level can help reduce your utility bills.
4. Unpredictable Lifestyle: If your daily routine is highly variable or unpredictable, the Schedule feature may not align well with your lifestyle. Turning off the Schedule allows you to adjust the temperature based on your immediate needs or preferences without being tied to a fixed time schedule.
5. Home Occupancy: If your home is frequently occupied throughout the day, turning off the Schedule can prevent unnecessary temperature adjustments. For example, if you work from home or have different family members coming and going, manually controlling the temperature ensures that the thermostat doesn’t change settings based on occupancy patterns.
6. Special Events or Gatherings: When hosting a special event or gathering at your home, you may want to temporarily turn off the Schedule. This allows you to accommodate additional guests, adjust the temperature for specific activities, or create a more comfortable environment for everyone in attendance.
Remember, turning off the Schedule feature on the Nest Thermostat doesn’t mean you lose the ability to control the temperature. You can manually adjust the temperature as needed or utilize other features like the Home/Away Assist function to maintain energy efficiency even without a set schedule.
How to Manually Change the Temperature
If you want to manually adjust the temperature on your Nest Thermostat, there are a few different methods you can use:
1. Using the Thermostat Itself: The easiest and most direct way to manually change the temperature is by using the Nest Thermostat itself. Simply tap on the screen to wake it up, and you will see the temperature displayed. Use the touch-sensitive ring around the thermostat to adjust the temperature up or down. The screen will provide real-time feedback on the temperature changes as you rotate the ring.
2. Using the Nest Mobile App: Another convenient way to manually change the temperature is through the Nest mobile app. Download and install the app on your smartphone or tablet and log in to your Nest account. From the app’s main screen, you will see the current temperature and options to adjust the temperature up or down. Simply swipe the temperature dial or use the on-screen buttons to make changes. The app will communicate with your Nest thermostat to apply the new temperature settings.
3. Using Voice Commands: If you have a smart speaker or a device with voice assistant capabilities like Google Home or Amazon Alexa, you can use voice commands to change the temperature on your Nest Thermostat. For example, you can say “Hey Google, set the temperature to 72 degrees” or “Alexa, decrease the temperature by 2 degrees.” The voice assistant will communicate with your Nest thermostat and apply the requested temperature changes.
4. Via Remote Access: With the Nest Thermostat’s remote access feature, you can control the temperature from anywhere using an internet connection. This is especially useful when you are away from home and want to adjust the temperature before your return. Simply open the Nest app on your smartphone, connect to your Nest thermostat, and make the necessary changes to the temperature settings.
Whether you choose to use the thermostat, the Nest app, voice commands, or remote access, manually changing the temperature on your Nest Thermostat is quick and easy. It provides you with control over the temperature in your home without relying on pre-set schedules or automation.
Using the Nest App to Turn Off Schedule
The Nest app offers a convenient way to manage your Nest Thermostat, including the ability to turn off the Schedule feature. Here’s how you can use the app to disable the schedule:
1. Launch the Nest App: Start by opening the Nest app on your smartphone or tablet. Ensure that you are logged in to your Nest account.
2. Select your Thermostat: If you have multiple Nest devices, choose the thermostat you want to adjust from the app’s main screen.
3. Access the Schedule Settings: Once you have selected your thermostat, locate the menu icon (usually represented by three horizontal lines) in the top left or right corner of the screen. Tap on the menu icon to open the navigation panel and select “Settings.”
4. Adjust the Schedule: In the “Settings” menu, you should find an option related to the Schedule feature. Depending on the app version, it may be labeled as “Schedule” or “Nest Scheduler.” Tap on this option to access the schedule settings.
5. Disable the Schedule: Within the schedule settings, you will see the option to turn off the schedule. It is typically represented by a toggle switch or a checkbox. Toggle the switch to the “Off” position or uncheck the box to disable the schedule.
6. Save Changes: Once you have turned off the schedule, ensure to save your changes by tapping on the “Save” or “Done” button. This will update your Nest Thermostat with the new settings.
By using the Nest app to turn off the Schedule feature, you regain full control over the temperature settings without any preset time restrictions. You can now manually adjust the temperature as needed, allowing for more flexibility in managing the comfort of your home.
It is important to note that turning off the Schedule does not disable the entire automation feature of the thermostat. The Nest Thermostat will still operate in other modes, such as Home/Away Assist, which adjusts the temperature based on occupancy detection or proximity to your home.
Turning Off Schedule Using the Thermostat Itself
If you prefer to make changes directly on your Nest Thermostat without using the app, you can easily turn off the Schedule feature. Here’s how you can do it using the thermostat itself:
1. Wake Up the Display: To begin, tap on the Nest Thermostat display to wake it up. You will see the current temperature and other relevant information on the screen.
2. Open the Main Menu: Look for a small button or icon on the display that resembles a gear or three horizontal lines. Press this button to open the main menu of the thermostat.
3. Access the Settings: Within the main menu, navigate to the “Settings” option. Depending on the model of your Nest Thermostat, this option may be labeled as “Preferences,” “Options,” or something similar. Select it to proceed to the settings menu.
4. Find the Schedule Settings: In the settings menu, locate the option related to the Schedule feature. It may be named “Schedule” or “Nest Scheduler.” Select this option to access the schedule settings.
5. Disable the Schedule: Within the schedule settings, you will see an option to turn off the schedule. It is typically represented by a toggle switch or a checkbox. Toggle the switch to the “Off” position or uncheck the box to disable the schedule.
6. Confirm and Save Changes: Once you have turned off the schedule, the thermostat may ask for confirmation. Follow the on-screen prompts or press the appropriate button to save your changes. The display will update to reflect the new settings.
After turning off the Schedule feature using the thermostat, you have full control over the temperature adjustments without any predefined schedule. You can manually set the temperature to your preference at any time without the thermostat automatically reverting to a specific schedule.
Remember that disabling the Schedule feature does not disable other automation features of the Nest Thermostat, such as Home/Away Assist or temperature adjustments based on occupancy. These features will still operate according to their respective settings, providing convenience and energy efficiency in your home.
Adjusting Settings for Specific Days
In addition to setting a general schedule for weekdays and weekends, the Nest Thermostat allows you to customize temperature settings for specific days. This feature provides a higher level of control and flexibility to match your unique routine. Here’s how you can adjust settings for specific days:
1. Access the Schedule Settings: From the main menu on your Nest Thermostat or through the Nest app, navigate to the Schedule settings. The option may be labeled as “Schedule,” “Nest Scheduler,” or something similar.
2. Choose the Desired Day: After accessing the Schedule settings, select the day for which you want to adjust the temperature settings. The available days will be displayed on the screen or listed in the app.
3. Set Temperature for Different Time Periods: Once you choose the specific day, you can set the temperature preferences for different time periods, similar to customizing the schedule for weekdays and weekends. Depending on your thermostat model, you may be able to add new time periods or edit existing ones.
4. Save the Changes: After setting the temperature for the specific day and time periods, save your changes by pressing the appropriate button on the thermostat or tapping “Save” in the app.
5. Repeat for Other Days: If you want to customize temperature settings for multiple days, simply repeat the process for each desired day. This way, you can tailor the temperature according to your specific needs for each day of the week.
By adjusting settings for specific days, you have the flexibility to create a more personalized and optimized schedule for your Nest Thermostat. For example, you can set a different temperature during weekends when you have a more relaxed routine or customize the temperature for certain days when you have special events or activities planned.
Having the ability to fine-tune temperature settings for specific days ensures that your Nest Thermostat aligns perfectly with your lifestyle, helping you maintain comfort and energy efficiency throughout the week.
Re-enabling Schedule When Needed
While turning off the Schedule feature on your Nest Thermostat provides flexibility and control over temperature settings, there may be times when you want to re-enable the schedule. Whether your routine becomes more consistent or you simply want the convenience of automated temperature adjustments, here’s how you can re-enable the Schedule feature:
1. Access the Schedule Settings: Using the Nest app or the thermostat itself, access the Schedule settings menu. This option is usually labeled as “Schedule” or “Nest Scheduler” and can typically be found in the main menu or settings section.
2. Enable the Schedule: Within the Schedule settings, look for an option to enable or turn on the schedule. It may be represented by a toggle switch or a checkbox. Toggle the switch to the “On” position or check the box to re-enable the schedule.
3. Customize the Schedule: After re-enabling the schedule, you have the option to customize it according to your preference. You can adjust the temperature settings for different time periods, add or remove time periods, and set different schedules for weekdays and weekends. Make any necessary changes to align the schedule with your routine.
4. Save the Changes: Once you have customized the schedule, save your changes by pressing the appropriate button on the thermostat or tapping “Save” in the app. The thermostat will update accordingly, and the Schedule feature will be active again.
By re-enabling the Schedule feature, your Nest Thermostat will automatically adjust the temperature based on the predefined schedule. This can be particularly useful if you have a consistent routine or prefer the convenience of automated temperature changes without the need for manual adjustments.
Remember that even with the Schedule feature enabled, you still have the flexibility to manually adjust the temperature at any time. Nest Thermostats allow for seamless integration of schedule and manual control, providing a balance between convenience and customization.
Benefits of Turning Off Schedule
Turning off the Schedule feature on your Nest Thermostat can offer several benefits, allowing for more control and flexibility over your home’s temperature settings. Here are some advantages of disabling the schedule:
1. Enhanced Flexibility: By turning off the Schedule, you have the freedom to adjust the temperature whenever you want, without being tied to a predefined schedule. This is particularly useful if your daily routine varies or if you have irregular occupancy patterns in your home.
2. Personalized Comfort: Disabling the Schedule allows you to set the temperature purely based on your personal preference. You can tailor the temperature to your comfort level without restriction, ensuring a more pleasant and customized indoor environment.
3. Energy Savings: While the Schedule feature is designed to optimize energy usage, turning it off can provide greater control over energy consumption. You can manually adjust the temperature to conserve energy during times when you are away from home or when you prefer a more economical setting.
4. Accommodating Special Occasions: When hosting gatherings or special events at your home, turning off the Schedule lets you have immediate control over the temperature. You can adjust it according to the number of guests, specific activities, or external weather conditions to ensure everyone’s comfort.
5. Adaptation to Changing Schedules: If your routine changes frequently, disabling the Schedule eliminates the need to constantly adjust the predefined schedule. You can easily modify the temperature settings to align with your changing schedule on a day-to-day basis.
6. Manual Overrides: When unexpected weather conditions arise or personal comfort preferences change, turning off the Schedule allows for quick manual overrides. You can instantly raise or lower the temperature without having to wait for the next scheduled time period.
7. Ideal for Vacation Periods: When you’re on vacation, turning off the Schedule provides control over temperature settings throughout your absence. You can set the thermostat to an energy-saving mode or adjust the temperature remotely via the Nest app to reduce energy consumption while ensuring a comfortable return home.
Disabling the Schedule feature on your Nest Thermostat gives you greater autonomy and control over your home’s temperature. It enables you to create a more customized and adaptable approach to regulating your indoor climate, enhancing comfort and energy management according to your specific needs.
Troubleshooting Common Issues Related to Turning Off Schedule
While turning off the Schedule feature on your Nest Thermostat can offer flexibility and control, it’s essential to be aware of some common issues that may arise. Here are a few troubleshooting tips for addressing these issues:
1. Temperature Inconsistencies: If you notice inconsistent temperature changes after turning off the Schedule, check the temperature differential settings in the advanced settings menu. Ensure that the temperature range is set appropriately to avoid abrupt temperature fluctuations.
2. Remote Access Problems: If you’re experiencing difficulties accessing and controlling the thermostat remotely after turning off the Schedule, ensure that your Nest Thermostat is connected to a stable Wi-Fi network. Verify the Wi-Fi connectivity on your thermostat and your mobile device and make sure they are on the same network.
3. Unexpected Temperature Adjustments: If the thermostat continues to make automatic temperature adjustments despite turning off the Schedule, review your Home/Away Assist settings. Home/Away Assist uses occupancy detection to automatically adjust the temperature. Disable or customize this feature to prevent unexpected changes.
4. Schedule Not Saving: If you encounter issues saving changes after re-enabling the Schedule feature or adjusting specific day settings, check for possible software updates for your Nest Thermostat. Outdated firmware can sometimes cause configuration issues. Ensure your thermostat is updated to the latest version provided by Nest.
5. Incorrect Time and Day Display: If the Thermostat displays an incorrect time or day after modifying or disabling the Schedule, verify the time settings and ensure that the correct timezone is selected. Adjust the time and timezone if necessary to ensure accurate scheduling and temperature control.
6. Lack of Temperature Control: If you find that you don’t have the expected control over the temperature after turning off the Schedule, confirm that the thermostat is properly calibrated. Use a separate thermometer to compare the temperature readings and consider recalibrating the thermostat if needed.
7. Battery Life Issues: If your thermostat operates on battery power, turning off the Schedule may result in decreased battery life due to increased manual temperature adjustments. If you notice a significant decrease in battery performance, consider using a C-wire or rechargeable batteries to provide a consistent power supply.
If you continue to experience issues or if the troubleshooting tips provided do not resolve the problem, it may be necessary to contact Nest support for further assistance. They can provide personalized guidance and troubleshooting specific to your situation, ensuring that your Nest Thermostat functions properly even after turning off the Schedule feature.