
Composing an Email in Gmail
Composing an email in Gmail is a simple process. To get started, login to your Gmail account and click on the “Compose” button to create a new email. This will open up a blank email draft where you can begin typing your message.
When composing your email, it’s helpful to keep a few best practices in mind. First, make your subject line clear and concise, as this will give the recipient a preview of the content of your email. Next, use a friendly and professional tone in your email body, addressing the recipient by their name if possible. This adds a personal touch and helps to establish a connection with the reader.
Gmail’s interface provides a variety of tools to enhance your email composition experience. You can format the text with options like bold, italics, and underline to emphasize important points. Additionally, you can add bulleted or numbered lists to organize your thoughts or present information in a structured manner.
Furthermore, Gmail allows you to add attachments, including pictures, in various ways to enhance your email communication. In the following sections, we will explore different methods for attaching and sending pictures in Gmail.
Attaching a Picture from Your Computer
Attaching a picture from your computer to an email in Gmail is a straightforward process. Here’s how you can do it:
1. Start by composing a new email in Gmail. Click on the “Attach files” button, represented by a paperclip icon, located at the bottom of the email composition window.
2. This will open a file explorer window where you can navigate to the location on your computer where the picture is saved. Select the desired picture and click “Open” or “Insert” (the exact wording may vary depending on your operating system).
3. Gmail will now upload the picture as an attachment to your email. You can verify this by checking the attachment section at the bottom of the email composition window.
4. If you want to attach multiple pictures, repeat the process for each picture you want to include. Gmail allows you to attach multiple files, including different types of media, to a single email.
5. Once you have attached all the desired pictures, you can proceed with composing the rest of your email. Add a subject, recipient’s email address, and the content of the email as needed.
6. Before sending the email, make sure to review the attachment section again to ensure that all the intended pictures are included. You can also remove or rearrange the attachments if necessary by clicking on the “x” or the three vertical dots next to each attachment.
Remember that there is typically a file size limit for attachments in Gmail, so make sure your picture file is within the permissible size to avoid any issues.
By following these steps, you can easily attach pictures from your computer to emails in Gmail and share visual content with your recipients.
Choosing a Picture from Google Drive
If you have pictures stored in your Google Drive and want to include them in an email, Gmail provides a convenient way to do so. Here’s how:
1. Begin by composing a new email in Gmail. Click on the “Google Drive” icon located at the bottom of the composition window. It looks like a triangular icon with the letter “D” inside.
2. A pop-up window will appear, showing your Google Drive files and folders. Browse through your Drive to locate the folder where your desired picture is saved. If needed, you can use the search bar or navigate through the folders to find the specific picture.
3. Once you find the picture you want to include, click on it to select it. You can choose multiple pictures by holding down the Ctrl (Windows) or Command (Mac) key while clicking on the pictures.
4. After selecting the picture(s), click on the “Insert” button. The selected picture(s) will then be added to your email as attachments.
5. If you want to include the picture(s) within the body of your email rather than as attachments, move your cursor to the desired location within the email body and click on the “Insert as Drive link” option that appears when you hover over the picture thumbnail in the attachment section. This will embed the picture(s) in the email.
6. In case you need to adjust or resize the picture(s), you can click on the inserted image and use the image editing options that appear to make any necessary changes.
7. Continue composing your email, adding a subject and the recipient’s email address, along with any additional content you wish to include.
8. Prior to sending the email, double-check that the pictures are correctly attached or embedded within the email body.
By utilizing these steps, you can conveniently choose and include pictures from your Google Drive in Gmail emails, making it easier to share your visuals with recipients.
Including a Picture Link in Your Email
Gmail allows you to include a picture link in your email, which directs your recipient to view the picture by clicking on the provided link. Here’s how you can add a picture link:
1. Begin by composing a new email in Gmail. You can either start with a blank email or reply to an existing email thread.
2. In your email body, place your cursor at the location where you want the picture link to appear.
3. To add the picture link, you can either paste the direct URL of the image or insert a hyperlink with descriptive text. You can get the direct URL of an image by uploading it to an image hosting service or by using the link to the image file stored on your website or blog.
4. If you choose to paste the direct URL, simply copy the URL and then use the “Paste as plain text” option in Gmail to ensure that the link is added correctly. This avoids any formatting issues that might occur when pasting from different sources.
5. If you prefer to insert a hyperlink with descriptive text, select the text or image where you want to create the link, then click on the “Insert link” icon in the email formatting toolbar. Enter the desired image URL in the “Web address” field and click “Apply”.
6. You can customize the display text of the hyperlink if necessary to make it more descriptive or appealing. Simply edit the text within the hyperlink tags (e.g., Link Text)
7. Double-check that the picture link is working correctly by hovering over the link or testing it before sending the email.
Including a picture link in your email provides an alternative way for recipients to access the picture, especially if you have large or numerous images. It also allows you to maintain the format and readability of your email without crowding it with attachments or embedded images.
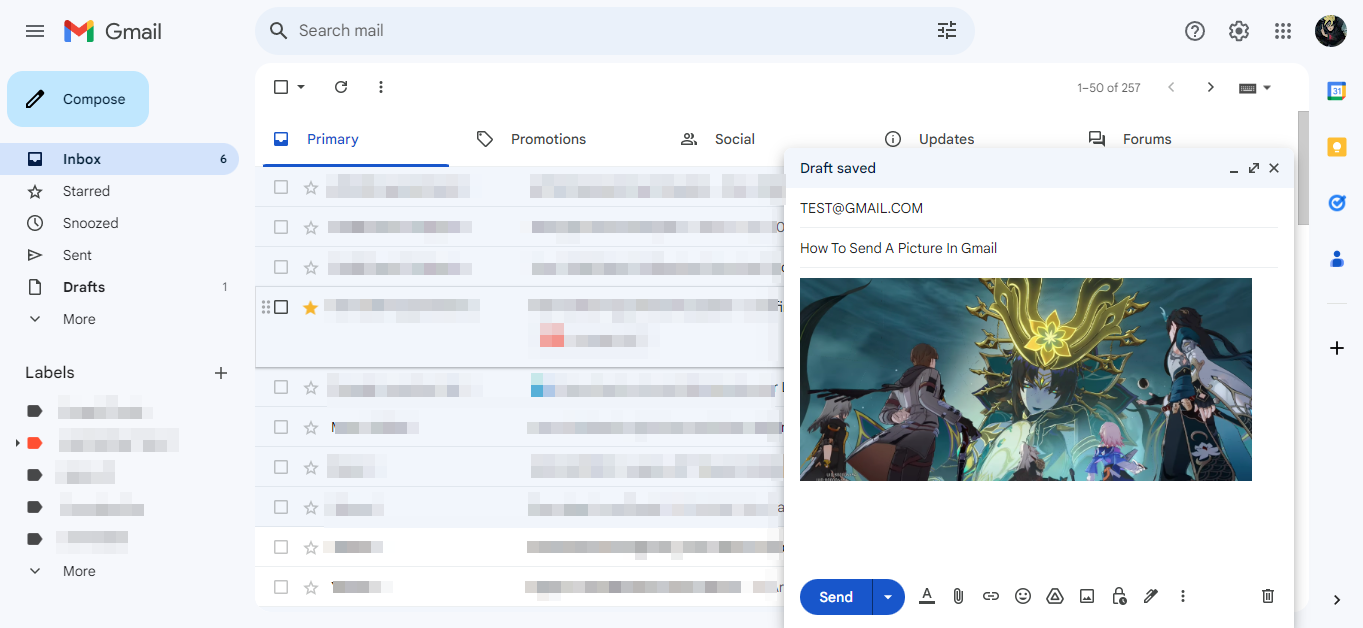
Embedding Pictures in the Body of the Email
Gmail allows you to embed pictures directly within the body of your email, providing a visual representation that is visible without the need to download attachments. Here’s how you can embed pictures in Gmail:
1. Start by composing a new email in Gmail or replying to an existing thread. Place your cursor at the desired location in the email body where you want to insert the picture.
2. Click on the “Insert photo” icon, represented by a mountain and sun icon, in the email composition toolbar.
3. A pop-up window will appear, giving you the option to select the source of the picture. You can choose from three options: “Upload”, “Photos”, or “By URL”.
4. If you choose to upload a picture, click on “Upload” and navigate to the location on your computer where the picture is saved. Select the picture and click “Open” to upload it to Gmail.
5. If you want to select a picture from your Google Photos collection, click on the “Photos” option. This will open a window showing your Google Photos albums and pictures. Browse through the collection and select the desired picture to insert it into your email.
6. Alternatively, you can also insert a picture by URL. Select the “By URL” option and paste the direct link to the image. Gmail will then fetch the image and display it in your email.
7. After selecting or uploading the picture, Gmail will insert the image at the cursor’s location in your email body. You can then resize or adjust the picture as needed by clicking on it and dragging the resize handles or using the options in the formatting toolbar.
8. Continue composing your email, adding a subject, recipient’s email address, and any additional content.
By embedding pictures in the body of your email, you can provide a visual element that enhances the communication and captures the attention of your recipients without the need for attachments or picture links.
Resizing and Adjusting Picture Formatting
Resizing and adjusting picture formatting in Gmail allows you to optimize the appearance and layout of your images within the email. Here are some steps to help you resize and adjust picture formatting:
1. Start by composing a new email in Gmail and inserting the desired picture into the email body. You can refer to Section 5 for instructions on how to embed pictures in Gmail.
2. Once the picture is inserted, click on the image to select it. You will notice resize handles around the edges of the picture.
3. To resize the picture, click and drag any of the corner handles while holding down the Shift key. This ensures that the picture maintains its aspect ratio while being resized. You can make the picture larger or smaller as per your requirement.
4. If you want to adjust the picture’s alignment or positioning, click on the image and use the alignment options in the formatting toolbar. You can align the picture to the left, right, or center of the email body.
5. To add some spacing around the picture, click on the “Padding” icon in the formatting toolbar. Increase the padding values to create more space between the picture and the surrounding text or other elements.
6. Gmail also provides options to add borders to the picture. Click on the “Border” icon in the formatting toolbar to access border settings. You can change the border color, style, and thickness to customize the picture’s appearance.
7. If you want to wrap text around the picture, click on the “Text wrapping” icon in the formatting toolbar. Choose either “Wrap left” or “Wrap right” to position the picture on one side and allow text to flow around it.
8. Make sure to review the picture formatting and adjust it as needed to achieve the desired visual effect. Repeat the resizing and adjustment steps for any additional pictures in the email.
By resizing and adjusting picture formatting in Gmail, you have the flexibility to create visually appealing emails that effectively communicate your message while maintaining a professional and polished look.
Previewing and Sending the Email
Before sending your email in Gmail, it is essential to preview and ensure that everything looks exactly as you intended. Here’s what you should do:
1. After composing your email, take a moment to review the overall content, including the subject, recipient’s email address, and the body of the email. Make sure there are no spelling mistakes, grammatical errors, or formatting issues.
2. Furthermore, verify that any attached pictures, embedded images, or picture links are correctly inserted and displayed. Check that the pictures are properly aligned, sized, and appear as intended.
3. It is also important to check the email’s layout and formatting on different devices, such as desktop, tablet, and mobile, to ensure it remains visually appealing and readable across various platforms.
4. Use the “Preview” function available in Gmail to get an accurate representation of how your email will look before sending it. This feature allows you to see the email as your recipients would, helping you identify any last-minute adjustments that may be required.
5. Finally, once you’re satisfied with the preview and confident that your email is error-free and visually appealing, it’s time to send it. Click on the “Send” button to dispatch the email to your intended recipient(s).
Remember, once the email is sent, it cannot be retracted or edited, so it’s crucial to thoroughly review and double-check everything before clicking that send button.
By previewing your email in Gmail, you can catch any potential issues, ensure the visual presentation is flawless, and confidently send out a polished and professional communication to your recipients.