
Determining the Size of the Video File
Sending large video files from your iPhone can be a bit tricky, especially if you’re limited by file size restrictions or slow internet connections. Before you decide on the best method to send your video, it’s important to determine the size of the file. By knowing the file size, you can choose the most suitable method to transfer it.
To determine the size of the video file on your iPhone, you can follow these steps:
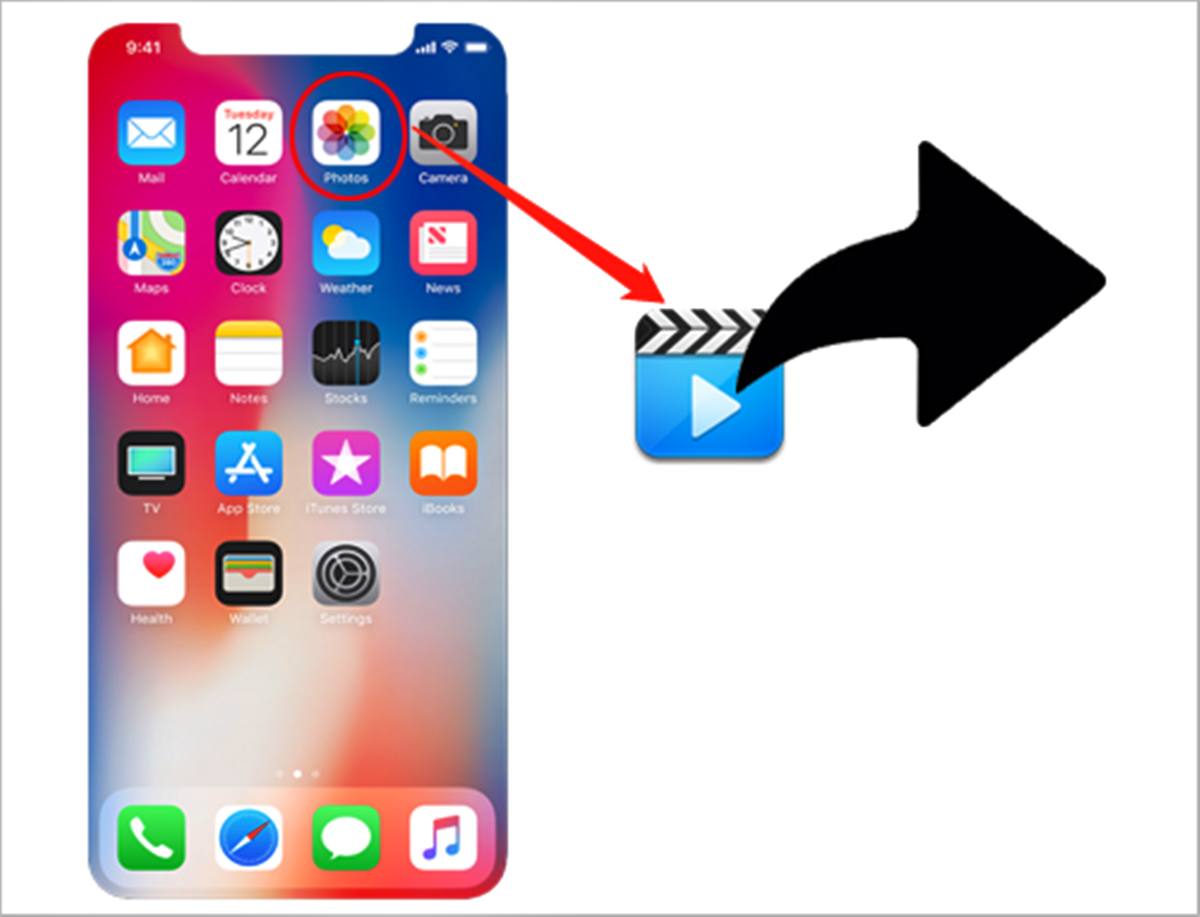
- Open the Photos app on your iPhone.
- Navigate to the video you want to send and tap on it to open it in full-screen mode.
- Tap on the share icon (usually represented by a square with an arrow pointing upward).
- A menu will appear with various sharing options. Look for the “Mail” option and tap on it.
- A new window will open with the video attached. Below the subject line, you’ll see the size of the video file.
Once you have determined the size of your video file, you can proceed with choosing the most suitable method to send it. If the file size is relatively small, you can use email or messaging apps like WhatsApp or Facebook Messenger to send it directly. However, if the file size exceeds the limits imposed by these platforms, you need to explore alternative methods.
It’s worth noting that videos captured on iPhones tend to be in high resolution, resulting in larger file sizes. If you want to reduce the size of the video file without compromising too much on the quality, you can consider compressing it using video editing apps or compression tools.
By taking the time to determine the size of your video file, you’ll be able to choose the most appropriate method to send it. In the following sections, we will explore various methods that can be used to send large videos from your iPhone, including using file transfer services, cloud storage, video hosting sites, and more.
Using a File Transfer Service
When it comes to sending large videos from your iPhone, using a file transfer service can be a convenient and efficient option. These services allow you to upload your video file to their servers and generate a link that you can share with the recipient. This way, you can bypass any file size limitations imposed by email or messaging apps. Here’s how you can use a file transfer service:
- Choose a reliable file transfer service such as WeTransfer, Send Anywhere, or Dropbox.
- Install the app or visit the website of the service you have chosen.
- Sign up for an account or log in if you already have one.
- Follow the instructions provided by the service to upload your video file. This usually involves selecting the file from your iPhone’s storage.
- Once the upload is complete, the service will generate a unique link to your video file. Copy this link.
- Share the link with the recipient through email, messaging apps, or any other preferred method.
- The recipient can then open the link and download the video file directly from the file transfer service’s server.
Using a file transfer service ensures that your large video files are delivered securely and efficiently. These services often offer options to set passwords or expiration dates for the shared links, providing an added layer of privacy and control. Additionally, some services allow you to track when the recipient has accessed the file, giving you peace of mind.
However, it’s worth noting that file transfer services may have limitations on the maximum file size you can upload for free. If your video file exceeds these limits, you may need to consider upgrading to a paid plan or exploring other methods.
Now that you’re familiar with using a file transfer service, let’s move on to the next section, where we will explore the option of using a cloud storage service to send large videos from your iPhone.
Using a Cloud Storage Service
If you’re looking for a convenient and efficient way to send large videos from your iPhone, using a cloud storage service can be a great option. These services allow you to store your videos in the cloud and share them with others by providing them with access to the cloud storage. Here’s how you can use a cloud storage service:
- Choose a reliable cloud storage service such as Google Drive, Dropbox, or iCloud.
- Install the app or visit the website of the service you have chosen.
- Create an account or sign in if you already have one.
- Upload your video file to the cloud storage. This usually involves selecting the file from your iPhone’s storage and uploading it to your cloud account.
- Once the upload is complete, you’ll have the option to generate a shareable link for the video file.
- Copy the generated shareable link.
- Share the link with the recipient through email, messaging apps, or any other preferred method.
- The recipient can then open the link and access the video file directly from the cloud storage service.
Using a cloud storage service offers several advantages. Firstly, you can store and access your videos from multiple devices, making it convenient to manage and share your files. Additionally, cloud storage services often provide generous storage capacities, allowing you to store large video files without any limitations.
Furthermore, some cloud storage services offer collaboration features, enabling multiple users to access and edit the same video file simultaneously. This can be particularly useful if you’re working on a video project with others or if you need to share the video file with a team of collaborators.
However, it’s important to note that the recipient will need to have access to the same cloud storage service or create an account if they don’t already have one. Additionally, some cloud storage services may have file size limitations, especially for free accounts. If your video file exceeds these limitations, you may need to consider upgrading to a paid plan or using an alternative method.
Now that you’re familiar with using a cloud storage service, let’s move on to the next section, where we will explore ways to compress the video file to reduce its size for easier sharing.
Compressing the Video File
When dealing with large video files on your iPhone, one effective way to make it easier to send and share them is by compressing the video file. This process reduces the file size while still maintaining an acceptable level of quality. Here are some methods you can use to compress a video file on your iPhone:
- Use a Video Editing App: There are several video editing apps available for iPhone that offer compression features. These apps allow you to adjust the video settings such as resolution, bitrate, and frame rate to reduce the file size. Some popular video editing apps for iPhone include iMovie, Adobe Premiere Rush, and Filmmaker Pro.
- Download a Video Compression App: Another option is to use a dedicated video compression app, such as Video Compressor or Video Slimmer. These apps are designed specifically for compressing video files on your iPhone. Simply select the video you want to compress, choose the desired compression settings, and let the app do the rest.
- Utilize Built-in Settings: Some iPhone models have built-in video compression settings that allow you to adjust the video quality and file size. To access these settings, go to “Settings” on your iPhone, then “Camera”, and look for options like “Record Video” or “Format”. Experiment with different settings to find the balance between file size and video quality that suits your needs.
When compressing a video file, it’s important to strike a balance between reducing the file size and maintaining an acceptable level of quality. Keep in mind that excessive compression can result in a loss of detail and clarity in the video. It’s advisable to test different compression settings and preview the results before finalizing the compressed version.
Once you have successfully compressed the video file, you can proceed with sending it using the methods mentioned earlier, such as via email, file transfer services, or cloud storage services.
Compressing video files is particularly useful when dealing with large videos captured on the iPhone, as these tend to have high resolutions and file sizes. By compressing the files, you can significantly reduce the file size without sacrificing too much of the video quality, making it easier to send and share the videos with others.
Now that you understand how to compress video files on your iPhone, let’s move on to the next section, where we will explore using AirDrop to share your video files directly with nearby devices.
Using AirDrop to Share the Video
One of the most convenient ways to share large video files from your iPhone to another iOS device or Mac is by using AirDrop. AirDrop is a wireless file-sharing feature that allows you to send files directly to nearby devices using Bluetooth and Wi-Fi. Here’s how you can use AirDrop to share your video files:
- Ensure that both your iPhone and the receiving device (another iOS device or Mac) have AirDrop enabled. To enable AirDrop on your iPhone, swipe up from the bottom of the screen to open the Control Center, then tap on the AirDrop icon. Choose your preferred AirDrop option: “Receiving Off,” “Contacts Only,” or “Everyone”.
- Open the Photos app on your iPhone and navigate to the video you want to share.
- Tap on the share icon (usually represented by a square with an arrow pointing upward).
- A list of available AirDrop recipients will appear. Select the device you want to send the video to.
- On the receiving device, a notification will pop up, indicating that someone wants to share a file via AirDrop. The recipient needs to accept the request to receive the video file.
- Once the recipient accepts the AirDrop request, the video file will be sent wirelessly from your iPhone to the receiving device.
Using AirDrop to share video files offers several advantages. Firstly, it’s a direct and fast method to transfer files between devices without the need for an internet connection. Secondly, AirDrop maintains the original quality of the video file, ensuring that there is no loss in quality during the transfer process.
It’s important to note that AirDrop requires both devices to be in close proximity to each other to establish a connection. Additionally, AirDrop is limited to sharing files between Apple devices, so it may not be suitable if the recipient is using a non-Apple device. In such cases, you can consider using other methods discussed earlier, such as file transfer services or cloud storage services.
Now that you’re familiar with using AirDrop to share video files, let’s move on to the next section, where we will explore sending large videos via email or messaging apps.
Sharing the Video via Email or Messaging Apps
If you have a relatively small video file that meets the maximum attachment size limits of email or messaging apps, you can opt to share it directly through these platforms. Here’s how you can share a video file via email or messaging apps on your iPhone:
- Open the Photos app on your iPhone and locate the video you want to share.
- Tap on the share icon (usually represented by a square with an arrow pointing upward).
- A menu will appear with various sharing options. Look for the email or messaging app you want to use, such as Mail, Messages, WhatsApp, or Facebook Messenger.
- Select the desired app, and a new window will open with the video file attached.
- Compose a message or enter the recipient’s details, and then tap on the send button or arrow to send the email or message.
Sharing videos via email or messaging apps is a convenient way to send small video files, especially if you don’t want to rely on third-party services or if the recipient prefers to receive the video directly on their device. However, it’s important to keep in mind that there are limitations to the maximum file size that can be attached to emails or sent through messaging apps.
Email providers and messaging apps may impose their own restrictions on attachment sizes, with common limits ranging from 10 MB to 25 MB. If your video file exceeds these limits, you may encounter issues sending it directly. In such cases, you will need to explore alternative methods discussed earlier, such as using file transfer services or cloud storage services.
Additionally, it’s worth noting that sending videos directly via email or messaging apps can occupy a significant amount of data if you’re on a cellular network without an unlimited data plan. If you’re concerned about data usage, it’s advisable to send videos using a Wi-Fi connection or consider alternative methods that don’t consume as much data.
Now that you’re familiar with sharing videos via email or messaging apps, let’s move on to the next section, where we will explore uploading videos to video hosting sites as another option for sending large videos from your iPhone.
Uploading the Video to a Video Hosting Site
If you’re looking for a way to share large videos from your iPhone without worrying about file size limitations or compatibility issues, uploading the video to a video hosting site can be an excellent option. Video hosting sites are platforms specifically designed for storing and streaming videos. Here’s how you can upload a video to a video hosting site:
- Choose a reputable video hosting site such as YouTube, Vimeo, or Dailymotion.
- Create an account on the chosen video hosting site if you don’t already have one.
- Open the app or website of the video hosting site and sign in to your account.
- Look for the option to upload a video, usually represented by an “Upload” or “Add” button. Tap on it.
- Select the video file you want to upload from your iPhone’s storage.
- Depending on the platform, you may have additional options to add titles, descriptions, tags, and privacy settings for the video.
- Once you have entered the necessary details, start the upload process. This may take some time, depending on the size of the video file and your internet connection speed.
- After the upload is complete, the video will be available on the video hosting site for viewing and sharing.
By uploading your videos to a video hosting site, you can take advantage of the platform’s streaming capabilities. These sites automatically optimize video playback based on the viewer’s internet connection speed, ensuring a smooth and enjoyable viewing experience.
Furthermore, video hosting sites often provide features such as the ability to embed videos on websites or share them via direct links. This way, you can easily share the video with others by sending them the link to the video on the hosting site.
It’s important to note that video hosting sites may have their own terms of service and guidelines regarding the type of content that can be uploaded. Before uploading your video, make sure it complies with the platform’s guidelines to avoid any issues.
Now that you know how to upload videos to a video hosting site, let’s move on to the next section, where we will explore using video editing apps to reduce the file size of your videos for easier sharing.
Using a Video Editing App to Reduce File Size
When it comes to reducing the file size of large videos on your iPhone, using a video editing app can offer you more control over the compression process. These apps allow you to adjust various video settings and optimize the file size without sacrificing too much of the video quality. Here’s how you can use a video editing app to reduce the file size of your videos:
- Choose a reliable video editing app that offers compression features. Some popular options include iMovie, Adobe Premiere Rush, and Filmmaker Pro.
- Install the chosen video editing app from the App Store if you haven’t already.
- Open the app and import the video file you want to compress.
- Once the video is imported, look for the compression or export settings within the app.
- Depending on the app, you may have options to adjust the video resolution, bitrate, frame rate, or other settings that impact the file size.
- Experiment with different compression settings to find the balance between file size and video quality that suits your needs.
- After adjusting the compression settings, save or export the video with the new settings. The app will process the video and generate a compressed version.
Video editing apps provide more flexibility in controlling the compression process compared to other methods. You can fine-tune the settings to achieve the desired file size while still maintaining an acceptable level of quality.
Keep in mind that excessive compression can result in a loss of detail and clarity in the video. It’s important to find the right balance between file size reduction and video quality to ensure the best viewing experience.
Once you have successfully compressed the video file using the video editing app, you can proceed with sharing it using various methods mentioned earlier, such as email, messaging apps, or even uploading it to video hosting sites.
Now that you understand how to use a video editing app to reduce the file size of your videos, let’s move on to the next section, where we will explore using a dedicated video compression app as an alternative method.
Using a Video Compression App
For a straightforward and efficient way to reduce the file size of your videos on your iPhone, consider using a dedicated video compression app. These apps are specifically designed to compress video files while maintaining an acceptable level of quality. Here’s how you can use a video compression app to reduce the file size of your videos:
- Choose a reputable video compression app from the App Store, such as Video Compressor or Video Slimmer.
- Install the chosen video compression app on your iPhone.
- Open the app and import the video file you want to compress.
- Follow the on-screen instructions provided by the app to adjust the compression settings.
- These settings may include options to change the resolution, bitrate, or other video parameters that affect file size.
- Experiment with different compression settings to find the right balance between file size reduction and video quality.
- Once you have adjusted the compression settings, initiate the compression process within the app. The app will process the video and generate a compressed version.
- Save or export the compressed video file to your desired location or directly to a sharing platform.
Video compression apps offer a convenient solution to reduce the file size of your videos without the need for advanced video editing skills. These apps streamline the compression process, allowing you to quickly and effectively compress your videos for easier sharing or storage.
When using a video compression app, it’s important to find the right balance between file size reduction and video quality. Be mindful that excessive compression can result in a loss of detail and clarity in the video. Preview the compressed version before finalizing to ensure the quality meets your expectations.
Once you have successfully compressed the video file using a video compression app, you can proceed with sharing it using various methods mentioned earlier, such as email, messaging apps, file transfer services, or even uploading it to video hosting sites.
Now that you are familiar with using a video compression app, let’s move on to the next section, where we will explore transferring the video to a computer and sending it from there as an alternative option.
Transferring the Video to a Computer and Sending it from there
If you’re facing limitations or difficulties in directly sending large videos from your iPhone, another viable option is to transfer the video to a computer and then send it from there. This method allows you to take advantage of a computer’s larger storage capacity and broader range of file-sharing options. Here’s how you can transfer the video to a computer and send it from there:
- Connect your iPhone to the computer using a USB cable.
- Unlock your iPhone and make sure to trust the computer if prompted.
- On your computer, open the appropriate software or file manager to access the files on your iPhone. For macOS, you can use the Finder, and for Windows, you can use File Explorer.
- Navigate to the folder or location where your videos are stored on your iPhone.
- Select the video file you want to transfer to the computer and copy it to a desired location on your computer’s storage.
- Once the video is successfully transferred to your computer, you can use various methods to send it, such as attaching it to an email, using file transfer services, or uploading it to a video hosting site directly from your computer.
Transferring the video to a computer provides you with more flexibility and options for sharing large video files. Computers typically have faster and more stable internet connections, which can make uploading and sending the video more efficient. Additionally, you can take advantage of computer applications and services specifically designed for file sharing.
When sending the video from your computer, you can utilize email clients, such as Microsoft Outlook or Apple Mail, to attach the video file to an email and send it to your desired recipient. Alternatively, you can use file transfer services or upload the video to a video hosting site from the computer, following the steps and methods discussed earlier.
Keep in mind that transferring the video to a computer adds an extra step to the process, and you may need access to a computer and a USB cable. However, it offers more flexibility and control over sharing large video files without worrying about limitations imposed by mobile devices.
Now that you know how to transfer the video to a computer and send it from there, let’s move on to the next section, where we will provide some helpful tips for sending large videos on your iPhone.
Tips for Sending Large Videos on iPhone
Sending large videos on your iPhone can sometimes be challenging, especially when dealing with file size limitations and slow internet connections. To help ensure a smooth and successful transfer, here are some useful tips for sending large videos on your iPhone:
- Compress the Video: Before sending the video, consider compressing it using video editing apps or dedicated compression apps to reduce the file size without compromising too much on quality.
- Check File Size Restrictions: Be aware of the file size limits imposed by email providers, messaging apps, or other sharing platforms. If your video exceeds these limits, consider using alternative methods like file transfer services or cloud storage.
- Use Wi-Fi When Available: When sending large videos, try to utilize a Wi-Fi connection instead of a cellular network to avoid potential data usage charges and ensure faster and more stable transfer speeds.
- Consider Video Hosting Sites: If you frequently share videos, uploading them to video hosting sites like YouTube or Vimeo can be a convenient option. This allows you to share the video with others by simply sharing the link, without worrying about file size limitations.
- Be Mindful of Quality: While reducing the file size is important for easier sharing, be cautious not to compromise too much on the video quality. Find a balance between file size and video resolution to ensure an enjoyable viewing experience.
- Split Large Videos into Parts: If your video is too large to send as a whole, consider splitting it into smaller parts and sending them separately. This can help bypass file size limitations and allow for easier and faster sharing.
- Upgrade Your Storage or Plan: If you frequently encounter file size limitations, consider upgrading your cloud storage or data plan to accommodate larger video files. This will provide more flexibility in sharing videos directly from your iPhone.
- Keep Backup Copies: Before sending a video, make sure to keep a backup copy on your iPhone or another storage device. This ensures that you have a copy of the video in case any issues arise during the transfer.
- Be Patient: Uploading and sending large videos may take time, especially if you have a slow internet connection. Remain patient throughout the process and allow enough time for the transfer to complete successfully.
By following these tips, you can navigate the challenges of sending large videos on your iPhone more effectively. Whether it’s compressing the video, choosing the right method, or being mindful of quality and file size restrictions, these tips will help ensure a smoother and more successful sharing experience.
Now armed with these helpful tips, you’re ready to confidently send your large videos from your iPhone to others with ease!