
Selecting Multiple Messages in Mac Mail
Mac Mail is a powerful email client that offers various ways to manage and organize your messages. One useful feature is the ability to select multiple messages at once, saving you time and effort. Whether you need to delete a batch of unwanted emails, move them to a different folder, or mark them as read, selecting multiple messages can streamline your email management process.
There are different methods to select multiple messages in Mac Mail, depending on your specific needs. Here are some commonly used techniques:
Selecting messages using the Shift key
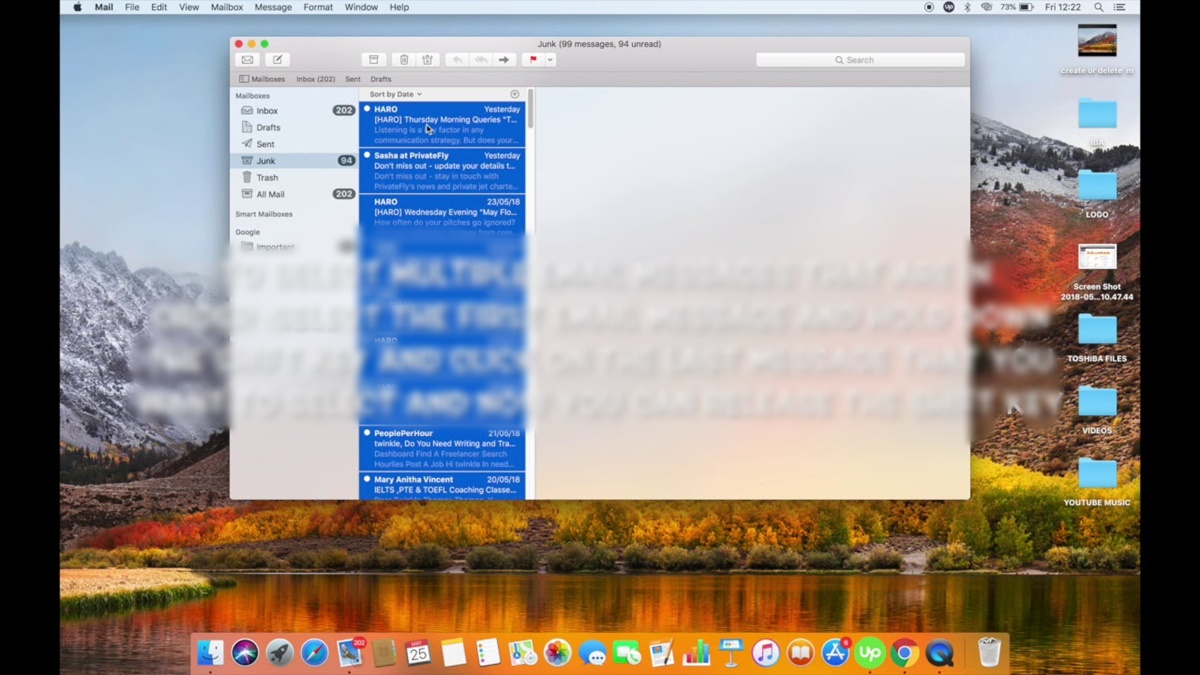
To select a consecutive range of messages, you can use the Shift key. Start by clicking on the first message you want to select, then press and hold the Shift key while clicking on the last message in the range. This will highlight all the messages in between.
Selecting messages using the Command key
If you want to select multiple non-consecutive messages, you can use the Command key (also known as the ⌘ key). Simply hold down the Command key and click on each message you want to select. Each clicked message will be highlighted accordingly.
Selecting a range of messages
In addition to using the Shift key, you can select a range of messages by clicking on the first message, then scrolling down to the last message while holding down the Shift key. This will highlight all the messages in between.
Selecting multiple non-contiguous messages
If you need to select multiple messages that are not consecutively placed, you can do so using the Command key. Hold down the Command key and click on each message you want to select. The selected messages will be highlighted individually.
Selecting all messages in a mailbox
Selecting messages using the Shift key
When working with Mac Mail, the Shift key is an efficient way to select multiple consecutive messages. This method is particularly useful when you have a long list of emails and want to select a specific range of messages.
To start, click on the first message in the desired range. Then, press and hold the Shift key on your keyboard and click on the last message in the range. Mac Mail will automatically select all the messages between the first and last one, highlighting them accordingly.
One advantage of using the Shift key is that it allows you to quickly select a large number of messages without the need for multiple clicks. This can save you valuable time, especially if you need to perform batch actions such as moving or deleting emails.
It’s important to note that you must click on the first and last messages in the desired range. If you accidentally click on a different message, Mac Mail will select a new range starting from that message.
Additionally, you can combine the Shift key method with other actions. For example, after selecting the desired messages using the Shift key, you can right-click and choose options like moving or deleting the selected emails, marking them as read or unread, or even creating a new mailbox for them.
Using the Shift key to select multiple messages in Mac Mail is a practical and time-saving technique, especially when dealing with a large volume of emails. By mastering this method, you can efficiently manage your inbox and stay organized.
Selecting messages using the Command key
Mac Mail provides another convenient method to select multiple non-consecutive messages using the Command key (⌘ key) on your keyboard. This method is useful when you want to select specific emails that are scattered throughout your mailbox.
To begin, click on the first message you want to select. Then, while holding down the Command key, click on each additional message you want to include in your selection. Each clicked message will be highlighted, indicating that it has been selected.
The Command key method allows you to choose multiple messages without having to select them in a consecutive order. This flexibility is particularly advantageous when you want to perform actions like forwarding, archiving, or categorizing multiple emails with ease.
It’s important to note that you can also combine the Command key method with other actions in Mac Mail. For example, after selecting multiple messages using the Command key, you can right-click and choose options like moving them to a different folder, marking them as spam, or applying a specific label or flag to them.
Moreover, the Command key method can be used in conjunction with the Shift key method to create complex selections. By holding down both the Command and Shift keys, you can select multiple messages in a range and include additional non-consecutive messages in your selection.
Mastering the Command key method in Mac Mail can greatly enhance your email management capabilities. It allows you to efficiently select specific emails, regardless of their order, and perform actions on them in a streamlined manner.
Selecting a range of messages
When working with a large number of emails in Mac Mail, it can be time-consuming to select each individual message. The good news is that Mac Mail provides a convenient method to select a range of messages all at once, making the process much more efficient.
To select a range of messages, begin by clicking on the first email in the desired range. Then, while holding down the Shift key on your keyboard, scroll down to the last email in the range and click on it. Mac Mail will automatically select all the messages between the first and last, highlighting them appropriately.
This method is ideal when you want to perform actions on a specific set of consecutively placed emails. For example, you may want to move all the messages from a particular sender to a different folder or delete a range of obsolete emails.
By using the Shift key in combination with scrolling, you can save a significant amount of time. Instead of manually selecting each message one by one, you can select an entire range in just a few simple steps.
It’s important to note that while scrolling to the last message in the range, you must ensure that all the desired emails are included. If you accidentally click on a message outside the range, Mac Mail will adjust the selection accordingly.
Additionally, once you have selected the range of messages, you can perform various actions on them. Right-clicking on the selected messages will display a menu of options, including moving them to a different mailbox, marking them as read or unread, or applying specific labels or flags.
Mastering the ability to select a range of messages in Mac Mail can significantly improve your email management efficiency. With just a few clicks, you can select a group of messages and easily perform actions on them, saving you valuable time and effort.
Selecting multiple non-contiguous messages
While selecting consecutive messages in Mac Mail is relatively straightforward, there are times when you may need to select multiple non-contiguous messages that are scattered throughout your inbox. Fortunately, Mac Mail offers a simple method to achieve this without having to select each message individually.
To select multiple non-contiguous messages, you can utilize the Command key (⌘ key) on your keyboard. Begin by clicking on the first message you want to select, and then hold down the Command key while clicking on each additional message. Each clicked message will be highlighted, indicating that it has been selected.
This method gives you the flexibility to choose several messages that are not placed consecutively. It becomes handy when you want to take similar actions on a specific set of emails, such as forwarding or archiving them as a group.
It’s worth noting that you can combine the Command key method with other actions in Mac Mail. Once you have selected multiple non-contiguous messages, you can right-click to access a menu of options. This allows you to perform various actions, such as moving the selected messages to a different mailbox, marking them as spam, or even applying specific labels or flags.
Furthermore, the Command key method can be used alongside the Shift key method to create more complex selections. By holding down both the Command and Shift keys, you can select multiple messages in a range while simultaneously including additional non-contiguous messages in your selection.
Mastering the ability to select multiple non-contiguous messages in Mac Mail can greatly enhance your productivity and streamline your email management process. Instead of manually selecting each message one by one, you can effortlessly create a selection that suits your needs with just a few clicks.
Selecting all messages in a mailbox
When you want to perform actions on all the emails in a specific mailbox in Mac Mail, selecting each message individually can be time-consuming. Fortunately, Mac Mail provides a convenient method to select all messages in a mailbox with just a few clicks.
To select all messages in a mailbox, first, open the mailbox you want to select from. Then, go to the Edit menu at the top of the screen and choose “Select All” or use the keyboard shortcut Command + A. This will highlight and select every message within that mailbox.
By selecting all messages in a mailbox, you can easily perform various actions on them. For example, you can choose to delete all the selected messages, move them to a different folder, mark them as read or unread, or even forward them as a batch.
It’s important to note that selecting all messages in a mailbox includes both the messages displayed on the current screen as well as any hidden or archived messages. If you have a large number of emails in the mailbox, it may take a few moments to select them all.
When you have selected all the messages, you can apply actions to them either through the right-click menu or by using the options available in the Mail toolbar. This allows you to efficiently manage a large volume of emails without the need for individual selection.
Utilizing the ability to select all messages in a mailbox in Mac Mail can significantly simplify your email management process. It provides a quick and effective way to perform actions on a batch of messages, ultimately saving you time and effort.
Selecting all messages in a conversation
Mac Mail offers a convenient feature that allows you to select all messages within a conversation with just a few simple clicks. When dealing with a lengthy email thread or conversation, selecting all the messages at once can save you time and help you manage your inbox more effectively.
To select all messages in a conversation, first, open the desired conversation in Mac Mail. Then, go to the Edit menu at the top of the screen and choose “Select All” or use the keyboard shortcut Command + A. This will highlight and select all the messages within that conversation.
By selecting all messages in a conversation, you can perform various actions on them simultaneously. For example, you can choose to delete all the selected messages, move them to a different folder, mark them as read or unread, or even reply to or forward the entire conversation as a whole.
It’s important to note that selecting all messages in a conversation includes both the messages displayed on the current screen and any hidden or archived messages. If the conversation spans multiple email threads, all the related messages will be selected.
Once you have selected all the messages in the conversation, you can apply actions to them using the options available in the Mail toolbar or the right-click menu. This allows you to efficiently manage and organize conversations with ease.
By utilizing the ability to select all messages in a conversation in Mac Mail, you can quickly perform actions on an entire discussion thread. This streamlines your email management and ensures that you don’t miss any important messages within a conversation.
Selecting messages with specific criteria
Mac Mail provides powerful search and filtering capabilities that allow you to select messages based on specific criteria. This feature comes in handy when you want to narrow down your selection and perform actions on a targeted group of emails.
To select messages with specific criteria, click on the search bar located in the top-right corner of the Mac Mail window. Enter your search terms or criteria, such as a sender’s name, a keyword, or a specific date range. As you type, Mail will dynamically display the matching results below the search bar.
Once the search results are displayed, you can select all the messages that match your criteria by going to the Edit menu and choosing “Select All” or using the keyboard shortcut Command + A. This will highlight and select all the messages that meet your specified search criteria.
By selecting messages based on specific criteria, you can perform various actions on them in one go. For instance, you can delete all the selected messages, move them to a different mailbox or folder, mark them as read or unread, or even forward them to another recipient.
It’s important to note that the search and filtering capabilities in Mac Mail are quite robust. You can combine multiple search terms and criteria to create sophisticated filters that precisely target the messages you want to select.
Additionally, you can save your search criteria as a Smart Mailbox, which automatically updates to display all the messages that meet the specified criteria. This allows you to quickly access and select the messages you’re interested in without having to perform the search each time.
With Mac Mail’s search and filtering capabilities, selecting messages with specific criteria becomes a breeze. By utilizing this feature, you can efficiently manage your emails and perform actions on a focused group of messages, saving you time and effort in the process.
Selecting messages in a Smart Mailbox
In Mac Mail, Smart Mailboxes provide a convenient way to organize and access specific groups of emails that meet certain criteria. When it comes to selecting messages within a Smart Mailbox, you can easily achieve this by following a few simple steps.
To select messages within a Smart Mailbox, first, navigate to the Smart Mailbox in Mac Mail’s mailbox list. Click on the Smart Mailbox to display its contents. You will see a list of emails that match the specified criteria set for the Smart Mailbox.
To select all messages within the Smart Mailbox, go to the Edit menu and choose “Select All” or use the keyboard shortcut Command + A. This will highlight and select all the emails within the Smart Mailbox, regardless of the underlying criteria.
Once you have selected the messages, you can perform various actions on them. For example, you can delete all the selected messages, move them to a different mailbox or folder, mark them as read or unread, or perform other actions available in Mac Mail’s toolbar or right-click menu.
Smart Mailboxes are dynamic, meaning they automatically update to include new messages that meet the specified criteria. Hence, your selection within a Smart Mailbox will always reflect the current state of messages that match the assigned criteria.
It’s worth mentioning that the criteria for a Smart Mailbox can be customized to suit your needs. You can set multiple criteria, such as a specific sender, certain keywords, or particular mailboxes, to create more refined Smart Mailboxes. This provides you with the flexibility to narrow down your selection and precisely choose the messages you want to work with.
With the ability to select messages within a Smart Mailbox, you can effectively manage and organize your emails based on specific criteria. This feature simplifies your workflow and allows you to focus on the emails that matter most, increasing your efficiency in Mac Mail.
Selecting messages using filters
In Mac Mail, filters offer a powerful way to automatically categorize and organize incoming messages based on predefined rules. When it comes to selecting messages using filters, Mac Mail provides a seamless process that allows you to target specific groups of emails with ease.
To select messages using filters, start by creating a filter in Mac Mail. You can do this by going to the Mail menu, selecting Preferences, and clicking on the Rules tab. From there, click on the Add Rule button and define the criteria for your filter, such as the sender’s email address, subject line keywords, or specific mailbox locations.
Once you’ve created the filter, Mac Mail will automatically apply it to incoming messages that meet the specified criteria. To select all messages that have been filtered, simply click on the mailbox or folder where the filtered messages are located.
With the filtered mailbox or folder open, you can then go to the Edit menu and choose “Select All” or use the keyboard shortcut Command + A to highlight and select all the messages within that filtered location.
After selecting the messages, you can perform various actions on them. For instance, you can delete all the selected messages, move them to a different mailbox or folder, mark them as read or unread, or apply other actions available in Mac Mail’s toolbar or right-click menu.
It’s important to note that filters are dynamic, so they will continue to apply to future incoming messages that meet the specified criteria. This means that your selection within the filtered mailbox or folder will always reflect the current state of messages that match the filter rules.
By utilizing filters to select messages, you can efficiently manage and handle specific groups of emails in Mac Mail. The automated nature of filters saves you time and allows you to focus on the emails that matter most, enhancing your overall email management workflow.
Selecting messages using search criteria
Mac Mail provides a robust search feature that allows you to quickly and efficiently locate specific emails based on specific search criteria. When it comes to selecting messages using search criteria, Mac Mail offers a seamless process that helps you narrow down your selection.
To select messages using search criteria, click on the search bar located in the top-right corner of the Mac Mail window. Enter your search terms or criteria, such as a sender’s name, a keyword, a date range, or even specific content within the email body.
As you type, Mac Mail will dynamically display a list of matching search results below the search bar. You can review the search results to ensure they match your desired criteria.
To select all the messages that match your search criteria, go to the Edit menu and choose “Select All” or use the keyboard shortcut Command + A. This will highlight and select all the messages that meet your specified search criteria.
After selecting the messages, you can perform various actions on them. For example, you can delete all the selected messages, move them to a different mailbox or folder, mark them as read or unread, or apply other actions using Mac Mail’s toolbar or right-click menu.
It’s worth noting that Mac Mail’s search functionality is quite robust and flexible. You can combine multiple search terms and criteria to create more refined searches, allowing you to precisely target the messages you want to select.
Additionally, the search criteria are not limited to the email header. You can search for specific content within the body of the email, attachments, or even perform advanced search operations using Boolean logic.
By utilizing the search criteria in Mac Mail, you can easily and effectively select messages that match your specific search parameters. This feature streamlines the process of managing and organizing your emails, ultimately saving you time and effort.
Selecting messages in the Junk mailbox
The Junk mailbox in Mac Mail is designed to automatically filter out spam and other unwanted emails, keeping your inbox clutter-free. When it comes to managing and selecting messages in the Junk mailbox, Mac Mail provides a straightforward process to quickly deal with unwanted emails.
To select messages in the Junk mailbox, first, click on the Junk mailbox located in the sidebar of Mac Mail. This will display a list of messages that have been filtered as junk or spam by Mac Mail’s built-in filtering system.
Once you’re in the Junk mailbox, you can select messages individually by clicking on the checkboxes next to each message. Alternatively, you can select multiple messages by holding down the Command key (⌘ key) and clicking on each message you want to select. This will highlight and select the chosen messages within the Junk mailbox.
After selecting the messages, you have several actions available to manage them. You can choose to delete all the selected messages by pressing the Delete key or using the right-click menu. Additionally, you can mark the selected messages as not junk by using the “Not Junk” button in the Mail toolbar.
Selecting and managing messages in the Junk mailbox is vital in ensuring that your inbox remains clean and that legitimate emails are not mistakenly marked as spam. Regularly reviewing and deleting the unwanted messages in the Junk mailbox helps to keep your email environment organized and prevents you from missing out on important communications.
It’s important to note that Mac Mail’s junk filtering system is customizable, allowing you to fine-tune the criteria used to identify unwanted messages. By going to the Mail menu, selecting Preferences, and clicking on the Junk Mail tab, you can adjust the sensitivity levels and other filtering rules to better align with your email needs.
By utilizing the capability to select messages in the Junk mailbox, you can efficiently manage and delete unwanted emails, freeing up space in your inbox and ensuring that your legitimate messages receive the attention they deserve.
Selecting messages in the Trash mailbox
The Trash mailbox in Mac Mail serves as a temporary holding place for deleted emails before they are permanently removed. When it comes to selecting and managing messages in the Trash mailbox, Mac Mail provides a straightforward process to help you review and delete emails you no longer need.
To select messages in the Trash mailbox, click on the Trash mailbox located in the sidebar of Mac Mail. This will display a list of messages that have been moved to the Trash.
Once you’re viewing the Trash mailbox, you can select individual messages by clicking on the checkboxes next to each message. If you want to select multiple messages, you can hold down the Command key (⌘ key) and click on each message you want to select. This will highlight and select the chosen messages within the Trash mailbox.
After selecting the messages, you have the option to permanently delete them by selecting the “Erase Deleted Items” option either from the Mailbox menu or by using the right-click menu. Alternatively, you can restore selected messages back to their original location using the “Put Back” option.
The Trash mailbox allows you to review your deleted emails before permanently removing them. This gives you the opportunity to ensure that no important messages are accidentally deleted and allows you to recover any messages that were mistakenly put in the Trash.
It’s worth noting that items in the Trash mailbox are typically deleted automatically after a certain period of time, depending on your Mail preferences. However, you can manually empty the Trash mailbox at any time by selecting “Erase Deleted Items” or using the Empty Trash option from the Mailbox menu.
By effectively managing and selecting messages in the Trash mailbox, you can keep your email storage organized and free up space on your system. Regularly reviewing and deleting unnecessary emails from the Trash ensures that your email environment remains clutter-free and optimized for better performance.
Remember to exercise caution when deleting messages from the Trash mailbox, as they will be permanently removed and cannot be recovered once deleted. Double-check the selected messages before proceeding with deletion to avoid accidental data loss.
Selecting messages in a specific mailbox
Mac Mail allows you to create multiple mailboxes to organize your emails effectively. When it comes to selecting messages within a specific mailbox, Mac Mail offers a simple and efficient process to help you locate and manage your desired emails.
To select messages in a specific mailbox, start by navigating to the desired mailbox in the Mac Mail sidebar. Click on the mailbox to display its contents, which will include all the messages stored in that particular mailbox.
Once you’re viewing the desired mailbox, you can select individual messages by clicking on the checkboxes next to each message. If you want to select multiple messages, you can hold down the Command key (⌘ key) and click on each message you want to select. This will highlight and select the chosen messages within that specific mailbox.
After selecting the messages, you can perform various actions on them. You can choose to delete the selected messages, move them to a different mailbox or folder, mark them as read or unread, or even reply to or forward them as needed. These actions can be accessed using the options available in Mac Mail’s toolbar or right-click menu.
Being able to select messages within a specific mailbox allows you to efficiently manage and organize your emails within designated categories. It ensures that you are able to focus on the specific mailboxes that are relevant to your current tasks or projects.
When working with specific mailboxes, it’s important to keep them well-organized so that you can easily locate and select the messages you need. Creating and using consistent naming conventions for your mailboxes and utilizing folders within mailboxes can further enhance your ability to manage and select messages efficiently.
By effectively selecting messages in a specific mailbox, you can streamline your email management process, ensuring that you can quickly access and take action on the emails that are most important to you.
Selecting messages in a specific folder
In Mac Mail, you can create folders within your mailboxes to further organize and categorize your emails. When it comes to selecting messages within a specific folder, Mac Mail provides a straightforward process that allows you to efficiently manage and work with your desired emails.
To select messages in a specific folder, start by navigating to the desired mailbox in the Mac Mail sidebar. Click on the mailbox to display its contents, which will include all the folders and emails within that mailbox.
Once you locate the desired folder, click on it to open and view its contents. You will see a list of emails that are stored within that particular folder.
To select individual messages, click on the checkboxes next to each email. If you want to select multiple messages, you can hold down the Command key (⌘ key) and click on each email you want to select. This will highlight and select the chosen messages within that specific folder.
Once you have selected the messages, you can perform various actions on them. You can choose to delete the selected messages, move them to a different folder or mailbox, mark them as read or unread, or apply specific actions using the options available in Mac Mail’s toolbar or right-click menu.
Being able to select messages within a specific folder allows you to effectively manage and organize your emails based on different categories or projects. It ensures that you can easily locate and work with the emails that reside within a particular folder.
To optimize your email management, it’s essential to maintain a well-structured folder hierarchy. Assigning emails to appropriate folders based on their content or relevance can significantly improve your ability to select and manage messages within specific folders.
By efficiently selecting messages in a specific folder, you can streamline your workflow and ensure that you focus on the emails that are relevant to your current tasks or projects. Organizing emails within folders allows for easy access and enhances your productivity in Mac Mail.