
How to Perform a Basic Search in Outlook
Searching for specific emails or messages within Microsoft Outlook can save you time and help you locate important information more efficiently. Whether you’re looking for a specific email from a colleague, a meeting invitation, or even a forgotten attachment, Outlook’s search function can be your go-to tool. Here’s how to perform a basic search in Outlook:
1. Open Microsoft Outlook on your computer and navigate to the desired mailbox or folder where you want to conduct the search.
2. Look for the search bar located at the top of the Outlook window. It is usually designated by a magnifying glass icon or a search box.
3. Click inside the search bar and type in the keywords or phrases that you want to search for. Outlook will start displaying results in real-time as you type, making it easy to find what you’re looking for.
4. If you want to narrow down your search to a specific type of item, such as emails, contacts, or calendar entries, click the filter icon next to the search bar and select the appropriate option.
5. Once you’ve entered your search criteria, press Enter or click the magnifying glass icon to execute the search. Outlook will display a list of results that match your search query.
6. You can further refine your search results by using the sorting and filtering options available in Outlook. These options allow you to sort the results by date, sender, subject, and other relevant criteria.
7. If you have a large number of search results and want to quickly find a specific item, you can use the scroll bar located on the right side of the Outlook window or use the page numbers at the bottom to navigate through the results.
8. To clear your search and return to the full view of your mailbox or folder, click the “X” button at the right end of the search bar or press the Esc key on your keyboard.
Remember, performing a basic search in Outlook is quick and straightforward. It allows you to locate specific items within your mailbox or folder by entering keywords or phrases. You can also use filtering and sorting options to narrow down the search results and find the information you need faster.
Searching Inside a Specific Folder
When you want to focus your search within a specific folder in Outlook, you can easily do so to find the information you need. Whether it’s a particular project folder, a shared mailbox, or your archived items folder, searching inside a specific folder can save you time and effort. Here’s how to do it:
1. Open Microsoft Outlook and navigate to the folder where you want to perform the search. You can find your folders in the left panel under the “Folders” section.
2. Look for the search bar located at the top of the Outlook window. Click inside the search bar to activate it.
3. Type your keywords or phrases into the search bar to specify your search criteria. Outlook will start displaying real-time results as you type.
4. Instead of pressing Enter or clicking the magnifying glass icon to execute the search, select the option “Current Folder” from the drop-down menu that appears below the search bar. This tells Outlook to search only within the folder you are currently in.
5. Once you’ve entered your search criteria, press Enter or click the magnifying glass icon. Outlook will display a list of results that match your search query within the specific folder you selected.
6. To further refine your search results, you can use the sorting and filtering options available in Outlook. These options allow you to sort the results by date, sender, subject, and other relevant criteria.
7. If you have a large number of search results within the specific folder, you can use the scroll bar or page numbers to navigate through them quickly.
8. If you want to clear your search and return to the full view of the folder, simply click the “X” button at the right end of the search bar or press the Esc key on your keyboard.
By searching inside a specific folder in Outlook, you can quickly find the information you need within the context of that particular folder. This allows you to focus your search and avoid sifting through irrelevant results from other folders in your mailbox. Utilize this feature to streamline your workflow and locate important emails or messages more efficiently.
Searching Inside Multiple Folders
Searching inside multiple folders in Outlook can be useful when you want to broaden your search scope and find information across different folders simultaneously. Whether you need to search through multiple project folders or different mailboxes, Outlook provides a convenient way to perform this type of search. Here’s how you can search inside multiple folders:
1. Open Microsoft Outlook and go to the “Mail” view where your folders are displayed.
2. Look for the search bar located at the top of the Outlook window. Click inside the search bar to activate it.
3. Enter your search keywords or phrases into the search bar to define your search criteria.
4. Instead of pressing Enter or clicking the magnifying glass icon right away, click on the “Search Tools” tab in the toolbar at the top of the Outlook window.
5. Under the “Options” section, click on the “All Mailboxes” drop-down menu and select “All Folders” or “Selected Folders” if you only want to search within specific folders.
6. If you choose “Selected Folders”, a new window will appear where you can select the folders you want to include in the search. Check the boxes next to the folders you wish to search within and click “OK” to apply your selection.
7. Once you’ve defined your search criteria and selected the folders, press Enter or click the magnifying glass icon to execute the search. Outlook will display a list of results that match your search query across the selected folders.
8. To further refine your search results, you can use the sorting and filtering options available in Outlook. These options allow you to sort the results by date, sender, subject, and other relevant criteria.
9. If you have a large number of search results across multiple folders, you can use the scroll bar or page numbers to navigate through them efficiently.
10. If you want to clear your search and return to the full view of your folders, click the “X” button at the right end of the search bar or press the Esc key on your keyboard.
By searching inside multiple folders in Outlook, you can save time and effort by consolidating your search results across different folders. This feature is especially beneficial when you need to locate specific emails or messages related to a project or when managing multiple mailboxes. Take advantage of this functionality to streamline your search process and find the information you need quickly and effectively.
Narrowing Down Your Search with Filters
When searching for specific information in Outlook, you may find it helpful to narrow down your search results using filters. Filters allow you to refine your search by specifying certain criteria, such as sender, recipient, date range, or even attachment type. By applying filters, you can quickly locate the exact emails or messages you are looking for. Here’s how to narrow down your search with filters in Outlook:
1. Open Microsoft Outlook and go to the location where you want to perform the search, such as a mailbox, folder, or search results.
2. Locate the search bar at the top of the Outlook window and click inside it to activate the search.
3. Enter your desired search keywords or phrases into the search bar to define your initial search.
4. After entering your search criteria, click on the “Search Tools” tab in the toolbar at the top of the Outlook window.
5. Under the “Refine” group, you will find various filter options that you can apply to narrow down your search results.
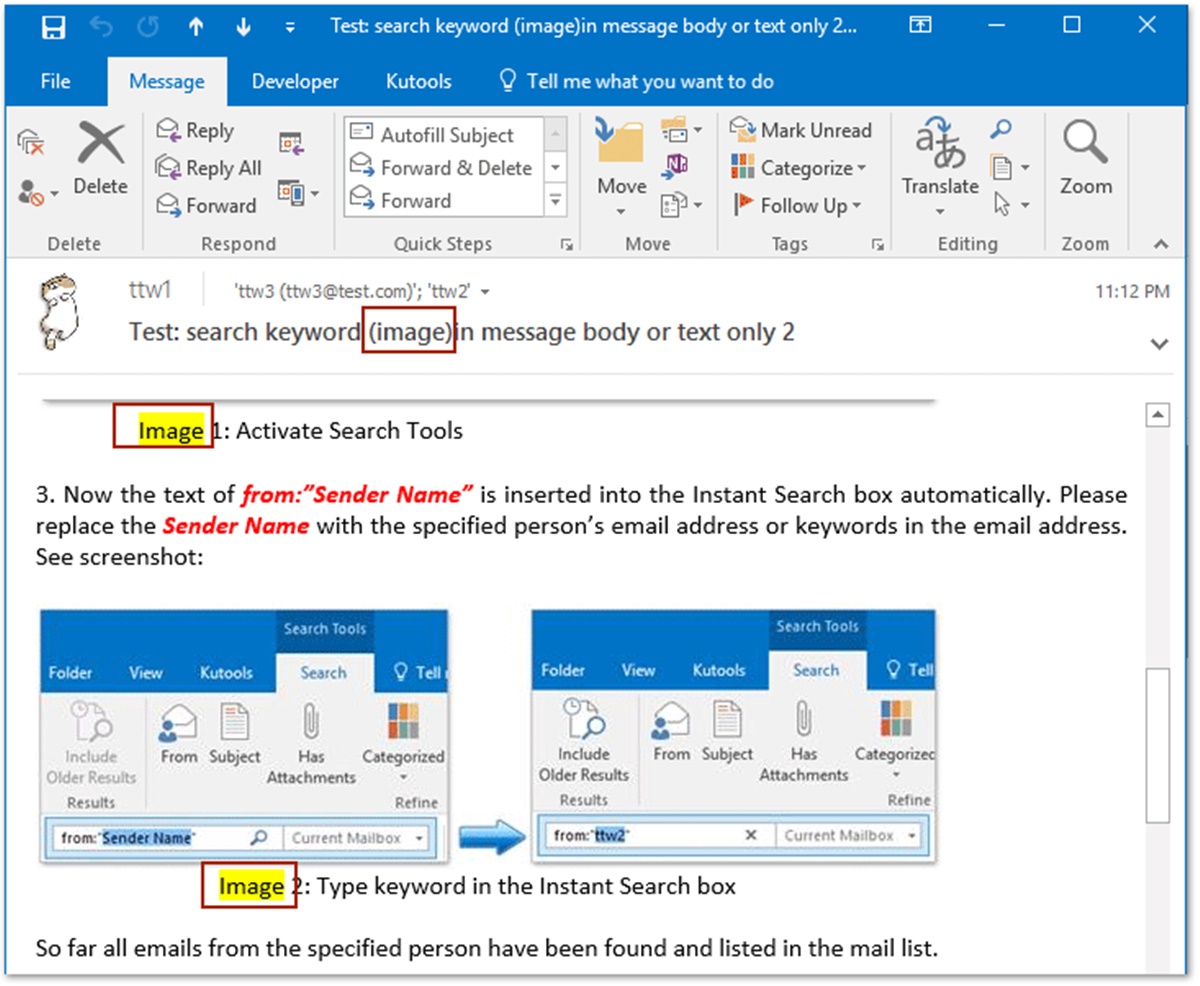
6. For example, if you want to filter by sender, click on the “From” drop-down menu and select the desired sender’s name from the list. This will limit the search results to emails or messages sent by that specific sender.
7. To filter by recipient, click on the “To” drop-down menu and select the intended recipient’s name from the list. This will display only the emails or messages sent to that particular recipient.
8. If you want to filter by date, click on the “Date” drop-down menu and choose either a pre-defined date range, such as “Last Week” or “This Month,” or select “Choose a Date” to specify a custom date range.
9. Outlook also allows you to filter by attachment type. This can be particularly useful when searching for emails that include specific file attachments. Click on the “Has Attachments” drop-down menu and choose the appropriate attachment type from the list.
10. After selecting your desired filters, click on the “Search” button or press Enter to execute the refined search.
By narrowing down your search with filters in Outlook, you can quickly pinpoint and focus on the specific emails or messages you need. These filters enable you to refine your search criteria based on sender, recipient, date, or even attachment type, allowing for more precise and targeted search results. Incorporate filters into your search process to efficiently find the relevant information within your mailbox or folders.
Using Advanced Search Operators
In addition to basic keyword searches, Outlook offers advanced search operators that allow you to further refine and customize your search criteria. These operators enable you to perform more complex searches and find specific information within your emails and messages. Here’s how to use advanced search operators in Outlook:
1. Open Microsoft Outlook and go to the location where you want to perform the search, such as a mailbox, folder, or search results.
2. Locate the search bar at the top of the Outlook window and click inside it to activate the search.
3. Enter your initial search keywords or phrases into the search bar.
4. To use advanced search operators, you can combine your keywords with specific operators to create a more targeted search query.
5. Some commonly used advanced search operators in Outlook are:
- AND: Use “AND” to search for items that contain both keywords. For example, entering “meeting AND agenda” will only show results that have both the words “meeting” and “agenda” in them.
- OR: Use “OR” to search for items that contain either one of the keywords. For example, entering “sales OR marketing” will display results that have either the word “sales” or “marketing” in them.
- NOT: Use “NOT” to exclude specific keywords from your search results. For example, entering “report NOT draft” will show results that have the word “report” but do not include the word “draft”.
- Quotes: Use quotes to search for an exact phrase. For example, entering “project kickoff meeting” within quotes will only display results that have that exact phrase in them.
6. You can also use parentheses to group keywords and operators together, allowing you to create more complex search queries. For example, entering “(report OR presentation) AND deadline” will show results that contain either the word “report” or the word “presentation”, and also have the word “deadline”.
7. Once you have entered your advanced search query, press Enter or click on the magnifying glass icon to execute the search. Outlook will display the results that match your search criteria based on the advanced operators you used.
By using advanced search operators in Outlook, you can perform more precise and targeted searches to find specific information within your emails and messages. Combining operators like “AND”, “OR”, and “NOT” with quotes and parentheses allows you to create complex search queries tailored to your needs. Expand your search capabilities with these advanced operators to locate the exact information you’re looking for.
Searching with Keywords and Phrases
One of the fundamental ways to search for information in Outlook is by using keywords and phrases. This method allows you to find specific emails or messages that contain the exact words or phrases you are looking for. By effectively utilizing keywords and phrases in your search, you can quickly locate the information you need. Here’s how to search with keywords and phrases in Outlook:
1. Open Microsoft Outlook and navigate to the location where you want to perform the search, such as a mailbox, folder, or search results.
2. Look for the search bar at the top of the Outlook window and click inside it to activate the search.
3. Enter the keywords or phrases that are relevant to your search into the search bar. It can be a single word or a combination of multiple words.
4. Outlook provides real-time search results as you type, helping you to see if your keywords or phrases are yielding the desired results.
5. To narrow down the search results, consider adding more specific or unique keywords or phrases. This can help refine the search and provide more accurate results.
6. You can also use quotation marks to search for an exact phrase. For example, if you are looking for emails related to a specific project, enter the project name within quotation marks like “project ABC”. This will restrict the results to emails with the exact phrase “project ABC”.
7. If you want to further refine your search based on specific criteria, such as sender, recipient, or date range, consider using filters or advanced search operators to enhance your search query.
8. Once you have entered your keywords or phrases and any additional search criteria, press Enter or click the magnifying glass icon to execute the search. Outlook will display a list of results that match your search query.
9. You can scroll through the search results to find the specific email or message that contains the keywords or phrases you are searching for.
10. If you want to clear your search and return to the full view of the mailbox, click the “X” button at the right end of the search bar or press the Esc key on your keyboard.
By searching with keywords and phrases in Outlook, you can efficiently locate specific emails or messages that contain the precise information you are looking for. Utilize this method to search effectively across your mailbox, folders, or search results and find the information you need quickly and accurately.
Searching for Specific Types of Attachments
Searching for specific types of attachments in Outlook can be extremely valuable when you need to locate emails that contain specific files or documents. Whether you’re searching for a presentation, spreadsheet, or PDF, Outlook provides a convenient way to find emails with specific attachments. Here’s how to search for specific types of attachments in Outlook:
1. Open Microsoft Outlook and navigate to the location where you want to perform the search, such as a mailbox, folder, or search results.
2. Look for the search bar at the top of the Outlook window and click inside it to activate the search.
3. Enter your desired search keywords or phrases if you have any specific criteria in addition to searching for attachments. This step is optional and can help narrow down your results further.
4. To search for a specific type of attachment, use the advanced search operator “hasattachment:[filetype]” in your search query. Replace [filetype] with the desired file type you are searching for. For example, to search for PDF files, enter “hasattachment:pdf” in your search query.
5. If you are not sure about the specific file type, you can use a wildcard character to broaden your search. For example, entering “hasattachment:*.docx” will search for all Word document attachments with the .docx extension.
6. If you want to search for multiple file types, you can combine the advanced search operator with other keywords using the “AND” operator. For example, entering “hasattachment:pdf AND project proposal” will search for emails that have PDF attachments and also contain the phrase “project proposal” in the email body.
7. Once you have entered your search query, press Enter or click the magnifying glass icon to execute the search. Outlook will display a list of results that match your search criteria, specifically focusing on emails with attachments of the specified file type(s).
8. You can scroll through the search results to find the specific emails that contain the desired attachments. Outlook will display a paperclip icon next to emails that have attachments.
9. If you want to clear your search and return to the full view of the mailbox or folder, click the “X” button at the right end of the search bar or press the Esc key on your keyboard.
By searching for specific types of attachments in Outlook, you can efficiently locate emails that contain the exact files or documents you are looking for. Take advantage of this feature to streamline your search process and find the information you need, saving time and effort in managing your email attachments.
Searching for Emails Based on Sender or Recipient
Searching for emails based on the sender or recipient can be a powerful way to find specific conversations or messages in Outlook. Whether you need to locate all emails from a particular contact or emails sent to a specific recipient, Outlook makes it easy to perform this type of search. Here’s how to search for emails based on the sender or recipient:
1. Open Microsoft Outlook and go to the location where you want to perform the search, such as a mailbox, folder, or search results.
2. Look for the search bar at the top of the Outlook window and click inside it to activate the search.
3. To search for emails from a specific sender, enter the sender’s name or email address into the search bar. Outlook will automatically suggest matching contacts or email addresses as you type, making it easier to select the correct sender.
4. If you want to search for emails sent to a specific recipient, enter the recipient’s name or email address into the search bar. Like with the sender search, Outlook will suggest matching contacts or email addresses to help you find the desired recipient.
5. Once you have entered the sender or recipient information, press Enter or click the magnifying glass icon to execute the search. Outlook will display a list of results that match your search criteria.
6. You can scroll through the search results to find the specific emails from the sender or to the recipient you searched for. Outlook provides a clear indication of the sender and the recipient in the search results.
7. If you want to clear your search and return to the full view of the mailbox or folder, click the “X” button at the right end of the search bar or press the Esc key on your keyboard.
By searching for emails based on the sender or recipient in Outlook, you can quickly filter and locate specific conversations or messages. Whether it’s finding emails from an important contact or reviewing email exchanges with a particular recipient, this feature will help you streamline your search process and locate the information you need efficiently.
Searching for Emails within a Specific Date Range
Searching for emails within a specific date range can be a useful way to find messages that were sent or received during a particular time period in Outlook. Whether you need to review emails from a specific week or search for messages within a certain month, Outlook provides the tools to perform this type of search. Here’s how to search for emails within a specific date range:
1. Open Microsoft Outlook and navigate to the location where you want to perform the search, such as a mailbox, folder, or search results.
2. Locate the search bar at the top of the Outlook window and click inside it to activate the search.
3. Enter any desired search keywords or phrases if you have specific criteria in addition to searching within a particular date range. This step is optional and can help further narrow down your results.
4. To search within a specific date range, enter the date range using the format “received:
5. Replace
6. Example: To search for emails received between January 1, 2022, and January 31, 2022, enter “received:01/01/2022..01/31/2022” in the search bar.
7. Once you have entered the date range, press Enter or click the magnifying glass icon to execute the search. Outlook will display a list of results that match your search criteria within the specified date range.
8. You can scroll through the search results to find the specific emails that were sent or received within the defined date range. Outlook will indicate the date of each email in the search results.
9. If you want to clear your search and return to the full view of the mailbox or folder, click the “X” button at the right end of the search bar or press the Esc key on your keyboard.
By searching for emails within a specific date range in Outlook, you can easily locate messages that were sent or received during a particular period. This feature allows you to review emails from specific timeframes, track communication history, and find relevant information within the desired date range.
How to Save and Reuse Search Queries in Outlook
Saving and reusing search queries in Outlook can be a time-saving feature that allows you to quickly access frequently used search criteria. Instead of manually entering the same search terms each time, you can save the search query and reuse it whenever needed. Here’s how to save and reuse search queries in Outlook:
1. Open Microsoft Outlook and perform the desired search using the search bar at the top of the window. Enter the keywords, filters, or other criteria to define your search.
2. Once you have executed the search and obtained the desired results, navigate to the “Search” tab in the toolbar at the top of the Outlook window.
3. Under the “Options” group, click on the “Save Search” button. This will open a dialog box where you can enter a name for the saved search query.
4. Enter a descriptive name for the search query that will help you identify and remember it in the future. For example, you can name it “Quarterly Sales Report” if it’s a search query related to finding sales reports for a specific quarter.
5. Choose the location or folder where you want to save the search query. You can opt to save it in your default search folders or select a specific folder of your choice.
6. Click “OK” to save the search query. Outlook will create a shortcut to the search query in the chosen location or folder.
7. To reuse the saved search query, simply navigate to the location or folder where you saved it.
8. Click on the saved search query shortcut or select it from the list of saved searches. Outlook will automatically execute the search query and display the results.
9. If you want to modify the saved search query, such as changing the search criteria or adding additional filters, right-click on the saved search and select “Modify Search”. Make the necessary changes and save it again.
10. You can create multiple saved search queries in Outlook to accommodate different search criteria or requirements. This allows for quick and easy access to commonly used search queries whenever you need them.
By saving and reusing search queries in Outlook, you can streamline your search process and save time by quickly accessing frequently used search criteria. Take advantage of this feature to efficiently find the information you need without having to manually enter the same search terms repeatedly.
Troubleshooting Common Search Issues in Outlook
While Outlook’s search function is generally reliable, there can be instances where you encounter search issues or experience difficulty in finding the information you’re looking for. This section will address common search issues and provide troubleshooting tips to help you overcome them. Here are possible solutions to troubleshoot common search issues in Outlook:
1. Check Indexing Status: Outlook relies on an indexing feature to provide quick and accurate search results. If you’re experiencing search problems, first verify that the indexing process is complete. Go to “File” > “Options” > “Search” > “Indexing Options”, and ensure that Outlook is included in the list of indexed locations. If Outlook is not listed, click “Modify” and select the appropriate folders to index.
2. Rebuild the Index: If indexing is enabled but search results are still inconsistent or incomplete, rebuilding the index can resolve the issue. Go to “File” > “Options” > “Search” > “Indexing Options” and click “Advanced”. In the “Advanced Options” dialog box, navigate to the “Index Settings” tab and click “Rebuild”. This process may take some time, but it can fix index-related search problems.
3. Clear Search Filters: Double-check that no search filters or restrictions are inadvertently applied. These filters can limit the search results to specific folders, dates, or other criteria. To clear filters, go to the search bar and click the “X” button on the right end of the search text box.
4. Disable Add-ins: Certain Outlook add-ins can interfere with the search functionality. Temporarily disable add-ins by going to “File” > “Options” > “Add-Ins”. From there, disable add-ins that you suspect might be causing search issues, then restart Outlook and check if the search starts working correctly.
5. Repair Outlook Data Files: Corrupted or damaged Outlook data files can lead to search problems. To repair them, go to “File” > “Options” > “Advanced” > “Outlook Data Files”, then select the affected data file and click “Repair”. Follow the prompts to complete the repair process.
6. Check Outlook Version: Older versions of Outlook may have limitations or known issues related to search. Ensure that you have the latest updates and patches installed for your version of Outlook. Consider upgrading to the latest version if it’s available.
7. Search in Webmail: If you are using Outlook with an Exchange or Office 365 account, try performing the search directly in the webmail interface. This can help determine if the issue is specific to the Outlook application or if it persists across different platforms.
8. Contact IT Support: If the above troubleshooting steps do not resolve the search issues, it may be necessary to seek assistance from your organization’s IT support team. They can provide further guidance and help resolve any underlying technical issues that may be impacting the search functionality.
Remember, troubleshooting steps may vary depending on your specific Outlook version and configuration. Utilize the steps above as a starting point to diagnose and resolve common search issues.