
Why do you need to reset your Wi-Fi extender to a new router?
Resetting your Wi-Fi extender to a new router may be necessary for several reasons. Whether you have upgraded to a newer router model, changed your internet service provider, or encountered connectivity issues, resetting your Wi-Fi extender can help ensure a smooth and reliable connection. Let’s delve into some of the key reasons why you may need to reset your Wi-Fi extender.
1. Upgrading to a newer router: If you have recently invested in a more advanced router to benefit from faster speeds, better coverage, or additional features, resetting your Wi-Fi extender is essential for it to establish a strong and seamless connection with the new router.
2. Changing your internet service provider: If you have switched to a new internet service provider, it is highly likely that the router provided by the new ISP will have different settings than your previous one. Resetting your Wi-Fi extender will allow it to sync with the new router’s configuration, ensuring reliable Wi-Fi coverage throughout your home or office.
3. Resolving connectivity issues: Sometimes, Wi-Fi extenders can encounter issues that result in poor or inconsistent connectivity. Resetting the extender can help troubleshoot and resolve any software glitches or configuration conflicts that may be causing disruptions in your Wi-Fi network.
4. Improving overall performance: Over time, Wi-Fi extenders can accumulate temporary files and outdated settings that may impact their performance. A reset ensures a fresh start, clearing any backlog and optimizing the extender’s performance for better range and speed.
Overall, resetting your Wi-Fi extender to a new router is a proactive measure to maintain a reliable and efficient network connection. It allows for seamless integration with upgraded equipment, adjustments to new ISP settings, and resolution of connectivity issues. In the following sections, we will outline the step-by-step process to reset your Wi-Fi extender and connect it to a new router.
Step 1: Understand the reasons for resetting your Wi-Fi extender
Before proceeding with the reset process, it is crucial to understand why you need to reset your Wi-Fi extender. By identifying the underlying reasons, you can ensure that resetting is the appropriate solution for the issues you are facing. Let’s explore some common scenarios where resetting your Wi-Fi extender is necessary.
1. Connection problems: If you are experiencing frequent disconnections or weak signals, resetting your Wi-Fi extender can help resolve these issues. It clears any previous configurations or interference that may be hindering the extender’s performance and allows it to establish a fresh and stable connection with your router.
2. Router replacement or upgrade: When you replace your old router with a new one or upgrade to a better model, it is important to reset your Wi-Fi extender. This ensures that the extender syncs with the new router’s settings, such as network name (SSID) and Wi-Fi password, providing consistent connectivity and optimal performance.
3. Change in network settings: If you change your network settings, such as modifying the Wi-Fi password or switching between security protocols (e.g., from WEP to WPA2), resetting the Wi-Fi extender is necessary. This allows the extender to update its configurations and adapt to the new network settings for seamless access to Wi-Fi coverage.
4. Troubleshooting purposes: When encountering persistent connectivity issues, resetting the Wi-Fi extender is often recommended as an initial troubleshooting step. It allows you to start afresh, eliminate potential software glitches, and determine if the extender or other factors are causing the problem.
5. Factory defaults: Resetting your Wi-Fi extender brings it to its factory default settings, erasing any customizations or changes you have made. This can be useful if you want to start from scratch or revert back to the original configurations.
By understanding the reasons for resetting your Wi-Fi extender, you can confidently proceed with the reset process, knowing that it is the appropriate solution for your specific situation. In the following sections, we will guide you through the step-by-step process to reset your Wi-Fi extender and establish a connection with a new router.
Step 2: Prepare the necessary items for the reset process
Before you begin resetting your Wi-Fi extender, it is important to gather the necessary items to ensure a smooth and successful reset process. By having these items ready, you can proceed without any interruptions or delays. Here’s what you’ll need:
1. Wi-Fi extender documentation: Retrieve the user manual or any documentation that came with your Wi-Fi extender. This will provide specific instructions for resetting the extender and any additional information you may need during the process.
2. A computer or mobile device: You’ll need a computer or mobile device with a web browser to access the management interface of the Wi-Fi extender. Make sure it is connected to the same network as the extender.
3. Ethernet cable: An ethernet cable is required if you need to establish a direct wired connection between your computer or mobile device and the Wi-Fi extender. This can enable a more stable connection during the reset process.
4. Power source: Ensure that your Wi-Fi extender is plugged into a power source. It is important to have a stable power supply to avoid any disruptions during the reset process.
5. Pen or pin: In some Wi-Fi extenders, resetting involves pressing a small reset button using a pen or pin. This button is usually located on the back or bottom of the device. Keep a pen or pin handy to access and press the reset button if required.
Having these items prepared will save you time and effort during the reset process. Make sure you have everything readily accessible before moving on to the next steps. In the following sections, we will walk you through the physical reset process and connecting the Wi-Fi extender to a new router.
Step 3: Physically reset the Wi-Fi extender to factory settings
Once you have gathered the necessary items, you can proceed with physically resetting your Wi-Fi extender to its factory settings. This process will clear any previous configurations and restore the extender to its default state. Follow these steps to reset your Wi-Fi extender:
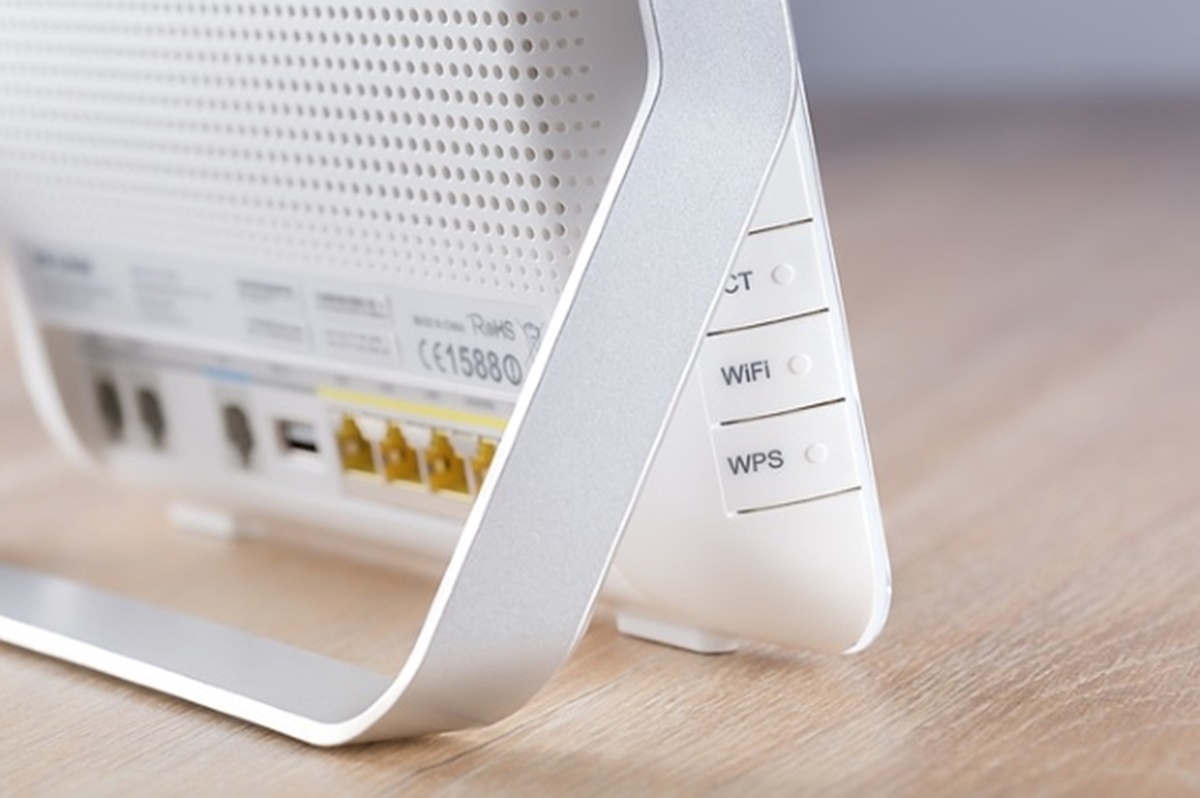
1. Locate the reset button: Look for a small reset button on the back or bottom of your Wi-Fi extender. It is usually labeled “Reset” and may require using a pen or pin to access.
2. Power on the Wi-Fi extender: Ensure that the extender is connected to a power source and turned on. This step is crucial for the reset process to work effectively.
3. Press and hold the reset button: Using a pen or pin, press and hold the reset button for about 10-15 seconds. Make sure to keep it pressed until you see the indicator lights on the extender start flashing or until the extender restarts.
4. Release the reset button: Once the lights start flashing or the extender restarts, release the reset button. The Wi-Fi extender will now be in the process of resetting to its factory settings.
5. Allow the reset process to complete: Give the Wi-Fi extender a few minutes to complete the reset process. During this time, the extender will restart and clear all previous configurations.
By physically resetting the Wi-Fi extender to its factory settings, you have effectively wiped out any previous settings or configurations. In the next section, we will guide you through the process of connecting the Wi-Fi extender to a new router.
Step 4: Connect the Wi-Fi extender to the new router
After resetting your Wi-Fi extender to factory settings, the next step is to connect it to your new router. This process ensures that the extender establishes a strong and stable connection to provide extended Wi-Fi coverage. Follow these steps to connect your Wi-Fi extender to the new router:
1. Position the extender: Place the Wi-Fi extender in a location where it can effectively extend your Wi-Fi signal. Ideally, it should be positioned between your new router and the area where you need improved coverage.
2. Power on the extender: Connect the Wi-Fi extender to a power source and ensure that it is turned on. Wait for the extender to power up and stabilize.
3. Check the Wi-Fi signal: On your computer or mobile device, check for the available Wi-Fi networks. You should see a new network name (SSID) that corresponds to your Wi-Fi extender.
4. Connect to the extender: Select the Wi-Fi extender’s network name (SSID) from the list of available networks. If prompted, enter the Wi-Fi extender’s network password, which is typically provided in the extender’s documentation.
5. Establish a connection: Your device will now connect to the Wi-Fi extender. Once the connection is established, you will have extended Wi-Fi coverage from your new router through the extender.
6. Test the connection: Verify that the Wi-Fi extender is successfully connected to your new router by testing the internet connection on the devices within the extended coverage area. Ensure that you have a stable and reliable connection.
By connecting the Wi-Fi extender to your new router, you can enjoy extended Wi-Fi coverage and improved connectivity throughout your home or office. In the next section, we will guide you through accessing the Wi-Fi extender’s management interface to configure it with the new router’s settings.
Step 5: Access the Wi-Fi extender’s management interface
Once your Wi-Fi extender is successfully connected to the new router, the next step is to access its management interface. This interface allows you to configure the extender with the settings of your new router. Follow these steps to access the management interface:
1. Determine the extender’s IP address: Check the documentation or the bottom of the extender for the default IP address. It is typically something like “192.168.1.1” or “192.168.0.1”.
2. Open a web browser: On your computer or mobile device, open a web browser such as Chrome, Firefox, or Safari.
3. Enter the extender’s IP address: In the address bar of the web browser, type the extender’s IP address and press Enter. This will take you to the extender’s management interface login page.
4. Enter login credentials: On the login page, enter the default username and password for the extender. If you have changed these credentials in the past, use the updated ones. If you have forgotten them, refer to the documentation or perform a quick online search to find the default login information for your extender model.
5. Access the management interface: After entering the correct login credentials, you will be granted access to the Wi-Fi extender’s management interface. Here, you can customize various settings, such as the network name (SSID), Wi-Fi password, security settings, and more.
By accessing the Wi-Fi extender’s management interface, you can configure its settings to match those of your new router, ensuring seamless connectivity and optimal performance. In the next section, we will guide you through the specific configurations needed to set up the extender with the new router’s settings.
Step 6: Configure the Wi-Fi extender with the new router’s settings
Once you have accessed the Wi-Fi extender’s management interface, it is time to configure it with the settings of your new router. This will ensure that the extender works seamlessly with the new router and provides extended Wi-Fi coverage. Follow these steps to configure the Wi-Fi extender:
1. Set the network name (SSID): In the management interface, locate the network settings or wireless settings section. Enter the new network name (SSID) that you want to assign to your Wi-Fi extender. This should match the network name of your new router for seamless connectivity.
2. Set the Wi-Fi password: Locate the security settings section and set the Wi-Fi password for your extender. Ensure that it matches the Wi-Fi password of your new router for consistent connection across both devices. Use a strong and unique password to enhance security.
3. Choose the security protocol: Select the appropriate security protocol (e.g., WPA2, WPA3) that is supported by your new router. This ensures that the extender and router share the same security protocol for secure and encrypted communication.
4. Adjust other advanced settings: Depending on your preferences and specific requirements, you may want to explore other advanced settings in the management interface. These could include channel selection, signal strength adjustments, or enabling guest networks. Customize these settings as needed.
5. Apply the changes: Once you have made the necessary configuration adjustments, locate the “Apply” or “Save” button in the management interface. Click on it to save the changes and apply the new settings to your Wi-Fi extender.
6. Wait for the extender to reboot: After applying the changes, wait for your Wi-Fi extender to reboot. This process may take a few minutes. Once the extender is back online and the changes have been implemented, it will be ready to provide extended Wi-Fi coverage with the new router’s settings.
By configuring the Wi-Fi extender with your new router’s settings, you ensure that both devices work together seamlessly to provide a reliable and extended Wi-Fi network. In the next section, we will guide you on testing the connection between the Wi-Fi extender and the new router.
Step 7: Test the connection between the Wi-Fi extender and the new router
After configuring the Wi-Fi extender with the settings of your new router, it is important to test the connection to ensure that both devices are working together seamlessly. Testing the connection will help verify that you have extended Wi-Fi coverage and a reliable network. Follow these steps to test the connection:
1. Connect devices to the extended network: On your computer, mobile devices, or any other devices that need Wi-Fi access, locate the Wi-Fi settings. Connect to the Wi-Fi network created by the extender. It should have the same network name (SSID) and Wi-Fi password as your new router.
2. Check signal strength: Move around your home or office to different areas and check the signal strength of the extended network. Ensure that the signal remains strong and stable regardless of your location.
3. Test internet connectivity: Use your connected devices to browse the internet, stream videos, or perform any other online activities. Check if the internet connection is reliable and consistent across all devices within the extended coverage area.
4. Monitor network speed: Perform a speed test using online tools or dedicated apps to measure your internet speed. Compare the speed results to the expected speed provided by your internet service provider. Ensure that the extended network offers satisfactory speeds.
5. Repeat the process: If you notice any connectivity issues or weak signals in certain areas, consider repositioning the Wi-Fi extender to optimize coverage. Repeat the testing process to ensure that the connection is improved in these areas.
By testing the connection between the Wi-Fi extender and the new router, you can have confidence that your extended network is functioning optimally. If you encounter any issues during the testing phase, refer to the troubleshooting tips in the next section to resolve the problem.
Step 8: Troubleshooting tips if the reset process fails
In some cases, the reset process of a Wi-Fi extender may not go as planned, and you may encounter difficulties. If you find yourself in this situation, don’t worry. Here are some troubleshooting tips to help you overcome any issues you may face during the reset process:
1. Power cycle the Wi-Fi extender: Disconnect the extender from the power source and wait for about 30 seconds before plugging it back in. This simple power cycle can often resolve minor glitches and allow for a successful reset process.
2. Ensure proper button pressing: When resetting the extender, make sure you are holding down the reset button for the recommended duration, usually around 10-15 seconds. Use a pen or pin to press the reset button firmly and ensure a proper connection.
3. Try a different reset method: If the physical reset button method is not working, refer to the extender’s documentation or online resources to explore alternative reset methods. Some extenders may have a different process, such as using software-based reset options through the management interface.
4. Verify the IP address and login credentials: Double-check that you are entering the correct IP address and login credentials to access the extender’s management interface. Ensure there are no typos or mistakes in the provided information.
5. Update the extender’s firmware: Check for any available firmware updates for your Wi-Fi extender and apply them if necessary. Firmware updates often address software issues and can improve the performance and stability of your extender.
6. Contact technical support: If all else fails, don’t hesitate to reach out to the manufacturer’s technical support. They can provide you with further guidance and assistance in troubleshooting the issue and ensuring a successful reset.
By utilizing these troubleshooting tips, you can overcome any challenges you may encounter during the reset process of your Wi-Fi extender. Remember, patience is key, and with a little perseverance, you’ll be able to reset your Wi-Fi extender to a new router and enjoy an optimized and reliable Wi-Fi network.