
Diagnosing the Problem
Is your Wi-Fi acting up and causing frustration? Before jumping into solutions, it’s essential to diagnose the problem accurately. Understanding the root cause can help you fix your Wi-Fi router effectively.
One of the first things to check is whether the issue lies with your router or your internet service provider (ISP). Start by rebooting your router and modem to eliminate any temporary glitches. Check if other devices in your home can connect to the Wi-Fi network. If they can, the problem might be specific to the device you are using.
Next, examine the signal strength. Weak Wi-Fi signals can be a major reason for connectivity issues. Move closer to the router and observe if the problem persists. If the signal becomes stronger, it indicates that there might be interference or obstacles hindering the signal’s reach. Factors such as distance, walls, and appliances can all impact signal strength.
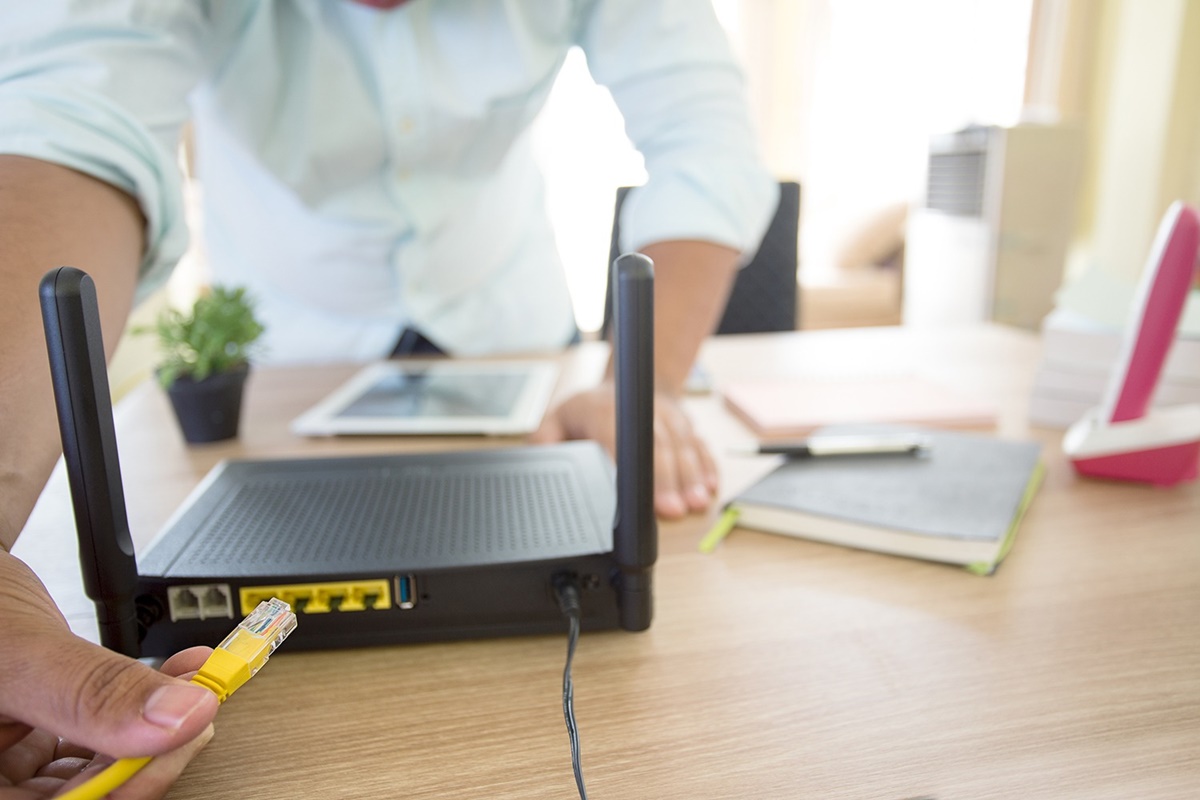
If you’ve confirmed that the issue is not with your device or signal strength, it’s time to consider other factors. Check if the router’s lights are blinking correctly, indicating proper power and internet connection. If not, try connecting the router to a different power outlet or checking the cables for any signs of damage.
In some cases, outdated router firmware can cause connectivity problems. Access the router’s settings page, usually by typing the default gateway IP address into your browser, and check for any available firmware updates. These updates can often fix bugs and improve the router’s performance.
Keep in mind that your router might be competing with other nearby routers on the same wireless channel. You can change the channel in the router settings to a less crowded one and improve your Wi-Fi performance. Experiment with different channels to find the one with the least interference.
Lastly, it’s important to consider any recent changes around the router that could impact connectivity. Have you moved the router to a new location or added any new electronic devices nearby? Both physical placement and electronic interference can affect Wi-Fi performance. Ensure your router is placed in a central location and away from obstacles such as walls or metal objects.
By diagnosing the problem accurately, you can save time and energy by focusing on the specific areas that need attention. Through a systematic approach, you’ll be on the right path towards fixing your Wi-Fi router and enjoying a seamless internet experience.
Checking the Power and Internet Connection
When experiencing Wi-Fi issues, it’s crucial to start troubleshooting by verifying the power and internet connection of your router. Even a small problem in these areas can disrupt your entire network. Follow these steps to ensure everything is properly connected and functioning:
First, check if the router is receiving power. Look for any LED lights or indicators on the router that show it’s turned on. If there are no lights, make sure the power cable is securely plugged into both the router and the power outlet. You can also try connecting the router to a different power outlet to rule out any electrical issues.
If the power lights are on but you still can’t connect to the internet, it’s time to examine the internet connection. Start by confirming that the modem is connected to the router. Ensure the Ethernet cable is securely plugged into both devices. If you have a separate modem, check its power and connection status as well.
Next, verify if the internet service is active and working. Connect a device to the modem using an Ethernet cable. If you can access the internet through the wired connection, it indicates a problem specific to the Wi-Fi. If you can’t connect to the internet even via wired connection, contact your ISP to ensure there are no outages or issues with your service.
If the wired connection is working fine, the problem might be related to the wireless settings. Check if the Wi-Fi indicator light is illuminated on the router, confirming that the Wi-Fi is enabled. Verify that the Wi-Fi password is correct and hasn’t been changed accidentally. It’s also worth noting that some routers have a physical switch or button to enable or disable Wi-Fi, so make sure it’s in the correct position.
Additionally, check if the SSID (network name) is visible on your device when searching for available networks. If it’s not appearing, the router might be experiencing a configuration issue. Access the router’s settings by typing the default gateway IP address into your browser. Ensure that the router is set to broadcast the SSID and that it’s not hidden.
By thoroughly examining the power and internet connection, you can alleviate common issues that might prevent your Wi-Fi router from functioning correctly. Remember to double-check all cables, power sources, and configuration settings to ensure a seamless connection to the internet.
Rebooting the Router and Modem
When faced with Wi-Fi connectivity issues, one of the simplest and most effective troubleshooting steps is to reboot both the router and modem. Rebooting can resolve temporary glitches and refresh the network connection, often resolving common problems. Here’s how to do it:
Start by locating the power source of your router and modem. Depending on the model, you may need to unplug them directly from the power outlet or use a power button if available. Take a moment to confirm that both devices are completely powered off.
After ensuring they are powered off, wait for about 30 seconds to a minute. This waiting period allows any residual charges in the devices to dissipate, ensuring a clean restart.
Once the waiting period has passed, plug the modem back into the power source. Allow the modem to fully power up and establish an internet connection. It may take a few minutes for all the lights on the modem to stabilize.
Next, plug the router back into the power source and wait for it to power up. The router lights should start flashing or stabilizing, indicating that it is booting up and establishing a connection with the modem. This process may also take a few minutes to complete.
Once the power and connection lights on both devices have stabilized, you can try connecting to the Wi-Fi network. Most of the time, rebooting the router and modem resolves temporary issues, such as conflicts or congestion that can hinder connectivity.
If the rebooting process doesn’t immediately solve your Wi-Fi problems, try restarting the devices connected to the network, such as computers, smartphones, or tablets. This ensures that all the devices establish a fresh connection to the network.
Remember that rebooting the router and modem should be a regular maintenance practice, particularly if you frequently experience Wi-Fi issues. Performing this step periodically can help optimize performance and minimize connectivity problems.
By rebooting your router and modem, you give them a fresh start, allowing them to establish a stable connection and potentially resolve connectivity issues. It’s a simple yet powerful troubleshooting step that should be one of the first actions you take when encountering Wi-Fi problems.
Checking the Router Settings
When troubleshooting Wi-Fi issues, it’s important to check the settings of your router to ensure they are properly configured. Incorrect settings can lead to connectivity problems and hinder your internet experience. Here are some key settings to check:
First, access the router’s settings page by typing the default gateway IP address into your browser. You may need to enter a username and password to login to the router’s administration panel. Consult your router’s manual or contact the manufacturer if you are unsure how to access the settings.
Once you are logged in, navigate to the wireless settings section. Check if the network name (SSID) and password are correct. The SSID should be unique and easily recognizable, while the password should be strong and secure. Consider changing the password periodically to enhance network security.
Make sure that the router’s wireless mode is set to the appropriate standard, such as 802.11n or 802.11ac, depending on the capabilities of your devices. Using an outdated or incompatible wireless mode can lead to compatibility issues and slower speeds.
Another important setting to check is the security type. It’s crucial to use encryption protocols like WPA2-PSK (AES) or WPA3 for secure communication between your devices and the router. Avoid using outdated and insecure security options like WEP or WPA.
Additionally, explore the advanced settings section of your router. Depending on your router model, you may have options to enable features like Quality of Service (QoS) to prioritize specific devices or applications, port forwarding for gaming or remote access, or parental controls to manage the content accessed by devices on your network.
While checking the settings, watch out for any unwanted changes or suspicious configurations. Sometimes, unauthorized users can access your router’s settings and make unauthorized modifications. This can impact performance and compromise your network security. Ensure that the router’s firmware is up to date to avoid known vulnerabilities.
If you have made any changes to the router settings and are experiencing issues, consider performing a factory reset. This will restore the router to its default settings, erasing any custom configurations you have made. Note that you will need to reconfigure the router after performing a factory reset.
By regularly checking and adjusting the router settings, you can ensure optimal performance and troubleshoot any problems related to the configuration. A properly configured router plays a vital role in maintaining a reliable and secure Wi-Fi network.
Updating the Router Firmware
Keeping your router’s firmware up to date is crucial for maintaining optimal performance and security. Firmware updates, released by the router manufacturer, often include bug fixes, performance improvements, and security patches. Here’s how to update your router firmware:
Start by accessing the router’s settings page. This can typically be done by typing the default gateway IP address into your browser and entering the login credentials. Check your router’s manual or manufacturer’s website for specific instructions if you’re unsure how to access the settings.
Once you’re in the router’s settings, look for the “Firmware Update” or “Software Update” option. The location and name of this option may vary depending on the router model and firmware version.
Next, check if there are any available firmware updates for your router. Some routers have an automatic update feature that periodically checks for updates and installs them. If your router doesn’t have this feature, you may need to manually check for updates.
If an update is available, follow the instructions provided by the router’s manufacturer to download and install the firmware update. This usually involves clicking on a button or link to initiate the update process.
During the update process, it’s essential to avoid interrupting the router’s power or internet connection. Any disruptions could lead to an incomplete update or even damage the router. Allow the update to complete fully, which may take a few minutes.
After the update is finished, the router will typically restart to apply the changes. Once the router is back online, double-check the firmware version in the settings to ensure that the update was successful.
If you encounter any difficulties during the update process, consult the router’s manual or visit the manufacturer’s support website for troubleshooting guidance. Backup your router’s configuration settings before updating, as some updates may reset the settings to their default values.
Regularly checking and updating the router’s firmware is vital for ensuring optimal performance, security, and compatibility. By staying up to date with the latest firmware, you can resolve any known issues and protect your network from potential vulnerabilities or exploits.
Changing the Wireless Channel
If you’re experiencing slow Wi-Fi speeds or frequent disconnections, changing the wireless channel on your router can help alleviate the problem. Wi-Fi networks can interfere with each other, especially in densely populated areas. Switching to a less congested channel can significantly improve your Wi-Fi performance. Here’s how to do it:
Start by accessing your router’s settings page. To do this, open a web browser and type the default gateway IP address into the address bar. You may need to enter a username and password to log in to the router’s administration panel. Consult your router’s manual or contact the manufacturer if you’re unsure how to access the settings.
Once you’re logged into the router’s settings, navigate to the wireless settings section. Look for an option related to “Channel” or “Wireless Channel.” The location of this option may vary depending on your router model and firmware version.
By default, most routers auto-select the channel, but manually selecting a less crowded channel can improve your Wi-Fi signal’s stability and strength. Look for a dropdown menu or a list of available channels.
To determine the best channel, you can use a Wi-Fi analyzer app on your smartphone or computer. These apps scan the nearby Wi-Fi networks and display information about the channel distribution. Look for channels with fewer overlapping networks or networks with weaker signals.
Once you’ve identified the best channel, select it from the dropdown menu or list in the router’s settings. Save the changes and wait for the router to apply the new channel.
Keep in mind that Wi-Fi channels are divided into two frequency bands: 2.4 GHz and 5 GHz. The 2.4 GHz band is more crowded, as many devices use this frequency range, including Bluetooth and microwaves. The 5 GHz band usually offers less interference and can provide faster speeds, but its range is more limited.
After changing the channel, monitor your Wi-Fi connection to see if the performance has improved. If you still experience issues, you may need to repeat the process and select a different channel.
Remember that neighboring Wi-Fi networks can change their channels, so it’s a good idea to periodically check and adjust your channel settings to ensure optimal performance.
By manually changing the wireless channel on your router, you can reduce interference and improve your Wi-Fi connection’s reliability. Experimenting with different channels can help you find the one that provides the best performance for your specific environment.
Positioning the Router Properly
The placement of your Wi-Fi router plays a crucial role in determining the signal strength and coverage throughout your home or office. To ensure optimal Wi-Fi performance, it’s important to position your router properly. Here are some tips for positioning your router:
Start by placing your router in a central location within your home or office. This allows for equal signal distribution throughout the space. Avoid placing the router in corners or close to walls, as these can block the Wi-Fi signal and reduce coverage.
Elevate the router off the floor and avoid placing it on any metal surfaces or near other electronic devices. Metal surfaces can reflect and interfere with the Wi-Fi signal, while other electronic devices, such as cordless phones and microwaves, can cause interference.
Ensure that your router has a clear line of sight to the areas where you need strong Wi-Fi coverage. Avoid obstructing the signal with furniture, walls, or other objects. If there are multiple floors, consider placing the router on the upper floor to improve signal coverage downstairs.
If you have a large home or office, you may need to use additional devices, such as Wi-Fi range extenders or mesh Wi-Fi systems, to extend the coverage to different areas. These devices can amplify and distribute the Wi-Fi signal, ensuring a strong and stable connection throughout the entire space.
Experiment with different router antenna positions, if applicable. Adjusting the antennas can help optimize signal strength and coverage. For example, positioning them vertically or horizontally can affect the signal distribution depending on your specific router model and antenna design.
Consider using a Wi-Fi analyzer app on your smartphone or computer to assess the signal strength in various locations. This can help you identify any dead zones or areas with weak connectivity. Use this information to adjust the router’s position until you achieve a balanced signal throughout the desired areas.
Lastly, regularly monitor the Wi-Fi signal strength and coverage in different parts of your home or office. If you notice any significant drops or weak spots, reposition the router to improve the signal in those areas.
By properly positioning your router, you can maximize its signal strength and coverage, ensuring a reliable and fast Wi-Fi connection throughout your space. Experimentation and monitoring play a key role in finding the optimal placement for your specific environment.
Checking for Interference
Interference from various sources can disrupt your Wi-Fi signal, resulting in slow speeds and unreliable connections. It’s important to identify and mitigate any potential sources of interference to ensure a smooth wireless experience. Here are some common sources of interference to check for:
1. Other Wi-Fi Networks: Wi-Fi signals from neighboring networks on the same or overlapping channels can interfere with your network’s performance. Use a Wi-Fi analyzer app to check the surrounding networks and their channel distribution. If there are multiple networks using the same channel, consider changing your router’s channel to a less congested one.
2. Cordless Phones and Microwaves: Devices such as cordless phones, baby monitors, and microwave ovens operate on the same frequency as Wi-Fi signals (2.4 GHz). These devices can cause significant interference, so try to position your router away from them or use a router that supports the 5 GHz frequency band.
3. Bluetooth Devices: Bluetooth devices, including headphones, speakers, and keyboards, can interfere with Wi-Fi signals. Try keeping your router and Bluetooth devices at a reasonable distance from each other to minimize interference.
4. Electrical Devices: Certain electrical devices, such as fluorescent lights, halogen lamps, and power cables, emit electromagnetic interference that can degrade Wi-Fi performance. Keep your router away from these devices and try to create some distance.
5. Physical Obstacles: Walls, furniture, and other physical objects can obstruct and weaken Wi-Fi signals. Try positioning your router in an open space and minimize the number of obstructions between the router and your devices to maximize signal strength.
6. Metal Objects: Metal surfaces, such as mirrors, metal furniture, and appliances, can reflect and absorb Wi-Fi signals. Avoid placing your router near these objects and try to create a clear line of sight between the router and your devices.
7. Wi-Fi Extenders and Repeaters: While Wi-Fi extenders and repeaters can improve signal coverage, they can also introduce interference if not properly placed. Avoid placing them too close to the router or in areas where the signal strength is already weak.
Regularly monitor the Wi-Fi signal strength in different areas of your location using a Wi-Fi analyzer app. This can help you identify any sources of interference and determine the best course of action to mitigate them.
By identifying and addressing potential sources of interference, you can ensure a reliable and strong Wi-Fi connection. Experiment with different placement options and configurations to minimize interference and optimize your wireless network’s performance.
Resetting the Router to Factory Settings
In some cases, when troubleshooting persistent Wi-Fi issues or after making significant configuration changes, resetting your router to its factory settings can help resolve the problems. This process erases all custom settings and restores the router to its original state. Here’s how to reset your router:
1. Locate the reset button on your router. It is usually a small hole labeled “Reset” or “Restore Factory Default” on the back or bottom of the device. You may need to use a paperclip or a pin to press and hold the reset button.
2. Before resetting, ensure that your router is powered on. Press and hold the reset button for about 10-15 seconds. The router lights may blink or change indicating that the reset process has begun.
3. Release the reset button once the router lights stabilize or after the specified time mentioned in your router’s manual. The router will then reboot and restore the factory settings. This process usually takes a few minutes. Do not interrupt the power during this time.
4. After the router has completed the reset process and restarted, it will be in its default state. This means that all custom settings, including Wi-Fi network names, passwords, and any personalized configurations, will be erased. You will need to set up the router again as if it were brand new.
5. Use a computer or a device connected to the router via Ethernet cable to access the router’s settings page. Enter the default login credentials, usually displayed on the router or provided in the router’s manual. From there, you can reconfigure the router by setting up a new Wi-Fi network name (SSID) and password.
If resetting the router did not resolve the Wi-Fi issues, there may be other underlying problems that need further investigation or assistance from the manufacturer or your internet service provider.
Before resetting the router, it’s advisable to take note of any custom settings or configurations that you may need to reapply later, such as port forwarding rules or QoS settings.
Resetting your router to factory settings can be a helpful troubleshooting step when dealing with persistent connectivity problems. It can provide a fresh start and eliminate any potential software issues or conflicts that may have occurred.
Contacting the Internet Service Provider
If all the previous troubleshooting steps have been unsuccessful in resolving your Wi-Fi issues, it may be time to reach out to your Internet Service Provider (ISP) for assistance. Your ISP is responsible for providing you with an internet connection, and they can help diagnose and resolve any issues that may be occurring on their end. Here’s what you should consider when contacting your ISP:
1. Gather Information: Before contacting your ISP, gather information about the nature of your Wi-Fi issues. Note down any error messages, specific times when the issues occur, and details about the devices affected. Having this information ready will help your ISP troubleshoot more effectively.
2. Check Service Status: Before contacting your ISP, check their website or social media accounts for any scheduled maintenance or reported outages in your area. It’s possible that the Wi-Fi issues you’re experiencing are due to network maintenance or an outage on their end.
3. Contact Customer Support: Reach out to your ISP’s customer support department. Most ISPs provide multiple avenues for contact, such as phone, live chat, or email. Choose the option that is most convenient for you. Be prepared for potential wait times as customer support may be busy assisting other customers.
4. Provide Information and Describe the Issue: When speaking with customer support, provide them with the gathered information and describe the Wi-Fi issues you’re experiencing. Be specific about the symptoms, devices affected, and any troubleshooting steps you’ve already taken. This will help the support agent understand the situation better.
5. Follow Troubleshooting Steps: To assist you, the support agent might guide you through some additional troubleshooting steps. Follow their instructions carefully and provide feedback on the results of each step. This will ensure an efficient troubleshooting process.
6. Request Technician Visit: If the support agent determines that the issue requires further investigation, request a technician visit to your location. The technician will diagnose the issue and perform any necessary repairs or upgrades to restore your Wi-Fi connectivity.
7. Escalate if Necessary: If repeated attempts to resolve the issue are unsuccessful, the Wi-Fi issues persist, and your ISP is unable to provide a satisfactory solution, ask to escalate the matter to a higher-level support or technical team. They may have access to additional resources or expertise to assist you.
Remember to stay polite and patient when contacting your ISP’s customer support. Sometimes, issues can take time to diagnose and resolve. By working together with your ISP, you can increase the chances of resolving your Wi-Fi issues effectively.