
Reasons for Resetting a Gateway Laptop
Resetting a Gateway laptop can be an effective solution for various issues and situations. Whether you’re encountering performance problems, software glitches, or simply want to start fresh, here are some common reasons why you might consider resetting your Gateway laptop:
1. Slow Performance: Over time, your laptop’s performance may decline due to accumulated junk files, outdated software, or conflicting programs. Resetting your Gateway laptop can help remove unnecessary files and improve overall performance.
2. Software Errors: If you’re experiencing frequent crashes, freezes, or errors while using specific software applications, a reset can help resolve these issues. It clears temporary files and resets software settings, allowing for a clean start.
3. Virus or Malware Infection: If your laptop is infected with viruses, malware, or other malicious programs, resetting can help eliminate these threats. By resetting to factory settings, you remove all existing files and software, including any potentially harmful infections.
4. System Instability: If your Gateway laptop is experiencing frequent system crashes, blue screens, or other stability issues, a reset can help stabilize the operating system. It clears out problematic system configurations and restores the laptop to a more stable state.
5. Selling or Donating: If you’re planning to sell or donate your Gateway laptop, resetting it is essential to protect your personal data. Resetting ensures that all your files, user accounts, and personal information are erased, minimizing the risk of data theft.
6. Unwanted Changes: If you’ve made extensive customizations to your Gateway laptop’s settings and preferences that have resulted in unwanted changes or issues, a reset can revert everything back to its default state.
7. Upgrading Operating System: When upgrading your Gateway laptop’s operating system, resetting it beforehand can ensure a smooth transition. This helps remove any incompatible software or conflicting settings, reducing the chance of compatibility issues.
Remember, before resetting your Gateway laptop, it’s crucial to back up any important files, documents, or personal data to an external storage device. Resetting will remove all data from the laptop, including files stored locally. After resetting, you can restore your backed-up data to the laptop or start anew with a fresh setup.
Backing Up Your Data
Before resetting your Gateway laptop, it’s crucial to back up your important data to prevent any loss or inconvenience. Here are some steps to help you effectively back up your data:
1. Identify Important Files: Take the time to identify the files that are essential to you. This may include documents, photos, videos, music, or any other personal files that you don’t want to lose.
2. Choose an External Storage Device: Select a reliable external storage device to back up your data. This can be an external hard drive, USB flash drive, or cloud storage service like Google Drive or Dropbox.
3. Organize and Transfer Files: Create a folder on your external storage device and organize your files accordingly. Use a simple naming convention or categorize the files into subfolders to make it easier to locate them later.
4. Copy or Sync Files: Depending on your chosen backup method, you can either copy and paste your files directly to the external storage device or use syncing software to automatically transfer the files. Make sure to follow the instructions provided by the selected backup method.
5. Verify Data Integrity: After the transfer process, double-check your backed-up files to ensure that they have been successfully copied or synced. Open a few files to confirm that they are accessible and not corrupted.
6. Store the External Storage Device Safely: Keep your external storage device in a safe place, away from potential physical damage or theft. If you’re using cloud storage, ensure that you have a secure password and enable two-factor authentication for added security.
Remember, it’s essential to regularly back up your data even outside of the resetting process. Set up automatic backups or establish a routine to manually back up your files on a consistent basis. This will help you avoid data loss in case of unexpected events such as hardware failure or accidental file deletion.
By following these steps and backing up your important data, you can proceed with resetting your Gateway laptop with peace of mind. Once the reset is complete, you can restore your backed-up files to your laptop or selectively transfer them back, ensuring a seamless transition to your refreshed system.
Performing a Soft Reset
If you’re experiencing minor issues or sluggish performance on your Gateway laptop, performing a soft reset can often resolve these problems without losing any of your data. Follow these steps to perform a soft reset:
1. Save your Work: Before initiating a soft reset, ensure that you save any open documents or files you’re working on to prevent data loss.
2. Close all Applications: Close all running applications and programs to ensure they’re not interfering with the reset process.
3. Disconnect External Devices: Unplug any external devices, such as printers, USB drives, or external monitors, from your laptop to avoid any connectivity issues during the reset.
4. Press and Hold Power Button: Locate the power button on your Gateway laptop and press and hold it for approximately 10 to 15 seconds. This will force the laptop to shut down completely.
5. Release and Power On: After releasing the power button, wait for a few seconds and then press it again to turn on your laptop.
6. Wait for Boot: Allow your laptop to boot up normally. This process may take a few minutes, so be patient.
7. Test Performance: Once your laptop has fully booted, test its performance to see if the issues you were experiencing have been resolved. Open some applications, browse the internet, and observe the overall speed and responsiveness of your system.
Performing a soft reset can be an effective solution for minor software glitches or temporary performance issues. However, it may not address more complex issues or persistent hardware problems. If the problems persist after a soft reset, you may need to consider a more comprehensive solution like a hard reset or resetting to factory settings.
Remember, a soft reset doesn’t erase your data or change any settings on your laptop. It simply restarts the system, allowing it to clear temporary files and refresh its processes. If you’ve successfully resolved the issues with a soft reset, continue using your laptop as usual. If not, further troubleshooting steps may be required to fully address the problem.
Performing a Hard Reset
If you’re encountering more serious issues with your Gateway laptop or the soft reset didn’t resolve the problem, performing a hard reset can help. A hard reset will force the laptop to restart and clear any temporary configurations. Here’s how you can perform a hard reset:
1. Save your Work: Prior to initiating a hard reset, ensure that you save any open documents or files to prevent data loss.
2. Power Off the Laptop: Click on the “Start” menu in the bottom left corner of your screen, then select the “Power” option and choose “Shut down” to turn off your laptop.
3. Disconnect Power and External Devices: Unplug the power cord from your laptop and remove any attached external devices, including USB drives, printers, or external monitors.
4. Remove the Battery (If Applicable): If your Gateway laptop has a removable battery, carefully remove it from the laptop. If your laptop doesn’t have a removable battery, skip this step.
5. Press and Hold the Power Button: Locate the power button on your laptop and press and hold it for about 15 to 20 seconds. This will discharge any remaining power and clear the laptop’s temporary configurations.
6. Reconnect Power and Battery (If Applicable): Plug the power cord back into your laptop and reinsert the battery, if it was removed in the previous step. Skip this step if your laptop doesn’t have a removable battery.
7. Power On your Laptop: Press the power button to turn on your laptop. The laptop will start up as usual, but with a cleared hardware state and refreshed configurations.
8. Test Performance: Once your laptop has fully booted, test its performance to see if the issues have been resolved. Launch applications, browse the internet, and observe the overall speed and responsiveness of your system.
Performing a hard reset can often resolve more persistent issues, such as hardware conflicts or system crashes. However, it’s essential to note that a hard reset may not solve all problems. If the issues persist, you may need to consider more advanced troubleshooting steps or seek technical assistance.
Remember, a hard reset doesn’t erase your data or change any settings on your laptop. It primarily focuses on rebooting the laptop and clearing temporary configurations. If the hard reset successfully resolves the problem, continue using your laptop as usual. If not, further action may be required to fully address the issue.
Resetting to Factory Settings
If you’re facing persistent and complex issues with your Gateway laptop that couldn’t be resolved through soft or hard resets, resetting it to factory settings can provide a fresh start. Resetting to factory settings means restoring your laptop to its original state when you first purchased it. Here’s how you can reset your Gateway laptop to factory settings:
1. Back Up Your Data: Before proceeding with a factory reset, it’s crucial to back up any important files, documents, or personal data to an external storage device. This process will erase all data on your laptop, including files stored locally.
2. Plug in your Laptop: Ensure that your Gateway laptop is connected to a power source during the reset process to prevent any interruptions due to low battery.
3. Access Recovery Options: Restart your laptop, and as it boots up, press the designated key or key combination (often F8, F11, or Alt + F10) to access the recovery options menu. The specific key or combination may vary depending on your Gateway laptop model.
4. Select Factory Reset: In the recovery options menu, navigate to the “Reset” or “Restore” option and select it. This will initiate the factory reset process. Follow the on-screen prompts and instructions provided to proceed.
5. Confirm the Reset: Before the reset begins, you’ll receive a warning about data loss. Carefully read and understand the implications of resetting to factory settings, as it will erase all files, applications, and settings on your laptop. If you’re sure about the reset, confirm your choice to proceed.
6. Wait for the Reset: The factory reset process may take some time to complete. It involves reinstalling the original operating system and drivers, so be patient and allow the process to finish.
7. Set Up Your Laptop: Once the factory reset is complete, your Gateway laptop will restart and prompt you to set up the initial system settings, such as language preferences, user accounts, and network configurations. Follow the on-screen instructions to complete the setup process.
Resetting to factory settings is a drastic step and should only be undertaken when necessary. It’s important to note that this process will remove all data and installed applications from your laptop, so it’s crucial to back up everything beforehand.
After the factory reset, your laptop will be in its original state, similar to how it was when you first purchased it. You will need to reinstall any necessary software applications, restore your files from the backup, and personalize your settings to match your preferences.
Remember, if you’re unsure or uncomfortable performing a factory reset yourself, it’s advisable to seek professional assistance to ensure the process is executed correctly.
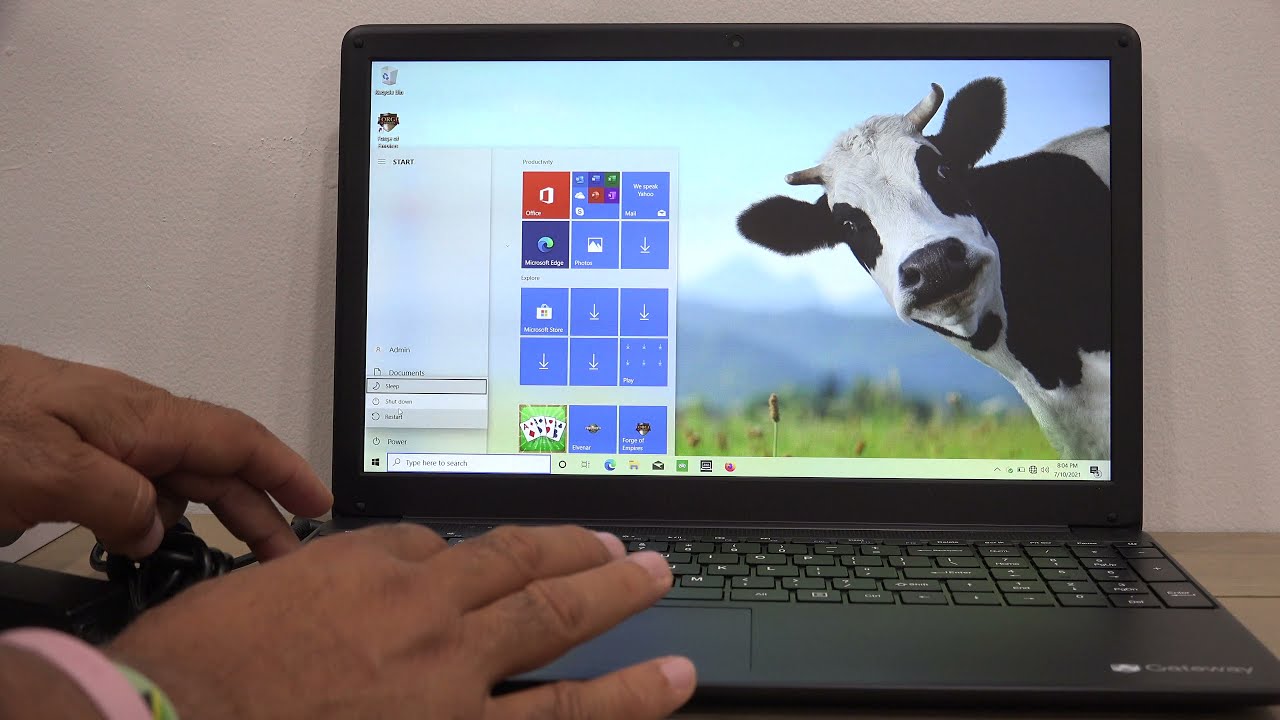
Resetting a Gateway Laptop with Windows 10
If you have a Gateway laptop running Windows 10 and need to reset it to resolve issues or start fresh, here’s how you can do it:
1. Back Up Your Data: Before proceeding with a reset, make sure to back up all your important files and data to an external storage device. This step ensures that you don’t lose any valuable information during the process.
2. Access the Settings: Click on the “Start” menu in the bottom left corner of your screen and select the “Settings” gear icon. Alternatively, you can press the Windows key + I on your keyboard to open the Settings app.
3. Open the Update & Security Menu: In the Settings app, locate and click on the “Update & Security” option. This will open the Update & Security menu that contains various Windows settings and options.
4. Select Recovery: In the left sidebar of the Update & Security menu, click on the “Recovery” option. This will display the recovery options available for your Gateway laptop.
5. Reset Your PC: Under the “Reset this PC” section, click on the “Get started” button. This will initiate the reset process and provide you with two options: “Keep my files” or “Remove everything.” Choose the option that suits your needs.
6. Follow the On-Screen Prompts: Depending on your selection in the previous step, the reset process will differ. If you choose “Keep my files,” Windows will reinstall Windows 10 while keeping your personal files intact. If you select “Remove everything,” Windows will remove all your files and reinstall Windows 10 from scratch. Follow the on-screen prompts and instructions to proceed.
7. Wait for the Reset: The reset process may take some time, and your laptop may restart multiple times. Allow the process to complete, and avoid interrupting it to ensure successful completion.
8. Set Up Your Laptop: Once the reset is finished, your Gateway laptop will restart, and you’ll be guided through the initial setup process. Follow the on-screen instructions to personalize your settings, create user accounts, and configure your preferences.
Resetting a Gateway laptop with Windows 10 can help resolve performance issues, software glitches, or start afresh with a clean installation of the operating system. Remember to back up your data before initiating the reset, as it will remove all files and settings from your laptop.
If you’re unable to access the Windows 10 operating system or encounter errors during the reset process, it’s advisable to seek professional assistance or contact Gateway support for further guidance.
Resetting a Gateway Laptop with Windows 8 or 8.1
If you have a Gateway laptop running Windows 8 or 8.1 and need to reset it for troubleshooting purposes or to start fresh, you can follow these steps:
1. Back Up Your Data: Before proceeding with a reset, it’s important to back up any important files, documents, or data to an external storage device. This will ensure that you don’t lose any valuable information during the reset process.
2. Access the Settings: Swipe in from the right edge of your Gateway laptop’s screen or press the Windows key + C on your keyboard to open the Charms menu. Click on the “Settings” option to proceed.
3. Select PC Settings: In the Settings menu, click on the “Change PC settings” option at the bottom. This will open the PC Settings menu, which contains various Windows 8 or 8.1 settings.
4. Open the Recovery Options: In the PC Settings menu, select the “Update and recovery” option. Then, click on the “Recovery” option in the left sidebar. This will display the recovery options available for your Gateway laptop.
5. Reset Your PC: Under the “Remove everything and reinstall Windows” section, click on the “Get started” button. This will initiate the reset process and provide you with two options: “Just remove my files” or “Fully clean the drive.” Choose the option that suits your needs.
6. Follow the On-Screen Prompts: Depending on your selection in the previous step, the reset process will differ. If you choose “Just remove my files,” Windows will reinstall Windows 8 or 8.1 while keeping your personal files intact. If you select “Fully clean the drive,” Windows will remove all your files and reinstall Windows 8 or 8.1 from scratch. Follow the on-screen prompts and instructions to proceed.
7. Wait for the Reset: The reset process may take some time, and your laptop may restart multiple times. Allow the process to complete, and avoid interrupting it to ensure successful completion.
8. Set Up Your Laptop: Once the reset is finished, your Gateway laptop will restart, and you’ll be guided through the initial setup process. Follow the on-screen instructions to personalize your settings, create user accounts, and configure your preferences.
Resetting a Gateway laptop with Windows 8 or 8.1 can help resolve various issues or provide a clean slate for a fresh start. Remember to back up your data before initiating the reset, as it will remove all files and settings from your laptop.
If you encounter any difficulties or have trouble accessing the reset options, you can consult the Gateway support documentation or reach out to their support team for further assistance.
Resetting a Gateway Laptop with Windows 7
If you have a Gateway laptop running Windows 7 and need to reset it for troubleshooting purposes or to start afresh, you can follow these steps:
1. Back Up Your Data: Before proceeding with a reset, it is essential to back up any important files, documents, or data to an external storage device. This will ensure that you do not lose any valuable information during the reset process.
2. Access the Start Menu: Click on the “Start” button in the bottom left corner of your Gateway laptop’s screen to open the Start menu.
3. Open the Control Panel: In the Start menu, locate and click on the “Control Panel” option. This will open the Control Panel, where you can customize various settings of your Windows 7 laptop.
4. Select System and Security: In the Control Panel, click on the “System and Security” option. This will display a range of system-related settings and options.
5. Access the Recovery Options: In the System and Security menu, click on the “Restore your computer to an earlier time” or “Backup and Restore” option. This will open the recovery options available for your Gateway laptop.
6. Choose the Reset Option: In the recovery options menu, select the “Advanced recovery methods” or “System Restore” option, depending on the available choices. This will provide you with different reset options for your Windows 7 laptop.
7. Follow the On-Screen Prompts: Depending on the reset option you choose, follow the on-screen prompts and instructions. You may be requested to choose a restore point or perform a full system reset. Ensure you carefully read and understand the implications before proceeding.
8. Wait for the Reset: The reset process may take some time, and your laptop may restart multiple times. Allow the process to complete and avoid interrupting it to ensure successful completion.
9. Set Up Your Laptop: Once the reset is finished, your Gateway laptop will restart, and you will be guided through the initial setup process. Follow the on-screen instructions to personalize your settings, create user accounts, and configure your preferences.
Resetting a Gateway laptop with Windows 7 can help resolve various issues or provide a fresh start. Remember to back up your data before initiating the reset, as it will remove all files and settings from your laptop.
If you encounter any difficulties or have trouble accessing the reset options, consult the Gateway support documentation or reach out to their support team for further assistance.
Troubleshooting Common Issues
Gateway laptops, like any other electronic devices, may encounter various issues from time to time. Here are some common problems you may encounter with your Gateway laptop and steps to troubleshoot them:
1. Slow Performance: If your Gateway laptop is running slowly, try closing unnecessary applications and tasks. Additionally, ensure that your laptop has sufficient storage space and consider removing unwanted programs or files. Performing a soft reset or a hard reset can also help refresh your laptop’s performance.
2. Wi-Fi Connectivity Issues: If you’re experiencing troubles connecting to Wi-Fi networks, start by restarting your laptop and router. Ensure that your laptop’s Wi-Fi is turned on and that you’re within range of the network. If the issue persists, updating the Wi-Fi driver or adjusting network settings may help.
3. Blue Screen Errors: Blue screen errors, also known as “blue screen of death” (BSOD) errors, can indicate hardware or software issues. Try updating your laptop’s drivers, as outdated or incompatible drivers can trigger these errors. If the problem persists, consider seeking technical assistance.
4. Battery Drain: If your Gateway laptop’s battery drains quickly, check for power-hungry applications running in the background. Adjust your laptop’s power settings to optimize battery life, and consider calibrating the battery if necessary. If the issue persists, the battery may need replacement.
5. Unresponsive Applications: If an application freezes or becomes unresponsive, start by closing it using the task manager. Once closed, check for updates for the application or reinstall it if necessary. If the problem persists, there may be underlying compatibility issues or conflicts with other software.
6. Audio or Sound Issues: If you’re experiencing problems with your laptop’s audio, make sure the volume is not muted and that the speakers/headphones are appropriately connected. Updating the audio driver or troubleshooting audio settings in the control panel may help resolve the issue.
7. Overheating: Overheating can cause performance issues and potential damage to your Gateway laptop. Ensure that the laptop’s vents are not obstructed and clean them regularly to prevent dust buildup. Consider using a laptop cooling pad or adjusting power settings to optimize temperature management.
8. Device Compatibility: If you’re encountering compatibility issues with external devices such as printers or USB drives, ensure that the drivers for those devices are up to date. Troubleshooting the device in the control panel or seeking guidance from the device manufacturer’s support can also help.
Remember, troubleshooting steps may vary depending on the specific issue and laptop model. If you’re unable to resolve a problem with basic troubleshooting or encounter more complex issues, it’s recommended to seek technical support from Gateway or consult a professional technician to ensure the issue is addressed effectively.
Regular maintenance, keeping your operating system and software up to date, and practicing good computing habits can help prevent and mitigate common issues, ensuring a smoother experience with your Gateway laptop.