
Disconnecting and Removing Components
Replacing a motherboard in a computer requires careful disconnection and removal of various components. Follow these steps to ensure a smooth and successful process:
- Power down the computer: Begin by shutting down the computer and disconnecting it from the power source. This will prevent any potential damage during the removal process.
- Document connections: Take pictures or make notes of the current connections between components and the motherboard. This will help you reconnect everything correctly later on.
- Remove the case cover: Depending on your computer’s design, use appropriate tools to remove the case cover. This will provide access to the internal components.
- Disconnect cables: Carefully unplug all cables attached to the motherboard, including power cables, data cables, and fan connectors. Take note of where each cable is connected to ensure proper reinstallation later.
- Remove expansion cards: Unscrew any expansion cards attached to the motherboard, such as graphics cards or sound cards. Gently pull them out of their slots, taking care not to damage any components.
- Detach the storage drives: Disconnect any storage drives, such as hard drives or solid-state drives, from the motherboard and remove them from their mounting brackets, if necessary.
- Remove memory modules: If you have any RAM modules installed, press the latches on either side of each module to release them. Carefully remove the memory modules from their slots.
- Detaching peripherals: Unplug any other peripherals connected directly to the motherboard, such as USB devices, audio connectors, or front panel connectors.
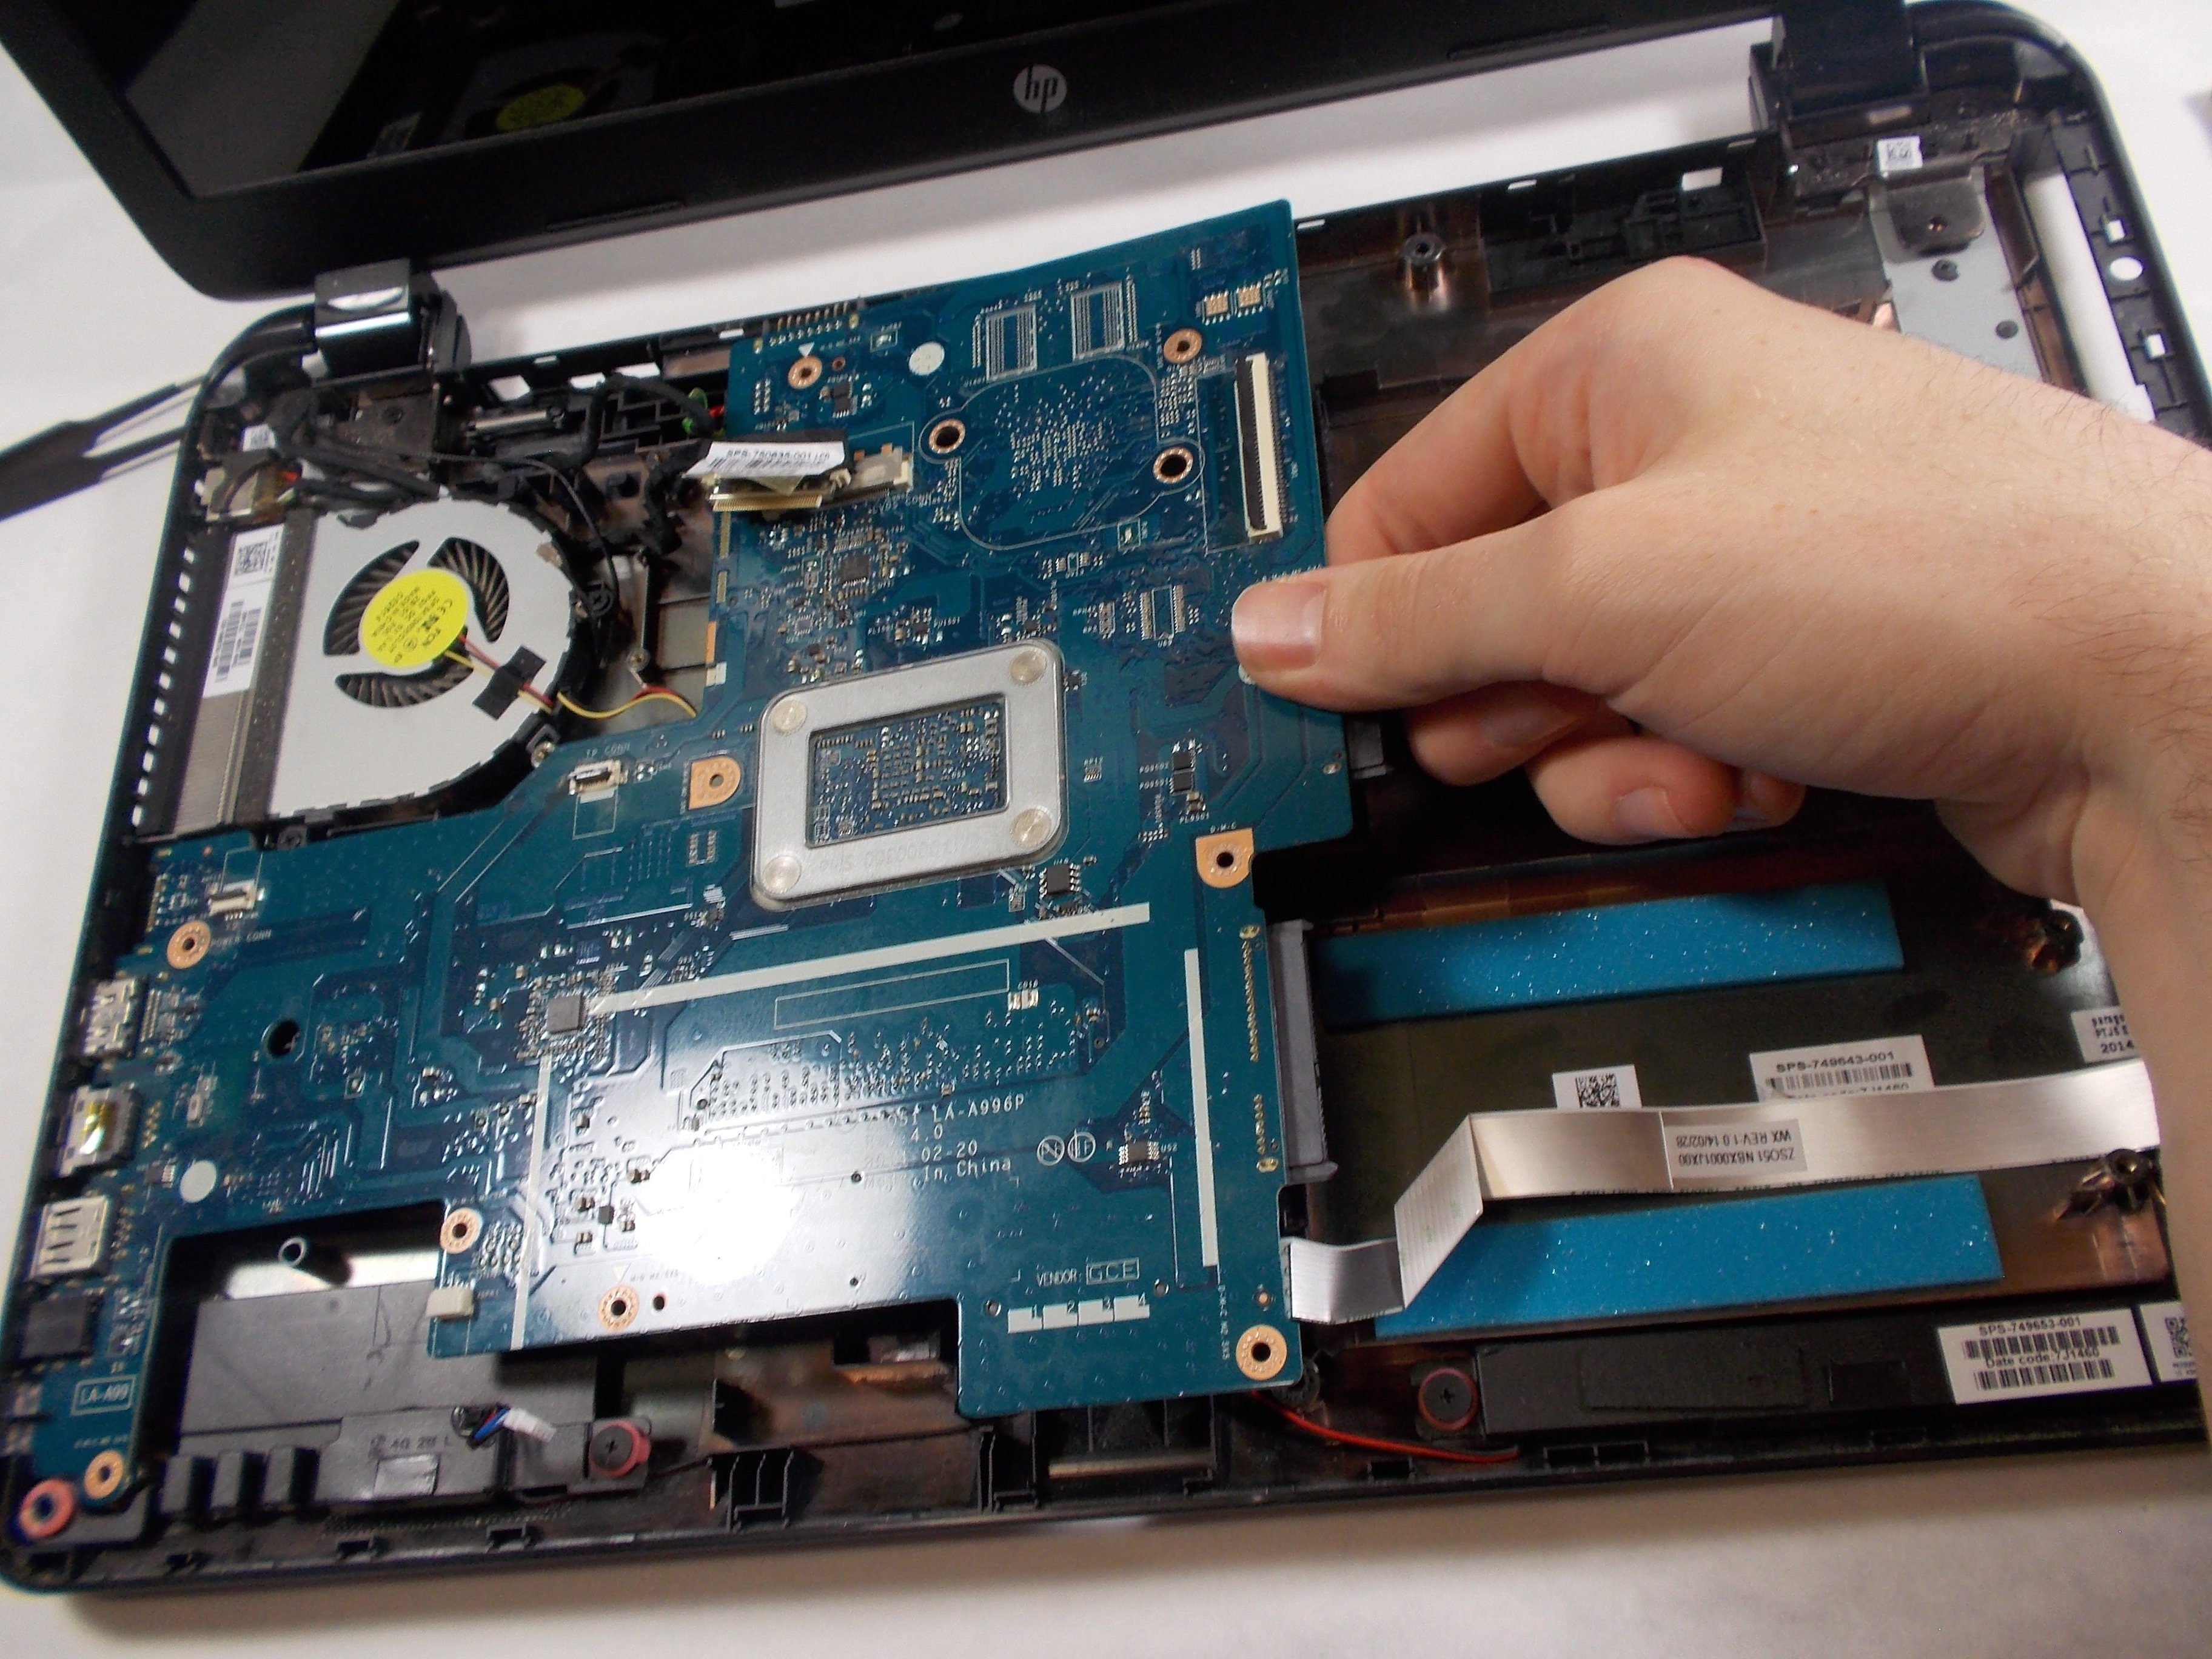
- Unscrew and remove the motherboard: Locate and unscrew any screws securing the motherboard to the case. Gently lift the motherboard out of its position, making sure there are no cables or components still attached.
By following these steps, you can safely disconnect and remove the components from the old motherboard, preparing it for the installation of a new one.
Removing the Old Motherboard
Once you have disconnected and removed all the components from the old motherboard, it’s time to remove the motherboard itself. Follow these steps to ensure a proper removal:
- Inspect the old motherboard: Before removing the old motherboard, take a moment to inspect it for any signs of damage or defects. This will help you identify any issues that may have caused the need for replacement.
- Remove any remaining screws: Check the motherboard for any additional screws that may be securing it to the case. Unscrew them carefully using the appropriate tools.
- Gently lift the motherboard: With all screws removed, grasp the motherboard by its edges and gently lift it out of the case. Be cautious not to apply excessive force or bend any of the delicate components.
- Set aside the old motherboard: Once the old motherboard is removed, place it on a clean and static-free surface. You may want to keep it for reference or troubleshooting purposes, or dispose of it properly if it is no longer needed.
By following these steps, you can safely and effectively remove the old motherboard from your computer, making way for the installation of a new one.
Preparing the New Motherboard
Before installing the new motherboard into your computer, it is essential to properly prepare it. Follow these steps to ensure a smooth and successful installation:
- Read the motherboard manual: Familiarize yourself with the documentation provided by the motherboard manufacturer. This will give you important information about specific installation requirements and any unique features of your motherboard.
- Install CPU and cooler: If your new motherboard requires it, carefully install the CPU and attach the CPU cooler. Ensure that you follow the manufacturer’s guidelines and apply thermal paste if necessary.
- Insert RAM modules: Check the motherboard manual for the recommended slots to install your RAM modules. Gently insert the modules into the corresponding slots, ensuring they are firmly seated and properly aligned.
- Prepare expansion slots: If you have any expansion cards, such as a graphics card or sound card, consult the motherboard manual to determine the appropriate slots for installation. Prepare the slots by removing any protective covers and aligning the cards for insertion.
- Connect storage drives: Identify the appropriate connectors on the motherboard for your storage drives. Connect them securely, ensuring proper alignment and cable management.
- Prepare front panel connectors: Refer to the motherboard manual for the correct placement of the front panel connectors. These include power button, reset button, USB ports, audio connectors, and indicator LEDs. Connect each one to its respective header on the motherboard.
- Prepare power and data cables: Identify the necessary power and data cables required for your components. Connect the power cables to the appropriate connectors on the motherboard, and connect the data cables to the storage drives and other peripherals.
- Double-check connections: Before proceeding, double-check all connections to ensure they are secure and properly aligned. This will help prevent any issues during the installation process.
By following these steps, you can effectively prepare the new motherboard for installation, ensuring a smooth and successful transition to the next stage of the process.
Installing the New Motherboard
Now that the new motherboard is properly prepared, it’s time to install it into your computer. Follow these steps to ensure a successful installation:
- Identify the motherboard standoff screws: Locate the standoff screws that match the mounting holes on your new motherboard. These screws will help secure the motherboard to the case and prevent it from touching the metal.
- Place the motherboard in the case: Gently lower the new motherboard into the case, aligning the mounting holes with the standoff screws. Make sure the I/O ports align properly with the case’s I/O shield.
- Screw in the motherboard: Start by screwing in one standoff screw to anchor the motherboard in place. Then, secure the remaining screws, alternating between corners to ensure even pressure.
- Connect power cables: Attach the necessary power cables to the motherboard, including the main 24-pin ATX power connector and the CPU power connector. Ensure they are properly inserted and firmly connected.
- Connect data cables: Connect the necessary data cables, such as SATA cables, to the storage drives and other peripherals. Double-check their proper alignment and secure connection.
- Install expansion cards: If you have any expansion cards, such as graphics cards or sound cards, install them into the appropriate expansion slots on the motherboard. Make sure they are properly aligned and securely fastened with screws.
- Reattach components: Reconnect the components that were disconnected during the removal process, including cables, memory modules, and any other peripherals or accessories.
- Double-check connections: Before closing the case, double-check all connections to ensure they are properly seated and securely connected. This will help prevent any issues during the boot-up process.
By following these steps, you can successfully install the new motherboard into your computer, setting the foundation for a fully functional system.
Connecting and Reassembling Components
With the new motherboard securely installed, it’s time to connect and reassemble the components of your computer. Follow these steps to ensure a proper reassembly:
- Reconnect cables and connectors: Begin by reconnecting all cables that were previously disconnected from the old motherboard. This includes power cables, data cables, fan connectors, and any other necessary connections.
- Attach the storage drives: Reconnect and secure the storage drives, such as hard drives or solid-state drives, to the appropriate connectors on the motherboard. Double-check the cables are properly seated and secure.
- Install memory modules: Reinsert the RAM modules into their designated slots on the motherboard. Ensure they are aligned correctly and fully seated by firmly pressing them down until the latches snap into place.
- Reinstall expansion cards: If you removed any expansion cards during the removal process, reinsert them into their respective slots on the motherboard. Make sure they are properly aligned and secure with screws.
- Reattach peripherals: Reconnect any peripherals that were previously detached, such as USB devices, audio connectors, or front panel connectors. Consult the motherboard manual if needed.
- Close the case: Once all components are reconnected and in their proper places, carefully close the case and secure it with the appropriate screws or latches.
- Double-check connections: Before powering on the computer, double-check all connections to ensure they are secure and properly aligned. This will help prevent any potential issues during startup.
By following these steps, you can successfully connect and reassemble the components of your computer, bringing it back to a fully functional state.
Powering On and Testing the New Motherboard
After connecting and reassembling all the components, it’s time to power on the computer and test the new motherboard. Follow these steps to ensure a successful startup:
- Connect the power cable: Plug in the power cable and ensure it is securely connected to both the power outlet and the power supply unit of your computer.
- Turn on the power supply: Locate the power supply switch on the back of the computer case and flip it to the “on” position. This will supply power to the motherboard and other components.
- Press the power button: Locate the power button on your computer case and press it to turn on the system. The computer should begin its startup process, and you may hear fans spinning and LED lights illuminating.
- Monitor the startup process: Observe the screen as the computer boots up. Look for the BIOS/UEFI splash screen or any error messages that may appear. This will indicate that the motherboard is functioning correctly.
- Check for proper functionality: Once the system is fully booted, test all the basic functions of the motherboard. This includes checking if the operating system loads correctly, if the USB ports are functional, and if the audio and video outputs are working as intended.
- Run diagnostic tools: To ensure everything is running smoothly, consider running diagnostic tools such as system monitoring software or stress tests to check the stability and performance of the new motherboard.
- Test additional components: If you have any peripherals or expansion cards connected to the motherboard, test their functionality as well to ensure they are working properly with the new motherboard.
By following these steps, you can power on and test the new motherboard, ensuring that it functions correctly and all components are working as intended. If you encounter any issues, refer to the motherboard manual or seek professional assistance to troubleshoot and resolve the problem.