
Tools and Materials Needed
Before embarking on the task of replacing the power connector on a laptop, it is essential to gather the necessary tools and materials. Here’s a list of what you’ll need:
- Screwdriver Set: A precision screwdriver set with various head types to accommodate different screws found in the laptop.
- Replacement Power Connector: Ensure that you have the correct replacement part for your laptop model. It’s advisable to purchase this in advance to avoid delays during the repair process.
- Anti-static Wrist Strap: This is crucial for preventing electrostatic discharge, which can damage sensitive components inside the laptop.
- Plastic Spudger or Opening Tool: This tool is useful for prying apart the plastic casing of the laptop without causing damage.
- Cotton Swabs and Isopropyl Alcohol: These are handy for cleaning any dust or debris encountered during the disassembly process.
- Replacement Adhesive Strips: If the disassembly process requires the removal of adhesive strips, having replacements on hand will ensure a secure reassembly.
- Small Cups or Containers: Use these to organize and store the various screws and small components removed from the laptop, preventing them from getting misplaced.
- Work Surface: A clean, well-lit, and spacious work area is essential for disassembling and reassembling the laptop. A large, soft cloth can be used to protect the laptop’s exterior during the process.
By having these tools and materials ready, you’ll be well-prepared to tackle the power connector replacement with confidence and efficiency.
Step 1: Preparation
Prior to initiating the power connector replacement process, it’s crucial to take certain preparatory steps to ensure a smooth and successful repair. Here’s what you need to do:
1. Gather the Necessary Tools and Materials: Refer to the list of tools and materials needed for the replacement process. Having these items readily available will streamline the repair and minimize the risk of misplacing essential components during disassembly.
2. Power Off and Disconnect the Laptop: Shut down the laptop and unplug it from any power source. Additionally, remove the battery to eliminate any electrical current running through the device. This precautionary measure is vital for personal safety and to prevent potential damage to the laptop during the repair.
3. Create a Workspace: Select a well-lit, spacious, and clean work area to perform the repair. Consider using a large, soft cloth to protect the laptop’s exterior from scratches and damage during disassembly. It’s also advisable to have a dedicated space for organizing and storing the removed components and screws to prevent them from getting misplaced.
4. Ground Yourself: To prevent electrostatic discharge, which can harm the delicate internal components of the laptop, wear an anti-static wrist strap. This simple yet effective measure will safeguard the laptop from potential damage caused by static electricity.
5. Familiarize Yourself with the Laptop Model: Before proceeding with the disassembly, it’s beneficial to review the laptop’s user manual or online guides specific to the model. Understanding the internal layout and component locations will facilitate a more efficient and confident disassembly process.
By completing these preparatory steps, you’ll be well-equipped to begin the disassembly process and replace the power connector with care and precision.
Step 2: Disassembly of the Laptop
Disassembling the laptop is a critical phase in the power connector replacement process. This step requires careful attention to detail and precision to avoid damaging any internal components. Follow these essential guidelines for a successful disassembly:
1. Remove the Screws: Using the appropriate screwdriver from your set, carefully remove the screws securing the bottom panel of the laptop. It’s advisable to organize the screws in a container or using a magnetic mat to keep track of their placement and avoid confusion during reassembly.
2. Separate the Bottom Panel: Once the screws are removed, gently pry open the bottom panel using a plastic spudger or opening tool. Exercise caution to avoid applying excessive force, as this can cause damage to the plastic casing or internal components.
3. Disconnect the Battery and Other Cables: Locate the battery and disconnect it from the laptop’s motherboard. Additionally, identify and disconnect any other cables or connectors linking the bottom panel to the main body of the laptop. Take note of their positions and orientations for reconnection later.
4. Access the Internal Components: With the bottom panel removed, you’ll gain access to the internal components of the laptop, including the motherboard, hard drive, and other essential parts. Exercise caution when maneuvering within this space to avoid accidental damage.
5. Create an Organized Workspace: As you proceed with the disassembly, arrange the removed screws, components, and cables in a systematic manner. Using small cups or containers to store and label these items will prevent confusion and streamline the reassembly process.
6. Document the Disassembly: Consider taking photographs or making notes as you disassemble the laptop. This documentation can serve as a helpful reference during the reassembly phase, ensuring that components are placed back in their original positions.
By carefully following these steps, you’ll be prepared to proceed with locating and replacing the power connector within the laptop’s internal structure.
Step 3: Locate the Power Connector
Locating the power connector within the laptop is a crucial phase in the replacement process. This step requires a methodical approach to identify the precise location of the power connector. Follow these essential guidelines to successfully locate the power connector:
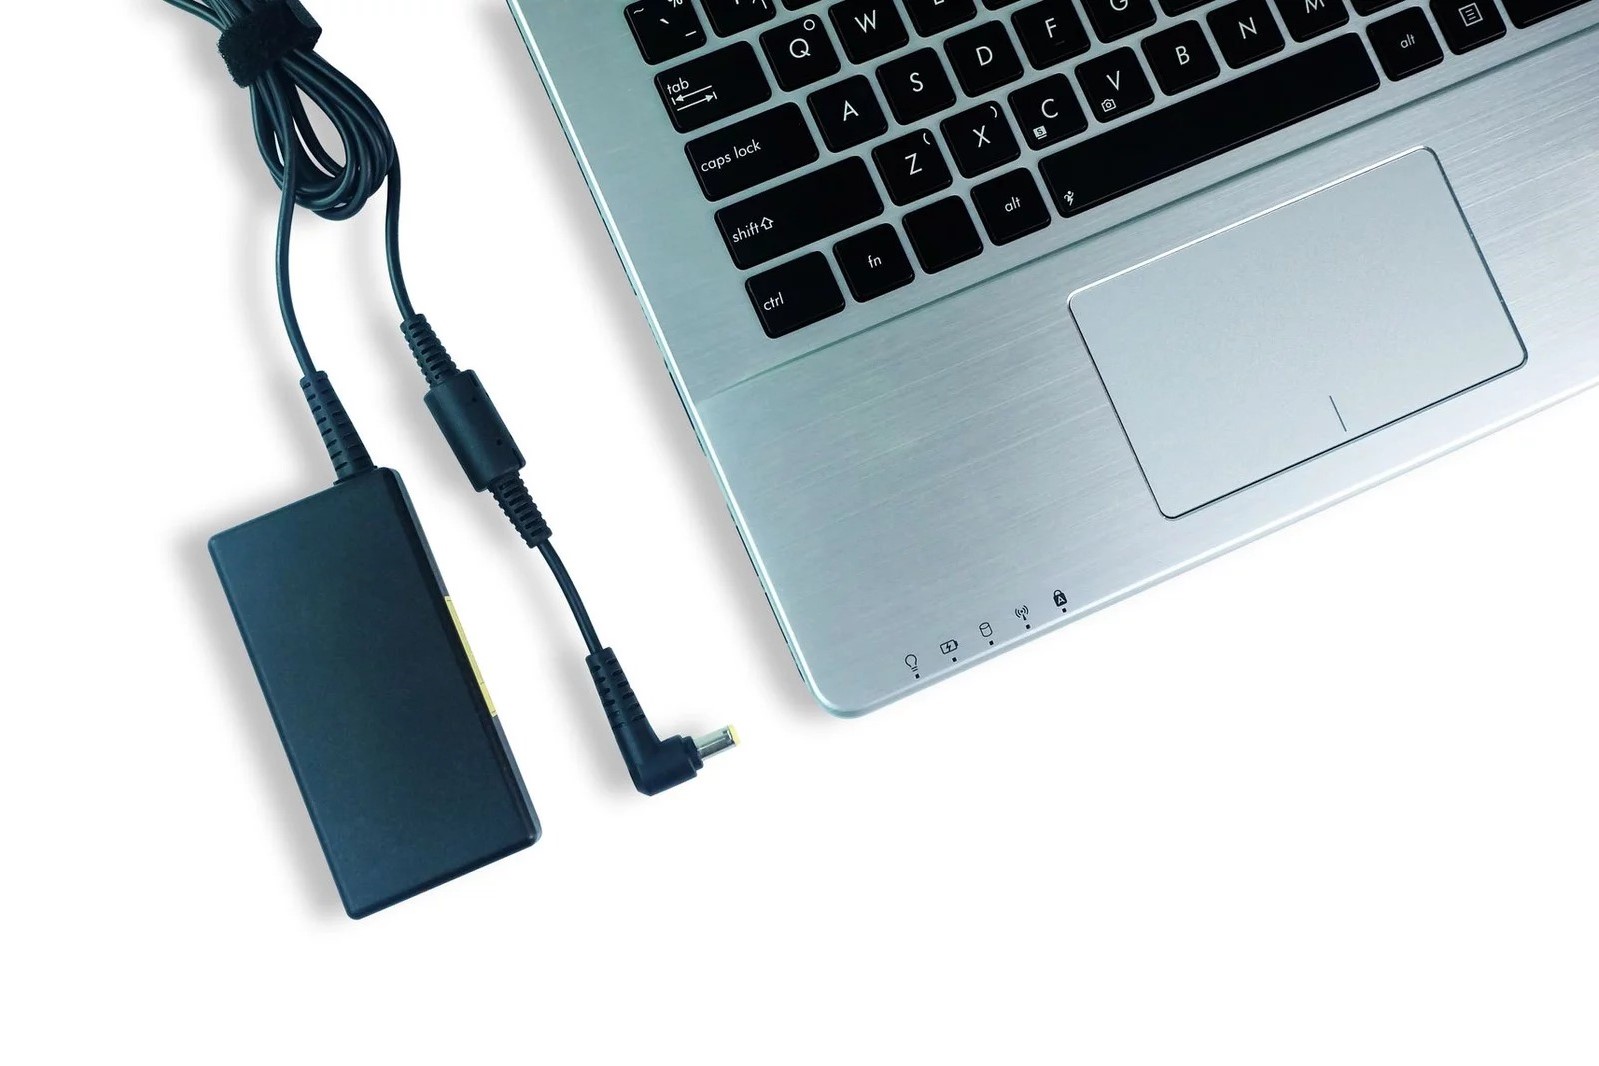
1. Identify the Charging Port: The charging port, also known as the power connector, is typically situated on the side or rear of the laptop. It is a small, rectangular or circular inlet where the power adapter is inserted to charge the laptop’s battery and power the device.
2. Consult the Laptop’s Service Manual: If available, refer to the laptop’s service manual or online resources specific to the model to gain insights into the internal layout and the location of the power connector. This documentation can provide valuable guidance in identifying the connector’s position within the laptop.
3. Inspect the Internal Components: With the bottom panel removed during the disassembly phase, visually inspect the internal components and circuitry near the area where the charging port connects to the motherboard. Look for a small, often soldered, component that corresponds to the shape and size of the power connector.
4. Follow the Power Cable Path: Trace the path of the power cable from the charging port to the point where it connects to the laptop’s internal circuitry. This can help you pinpoint the location of the power connector and understand its connectivity within the laptop.
5. Take Note of Surrounding Components: While locating the power connector, observe any nearby components, such as capacitors, resistors, or other connectors, that may be in close proximity. Understanding the spatial relationship between these components can aid in the safe removal and replacement of the power connector.
6. Exercise Caution: As you locate the power connector, handle the internal components with care to avoid causing damage to the delicate circuitry. Avoid applying excessive force or pressure to prevent unintended harm to the laptop’s internal structure.
By methodically following these steps, you’ll be well-prepared to proceed with the removal and replacement of the power connector, ensuring a successful repair of the laptop’s charging system.
Step 4: Removal of the Old Power Connector
Removing the old power connector from the laptop is a delicate process that requires precision and attention to detail. Follow these essential steps to successfully remove the old power connector:
1. Discharge Any Residual Power: Before proceeding with the removal, ensure that the laptop is completely powered off and disconnected from any power source. Press and hold the laptop’s power button for a few seconds to discharge any residual power from the system.
2. Disconnect the Power Cable: Carefully detach the power cable connected to the old power connector. Gently wiggle the connector to release it from the charging port, ensuring a smooth disconnection without causing damage to the port or the cable.
3. Inspect the Connector’s Mounting: Observe how the old power connector is mounted within the laptop. It may be secured to the motherboard through soldered connections or additional fastening mechanisms. Take note of these mounting points for the reinstallation of the new connector.
4. Use Desoldering Techniques (If Applicable): If the old power connector is soldered to the motherboard, employ desoldering techniques using a desoldering pump or wick to carefully remove the solder and free the connector from its connections. Exercise caution to avoid damaging nearby components during this process.
5. Employ Precision Tools: Utilize precision tools such as a soldering iron and desoldering tools to delicately remove the old power connector from its position. Take your time and work methodically to prevent accidental damage to the surrounding components and the motherboard.
6. Ensure Proper Heat Management: When using a soldering iron, regulate the heat to an appropriate level to avoid overheating the motherboard and causing damage. Follow best practices for soldering and desoldering to maintain the integrity of the laptop’s internal components.
7. Exercise Patience and Caution: The process of removing the old power connector demands patience and precision. Avoid rushing the removal to prevent unintended damage, and handle the internal components with care throughout the process.
By meticulously following these steps, you’ll be prepared to safely and effectively remove the old power connector, paving the way for the installation of the new connector to restore the laptop’s charging functionality.
Step 5: Installation of the New Power Connector
Installing the new power connector is a critical phase in the laptop repair process, and it requires careful attention to detail and precision. Follow these essential steps to successfully install the new power connector:
1. Align the New Connector: Position the new power connector in the designated location, ensuring that it aligns correctly with the mounting points on the motherboard. Take note of the orientation and alignment to facilitate a secure and accurate installation.
2. Soldering (If Applicable): If the new power connector requires soldering to the motherboard, utilize a soldering iron and high-quality solder to establish secure connections. Exercise caution and precision during the soldering process to prevent damage to the motherboard and surrounding components.
3. Verify Stability and Alignment: After securing the new connector, verify that it is firmly positioned and aligned with the mounting points. Confirm that the connector sits flush with the motherboard and is free from any misalignment or instability that could affect its functionality.
4. Reconnect the Power Cable: Carefully reconnect the power cable to the new connector, ensuring a secure and snug fit. Gently guide the cable into place, taking care not to exert excessive force that could damage the connector or the cable itself.
5. Conduct a Visual Inspection: Inspect the newly installed power connector and its connections to ensure that the installation is free from any visible defects or irregularities. Verify that the soldered connections (if applicable) exhibit proper form and integrity.
6. Test the Connectivity: Before proceeding with the reassembly of the laptop, conduct a brief test to ensure that the new power connector establishes a reliable connection with the laptop’s charging port. This test will help identify any potential issues before finalizing the repair.
7. Clean the Work Area: Once the installation is complete and verified, tidy up the work area by removing any debris, soldering residues, or other potential sources of contamination. A clean work environment is essential for the subsequent reassembly of the laptop.
By meticulously following these steps, you’ll be well-prepared to install the new power connector with precision and care, setting the stage for the successful restoration of the laptop’s charging functionality.
Step 6: Reassembly of the Laptop
The reassembly phase is a critical part of the power connector replacement process, and it requires meticulous attention to detail to ensure the successful restoration of the laptop’s functionality. Follow these essential steps to effectively reassemble the laptop:
1. Organize the Disassembled Components: Gather the components, screws, and cables that were removed during the disassembly phase. Ensure that they are organized and readily accessible for the reassembly process, minimizing the risk of misplacement or confusion.
2. Reconnect Internal Cables and Components: Carefully reconnect any cables, such as the display cable and touchpad cable, to their respective ports on the motherboard. Exercise caution to align and seat the connectors properly, ensuring secure and reliable connections.
3. Secure the Bottom Panel: Position the bottom panel of the laptop and secure it in place using the appropriate screws. Take care to align the panel correctly with the laptop’s chassis and avoid overtightening the screws, which could cause damage to the casing.
4. Install Any Removed Adhesive Strips: If adhesive strips were removed during the disassembly, ensure that they are replaced with new strips to secure components such as the battery or other internal elements. Proper adhesion is essential for the structural integrity of the laptop.
5. Verify the Integrity of the Reassembled Laptop: Conduct a visual inspection of the reassembled laptop to ensure that all components are securely in place and that no cables or connectors are left unattached. This verification step is crucial for identifying any oversights before proceeding further.
6. Power On and Test the Laptop: Reconnect the power source and power on the laptop to verify that the reassembly was successful. Check for proper functionality, including the charging system and the overall performance of the device.
7. Document the Reassembly Process: Consider taking notes or photographs during the reassembly to aid in the event of future repairs or troubleshooting. This documentation can serve as a valuable reference for understanding the internal layout of the laptop.
By methodically following these steps, you’ll be well-prepared to reassemble the laptop with precision and care, ensuring that the power connector replacement process is completed successfully and that the device functions as intended.
Step 7: Testing the New Power Connector
Testing the new power connector is a critical phase in the laptop repair process, and it serves as the final verification of the successful replacement. Follow these essential steps to effectively test the new power connector:
1. Power On and Charging Test: Connect the laptop to a power source and power it on to verify that the new power connector establishes a reliable connection with the charging system. Monitor the laptop’s response to the power source, ensuring that it charges the battery and operates without interruptions.
2. Stability and Firmness Check: Assess the stability and firmness of the new power connector by gently wiggling the power cable while it is connected. Verify that the connector remains securely seated in the charging port and does not exhibit any signs of looseness or instability that could affect its functionality.
3. Visual Inspection of Connections: Examine the connections of the new power connector, particularly if it required soldering during the installation. Ensure that the soldered connections exhibit proper form and integrity, free from any visible defects or irregularities that could compromise the connectivity.
4. Charging Indicator Verification: If the laptop features a charging indicator light, observe its behavior when the power source is connected. Confirm that the indicator accurately reflects the charging status and that it responds appropriately to the connection and disconnection of the power cable.
5. Functional Testing Under Load: Test the laptop’s functionality under a moderate load, such as running applications or performing tasks that require power consumption. Monitor the laptop’s performance and charging behavior to ensure that the new power connector accommodates the device’s power requirements without issues.
6. Repeat the Testing Process: Conduct multiple rounds of testing to validate the consistent performance and reliability of the new power connector. This iterative approach allows for the identification of any intermittent issues that may arise during prolonged use.
7. Verify Compatibility with Power Adapter: Ensure that the new power connector is compatible with the laptop’s power adapter and that it facilitates a stable and efficient connection without compatibility issues or power delivery constraints.
By diligently carrying out these testing procedures, you can confidently verify the successful replacement of the power connector and ensure that the laptop’s charging system operates reliably and efficiently.
Tips and Warnings
When replacing the power connector on a laptop, it’s essential to consider several tips and warnings to ensure a safe and successful repair process. Follow these guidelines to navigate the replacement with confidence and avoid potential pitfalls:
Tips:
- Refer to Manufacturer Documentation: Consult the laptop’s service manual or online resources provided by the manufacturer for specific guidance on disassembly, component locations, and replacement procedures.
- Organize Disassembled Components: Use small cups or containers to store and label the removed screws and components, facilitating a systematic reassembly and minimizing the risk of misplacement.
- Document the Disassembly Process: Take photographs or make notes during the disassembly to aid in the reassembly phase, ensuring that components are returned to their original positions.
- Exercise Caution with Soldering: If soldering is required, practice proper soldering techniques to avoid damage to the motherboard and surrounding components. Use heat-resistant materials to protect sensitive areas during soldering.
- Test the New Connector Thoroughly: Conduct comprehensive testing of the new power connector, including charging, stability, and compatibility with the power adapter, to ensure reliable and consistent performance.
Warnings:
- Risk of Component Damage: Handle internal components with care to avoid damage to the motherboard, circuitry, and surrounding elements. Static electricity can cause irreparable harm to sensitive electronic components.
- Proper Soldering Precautions: When soldering the new power connector, be mindful of the heat applied to prevent overheating and potential damage to the motherboard. Use appropriate protective measures to shield nearby components from excessive heat.
- Electrical Safety: Always disconnect the laptop from power sources and discharge any residual power before initiating the repair. Adhere to safety protocols to minimize the risk of electrical hazards during the replacement process.
- Component Compatibility: Ensure that the replacement power connector is compatible with the specific laptop model to avoid functional issues and ensure seamless integration with the charging system.
- Professional Assistance: If unsure about the replacement process or lacking the necessary tools and expertise, consider seeking assistance from a qualified technician to avoid potential damage to the laptop.
By adhering to these tips and warnings, you can approach the power connector replacement with the necessary precautions and best practices, ultimately achieving a successful and reliable repair of the laptop’s charging system.