
Why RAM and Motherboard Compatibility is Important
When it comes to building or upgrading a computer, one crucial aspect that often goes unnoticed is the compatibility between RAM (Random Access Memory) and the motherboard. RAM and motherboard compatibility is of utmost importance because it directly affects the performance and stability of the system.
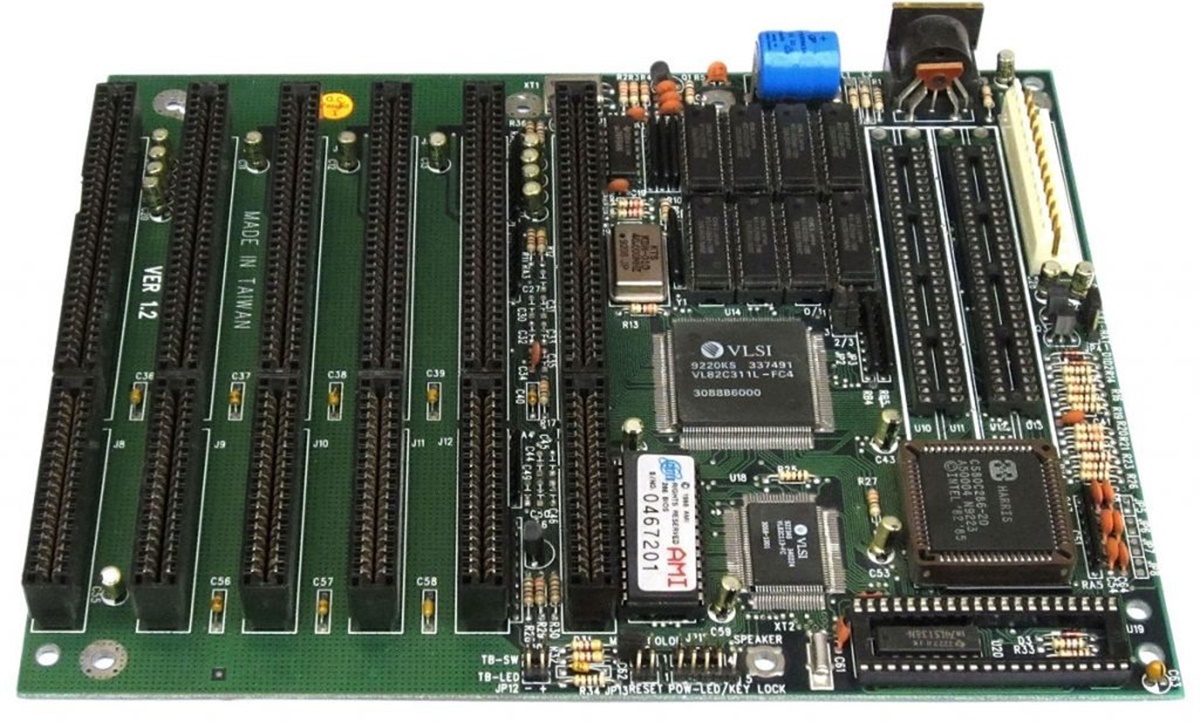
RAM is responsible for temporarily storing data that the computer needs to access quickly. It plays a vital role in multitasking, gaming, and running memory-intensive applications. The motherboard, on the other hand, connects various components of the computer, including the CPU, RAM, graphics card, storage devices, and more.
Here are a few reasons why compatibility between RAM and motherboard is crucial:
-
Optimal Performance: Incompatible RAM can lead to suboptimal performance or even system instability. When the RAM is not compatible with the motherboard, it may not function at its full potential, resulting in slower data transfer rates and decreased overall system performance.
-
System Stability: Incompatibility issues between RAM and motherboard can cause frequent system crashes, blue screens, and other unpredictable behavior. In some cases, the system may not even boot up properly or fail to recognize the RAM altogether.
-
Expandability: Compatibility ensures that you can upgrade or add more RAM modules as needed. Knowing the compatibility ensures that you can seamlessly upgrade your system’s RAM without any compatibility issues.
Now that we understand the importance of RAM and motherboard compatibility, let’s explore how to check the compatibility of RAM with a motherboard.
Checking RAM Compatibility
Before purchasing RAM for your computer, it is essential to ensure that it is compatible with your motherboard. Here are some steps to check RAM compatibility:
-
Identify the type of RAM: There are different types of RAM available in the market, such as DDR4, DDR3, and DDR2. Check the specifications of your motherboard to determine which type of RAM it supports. This information is typically available in the motherboard’s manual or on the manufacturer’s website.
-
Check the RAM speed: RAM modules come in different speeds, indicated by the frequency in megahertz (MHz). Verify the maximum supported RAM speed by your motherboard. It is important to note that if you install RAM modules with a higher speed than what your motherboard supports, they will automatically run at the maximum supported speed.
-
Confirm the RAM capacity: Determine the maximum amount of RAM that your motherboard can handle. This information can also be found in the motherboard’s manual or specifications. It is crucial to ensure that the RAM capacity you choose is within the motherboard’s supported range.
-
Consider the form factor: The physical dimensions of RAM modules are important to ensure compatibility. The most common form factor is DIMM (Dual Inline Memory Module), but some motherboards may require smaller SODIMM (Small Outline Dual Inline Memory Module) modules used in laptops or compact systems.
By following these steps, you can determine the compatibility of RAM with your motherboard and make an informed decision when purchasing RAM modules.
Next, let’s explore how to check motherboard compatibility.
Types of RAM
When it comes to RAM, there are several types available in the market. Let’s take a closer look at the most common types of RAM:
-
DDR4: DDR4 (Double Data Rate 4) is the latest and most widely used RAM type in modern systems. It offers higher performance and lower power consumption compared to its predecessors. DDR4 RAM modules have a different pin configuration than older types, making them incompatible with motherboards that only support DDR3 or DDR2.
-
DDR3: DDR3 (Double Data Rate 3) was the standard for many years before DDR4. DDR3 RAM modules are compatible with motherboards that support DDR3 or DDR2, but not DDR4. They offer decent performance and are still commonly found in older systems.
-
DDR2: DDR2 (Double Data Rate 2) was popular in the early 2000s. While it is not commonly used in modern systems, some older motherboards still support DDR2 RAM. DDR2 modules have a different pin layout and are not compatible with DDR3 or DDR4 slots.
-
DDR: DDR (Double Data Rate) is the oldest type of DDR RAM. It is rarely used in modern systems and is found mostly in very old computers. DDR modules have even fewer pins compared to DDR2, DDR3, or DDR4.
It’s crucial to note that each type of RAM has a specific notch or keying mechanism to ensure proper insertion into the motherboard’s memory slots. Attempting to insert the wrong type of RAM can cause damage to the module or the slot.
Before purchasing RAM, it is essential to verify the specific type supported by your motherboard to ensure compatibility. Additionally, consider factors like capacity, speed, and form factor to make an informed decision and maximize the performance of your system.
Now that we have a better understanding of the different types of RAM, let’s move on to how you can determine RAM compatibility with your motherboard.
Determining RAM Compatibility with a Motherboard
Ensuring that your chosen RAM modules are compatible with your motherboard is crucial to maintain optimal performance and stability. Here are some steps to determine RAM compatibility:
-
Check the motherboard specifications: The first step is to refer to your motherboard’s manual or visit the manufacturer’s website to find detailed information about supported RAM specifications. Look for details like the maximum capacity, supported speed, and type of RAM.
-
Identify the number of RAM slots: Check the number of available memory slots on your motherboard. This information is critical for determining how many RAM modules you can install and their configuration.
-
Consider the memory channels: Some motherboards support dual-channel or even quad-channel memory configurations, which can offer improved performance. Ensure that you understand the memory channel configuration supported by your motherboard to optimize your RAM module selection.
-
Check for any specific requirements: Occasionally, certain motherboards may have specific requirements or limitations concerning RAM modules, such as voltage restrictions or only supporting ECC (Error Correction Code) RAM. Confirm if there are any such requirements or limitations that you need to be aware of.
Once you have gathered this information, you can compare it with the specifications of the RAM modules you plan to purchase. Ensure that the RAM modules meet the requirements set by your motherboard in terms of capacity, speed, and type. Also, ensure that you have selected the appropriate number of RAM modules based on the number of available slots.
Remember, installing incompatible RAM modules can result in system instability, performance issues, and even the inability to properly boot up. Therefore, it is crucial to double-check and confirm the compatibility between your chosen RAM and motherboard.
After confirming RAM compatibility, the next step is to check the compatibility of your motherboard with other components, especially the CPU. Let’s explore how to check motherboard compatibility.
Checking Motherboard Compatibility
Before purchasing a motherboard for your computer or upgrading an existing one, it is important to ensure that it is compatible with your system’s components. Here are some key factors to consider when checking motherboard compatibility:
-
Understanding Motherboard Specifications: Start by familiarizing yourself with the specifications of the motherboard you are considering. Check the manufacturer’s website or the motherboard’s manual to find information about the supported CPU sockets, RAM slots, expansion slots, and other crucial details.
-
Motherboard Socket Compatibility: The CPU socket on the motherboard determines which processors are compatible. Each CPU family has its own socket type, such as Intel’s LGA or AMD’s AM4. Ensure that the motherboard supports your chosen CPU socket to avoid compatibility issues.
-
Expansion Slots: Consider the expansion slots available on the motherboard, such as PCI Express (PCIe) slots or M.2 slots. These slots allow you to connect additional components like graphics cards, sound cards, and storage devices. Check if the motherboard has the necessary slots to accommodate your desired expansion cards.
-
RAM Compatibility: Confirm that the motherboard supports the type of RAM you plan to use. Check for specifications like DDR4, DDR3, or DDR2 support, maximum RAM capacity, and memory speed compatibility. This ensures that your chosen RAM modules will work seamlessly with the motherboard.
-
Connectivity and Ports: Examine the connectivity options available on the motherboard, including USB ports, audio jacks, Ethernet ports, and video outputs. Make sure they align with your requirements and external devices you plan to connect to your computer.
Checking motherboard compatibility is essential to ensure smooth system operation and prevent component conflicts. It allows you to make informed decisions when purchasing or upgrading your motherboard.
Once you have ensured the compatibility of your RAM with both the motherboard and CPU, you can confidently proceed with the next steps in building or upgrading your computer. Whether it’s for gaming, professional work, or everyday computing, ensuring compatibility will result in a stable and well-performing system.
Upgrading your computer’s RAM or motherboard can significantly improve its performance. In the next section, we’ll discuss how to choose the right RAM for your motherboard.
Understanding Motherboard Specifications
When it comes to choosing or upgrading a motherboard for your computer, understanding the specifications is crucial. The motherboard specifications provide valuable information about the compatibility, features, and capabilities of the motherboard. Here are some key aspects to consider:
-
CPU Socket: The CPU socket is where the processor is installed on the motherboard. Different processors require different socket types, such as Intel’s LGA (Land Grid Array) or AMD’s AM4. Ensure that the motherboard you choose supports the socket type required by your processor.
-
Form Factor: The form factor of the motherboard determines its physical size and layout. Common form factors include ATX, Micro-ATX, and Mini-ITX. Consider the size of your computer case and the available space when choosing a motherboard with the appropriate form factor.
-
RAM Slots: The number and type of RAM slots on the motherboard determine the maximum amount and type of RAM that can be installed. Make sure the motherboard has enough slots and supports the RAM type you plan to use.
-
Expansion Slots: Expansion slots, such as PCI Express (PCIe) slots, allow you to install additional components like graphics cards, sound cards, or Wi-Fi cards. Consider the number and type of expansion slots available on the motherboard to ensure compatibility with your desired expansion cards.
-
Storage Interfaces: Check the motherboard’s storage interfaces, such as SATA (Serial ATA) or M.2 slots, to ensure compatibility with your storage devices, such as hard drives or solid-state drives (SSDs).
-
Connectivity: Pay attention to the connectivity options provided by the motherboard, including USB ports, audio jacks, Ethernet ports, and video outputs. Ensure that the motherboard has the necessary ports to connect your peripherals and external devices.
-
BIOS Version: The BIOS (Basic Input/Output System) is the firmware that initializes the hardware during startup. Check the motherboard’s specifications or manufacturer’s website for information about the BIOS version and any available updates.
By understanding these specifications, you can make an informed decision when choosing a motherboard that meets your requirements and ensures compatibility with your existing components or future upgrades.
Before making a purchase, take the time to research and compare different motherboard options. Consider factors like performance, features, and price to find the best fit for your needs. Additionally, consult user reviews and expert opinions to gather more information about the reliability and performance of the motherboard.
Now that you have a better understanding of motherboard specifications, you can confidently choose the right motherboard for your system and ensure smooth compatibility with other components.
Motherboard Socket Compatibility
When it comes to motherboard compatibility, one crucial factor to consider is the socket type. The socket on a motherboard is the physical interface that connects the CPU (Central Processing Unit). Each processor family requires a specific socket type for proper installation and operation. Understanding motherboard socket compatibility is essential when choosing a compatible CPU for your system. Here are some key points to keep in mind:
-
Intel Sockets: Intel processors utilize different socket types for different generations. Some popular Intel socket types include LGA 1151, LGA 1200, and LGA 2066. It is important to match the socket type of the motherboard with the socket type required by the specific Intel processor you intend to use.
-
AMD Sockets: AMD processors also have their own socket types. Common AMD socket types include AM4 and TR4. Similar to Intel, you need to ensure that the motherboard’s socket matches the socket type required by the AMD processor you plan to use.
-
Socket Compatibility within Generations: It’s important to note that even within a specific socket type, there can be different generations or variations that may not be compatible with each other. For example, a motherboard with an LGA 1151 socket designed for 6th or 7th generation Intel processors may not be compatible with 8th or 9th generation Intel processors.
-
Upgrade Path: Consider the future upgrade path when choosing a motherboard socket. If you might want to upgrade your CPU in the future, selecting a motherboard with an applicable socket will provide you with greater flexibility to upgrade without replacing the entire motherboard.
-
Socket and CPU Compatibility: It’s important to verify the compatibility list provided by the motherboard manufacturer. They usually provide a list of compatible CPUs for each motherboard model along with the corresponding socket type.
Ensuring motherboard socket compatibility is crucial as using an incompatible CPU can result in system instability, performance issues, or even physical damage. Always consult the motherboard’s manual or the manufacturer’s website for detailed information about socket compatibility.
Socket compatibility is just one aspect of motherboard compatibility. It is also important to consider other factors such as RAM compatibility, expansion slots, storage interfaces, and connectivity options to ensure a fully compatible and well-matched system.
By carefully considering motherboard socket compatibility and other compatibility factors, you can make an informed decision when selecting a motherboard that is compatible with your chosen CPU and other components.
Choosing the Right RAM for Your Motherboard
When it comes to selecting RAM for your motherboard, compatibility is key for optimal performance and stability. Here are some important factors to consider when choosing the right RAM:
-
RAM Type: Determine the type of RAM supported by your motherboard, such as DDR4, DDR3, or DDR2. Refer to the motherboard’s specifications or manual to ensure compatibility. Mixing different RAM types is not recommended as it can lead to compatibility issues and hinder performance.
-
Maximum RAM Capacity: Check the maximum RAM capacity supported by your motherboard. This will determine how much RAM you can install. It is important to note that some operating systems have limitations on the maximum amount of RAM they can utilize.
-
RAM Speed: Different motherboards have different supported RAM speeds, indicated in megahertz (MHz). It is recommended to choose RAM modules that match or are compatible with the maximum supported RAM speed of your motherboard. However, if you install RAM with a higher speed than the motherboard supports, it will automatically downclock to the maximum supported speed.
-
Memory Channels: Check if your motherboard supports dual-channel or quad-channel memory configurations. In general, using multiple RAM modules in a dual-channel or quad-channel configuration can provide a performance boost. Ensure that you install an equal number of RAM modules to take advantage of the memory channel capabilities offered by your motherboard.
-
Timing and Latency: RAM modules have different timing and latency values, such as CAS (Column Address Strobe) latency. These values affect the speed and performance of the RAM. While they don’t directly impact compatibility, it’s recommended to choose RAM modules with the same or similar timing and latency specifications for optimal performance.
-
Form Factor: Consider the form factor of the RAM modules. The most common form factor is DIMM (Dual Inline Memory Module), but some smaller form factors like SODIMM are used in laptops or compact systems. Ensure that you choose RAM modules with the correct form factor that fits the memory slots on your motherboard.
Before making a purchase, it’s always advisable to consult the motherboard’s manual or visit the manufacturer’s website for a list of tested and compatible RAM modules. This ensures that you choose RAM that has been proven to work well with your specific motherboard model.
Remember, investing in high-quality, reputable RAM modules from trusted manufacturers can also play a significant role in ensuring compatibility, reliability, and performance.
By considering these factors and verifying compatibility, you can choose the right RAM for your motherboard, enabling your system to run smoothly and efficiently.
Upgrading RAM or Motherboard
Upgrading your computer’s RAM or motherboard can greatly enhance its performance and functionality. Here are some considerations and steps to follow when upgrading either the RAM or motherboard:
Upgrading RAM:
-
Evaluate your needs: Determine why you need to upgrade your RAM. Are you experiencing slow performance while running resource-intensive applications? Do you frequently multitask and find your system struggling to keep up? Understanding your needs will help you choose the right amount of RAM for your upgrade.
-
Check compatibility: Before purchasing new RAM modules, ensure they are compatible with your existing motherboard. Consider factors such as the type of RAM (DDR4, DDR3, etc.), capacity, speed, and form factor. Consult your motherboard’s manual or manufacturer’s website to verify compatibility.
-
Install the new RAM: Once you have selected compatible RAM, power off your computer, unplug it, and open the case. Locate the RAM slots on your motherboard and carefully insert the new RAM modules, ensuring they are fully seated and secured. Close the case, reconnect all cables, and power on your computer.
-
Verify successful upgrade: After upgrading the RAM, boot up your computer and check if the new RAM is recognized. You can verify this by checking the system properties or using software utilities that display hardware information. If the new RAM is detected, you have successfully upgraded.
Upgrading the Motherboard:
-
Determine the need for an upgrade: Assess your reasons for upgrading the motherboard. Do you require more powerful CPU support? Are you looking to add more RAM slots or additional expansion slots? Understanding your requirements will guide you in choosing the right motherboard.
-
Research and compare: Take the time to research and compare various motherboard options. Consider factors such as CPU socket compatibility, RAM slots, expansion slots, storage interfaces, and connectivity options. Check for features that align with your needs and read reviews to gauge reliability and performance.
-
Backup and prepare: Before replacing the motherboard, ensure you have made backups of your important data. Gather all necessary tools and components, such as CPU, RAM modules, and storage devices, to facilitate the installation process.
-
Replace the motherboard: Begin by turning off your computer, unplugging all connections, and opening the case. Carefully disconnect all cables, remove the old motherboard, and install the new one, ensuring it is securely fastened. Connect all cables, insert the CPU and RAM modules, and secure them properly. Close the case and reconnect all cables.
-
Reinstall operating system and drivers: As the motherboard replacement often necessitates a fresh installation of the operating system, back up your data and follow the installation process. Additionally, install the necessary drivers and software to ensure proper functionality.
Whether you are upgrading your RAM or motherboard, be sure to follow proper safety guidelines, such as grounding yourself to prevent electrostatic discharge, and handle components with care. If you are uncertain or uncomfortable with the process, seek assistance from a professional.
By following these steps and considerations, you can successfully upgrade your computer’s RAM or motherboard, resulting in improved performance and an enhanced computing experience.