
Choosing the Right Scanner
When it comes to purchasing a radio scanner, there are several factors to consider to ensure that you choose the right one for your needs. With the wide variety of scanners available on the market, it can be overwhelming to decide which one is best suited for you. Here are some key points to keep in mind when choosing a scanner:
- Frequency Range: Make sure that the scanner you select covers the frequency range that you are interested in monitoring. Different scanners support different frequency ranges, so it’s essential to choose one that aligns with your specific needs.
- Trunking Capability: If you plan on monitoring trunking systems, such as those used by public safety agencies and businesses, opt for a scanner that supports trunking functionality. Some scanners even offer triple-trunking capabilities, allowing you to monitor multiple trunking systems simultaneously.
- Channel Memory: Consider the number of channels the scanner can store. If you plan on monitoring a large number of frequencies, make sure the scanner has sufficient memory to accommodate your needs. Additionally, some scanners allow you to store frequencies in banks or groups, enabling easier organization.
- Display and Controls: Look for a scanner with a clear and easy-to-read display, as well as user-friendly controls. A backlit display can be especially useful in low-light conditions. Additionally, consider whether you prefer a handheld scanner for portability or a base/mobile scanner for home or vehicle use.
- Programming Options: Evaluate the scanner’s programming capabilities. Some scanners have built-in software for programming frequencies and systems, while others require manual programming or the use of computer software. Choose a scanner that aligns with your technical aptitude and preferences.
By considering these factors, you can make an informed decision when selecting a radio scanner that suits your scanning needs. Remember, each individual’s requirements may vary, so take the time to assess your specific needs before making a purchase. Investing in the right scanner will enhance your scanning experience and ensure that you can easily access the frequencies you want to monitor.
Understanding the Basics of Trunking Systems
Trunking systems are widely used in modern radio communications, particularly by public safety agencies, businesses, and other organizations. To effectively use a scanner, it’s essential to understand the basics of trunking systems and how they operate.
In conventional radio systems, each user or agency is assigned a dedicated frequency. However, in trunking systems, multiple users share a group of frequencies dynamically. This dynamic allocation of frequencies allows for efficient use of limited radio spectrum resources.
Here are some key concepts to grasp when it comes to trunking systems:
- Talkgroups: In a trunking system, each user or agency is assigned a talkgroup, which is like a virtual channel. When a user initiates communication, their radio sends a request to a central controller, which assigns an available frequency from the shared pool. The communication is then carried out on that frequency until the conversation ends.
- Control Channels: Within a trunking system, there is a dedicated control channel that serves as the communication hub. This channel is continuously monitored by the scanner to receive control data and monitor the status of talkgroups.
- System ID: Each trunking system has a unique identifier known as the system ID. This identifier helps scanners differentiate between different trunking systems and select the appropriate frequencies.
- Trunktracking: Scanners equipped with trunktracking capabilities can automatically follow and monitor the dynamic allocation of frequencies in a trunking system. The scanner listens to the control channel and tracks the active talkgroups, allowing you to hear conversations as they occur.
Understanding these fundamental concepts will enable you to effectively program and use your scanner to monitor trunking systems. It’s important to consult the scanner’s manual or manufacturer’s website for specific instructions on programming trunking systems, as different scanner models may have slight variations in operation.
Now that you have a basic understanding of trunking systems, you can proceed to set up and program your Radio Shack triple-trunking scanner to start monitoring various talkgroups and frequencies.
Getting to Know Your Radio Shack Triple-Trunking Scanner
Your Radio Shack triple-trunking scanner is a powerful device that allows you to monitor a wide range of frequencies, including conventional channels and trunking systems. Before you start using your scanner, it’s important to familiarize yourself with its features and functionality.
Here are the key components and functions of your scanner:
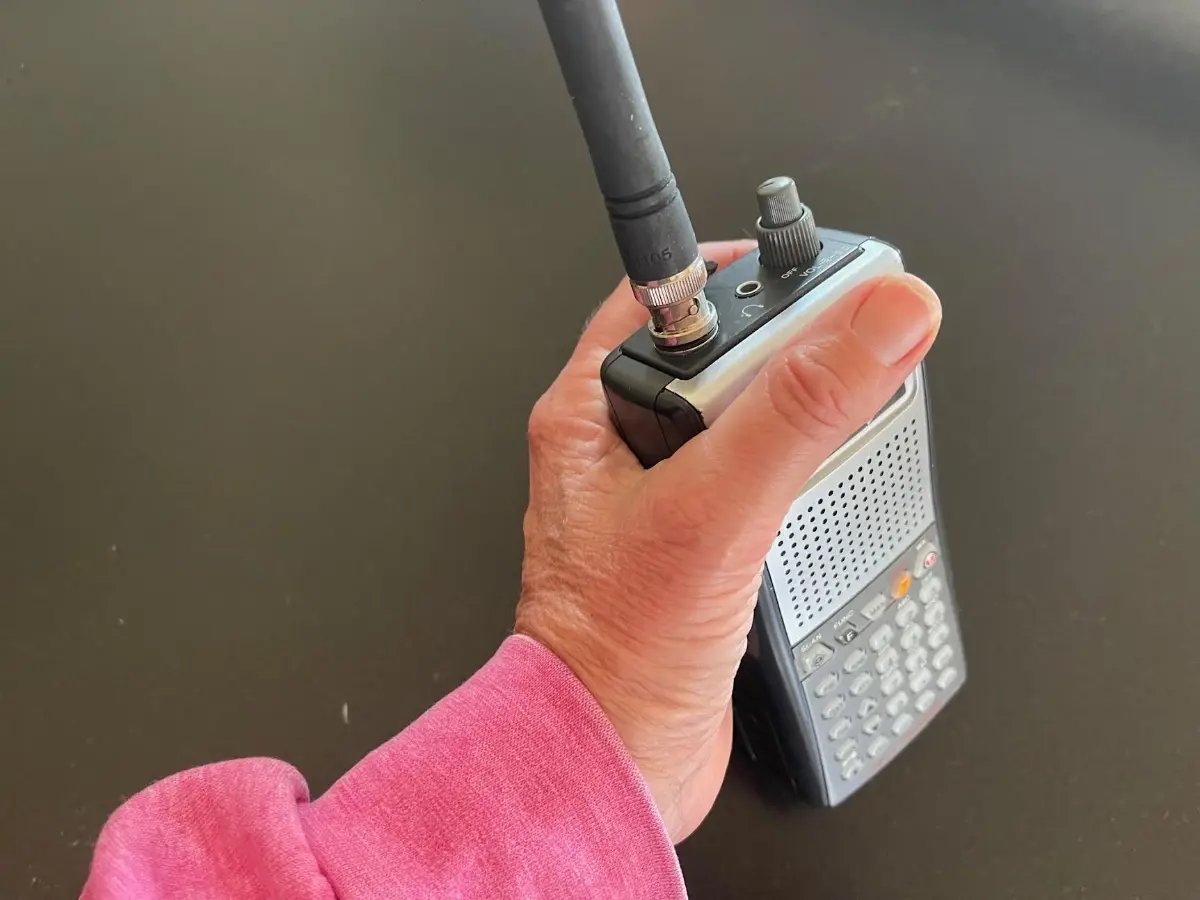
- Antenna: The antenna is responsible for capturing radio signals. Ensure that it is securely connected to the scanner for optimal reception.
- Display: The display shows important information such as frequencies, talkgroup IDs, signal strength, and scanner settings. Familiarize yourself with the different icons and indicators on the display for easy navigation.
- Keypad: The keypad allows you to input frequencies, talkgroup IDs, and other settings. Take note of the function keys and their corresponding operations for programming and customization.
- Menu Options: Your scanner will have various menu options that allow you to access different settings and functions. Explore the menu system to discover the available options and customize your scanner according to your preferences.
- Volumes and Squelch: The volume control adjusts the audio output level, while the squelch control eliminates background noise when no signal is present. Experiment with these controls to achieve clear and audible reception.
- Scan Modes: Your scanner offers different scan modes, such as priority scan, weather scan, and service scan. Each mode prioritizes specific frequencies or channels, allowing you to customize your scanning experience.
- Power Source: Your scanner can be powered by either batteries or an AC adapter. Ensure that you have sufficient power to prevent interruptions during scanning sessions.
Take the time to read through the user manual provided with your scanner to fully understand its capabilities and features. Experiment with the different functions and settings to gain confidence in operating your scanner effectively.
By familiarizing yourself with your Radio Shack triple-trunking scanner, you’ll be ready to move on to the next step of setting up and programming the scanner to start scanning frequencies and listening to the conversations happening around you.
Turning on and Setting up the Scanner
Now that you’re acquainted with the key components of your Radio Shack triple-trunking scanner, it’s time to turn it on and set it up for scanning. Follow these steps to get your scanner up and running:
- Ensure that your scanner has power either through batteries or an AC adapter. Insert fresh batteries or connect the AC adapter to the scanner and a power source.
- Locate the power button on your scanner and press it to turn on the device. The scanner will perform a self-test and display basic information on the screen.
- Adjust the volume and squelch controls to your desired levels. The volume control determines the audio output level, while the squelch control eliminates background noise.
- Use the keypad and navigation buttons to access the menu system. Familiarize yourself with the different menu options and submenus available on your scanner.
- Set your location by entering the appropriate information, such as your city or zip code. This enables the scanner to provide local weather alerts and tailor scanning options to your area.
- Choose the scan mode you wish to use, such as service scan or weather scan. Experiment with different scan modes to find the one that suits your scanning preferences.
- Program your scanner with the frequencies and talkgroup IDs you want to monitor. Refer to the scanner’s manual for instructions specific to your model on how to enter and save frequencies.
- Organize your programmed frequencies into banks or groups if your scanner supports this feature. This allows for easier navigation and quick access to specific frequencies.
- Save your settings and start scanning. Press the scan button or select the scan option from the menu to begin scanning the programmed frequencies.
Remember to periodically update your scanner with new frequencies or talkgroup IDs as needed. Stay up-to-date with local radio communications and adjust your scanner’s settings accordingly.
With your Radio Shack triple-trunking scanner now turned on and set up, you’re ready to start scanning frequencies and exploring the world of radio communications.
Scanning Frequencies and Channels
Scanning frequencies and channels is the primary function of your Radio Shack triple-trunking scanner. By scanning, you can listen to various radio communications and stay informed about events happening in your area. Here are the key steps to scan frequencies and channels:
- Ensure that your scanner is powered on and set up according to your preferences.
- Select the desired scan mode from the menu options. Common scan modes include service scan, weather scan, and custom scan.
- If you have programmed frequencies and talkgroup IDs, ensure that they are saved and organized in banks or groups for easy access.
- Press the scan button or select the scan option from the menu to begin scanning the programmed frequencies.
- Observe the scanner’s display as it cycles through the programmed frequencies. It will stop on any active channels or talkgroups that are currently in use.
- When the scanner stops on an active frequency or talkgroup, you can listen to the ongoing communication. Adjust the volume control as needed.
- If the scanner stops on a channel that you wish to skip, press the “skip” or “lockout” button to exclude it from future scanning cycles.
- To manually search for frequencies not programmed into the scanner, enter the search mode and use the keypad to specify the frequency range to scan.
During scanning, you may come across various types of radio communications, including public safety agencies, Amateur Radio (Ham) operators, businesses, and more. It’s important to respect privacy and adhere to legal restrictions regarding eavesdropping or interfering with radio transmissions.
Keep in mind that scanning can be an ongoing process as new frequencies and talkgroup IDs may become active in your area. Stay updated with radio communication news and consider joining local scanner enthusiast groups to share information and stay informed about new frequencies to program into your scanner.
By scanning frequencies and channels, you can stay connected to what’s happening in your community and enjoy the diverse world of radio communications.
Programming Trunking Systems
Programming trunking systems into your Radio Shack triple-trunking scanner allows you to monitor multiple talkgroups and efficiently follow conversations within those systems. Here’s a step-by-step guide to programming trunking systems:
- Refer to the user manual or online resources specific to your scanner to understand the programming process for trunking systems.
- Identify the trunking system(s) you want to program. Obtain the necessary information, such as system IDs, talkgroup IDs, and frequency ranges.
- Access the programming menu on your scanner and navigate to the trunking system programming options.
- Enter the system ID for the trunking system you want to program. This unique identifier distinguishes different trunking systems.
- Program the talkgroup IDs into the scanner. These IDs represent specific groups or agencies within the trunking system.
- Enter the appropriate frequency ranges for each trunking system. Refer to the available documentation to ensure accurate input.
- Save the programmed trunking system and assign it to a specific bank or group for easier organization.
- Activate the trunktracking feature on your scanner to allow it to dynamically follow the allocation of frequencies within the programmed trunking systems.
- Start scanning, and your scanner will automatically detect and follow active talkgroups within the programmed trunking systems.
It’s important to note that trunking systems can be complex, and the programming process may vary depending on your specific scanner model. Take your time to read the scanner’s manual thoroughly and consult online resources or scanner enthusiast forums for assistance.
Stay updated with changes to trunking systems and new talkgroup IDs in your area. Many online resources provide updated information on trunking systems, allowing you to expand and modify your scanner’s programming as needed.
By effectively programming trunking systems into your scanner, you can navigate the intricate world of multiple talkgroups and enjoy comprehensive monitoring of diverse radio communications.
Programming Conventional Channels
In addition to programming trunking systems, your Radio Shack triple-trunking scanner allows you to program and monitor conventional channels. These channels are standalone frequencies that are not part of a trunking system. Here’s a guide to programming conventional channels into your scanner:
- Identify the conventional channels you want to program. These can include frequencies used by local police departments, fire stations, amateur radio operators, and other organizations.
- Access the programming menu on your scanner and navigate to the conventional channel programming options.
- Enter the frequency for each conventional channel you want to program. The frequency typically consists of a combination of numbers and a decimal point, such as “155.325”.
- Assign a name or label to each programmed conventional channel for easier identification. This can be the name of the agency or organization associated with the frequency.
- Save the programmed conventional channels and assign them to a specific bank or group for organization purposes.
- Enable the scanner to scan the programmed conventional channels by selecting the appropriate scan mode or manually activating the scan function.
- Adjust the scanner’s squelch control to eliminate background noise and ensure clear reception of the programmed conventional channels.
- Monitor the programmed conventional channels by observing the scanner’s display. It will stop at any active channels, allowing you to listen to the conversations taking place.
It’s important to note that frequencies used by some agencies or organizations may require a license to monitor legally. Always respect privacy and adhere to legal restrictions regarding the use of your scanner.
As with programming trunking systems, consult the scanner’s manual for specific instructions on programming conventional channels for your particular model. Take advantage of online resources and scanner enthusiast communities to stay informed about new frequencies and ensure your programming remains up to date.
By effectively programming conventional channels into your scanner, you can expand your monitoring capabilities and stay connected to various radio communications in your area.
Programming Weather Alert Channels
One of the valuable features of your Radio Shack triple-trunking scanner is the ability to program and receive weather alerts. By programming weather alert channels into your scanner, you can stay informed about severe weather conditions and receive important weather updates in your area. Here’s how to program weather alert channels:
- Identify the specific weather channels used in your region. These channels are typically designated for weather broadcasts from the National Weather Service (NWS).
- Access the programming menu on your scanner and navigate to the weather alert channel programming options.
- Enter the frequency for the weather alert channels. These frequencies are specific to your region and should be available from local weather authorities or the NWS.
- Assign a label or name to each programmed weather alert channel for easy identification.
- Save the programmed weather alert channels and assign them to a specific bank or group for better organization.
- Enable the scanner’s weather alert feature, which allows it to automatically monitor the programmed weather channels for alerts.
- Make sure your scanner is connected to a power source or has sufficient battery power to ensure uninterrupted monitoring of weather alerts.
- During severe weather events, the scanner will automatically activate alerts and notify you of important weather updates.
It’s important to note that weather alert channels are region-specific, so be sure to program the appropriate frequencies for your location. Consult local weather authorities or the NWS for the correct frequencies to program into your scanner.
By programming and utilizing the weather alert feature on your scanner, you can stay informed about severe weather conditions, ensuring the safety of yourself and your community.
Customizing the Scanner’s Settings
Your Radio Shack triple-trunking scanner offers a range of customizable settings that allow you to personalize your scanning experience. By adjusting these settings, you can optimize the scanner’s performance to suit your preferences. Here’s a guide to customizing the scanner’s settings:
- Access the scanner’s menu system to explore the available settings options.
- Adjust the backlight settings to control the display’s brightness. This can be especially useful when scanning in low-light conditions.
- Set the scan delay, which determines the amount of time the scanner pauses on an active channel before moving to the next programmed frequency. Customize the scan delay according to your preference.
- Configure priority settings to prioritize certain frequencies or channels over others. This ensures that specific channels are scanned more frequently, allowing you to stay updated on important communications.
- Enable or disable certain scan modes based on your scanning needs. For example, you may want to enable weather scan if you frequently monitor weather channels.
- Adjust the audio settings, including volume and squelch controls, to achieve the desired audio output clarity.
- Customize the display settings, such as the font size and contrast, to enhance readability.
- Assign custom names or labels to frequencies, talkgroup IDs, or channels for easier identification during scanning.
- Save your customized settings to ensure they persist even after powering off the scanner.
Take the time to experiment with different settings and fine-tune them to your liking. Each individual scanner model may have unique customization options, so consult the user manual or online resources specific to your scanner for more in-depth instructions.
Regularly review and update your customized settings based on your scanning needs or any changes in your scanning environment. Stay connected with scanner enthusiast communities to learn about new customization techniques or settings tweaks that can enhance your scanning experience.
By customizing the scanner’s settings, you can tailor the device to align with your preferences, allowing for a more personalized and enjoyable scanning experience.
Troubleshooting Common Issues
While your Radio Shack triple-trunking scanner is designed to provide reliable performance, you may encounter certain issues or challenges during its usage. Here are some common problems that users may face and troubleshooting tips to help you resolve them:
- No Reception: If you’re not receiving any signals, check your antenna connection. Ensure that it is securely connected to the scanner. Also, verify that the squelch control is properly adjusted to allow reception.
- Weak Signal: If you’re experiencing a weak signal, try repositioning the scanner or adjusting the antenna’s placement. You may also consider using an external antenna for enhanced reception.
- Interference: If you’re encountering interference, such as static or distorted audio, try moving the scanner away from electronic devices that could be causing interference. Additionally, adjust the squelch control to minimize background noise.
- Scanner Not Powering On: If the scanner is not powering on, check the batteries or the AC adapter connection. Replace the batteries with fresh ones or ensure that the AC adapter is properly plugged into a power source.
- Programming Errors: If you’re having trouble programming frequencies or talkgroup IDs, double-check the entered information for accuracy. Make sure you’re inputting the correct values and following the scanner’s programming instructions.
- Scanner Freezing or Not Responding: If the scanner freezes or becomes unresponsive, try resetting it by turning it off and then on again. If the problem persists, consult the scanner’s manual for specific troubleshooting steps or contact customer support.
- Inaccurate Weather Alerts: If you’re receiving inaccurate or outdated weather alerts, ensure that you have properly programmed the correct weather alert channels for your region. Check for any firmware updates that may address weather alert issues.
If you encounter any other issues not mentioned here, consult the scanner’s manual or reach out to the manufacturer’s customer support for further assistance. Engaging with scanner enthusiast forums or online communities can also provide valuable insights and troubleshooting advice.
Remember to periodically update your scanner’s firmware and programming to keep it up to date with the latest features and fixes. Regular maintenance and troubleshooting can help ensure optimal performance and a seamless scanning experience.
Tips and Tricks for Using Your Scanner
Using your Radio Shack triple-trunking scanner effectively can enhance your scanning experience and help you make the most of its features. Here are some tips and tricks to help you optimize your scanner usage:
- Stay Updated: Regularly check online resources, scanner enthusiast forums, and social media groups for the latest information on frequencies, talkgroup IDs, and scanner enhancements in your area. This can help you stay current with the ever-evolving world of radio communications.
- Experiment with Scan Modes: Explore and experiment with the different scan modes available on your scanner, such as priority scan, weather scan, or service scan. Each mode offers unique scanning options and can be tailored to your scanning preferences.
- Utilize Banks and Groups: Take advantage of the bank or group functionality if your scanner supports it. Organize your programmed frequencies, talkgroup IDs, or channels into logical groups for easy navigation and quick access during scanning.
- Community Engagement: Engage with local scanner enthusiast communities, attend scanner-related events, or join online groups. These communities can provide valuable insights, share frequency updates, and offer troubleshooting assistance.
- Consider Accessories: Explore compatible accessories for your scanner, such as external antennas, carrying cases, or earphones. These accessories can enhance reception, provide convenience, and improve your overall scanning experience.
- Learn Scanner Jargon: Familiarize yourself with scanner terminology and jargon to better understand scanner manuals, online resources, and discussions. This can help you navigate programming instructions and make better use of your scanner’s features.
- Record and Playback: Take advantage of any recording or playback features your scanner offers. This allows you to capture and review interesting conversations or important information you may have missed during live scanning sessions.
- Be Respectful: Respect the privacy of individuals and organizations whose communications you listen to. Adhere to legal restrictions and regulations regarding the use of scanner devices and eavesdropping on private conversations.
- Regular Maintenance: Keep your scanner clean and in good condition by regularly wiping it down with a soft cloth. Ensure that the antenna connection is secure and periodically check for firmware updates to keep your scanner up to date.
Remember, the more you explore and experiment with your scanner, the better you’ll understand its capabilities and the more enjoyable your scanning experience will be. Take the time to personalize your scanner settings, stay connected with the scanning community, and continuously learn about new features or improvements.
Enjoy the fascinating world of radio communications and make the most of your Radio Shack triple-trunking scanner!