
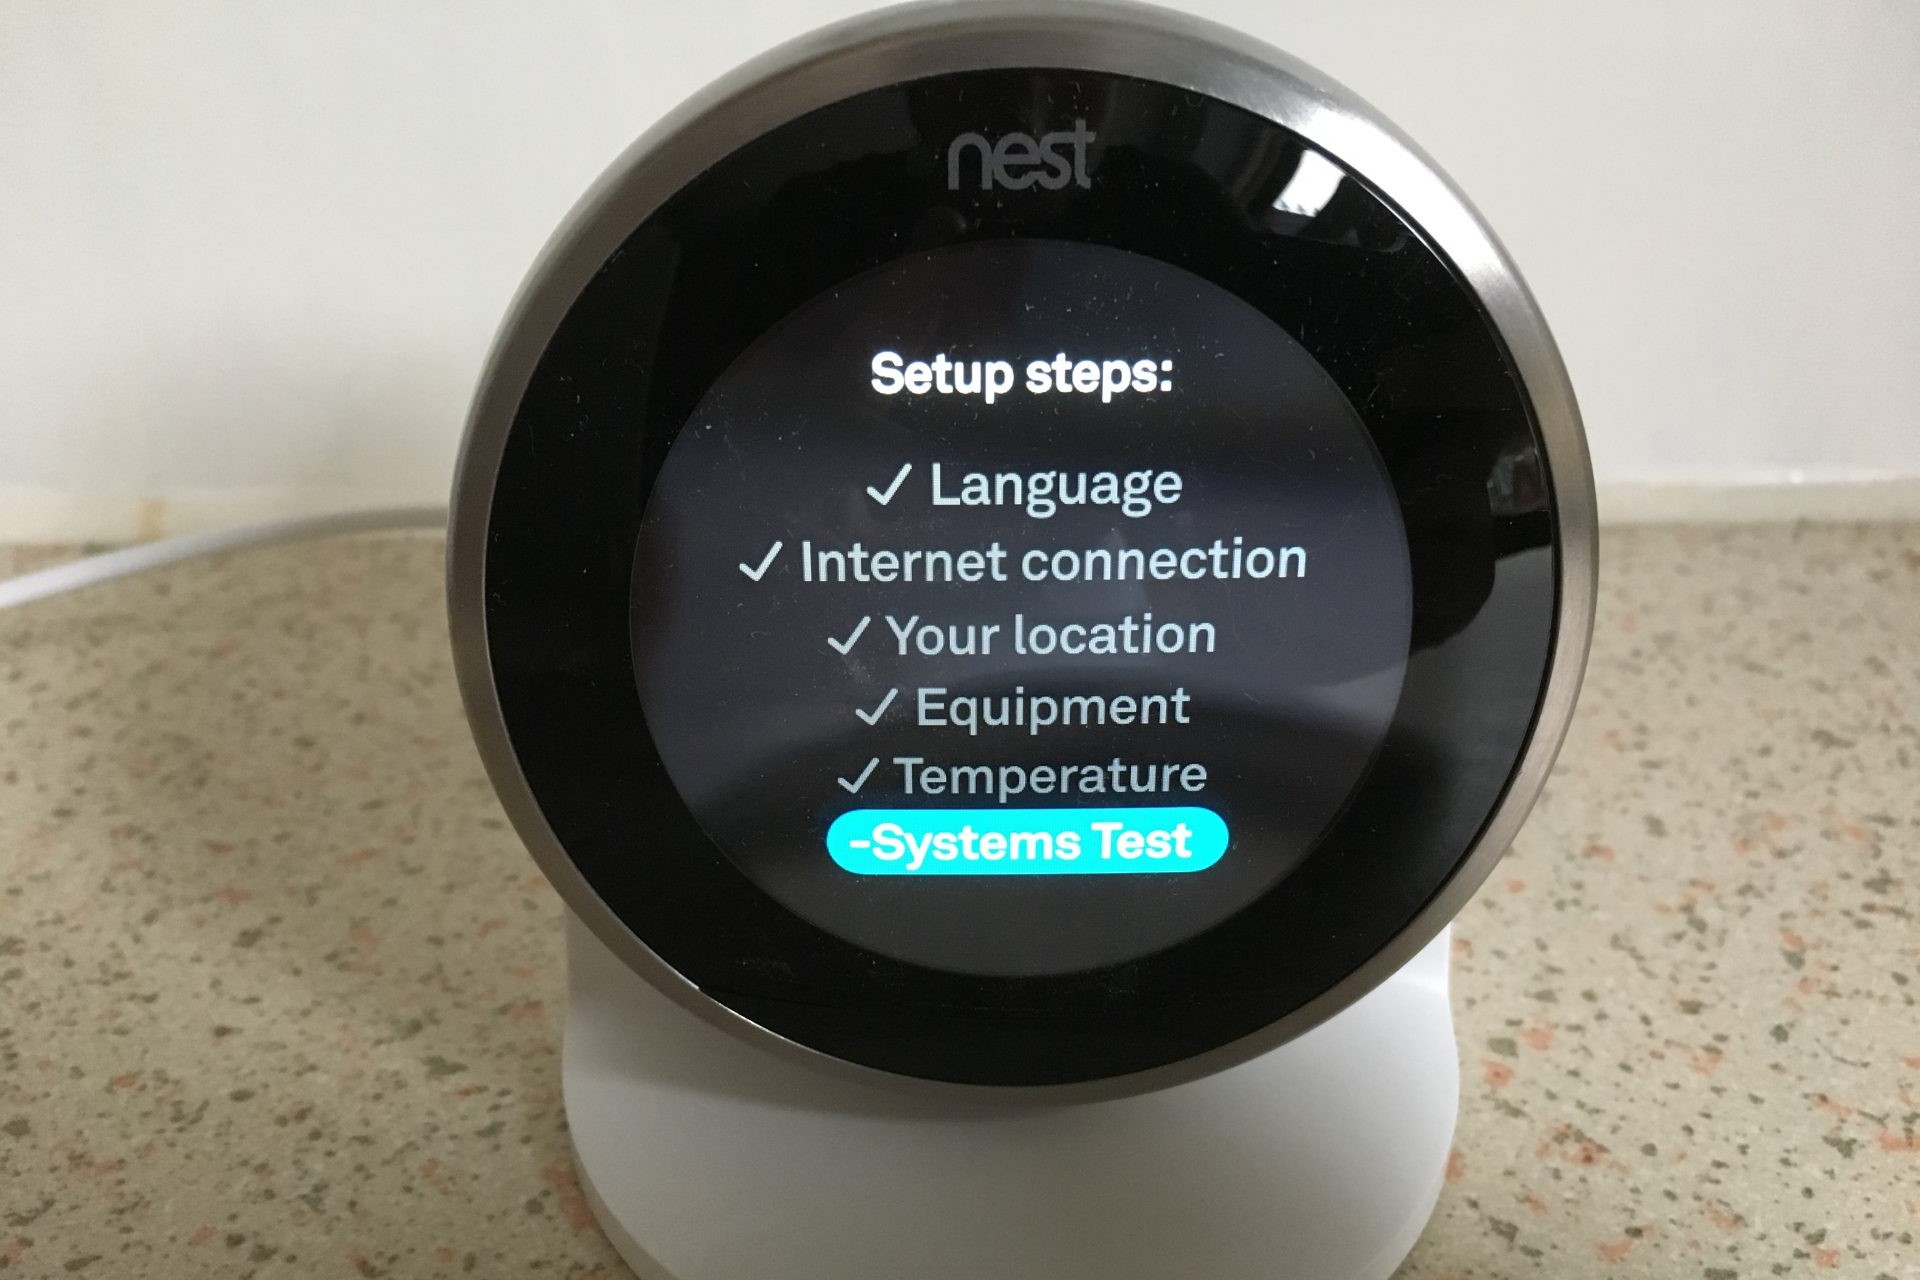
Important Things to Know Before Programming Your Nest Thermostat
Before you start programming your Nest thermostat, there are a few key things you should be aware of to ensure a smooth and successful installation process. By understanding these important points, you’ll be better equipped to take full advantage of your device’s capabilities and optimize its performance.
1. Ensure a Compatible HVAC System: Before purchasing a Nest thermostat, it’s essential to check if your heating, ventilation, and air conditioning (HVAC) system is compatible. Nest offers a compatibility checker tool on their website, enabling you to verify if your system will work seamlessly with their thermostat. If you’re unsure about the compatibility, it’s recommended to consult a professional HVAC technician.
2. Check Your Home’s Wi-Fi Connectivity: Since Nest thermostats rely on Wi-Fi for control and smart features, ensure that your home has a stable and reliable internet connection. Weak or intermittent Wi-Fi signals can impact the thermostat’s performance and connectivity to the mobile app or other smart devices.
3. Understand the Wiring Requirements: Familiarize yourself with the wiring requirements for your Nest thermostat model. Different thermostats may have varying wiring configurations, so it’s crucial to follow the instructions provided in the Nest installation guide or consult a professional if needed. Incorrect wiring can lead to functionality issues or even damage the thermostat.
4. Learn About Energy Saving Features: Take some time to explore the energy-saving features and benefits of your Nest thermostat. These devices are designed to optimize energy usage and reduce utility costs over time. Familiarize yourself with features such as auto-scheduling, eco-mode, and energy usage reports to maximize your thermostat’s efficiency.
5. Download the Nest App: To fully utilize the capabilities of your Nest thermostat, download the Nest mobile app from your device’s app store. The app allows you to control your thermostat remotely, set schedules, adjust settings, and receive notifications. It’s a convenient way to manage your thermostat, especially when you’re away from home.
6. Consider Additional Accessories: Nest thermostats offer compatibility with various accessories that can enhance their functionality. For example, additional room sensors can help you manage heating and cooling more efficiently, and the Nest Protect smoke and carbon monoxide detector can integrate seamlessly with your thermostat for enhanced safety and convenience.
7. Refer to the Nest Support Resources: Nest provides comprehensive support resources, including installation guides, troubleshooting tips, and frequently asked questions on their website. If you encounter any difficulties during the installation or programming process, these resources can be invaluable in resolving the issue and getting your Nest thermostat up and running smoothly.
By keeping these important considerations in mind, you’ll be well-prepared to program and utilize your Nest thermostat effectively. Understanding the compatibility, wiring requirements, and additional features will ensure a successful installation and a comfortable and energy-efficient home environment.
Step 1: Connecting Your Nest Thermostat to Wi-Fi
Connecting your Nest thermostat to Wi-Fi is a crucial step that allows you to access its smart features and control it remotely. Follow these simple steps to ensure a seamless Wi-Fi setup:
1. Turn Off Power: Before starting the installation process, turn off the power to your HVAC system at the circuit breaker. This step is essential for safety and to prevent any electrical damage during the setup.
2. Prepare Your Nest Thermostat: Remove the display from the base by firmly pressing on the screen and gently pulling it away. Once the display is separated, locate the connector block and ensure that the wires are correctly inserted.
3. Connect to Power and Wi-Fi: Connect the Nest base to the power source by plugging it into an electrical outlet or wiring it directly to the HVAC system. Once the display is powered, you’ll be prompted to select your language and connect to your home’s Wi-Fi network.
4. Select Wi-Fi Network: On the Nest display, navigate to the Settings menu and select “Network.” Choose the option to connect to a new network, and a list of available Wi-Fi networks will appear. Select your home network and enter the Wi-Fi password if prompted.
5. Wait for Connection: After entering the Wi-Fi password, wait for the thermostat to establish a connection with your home network. This process may take a few moments. Once the connection is established, you’ll see a confirmation message on the display.
6. Download the Nest App: To control your Nest thermostat remotely and access its smart features, download the Nest app on your smartphone or tablet. The app is available for both iOS and Android devices. Open the app and follow the on-screen instructions to create an account or log in if you already have one.
7. Pair Your Nest Thermostat: Launch the Nest app and select the option to add a new device. The app will guide you through the pairing process, which typically involves scanning a QR code on the back of the Nest display or manually entering a unique code provided on the screen.
8. Verify Connection: Once the pairing is complete, the app will attempt to connect to your Nest thermostat. Ensure that your smartphone or tablet is connected to the same Wi-Fi network that you configured for your thermostat. Follow the app’s instructions to verify the connection and control your Nest thermostat remotely.
By following these steps, you can easily connect your Nest thermostat to Wi-Fi and unlock its full potential. Once connected, you’ll have the convenience of adjusting temperature settings, creating schedules, and monitoring energy usage from anywhere using the Nest app. Enjoy the comfort and control that a connected Nest thermostat provides in your home.
Step 2: Understanding the Basic Controls of Your Nest Thermostat
Before you start programming your Nest thermostat, it’s essential to understand its basic controls. Familiarizing yourself with the features and functions will allow you to effortlessly adjust temperature settings and optimize your home’s comfort. Follow these steps to gain a better understanding of your Nest thermostat:
1. Temperature Adjustment: The most basic function of your Nest thermostat is temperature adjustment. Simply turn the outer ring clockwise to increase the temperature and counterclockwise to decrease it. The display will show the set temperature as you make adjustments.
2. Mode Selection: Your Nest thermostat offers three major modes: heating, cooling, and off. To select a specific mode, press the display once to wake it up and then turn the outer ring to cycle through the available options. The selected mode will be indicated on the display.
3. Fan Control: Your Nest thermostat can control the fan in your HVAC system independently. To turn on or off the fan, press the display twice to access the Quick View menu. The fan icon will be displayed, and you can select either “Auto,” “On,” or “Off” to control the fan’s operation.
4. Viewing and Adjusting Settings: To access and modify additional settings, press the display twice to enter the Quick View menu. From there, navigate to the desired setting by turning the outer ring. Press the display once to select a setting, and then use the outer ring or press on the display to make adjustments.
5. Using the Nest App: The Nest app provides a convenient way to control your thermostat remotely and access additional settings. From the app, you can adjust temperature settings, set schedules, and enable energy-saving features. It’s a powerful tool that complements the physical controls of your Nest thermostat.
6. Learning Features: Your Nest thermostat is equipped with intelligent learning features that adapt to your preferences and behaviors over time. It analyzes your usage patterns and adjusts temperature settings automatically to optimize energy efficiency and comfort. Take advantage of this feature to maximize your thermostat’s potential.
By familiarizing yourself with these basic controls, you’ll be able to effortlessly adjust the temperature, select modes, control the fan, and access additional settings on your Nest thermostat. Remember to leverage the power of the Nest app to control your thermostat remotely and make the most of its smart features. With a clear understanding of these controls, you can create a comfortable and energy-efficient home environment tailored to your preferences.
Step 3: Creating a Schedule for Your Nest Thermostat
Creating a schedule for your Nest thermostat is an essential step that allows you to automate temperature adjustments throughout the day. By setting a schedule tailored to your preferences and daily routine, you can ensure optimal comfort while maximizing energy efficiency. Follow these steps to create a schedule for your Nest thermostat:
1. Access the Schedule: To start creating your schedule, press the display twice to access the Quick View menu. From there, select the “Schedule” option. The display will then show a graphical representation of the 24-hour day, with temperature segments and time slots.
2. Set Temperature for Each Time Slot: Begin by selecting a time slot on the schedule that corresponds to a specific part of the day. For example, you may want to set a higher temperature in the morning when you wake up and a lower temperature at night when you’re sleeping. Use the outer ring to adjust the temperature for each time slot.
3. Add Additional Time Slots: To add more time slots to your schedule, press the display once while on the schedule screen. You can then select the desired position on the schedule and adjust the temperature accordingly. This allows you to create a schedule that aligns with your daily activities.
4. Delete or Adjust Time Slots: If you need to delete or adjust a time slot, simply select it on the schedule screen and press the display once. From there, you can choose to delete the time slot or modify the temperature settings using the outer ring or by pressing on the display.
5. Set Days of the Week: By default, the schedule applies to all days of the week. However, if you have different routines on certain days, you can customize the schedule accordingly. To do this, select the desired day on the schedule screen and make the necessary adjustments.
6. Enable Early-On and True Radiant: Your Nest thermostat offers advanced features such as Early-On and True Radiant. Early-On ensures that your home reaches the desired temperature at the scheduled time by starting the heating or cooling process in advance. True Radiant optimizes performance for radiant flooring systems. You can enable these features in the schedule settings.
7. Save and Apply the Schedule: Once you’ve set up your desired schedule, ensure that you save and apply the changes. Press the display once while on the schedule screen and select the “Save” option. Your Nest thermostat will then begin following the schedule you’ve created.
8. Make Adjustments as Needed: Remember that your schedule isn’t set in stone. Life can be unpredictable, and you may need to make adjustments from time to time. Fortunately, the Nest app provides an intuitive interface that allows you to modify your schedule with ease.
By creating a customized schedule for your Nest thermostat, you can automate temperature adjustments throughout the day, ensuring optimal comfort and energy efficiency. Take advantage of the flexibility offered by the schedule feature to align your thermostat’s settings with your daily routine. With a well-designed schedule in place, you can enjoy a comfortable home environment while saving energy and reducing utility costs.
Step 4: Adjusting Your Nest Thermostat’s Temperature Settings
Adjusting the temperature settings of your Nest thermostat is a simple yet important step to ensure personalized comfort in your home. Whether you need to make immediate adjustments or fine-tune your thermostat’s settings, follow these steps to effectively modify the temperature:
1. Using the Physical Controls: The easiest and most immediate way to adjust the temperature is by using the physical controls on your Nest thermostat. Simply turn the outer ring clockwise to increase the temperature or counterclockwise to decrease it. The updated temperature will be displayed on the thermostat’s screen.
2. Using the Nest App: If you prefer to control your Nest thermostat remotely or want more advanced temperature adjustment options, utilize the Nest app. Launch the app on your smartphone or tablet and select your thermostat. From there, you can use the intuitive interface to adjust the temperature settings to your liking. The app allows you to make immediate changes or set schedules for temperature adjustments throughout the day.
3. Creating Temperature Preferences: The Nest thermostat also provides an option to create temperature preferences. These preferences allow you to set specific temperatures for different times of the day or occasions. For example, you can create a “Morning” preference with a warmer temperature and an “Evening” preference with a cooler temperature. This feature gives you the flexibility to personalize your thermostat’s settings and adapt them to your daily routine.
4. Fine-Tuning with Home/Away Assist: Take advantage of the Home/Away Assist feature on your Nest thermostat to automatically adjust the temperature when you leave or arrive at home. This feature uses sensors to detect your presence and adjusts the temperature accordingly. You can customize the settings for Home/Away Assist in the Nest app to fit your preferences and energy-saving goals.
5. Utilizing Temperature Sensors: If you have additional temperature sensors in your home, such as the Nest Temperature Sensor, you can use them to further enhance your thermostat’s performance. These sensors allow you to monitor and adjust the temperature in specific areas of your home, giving you more precise control over your comfort settings.
6. Monitoring Energy Usage: Keep an eye on your Nest thermostat’s energy usage reports to gain insights into your heating and cooling patterns. Understanding how your thermostat operates and the impact it has on your energy consumption can help you make informed decisions to optimize both comfort and energy efficiency.
Remember, adjusting your Nest thermostat’s temperature settings is a continuous process. As your preferences and needs change, feel free to modify your temperature settings accordingly. By effectively utilizing the physical controls, the Nest app, temperature preferences, Home/Away Assist, and additional sensors, you can achieve personalized comfort while maximizing energy efficiency in your home.
Step 5: Enabling and Customizing the Auto-Schedule Feature
The Auto-Schedule feature is one of the powerful capabilities of your Nest thermostat that can greatly simplify your life. By automatically learning your temperature preferences and routine, the Auto-Schedule feature creates a personalized schedule for your thermostat. Follow these steps to enable and customize the Auto-Schedule feature:
1. Access the Auto-Schedule Setting: On the Nest thermostat, press the display twice to access the Quick View menu. From there, select the “Settings” option. Scroll down and choose “Auto-Schedule” from the list of available settings.
2. Enable Auto-Schedule: In the Auto-Schedule settings menu, toggle the switch to enable the feature. Once enabled, the Nest thermostat will start learning your temperature preferences based on your manual adjustments over a few days or weeks.
3. Provide Feedback (Optional): During the learning process, your Nest thermostat may suggest temperature adjustments to suit your preferences. You can choose to accept these suggestions as they appear on the display or continue making manual adjustments until the thermostat aligns with your desired settings.
4. Customize Temperature Preferences: After the learning period, you can customize the temperature preferences set by the Auto-Schedule feature. Access the schedule from the Quick View menu and make adjustments as needed. The Auto-Schedule will still adapt to minor pattern changes, but you have the flexibility to fine-tune the schedule to your liking.
5. Review and Refine: Regularly review the schedule created by the Auto-Schedule feature to ensure it aligns with your routine and preferences. If you notice any inconsistencies or changes in your schedule, make manual adjustments to maintain optimal comfort throughout the day.
6. Overriding the Auto-Schedule: There may be occasions when you want to temporarily override the Auto-Schedule to make immediate temperature adjustments. Simply adjust the temperature using the physical controls or the Nest app. The Auto-Schedule will resume according to your regular routine once the temporary override period ends.
7. Utilizing Other Nest Features: The Auto-Schedule feature works in conjunction with other Nest capabilities, such as Home/Away Assist and Energy-Saving Mode. By enabling these features and customizing their settings, you can further optimize your thermostat’s performance, comfort, and energy efficiency.
8. Continuous Learning: The Auto-Schedule feature continues to learn and adapt based on your temperature preferences and routine changes. Over time, it becomes more accurate and refined in creating a schedule that meets your needs.
By enabling and customizing the Auto-Schedule feature, you can automate the creation of a personalized schedule for your Nest thermostat. The thermostat learns your temperature preferences, adapts to routine changes, and simplifies your comfort settings. Take advantage of this powerful feature to enhance convenience and energy efficiency in your home.
Step 6: Setting Your Nest Thermostat to Away Mode
Setting your Nest thermostat to Away mode is a useful feature that allows you to save energy when you’re not at home. By activating the Away mode, your thermostat will adjust the temperature settings to an energy-saving level until you return. Follow these steps to set your Nest thermostat to Away mode:
1. Access the Home/Away Settings: On the Nest thermostat, press the display twice to access the Quick View menu. From there, select the “Settings” option. Scroll down and choose “Home/Away Assist” from the list of available settings.
2. Select Away Mode: In the Home/Away Assist settings menu, you can choose how the thermostat detects when you’re away. Depending on your preference, you can use the built-in occupancy sensor or enable the GPS tracking feature through the Nest app on your smartphone or tablet. Select the desired option to activate the Away mode.
3. Adjust the Away Temperature: Once the Away mode is activated, you can customize the temperature that your Nest thermostat will maintain while you’re away. Go to the settings menu and select “Temperature” to modify the Away temperature. Decreasing the temperature a few degrees below your usual comfort level can help save energy during your absence.
4. Set the Duration: You can also specify how long your Nest thermostat will remain in Away mode once it detects that you’re no longer at home. The duration options vary, allowing you to choose a timeframe that aligns with your typical absence. The thermostat will automatically return to the regular schedule when the set duration expires.
5. Manual Activation: If you prefer, you can manually activate the Away mode at any time, even if you’re still at home. Access the Quick View menu on your thermostat and select “Away.” This option is useful if you’re planning an extended absence or want to conserve energy during specific periods.
6. Automatic Recovery: When you return home, your Nest thermostat will automatically detect your presence and switch from Away mode to the regular schedule. This feature ensures that you come back to a comfortable temperature without the need for manual adjustments.
7. Override the Away Mode: If necessary, you can temporarily override the Away mode to make immediate temperature adjustments. Simply adjust the temperature using the physical controls or the Nest app. The thermostat will continue following the regular schedule until the next programmed Away period begins.
8. Customize Away-Related Features: Explore additional features related to the Away mode, such as the Eco Mode and Home/Away Assist. These features can help further optimize your thermostat’s energy-saving capabilities and tailor them to your needs.
By setting your Nest thermostat to Away mode, you can conserve energy and reduce utility costs when you’re not at home. Take advantage of the customizable settings and automation features to tailor the Away mode to your comfort preferences and routine. Your Nest thermostat will efficiently save energy during your absence and ensure a comfortable environment upon your return.
Step 7: Using the Nest App to Control Your Thermostat Remotely
One of the key benefits of owning a Nest thermostat is the ability to control it remotely using the Nest app. With the app installed on your smartphone or tablet, you can easily adjust temperature settings, set schedules, and access advanced features wherever you are. Follow these steps to make the most of the Nest app and control your thermostat remotely:
1. Download and Install the Nest App: Search for the Nest app in your device’s app store, whether it’s the Apple App Store for iOS devices or the Google Play Store for Android. Download and install the app, then open it to begin the setup process.
2. Create or Sign In to Your Account: If you’re a new Nest user, you’ll need to create an account using your email address and password. If you already have a Nest account, simply sign in using your existing credentials.
3. Add Your Thermostat to the App: In the app’s home screen, tap on the “+” symbol or “Add” button to add your thermostat. Follow the on-screen instructions, which may include scanning a QR code on the back of the thermostat or inputting a unique key. Once connected, your thermostat will appear in the app’s device list.
4. Control Temperature Settings: From the app’s main screen, select your thermostat to access its controls. You can adjust temperature settings by sliding your finger along the temperature scale or tapping on the up and down arrows. Changes made in the app will be reflected on your thermostat’s display.
5. Set Schedules: Using the app, you can easily set up schedules for your thermostat. Tap on the schedule icon or menu option, then follow the prompts to create or modify schedules. The app provides a user-friendly interface for setting temperature targets for different times of the day and days of the week.
6. Activate Home/Away Assist: Access the settings menu in the app to enable and customize the Home/Away Assist feature. This feature utilizes your smartphone’s location to automatically adjust the thermostat’s settings based on whether you’re at home or away. It helps optimize comfort and energy efficiency, even when you forget to manually adjust the temperature.
7. Receive Temperature Notifications: Customize the app’s notification settings to receive alerts and reminders related to your thermostat. You can set up notifications for when the temperature exceeds a certain threshold, schedule changes, or reminders to change air filters. This feature keeps you informed of critical thermostat-related events.
8. Monitor Energy Usage: The Nest app provides insights into your thermostat’s energy usage. View energy reports and trends to better understand your heating and cooling patterns. This information can help you make informed decisions to optimize energy efficiency and reduce utility costs.
Using the Nest app gives you convenient access to your thermostat’s controls and features, no matter where you are. Make use of its intuitive interface, ability to set schedules, and automation options to effortlessly manage your thermostat and create a comfortable home environment. Explore the app’s additional features to enhance energy savings, receive notifications, and gain valuable insights into your thermostat’s performance.
Step 8: Learning from Your Usage and Making Adjustments
As you use your Nest thermostat, it learns from your habits and preferences, allowing it to make adjustments that maximize comfort and energy efficiency. This ongoing learning process is an important aspect of optimizing your thermostat’s performance. Follow these steps to ensure you get the most out of your Nest thermostat:
1. Monitor and Analyze: Keep an eye on your thermostat’s performance and energy usage reports provided by the Nest app. Regularly review these reports to identify patterns and trends in your heating and cooling usage. This information will help you better understand your energy consumption and make informed adjustments.
2. Utilize Energy-Saving Features: Take advantage of the energy-saving features available on your Nest thermostat. Enable features such as Eco Mode or Home/Away Assist to optimize energy efficiency when you’re not at home. These features can help reduce energy consumption and lower your utility bills without sacrificing comfort.
3. Track Temperature Preferences: Pay attention to the temperature preferences you set for different times of the day and adjust them as needed. If you find certain rooms consistently too warm or too cold, consider using additional temperature sensors or adjusting airflow to balance comfort throughout your home.
4. Make Adjustments to Schedules: Your routine may change over time, or you may discover better temperature settings for specific periods of the day. Regularly review and adjust your thermostat’s schedules to ensure they align with your current lifestyle and preferences. This will help maintain optimal comfort while minimizing energy waste.
5. Experiment with Manual Adjustments: While the Nest thermostat offers smart learning capabilities, don’t be afraid to make manual adjustments when needed. Trust your own comfort preferences and make immediate temperature changes using the physical controls or the Nest app. This ensures that you stay comfortable in real-time situations.
6. Explore Additional Nest Features: Nest offers a range of additional features and accessories that can enhance your thermostat’s performance. Consider adding room sensors to regulate temperature in specific areas of your home or integrating other Nest products like smoke detectors or smart locks. These additional features can further improve your comfort, safety, and energy efficiency.
7. Stay Informed: Keep up to date with software updates and new features released by Nest. These updates may introduce enhancements, bug fixes, and new tools to improve your thermostat’s performance and user experience. Stay informed through the Nest app or their website to take full advantage of the latest advancements.
By monitoring your thermostat’s usage, leveraging energy-saving features, making adjustments to schedules, and exploring additional features, you can continuously optimize your Nest thermostat’s performance. Stay engaged with your thermostat’s learning process and make personalized adjustments to ensure it meets your comfort preferences while helping you conserve energy and reduce costs.