
Overview
Printing Google Slides with notes is a useful feature when you want to have a physical copy of your presentation and include additional information for reference. Whether you’re a student preparing for a presentation or a professional creating a handout for a meeting, this guide will walk you through the steps to print Google Slides with notes.
Google Slides is a web-based presentation tool that allows you to create, edit, and share slideshows online. With its intuitive interface and collaborative features, it has become a popular choice for users who want to create visually appealing presentations.
One of the key features of Google Slides is the ability to add speaker notes to each slide. Speaker notes allow you to provide additional information or reminders that can help you deliver a more engaging presentation. When printing Google Slides with notes, you have the option to include these speaker notes alongside the slides.
By printing your Google Slides with notes, you can have a physical copy of your presentation that includes all the essential information. This can be particularly helpful in situations where you need to distribute handouts or when you want to review your presentation offline.
In this step-by-step guide, we will outline the process of printing Google Slides with notes. Whether you are using Google Slides for personal or professional purposes, this guide will help you make the most of this powerful presentation tool.
Step 1: Open Google Slides
Before you can print your Google Slides with notes, you need to open the Google Slides application. Here’s how to do it:
1. Open a web browser on your computer.
2. Go to the Google Slides website (https://slides.google.com).
3. Sign in to your Google account if you haven’t already.
4. Once you’re signed in, you’ll be directed to the Google Slides homepage.
If you already have a Google Slides presentation created, you can open it by clicking on the presentation title from the homepage or by navigating to the Google Drive where your presentation is saved.
If you don’t have a presentation yet, you can create a new one by clicking on the “Blank” option or selecting a template from the available options.
Google Slides offers a wide range of templates and themes to choose from, so you can customize your presentation to fit your style or purpose.
Once you have opened or created your Google Slides presentation, you’re ready to move on to the next step, where we’ll explore how to access the printing options.
Step 2: Go to the File Menu
Now that you have your Google Slides presentation open, it’s time to access the file menu where you’ll find the printing settings. Here’s how to do it:
1. At the top left corner of the screen, you’ll see the toolbar. Click on the “File” option in the toolbar.
2. A drop-down menu will appear with various options.
3. From the drop-down menu, click on the “Print” option. This will open the Print settings and preview window.
The File menu in Google Slides provides a range of options for managing your presentation, including saving, exporting, and printing. By selecting the “Print” option, you can configure the printing settings to include your speaker notes.
It’s important to note that the specific location of the File menu may vary slightly depending on the device or web browser you’re using. However, you can always locate it at the top left corner of the Google Slides interface.
Now that you have accessed the Print settings and preview window, we can move on to the next step where we’ll explore the layout options for printing your Google Slides with notes.
Step 3: Click on Print Settings and Preview
Once you’ve opened the “Print” option from the File menu, you’ll be taken to the Print settings and preview window in Google Slides. This step allows you to configure the printing options before generating a physical copy of your presentation with speaker notes. Here’s what you need to do:
1. In the Print settings and preview window, you’ll see an overview of your slides on the right-hand side of the screen.
2. On the left-hand side of the screen, you’ll find a panel with various settings and options.
3. Take a moment to review the slides in the preview pane to ensure they appear as you intended. You can use the navigation arrows to navigate through the slides.
4. In the settings panel, you have the option to customize the layout, range, and other print settings for your presentation.
The Print settings and preview window provide you with the flexibility to adjust the settings according to your requirements. For example, you can choose to print all slides or a specific range of slides, adjust the scale of the slides, and control other print settings.
Additionally, in this step, you’ll find options to configure the layout settings for your printed handouts, including the orientation (portrait or landscape), number of slides per page, and the inclusion of speaker notes.
By default, Google Slides will include the speaker notes along with the slides when you choose to print with notes. However, if you prefer to exclude the speaker notes, you can uncheck the corresponding option in the settings panel.
Once you have reviewed and adjusted the print settings and previewed your slides, you’re ready to proceed to the next step where we’ll explore the layout options for printing your Google Slides with notes.
Step 4: Select the Layout Options
After accessing the Print settings and preview window in Google Slides, you can now customize the layout options for printing your presentation with speaker notes. Here’s how you can do it:
1. In the Print settings and preview window, locate the “Layout” section in the settings panel on the left-hand side of the screen.
2. Under the “Layout” section, you will find options to choose the orientation (portrait or landscape) and the number of slides per page.
3. Select the desired orientation by clicking on the “Portrait” or “Landscape” option.
4. Choose the number of slides you want to include per page using the drop-down menu next to the “Slides” option.
The layout options allow you to customize how your slides and speaker notes will appear on the printed page. You can choose the orientation that best fits your needs and adjust the number of slides per page to conserve paper or provide a more compact layout.
Additionally, under the “Layout” section, you may find other options like “Paper size” and “Scale.” These options enable you to select the paper size for printing and adjust the scale of the slides if needed.
It’s important to choose the layout options that ensure the legibility and clarity of your speaker notes and slides when printed. Consider the purpose and audience of your printed handouts to determine the most suitable layout for your presentation.
Once you have selected the desired layout options, you’re ready to proceed to the next step where we’ll explore how to include the speaker notes when printing your Google Slides.
Step 5: Check the “Include Speaker Notes” Box
In order to print your Google Slides with speaker notes, you need to ensure that the “Include Speaker Notes” option is selected in the Print settings and preview window. Here’s how you can do it:
1. Look for the “Include Speaker Notes” checkbox in the settings panel of the Print settings and preview window.
2. Check the box next to “Include Speaker Notes” to enable the printing of speaker notes.
When the “Include Speaker Notes” option is checked, Google Slides will include your speaker notes alongside the corresponding slides when you print your presentation. This allows you to have a comprehensive handout that includes additional information, reminders, or cues to support your verbal presentation.
Speaker notes are a valuable aspect of creating engaging and informative presentations. They provide you with a space to add relevant details, expand on key points, and remember important talking points during your presentation.
By including speaker notes in your printed handouts, you can enhance the understanding and retention of the presentation content for the audience. They can refer to the speaker notes as a helpful reference while reviewing your presentation or when following along during the actual presentation.
Once you have checked the “Include Speaker Notes” box, you have successfully set up the option to print your Google Slides with speaker notes. Now, you’re ready to proceed to the next step where we’ll configure other essential printing settings.
Step 6: Configure Other Printing Settings
In addition to selecting the layout options and including speaker notes, there are a few other printing settings you can configure to customize your Google Slides printout. Here’s how you can configure these settings:
1. In the Print settings and preview window, review the additional settings available in the settings panel.
2. Explore options such as “Color,” “Copies,” “Margins,” and “Paper size” to adjust according to your preferences.
3. Choose whether you want to print in color or black and white by selecting the appropriate option under the “Color” setting.
4. Adjust the number of copies you want to print by entering the desired quantity in the “Copies” field.
5. Set the margins for your printed slides by selecting a preset option or customizing the values in the “Margins” section.
6. Select the paper size that matches the size of the paper you plan to use for printing.
These additional printing settings allow you to further tailor the physical copy of your Google Slides presentation to meet your specific requirements. You can choose whether to print in color or black and white, adjust the number of copies, set the margins to ensure nothing is cut off, and select the appropriate paper size for the printout.
It’s important to note that the available options may vary based on your printer and operating system settings. Therefore, it’s recommended to review the settings and adjust them as needed to optimize the quality and appearance of your printed handouts.
Once you have configured the other printing settings according to your preferences, you’re now ready to proceed to the final step, where we’ll review the print preview and initiate the printing process.
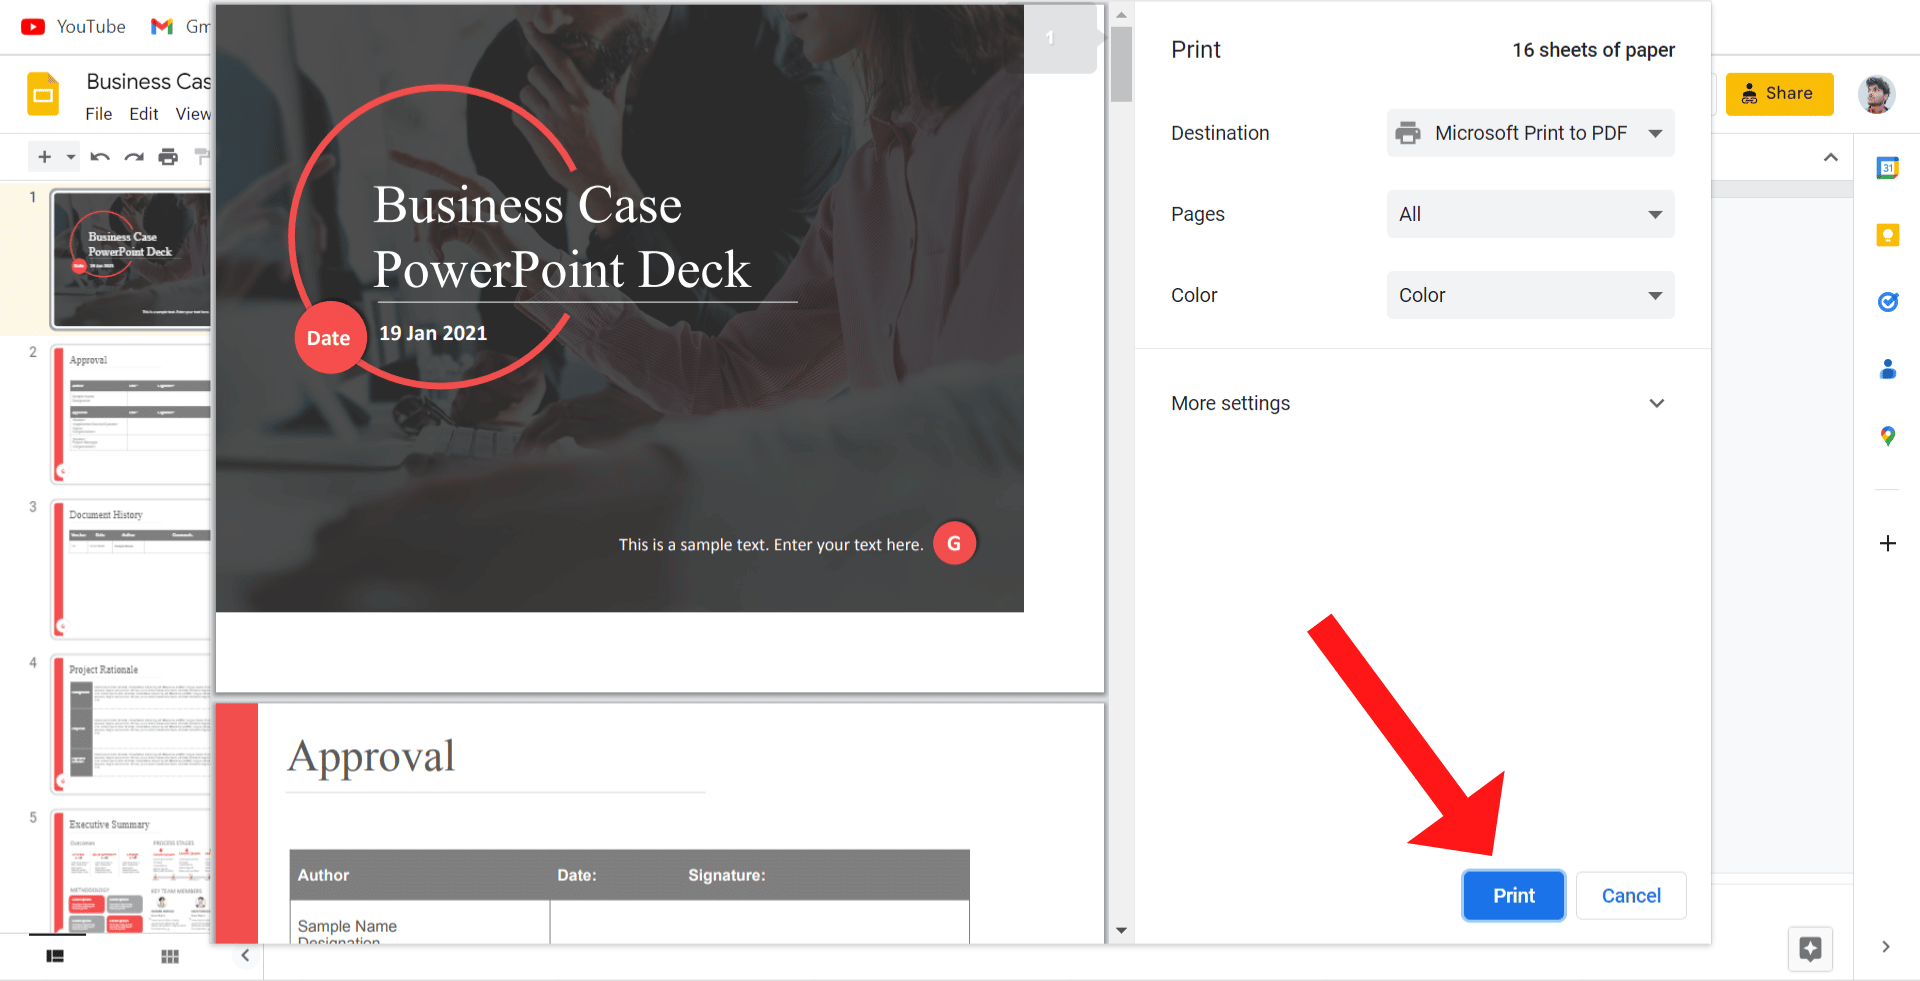
Step 7: Preview and Print
After configuring the necessary printing settings, it’s essential to preview your Google Slides printout to ensure everything appears as intended before initiating the printing process. Here’s what you need to do in this final step:
1. Take a moment to review the print preview of your slides and speaker notes on the right-hand side of the Print settings and preview window.
2. Use the navigation arrows or the slide thumbnails to navigate through the pages of your presentation and ensure no important information is missing.
3. Pay close attention to the layout, formatting, and legibility of your slides, speaker notes, and any other content present in your presentation.
4. If you notice any issues or errors, you can go back and make adjustments to the printing settings and layout options to rectify them.
5. Once you are satisfied with the preview and confident that all the necessary information is present and correctly formatted, it’s time to initiate the printing process.
6. Click on the “Print” button in the Print settings and preview window to start the printing.
7. Follow the prompts provided by your operating system and printer to complete the printing process.
By following these steps, you’ll be able to preview your Google Slides printout and ensure the quality and accuracy of your physical handouts. Taking the time to review the print preview helps prevent wasted resources and ensures that you have a professional and polished final output.
Remember to have your printer properly set up and have enough paper and ink or toner cartridges before initiating the printing process to avoid any interruptions or delays.
Once you have successfully printed your Google Slides with speaker notes, you can distribute them to your audience, share them digitally, or use them as a reference for your presentation.