
Checking the Default Gateway IP Address
Before accessing your router settings, you need to know the default gateway IP address of your network. This IP address is essential for accessing the router’s configuration page.
To find the default gateway IP address on Windows, follow these steps:
- Open the Command Prompt by pressing “Windows Key + R,” typing “cmd” in the Run dialog box, and then clicking “OK.”
- In the Command Prompt window, type “ipconfig” and press Enter.
- A list of network connections and their configurations will appear. Locate the “Default Gateway” entry, which will display the IP address assigned to your router. Note down this IP address.
Alternatively, you can check the default gateway IP address through the Network and Sharing Center. Here’s how:
- Click on the Wi-Fi or Ethernet icon in the system tray to open the Network and Sharing Center.
- Click on your network connection, which will open a new window.
- In the new window, click on the “Details” button.
- A dialog box will appear, showing various network details. Look for the “IPv4 Default Gateway” entry to find the IP address of your router.
Once you have obtained the default gateway IP address, you can proceed to access the router settings page.
Accessing the Router Settings Page
To configure your router and make changes to its settings, you need to access the router’s settings page. Here are the steps to follow:
- Open a web browser on your Windows computer.
- In the address bar, type in the default gateway IP address you obtained in the previous section.
- Press Enter to load the router settings page.
The router settings page may prompt you to enter a username and password. These credentials are necessary to log in and access the settings. If you haven’t changed the default username and password, you can find them in the router’s documentation or on the manufacturer’s website.
Once you have entered the correct login credentials, you will be granted access to the router settings page. The appearance and organization of the settings may vary depending on the router’s make and model.
It’s worth noting that some routers have a separate mobile app or software that you can use to access and configure the router settings. In such cases, you may need to download the app or install the software on your Windows computer.
Additionally, if you are accessing the router settings page remotely, you may need to enable remote access on the router and set up a Dynamic DNS (DDNS) service.
Now that you have successfully accessed the router settings page, you can start exploring the various options and configurations available to customize your network settings.
Using the Command Prompt to Open Router Settings
If you prefer a command-line approach, you can also use the Command Prompt on your Windows computer to open the router settings. Follow these steps:
- Open the Command Prompt by pressing “Windows Key + R,” typing “cmd” in the Run dialog box, and then clicking “OK.”
- In the Command Prompt window, type “telnet [default gateway IP address]” and press Enter. Replace “[default gateway IP address]” with the actual IP address of your router.
- If Telnet is enabled on your router and the IP address is correct, you will establish a Telnet session.
- Next, enter the router’s username and password when prompted. If you haven’t changed the default credentials, refer to the router’s documentation or manufacturer’s website for the default login details.
- After successful login, you will have access to the router’s command-line interface (CLI), where you can execute specific commands to configure the router settings.
It’s important to note that not all routers support Telnet access, and some newer models may require additional configuration to enable Telnet. Moreover, Telnet is considered less secure compared to other methods of accessing router settings, so exercise caution when using this method.
If the Telnet command doesn’t work or you prefer a more user-friendly interface, using a web browser to access the router settings page is recommended.
By using the Command Prompt to open router settings, you can quickly access and configure specific features or troubleshoot issues using the power of command-line tools.
Using the Control Panel to Open Router Settings
If you prefer a graphical user interface, you can use the Control Panel on your Windows computer to open the router settings. Here’s how:
- Click on the “Start” menu and open the Control Panel.
- In the Control Panel window, select the “Network and Internet” category.
- Under the “Network and Internet” category, click on the “View network status and tasks” link.
- In the Network and Sharing Center window, click on the “Change adapter settings” link on the left-hand side.
- A new window will open, displaying all the network connections on your computer. Right-click on the network connection that is currently active and select “Properties” from the context menu.
- In the Connection Properties window, double-click on the “Internet Protocol Version 4 (TCP/IPv4)” entry.
- Another window will appear, showing the TCP/IP settings for the selected network connection. Click on the “Advanced” button.
- In the Advanced TCP/IP Settings window, navigate to the “WINS” tab and click on the “Default Gateway” checkbox.
- Click on the “Add” button and enter the IP address of your router as the default gateway.
- Click “OK” to save the changes and close all the open windows.
By adding the default gateway IP address through the Control Panel, you can conveniently access the router settings page directly from the network connection properties. Simply open a web browser and enter the default gateway IP address to access and configure your router settings.
Note that these steps may vary slightly depending on the version of Windows you are using. If you encounter any difficulties, refer to the Windows documentation or seek assistance from the manufacturer of your computer or router.
Opening Router Settings with the Network and Sharing Center
The Network and Sharing Center in Windows provides a convenient way to open the router settings. Follow these steps:
- Click on the network icon in the system tray to open the Network and Sharing Center.
- In the Network and Sharing Center window, click on the “Change adapter settings” link on the left-hand side.
- A new window will open, displaying all the network connections on your computer. Right-click on the active network connection you are using and select “Status” from the context menu.
- In the Status window, click on the “Details” button.
- A dialog box will appear, showing various details about the network connection. Look for the “IPv4 Default Gateway” field, which displays the IP address of your router.
- Once you have obtained the default gateway IP address, open a web browser and type it into the address bar.
- Press Enter to access the router settings page.
Through the Network and Sharing Center, you can easily find the default gateway IP address and quickly access the router settings page without going through multiple menus or settings windows.
It’s worth mentioning that the steps may vary slightly depending on the version of Windows you are using. If you encounter any difficulties, refer to the Windows documentation or consult the manufacturer’s support resources for your computer or router.
Now that you have successfully opened the router settings, you can proceed to configure various network settings and customize your router according to your requirements.
Logging in to the Router Settings Page
Before you can make any changes to your router’s settings, you’ll need to log in to the router settings page. Here’s how:
- Open a web browser on your Windows computer and enter the default gateway IP address in the address bar. Press Enter.
- The router settings page will load, prompting you to enter a username and password. By default, many routers use a generic username such as “admin” and a default password, which can often be found in the router’s documentation or on the manufacturer’s website.
- Once you’ve entered the username and password, click the “Login” or “Sign In” button.
If you’ve changed the default login credentials in the past but can’t recall them, you may need to reset your router to factory settings. Most routers have a small reset button located on the back or bottom. Use a pin or paperclip to press and hold the reset button for about 10 seconds until the router restarts.
After resetting the router, the default login credentials will be restored, allowing you to log in using the original username and password.
It’s essential to change the default username and password after logging in for the first time. This strengthens the security of your router and prevents unauthorized access.
If you’ve forgotten the customized username and password, you may need to perform a factory reset again or contact the router’s manufacturer for further assistance.
Once you successfully log in to the router settings page, you’ll have access to various configuration options to manage and customize your network settings. Remember to save any changes you make to ensure they take effect.
Navigating the Router Settings Menu
After logging in to the router settings page, you’ll find yourself in the main interface, typically referred to as the router settings menu. This menu allows you to navigate various configuration options to customize and manage your router’s settings. Here’s a guide on navigating the router settings menu:
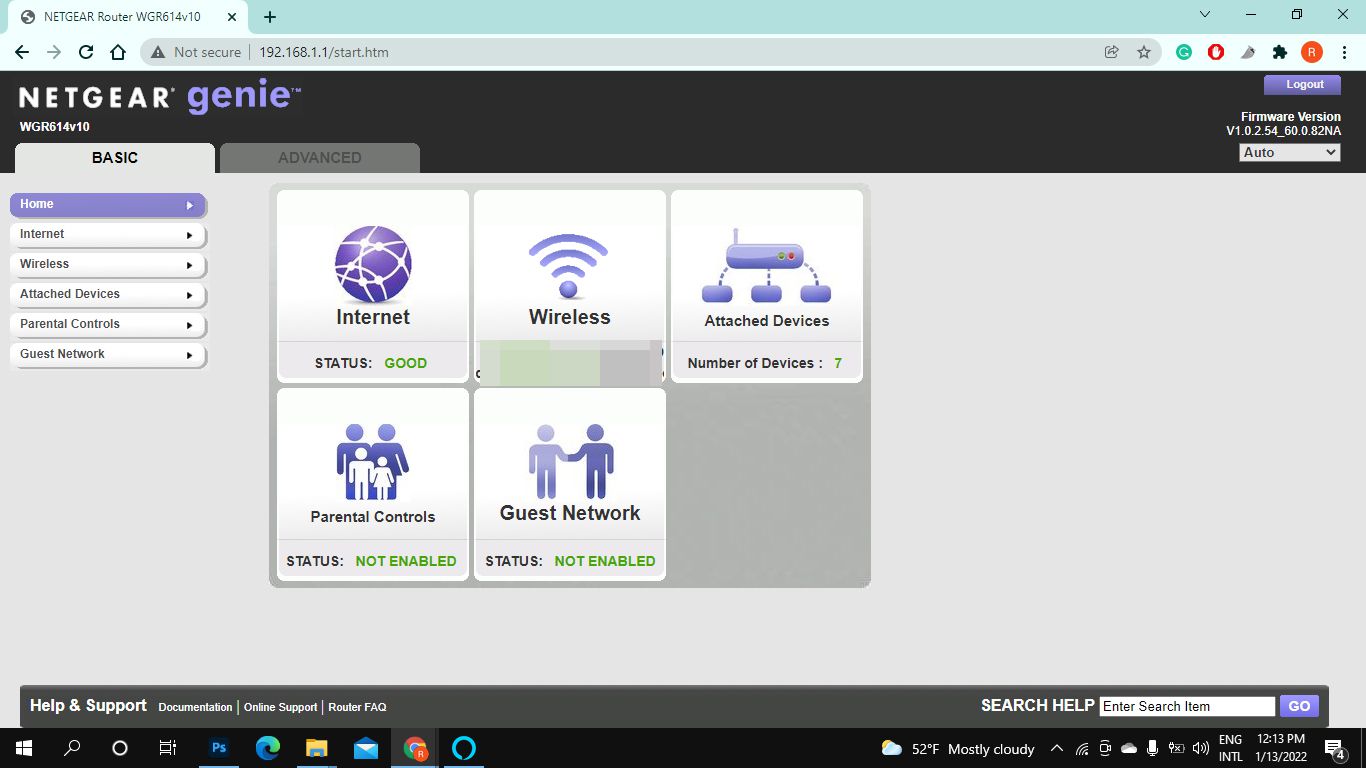
- Dashboard/Home: This is the landing page of the router settings menu. It provides an overview of your network’s current status, including connection information, active devices, and any important notifications or updates.
- Wireless/Wi-Fi Settings: This section allows you to configure your router’s wireless network settings. You can change the network name (SSID), set a password, enable guest networks, adjust wireless signal strength, and manage connected devices.
- Network/Internet Settings: Here, you can customize your network settings, including IP address configuration, DNS settings, and enabling or disabling DHCP (Dynamic Host Configuration Protocol).
- Security/Firewall Settings: This section allows you to manage your router’s security features. You can enable or disable the firewall, set up port forwarding, create access control rules, and configure VPN (Virtual Private Network) settings.
- Parental Controls: In this section, you can set up parental controls to restrict access to certain websites or limit internet usage for specific devices connected to your network.
- Advanced Settings: This section provides access to more advanced configuration options, such as QoS (Quality of Service) settings, VLAN (Virtual Local Area Network) settings, firmware updates, and system log information.
- Administration: Here, you can manage administrative settings for your router, including changing the login credentials, updating the firmware, managing user accounts, and performing system backups or restores.
These are some of the common sections you may find in the router settings menu. The layout and organization of the settings may vary depending on your router’s make and model. Take some time to explore the different options available to fully customize your network settings.
Remember to save any changes you make to the settings before navigating away from a particular section. This ensures that your changes are applied and take effect.
By navigating the router settings menu, you can fine-tune your network configuration and optimize your router’s performance according to your specific needs.
Configuring Network Settings in the Router Settings Page
One crucial aspect of managing your router is configuring the network settings. This section of the router settings page allows you to customize various parameters related to your network. Here’s a guide on how to configure network settings:
- IP Address Configuration: In this section, you can choose between dynamic or static IP address assignment for your network devices. Most users opt for dynamic IP allocation, which allows the router to automatically assign IP addresses to connected devices using DHCP.
- DNS Settings: DNS (Domain Name System) settings determine how your router resolves domain names into IP addresses. You can use default DNS servers provided by your ISP or configure custom DNS servers like Google DNS or OpenDNS for improved performance or additional features.
- Subnet Mask: The subnet mask defines the range of IP addresses available in your network. It works in conjunction with the IP address to determine which devices are part of your local network.
- Gateway: The gateway or default gateway is the IP address of your router. It serves as the access point for devices to connect to other networks or the internet.
- LAN/WAN Configuration: In this section, you can set parameters specific to your local network (LAN) and wide area network (WAN) connections. This includes specifying the WAN connection type, configuring VLANs, and managing LAN IP settings.
- Port Forwarding: Port forwarding allows you to forward specific ports on your router to designated devices within your network. This is useful for hosting servers or accessing certain applications or services remotely.
- DHCP Settings: DHCP (Dynamic Host Configuration Protocol) settings control how IP addresses are allocated to devices within your network. You can set the lease time, reserve IP addresses for specific devices, and define the DHCP range.
It’s important to note that the specific options and terminology may vary depending on your router’s manufacturer and model. Refer to your router’s documentation or online resources for detailed instructions specific to your device.
Take your time to configure network settings carefully, ensuring they align with your network requirements and priorities. Make sure to save any changes you make in the router settings page to apply the new configurations.
By configuring network settings, you can optimize your network’s performance, enhance security, and enable specific features that cater to your network’s needs.
Customizing Wi-Fi Settings in the Router Setup
The Wi-Fi settings in your router setup allow you to customize and fine-tune your wireless network for optimal performance and convenience. Here’s a guide on how to customize Wi-Fi settings:
- Network Name (SSID): The SSID is the name of your wireless network that appears when devices search for available networks. Consider choosing a unique and easily identifiable SSID to differentiate it from neighboring networks.
- Security Mode: You can select the security mode for your Wi-Fi network to protect it from unauthorized access. The most common options include WPA2-PSK (Wi-Fi Protected Access II – Pre-Shared Key) or WPA3-PSK for enhanced security.
- Wi-Fi Password: Set a strong and secure password for your Wi-Fi network to prevent unauthorized users from connecting. Use a combination of letters, numbers, and special characters and avoid using easily guessable passwords.
- Channel Selection: Wi-Fi networks operate on different channels, and interference can occur if neighboring networks are on the same channel. Choose the optimal channel or enable automatic channel selection for minimal interference and better performance.
- Bandwidth and Channel Width: Depending on your router and device capabilities, you may have options to select the bandwidth (2.4 GHz or 5 GHz) and channel width (20 MHz, 40 MHz, or 80 MHz). Choosing the appropriate settings can influence network performance and compatibility.
- Guest Network: Creating a separate guest network allows visitors to connect to the internet without accessing your main network. Enable this feature if you frequently have guests and want to ensure the privacy and security of your primary network.
- Wi-Fi Range and Signal Strength: Adjusting the transmit power or antenna options can help enhance the Wi-Fi range and signal strength within your network coverage area. Experiment with different settings to find the best balance between coverage and signal quality.
It’s important to note that the available customization options may vary depending on your router’s make and model. Always refer to your router’s documentation or online resources for specific instructions tailored to your device.
After making any changes to your Wi-Fi settings, be sure to save the changes to apply them. Devices connected to your network will need to reconnect using the updated credentials if any changes were made to the SSID or Wi-Fi password.
By customizing your Wi-Fi settings, you can optimize network performance, enhance security, and provide a personalized wireless experience for your connected devices and users.
Managing Security Settings in the Router Configuration
Securing your router is crucial to protect your network and connected devices from potential threats. In the router configuration, you can manage several security settings to enhance the overall security of your network. Here’s a guide on how to manage security settings:
- Change Default Login Credentials: The default username and password for your router’s configuration page are often well-known and easily exploitable. Change these credentials to a strong and unique combination to prevent unauthorized access.
- Enable WPA2 or WPA3 Encryption: Use WPA2 (Wi-Fi Protected Access II) or WPA3 encryption to secure your wireless network. This prevents eavesdropping and unauthorized access by encrypting the data transmitted between your router and devices.
- Disable WPS (Wi-Fi Protected Setup): WPS can be a security vulnerability, allowing potential attackers to bypass encryption. Disable this feature unless it’s absolutely necessary for certain devices.
- Firewall Configuration: Enable and configure your router’s firewall to protect your network from unwanted incoming connections. You can set up default rules and create specific rules to allow or block traffic based on your requirements.
- Enable MAC Address Filtering: MAC (Media Access Control) address filtering allows you to specify which devices are allowed to connect to your network based on their unique MAC addresses. Add trusted devices to the whitelist and block unauthorized devices.
- Enable Intrusion Detection/Prevention: Some routers offer built-in intrusion detection and prevention systems. Enable these features to detect and block suspicious network activity, such as malicious attacks or unauthorized access attempts.
- Regular Firmware Updates: Keep your router’s firmware up to date to ensure you have the latest security patches and bug fixes. Check the manufacturer’s website periodically for firmware updates and follow the instructions provided to update your router.
- Disable Remote Management: Unless you require remote management access, it’s generally recommended to disable this feature. Remote management can be a security risk if not properly secured.
Always consult your router’s documentation or online resources for specific instructions and security features available for your device. Additionally, consider implementing good security practices such as using strong passwords, regularly checking device connections, and monitoring network activity.
By managing security settings in your router configuration, you can strengthen the overall security of your network and mitigate potential risks and vulnerabilities.
Advanced Settings in the Router Setup
In addition to basic network and security configurations, routers offer advanced settings that allow for more precise control and customization of your network. These settings are typically found in the router setup and can provide additional functionality and performance optimizations. Here’s an overview of some common advanced settings:
- Quality of Service (QoS): QoS settings enable you to prioritize certain types of network traffic over others. This can be useful when you want to ensure smooth streaming, low-latency gaming, or prioritize VoIP (Voice over Internet Protocol) calls.
- Virtual Local Area Network (VLAN): VLAN settings allow you to segment your network into separate virtual networks, enhancing security and improving network efficiency by isolating devices and controlling data flow between segments.
- Port Forwarding: Port forwarding is useful when you need to direct incoming internet traffic from a specific port to a designated device on your network. This is commonly used for hosting servers or setting up remote access to certain applications.
- Dynamic DNS (DDNS): DDNS allows you to assign a domain name to your dynamic IP address. This enables you to remotely access your network using a fixed domain name, even if your ISP assigns you a dynamic IP address that changes periodically.
- VPN (Virtual Private Network): Setting up a VPN on your router provides an added layer of security and privacy for your internet connection. It encrypts your traffic and routes it through a secure server, enabling secure remote access to your network.
- Wireless Bridge Mode: Wireless bridge mode allows you to connect multiple routers wirelessly, extending the coverage area of your network. This can be useful in larger homes or offices where a single router may not provide adequate coverage.
- Firmware Management: Advanced settings often include options for managing and updating router firmware. Regularly updating the firmware ensures that your router has the latest features, bug fixes, and security patches.
It’s important to note that advanced settings differ among router models and manufacturers. Additionally, accessing advanced settings may require an understanding of networking concepts and technical knowledge.
For specific instructions on accessing and configuring advanced settings, refer to your router’s documentation or online resources provided by the manufacturer. Be cautious when making changes to advanced settings, and always save any changes to ensure they take effect.
By exploring and utilizing advanced settings in your router setup, you can enhance the capabilities, performance, and security of your network according to your specific requirements.
Troubleshooting Router Connection Issues
Router connection issues can be frustrating, but with some troubleshooting techniques, you can often identify and resolve the problem. Here are some steps to help troubleshoot common router connection issues:
- Check Physical Connections: Ensure that all cables connecting your router to the modem and devices are securely plugged in. Verify that the power source is working and the router’s lights indicate it is receiving power.
- Restart Router and Modem: Power cycling your router and modem can often resolve connectivity issues. Turn off both devices, wait for a few seconds, and then turn them back on. Allow them to fully restart before testing the connection.
- Ensure Proper Placement: Place your router in a central location, away from obstructions and electronic devices that may cause interference. Ensure that the signal can reach all areas you want to connect from.
- Check Wi-Fi Signal and Channels: Use your device’s Wi-Fi settings to check the signal strength. Consider switching to a less congested Wi-Fi channel if you experience slow speeds or intermittent connections. This can be done through the router settings page.
- Update Router Firmware: Outdated router firmware can cause connectivity issues. Check the router manufacturer’s website for firmware updates and follow their instructions to update your router’s firmware.
- Disable Firewall or Antivirus: Temporarily disable any third-party firewall or antivirus software on your computer to check if they are causing connectivity problems. If the connection works with the firewall disabled, configure it to allow network traffic.
- Reset Router to Factory Settings: If all else fails, you can perform a factory reset on your router. This will erase all custom settings and revert it to its original state. Refer to your router’s documentation for instructions on how to perform a factory reset.
If these steps do not resolve the issue, there may be a problem with your internet service provider (ISP), or the router itself may be faulty. In such cases, contact your ISP for further assistance or consider contacting the router’s manufacturer for support.
Remember, troubleshooting router connection issues may require a combination of techniques and patience. It’s essential to document any changes you make during the troubleshooting process, as this can help pinpoint the cause of the problem and facilitate future troubleshooting if needed.
By following these troubleshooting steps, you can often resolve common router connection issues and get your network up and running smoothly once again.
Updating Firmware in the Router Settings
Regularly updating your router’s firmware is important for optimal performance, security enhancements, and accessing new features. Firmware updates can address bugs, vulnerabilities, and compatibility issues. Here’s a guide on updating the firmware in the router settings:
- Check for Firmware Updates: Visit the manufacturer’s website or access the router settings page to check if there are any firmware updates available for your model. Look for a “Firmware Update” or “Router Upgrade” section.
- Download the Firmware: If there is a new firmware version available, download it from the manufacturer’s website and save it to your computer. Make sure to download the correct firmware for your specific router model.
- Access the Router Settings Page: Open a web browser on your Windows computer and enter the default gateway IP address of your router in the address bar. Press Enter to access the router settings page.
- Login to the Router: Enter the username and password for your router to log in. If you have previously changed the login credentials, use the updated credentials. If you can’t remember the credentials, consult your router’s documentation or perform a factory reset to use the default login details.
- Locate the Firmware Update Section: Once logged in, navigate to the “Firmware Update” or “Router Upgrade” section in the router settings. The location may vary depending on your router’s interface and firmware version.
- Upload and Install the Firmware: Look for an option to browse for the firmware file you downloaded earlier. Select the file and click the “Upload” or “Upgrade” button to start the firmware update process. Be patient and avoid interrupting the process until completed.
- Wait for the Update to Complete: The firmware update process may take several minutes. During this time, the router may restart automatically or display a progress bar indicating the update’s status. Avoid turning off the router or closing the browser until the update completes.
- Verify the Firmware Update: After the firmware update is successfully installed, check the router settings page or the manufacturer’s website to ensure that the new firmware version is displayed.
- Configure Settings (If Necessary): After the firmware update, it’s good practice to review and reconfigure any settings that may have been reset to default. Double-check your network configurations, security settings, and any customizations you had in place.
Remember, firmware updates are critical for maintaining the security and functionality of your router. It’s recommended to check for firmware updates periodically and apply them as they become available.
Keep in mind that the firmware update process may vary depending on your router’s make and model. Always refer to the manufacturer’s documentation or online resources for specific instructions tailored to your device.
By regularly updating the firmware in the router settings, you can ensure that your router remains stable, secure, and up to date with the latest improvements and fixes provided by the manufacturer.
Resetting the Router to Factory Settings
Resetting your router to factory settings can be necessary in certain situations, such as troubleshooting network issues or restoring the router to its original state. Resetting the router erases all custom configurations and returns it to the default settings. Here’s a guide on how to reset the router:
- Locate the reset button on your router. It is often a small hole labeled “Reset” located on the back or bottom of the device.
- Using a pointed object like a paperclip or pin, press and hold the reset button for about 10 seconds. The router’s lights may flash indicating that the reset process has started.
- Release the reset button after 10 seconds. The router will restart automatically, and the lights will cycle through different patterns as it resets to factory settings.
- Wait for the router to complete the reset process. This may take a few minutes, during which the router will reboot a few times.
- Once the router has finished resetting, it will be restored to its original state. The default factory settings, including the default username, password, and network configurations, will be reinstated.
After resetting the router, you will need to reconfigure it to your specifications. This includes setting up a new username and password, configuring network settings, and re-establishing any custom settings such as port forwarding or Wi-Fi preferences.
It’s important to note that resetting the router to factory settings should be done as a last resort when other troubleshooting methods have failed. Before resetting, consider backing up any important router configurations or settings, as they will be lost during the reset process.
If you’re unsure about the reset procedure or need assistance in reconfiguring the router, consult the documentation provided by the router’s manufacturer or contact their customer support for guidance.
Resetting your router to factory settings can be an effective solution for resolving persistent issues or starting fresh with a clean slate when reconfiguring your network.