
Why Open a Desktop Computer Case?
Opening a desktop computer case may seem like a daunting task for some, but there are several reasons why you might need to do so. Whether you are a computer enthusiast looking to upgrade your system, a technician troubleshooting hardware issues, or simply curious about the inner workings of your computer, opening the desktop computer case can provide valuable insights and opportunities. Here are a few reasons why you might consider opening a desktop computer case:
- Upgrading Components: Opening the computer case allows you to easily access and replace various components. Whether you want to install a new graphics card, add more RAM, or upgrade your storage drive, opening the case provides the necessary access to carry out these upgrades.
- Cleaning and Maintenance: Dust and debris can accumulate inside the computer case over time, impacting performance and increasing the risk of overheating. Opening the case allows you to clean the internal components and ensure proper airflow, thus extending the lifespan of your computer.
- Troubleshooting Issues: When encountering hardware problems, opening the computer case can help identify the source of the issue. You can visually inspect components, check cable connections, and perform necessary diagnostic tests to pinpoint and resolve any hardware-related problems.
- Customization and Personalization: Opening the computer case provides you with the opportunity to personalize your system. Whether it’s adding LED lighting, custom cables, or a liquid cooling solution, opening the case grants you the freedom to enhance the aesthetics and functionality of your computer.
Opening a desktop computer case gives you a greater understanding of the internal components and allows you to take control of your computer’s performance and functionality. It provides the flexibility to make upgrades, troubleshoot problems, and customize your system to suit your specific needs. However, it is essential to practice proper safety precautions and follow step-by-step procedures to ensure a smooth and successful experience when opening a desktop computer case.
Tools Needed to Open a Desktop Computer Case
When it comes to opening a desktop computer case, having the right tools can make the process much easier. Here are the essential tools you will need:
- Screwdriver: A screwdriver is the most important tool you’ll need. Most desktop computer cases use either Phillips head screws or thumb screws. Make sure to have the appropriate screwdriver on hand to remove these screws.
- Anti-static Wrist Strap: It’s crucial to protect the sensitive electronic components inside your computer from static electricity. An anti-static wrist strap helps to ground you and prevent static discharge, which can damage the internal parts of your computer.
- Compressed Air Can or ESD-Safe Vacuum Cleaner: Dust and debris can accumulate inside the computer case, hindering airflow and causing overheating. To clean the components, you’ll need a can of compressed air or an ESD-safe vacuum cleaner specifically designed for electronic devices.
- Thermal Paste and Isopropyl Alcohol: If you’re planning to upgrade your computer’s processor or replace the CPU cooler, you’ll need thermal paste to create a proper heat transfer interface. Additionally, isopropyl alcohol is essential for cleaning off the old thermal paste before applying a new one.
- Zip Ties or Cable Management Accessories: Maintaining a neat and organized internal layout not only improves airflow but also makes troubleshooting and future upgrades easier. Zip ties or other cable management accessories can help secure and route cables, keeping them out of the way.
- Flashlight: Some desktop computer cases have areas that are difficult to see or access. Having a flashlight handy can assist in illuminating these hard-to-reach spots and make your work easier.
Having these tools readily available will ensure that you can open your desktop computer case with ease. It’s important to note that the specific tools required may vary depending on the case and the components you plan to work on. Always refer to the manufacturer’s instructions and guidelines for any additional tools or equipment that may be needed for specific tasks.
Safety Precautions
When opening a desktop computer case, it’s crucial to prioritize your safety and the well-being of your computer’s components. Follow these essential safety precautions to ensure a safe and successful experience:
- Power Off and Unplug: Before starting, power off your computer completely and unplug it from the electrical outlet. This precaution prevents any electrical shocks and protects the internal components from accidental damage.
- Wear an Anti-static Wrist Strap: To prevent static electricity from damaging sensitive computer components, wear an anti-static wrist strap. This strap grounds you, reducing the risk of static discharge that can harm the delicate circuits.
- Work in a Static-free Environment: Choose a clean and static-free work area. Avoid working on carpets as they can generate static electricity. Ideally, use a grounded worktable or an anti-static mat to provide an additional layer of protection.
- Avoid Touching Components: When handling internal components, try to minimize direct contact. Grasp components by their edges or use anti-static bags or packaging when removing, storing, or transporting them.
- Be Gentle with Cables and Connectors: When disconnecting or reconnecting cables, exercise caution to avoid excessive force or bending. Pull on the plastic housing or the connector, not the cable itself, to prevent damage to the delicate wires inside.
- Watch for Sharp Edges: Some computer cases may have sharp edges, particularly around openings or removable panels. Take care to avoid accidentally cutting yourself during the process. Consider wearing protective gloves if needed.
- Keep Screws Safe and Organized: While removing screws from the case, keep them organized and in a safe place. This prevents them from getting lost or accidentally causing damage by floating around inside the computer.
- Follow Manufacturer’s Instructions: Every computer case may have specific instructions or precautions outlined by the manufacturer. Refer to these guidelines for additional safety measures or case-specific information.
By following these safety precautions, you can minimize the risk of damage to yourself or your computer components. Always prioritize safety and take your time when opening a desktop computer case. If you are unsure or uncomfortable with any step, consider seeking professional assistance to ensure the integrity of your computer and your personal well-being.
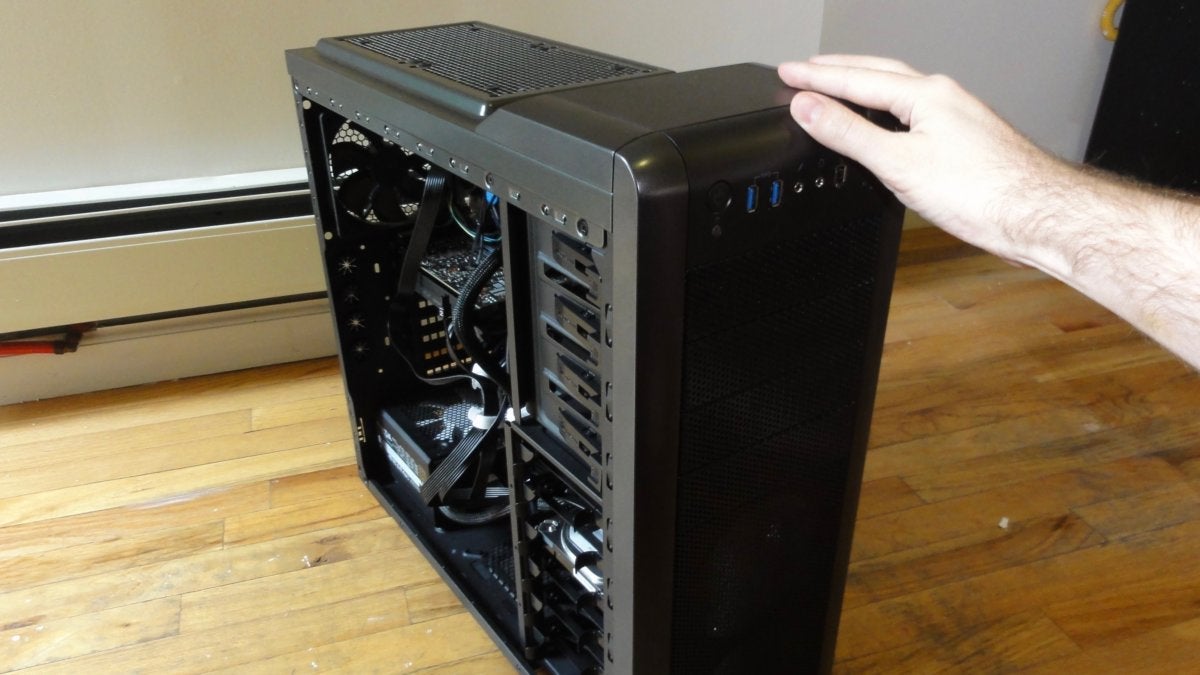
Step-by-Step Guide to Opening a Desktop Computer Case
Opening a desktop computer case may vary slightly depending on the specific case model, but here is a general step-by-step guide to help you get started:
- Prepare: Power off the computer and unplug it from the electrical outlet. Put on an anti-static wrist strap to prevent static discharge.
- Locate the Screws: Identify the screws that secure the side panels of the computer case. These screws are typically located on the backside, holding the side panel firmly in place.
- Remove the Screws: Use the appropriate screwdriver to remove the screws holding the side panel. Set the screws aside in a safe place to prevent them from getting lost.
- Slide Off the Side Panel: Once the screws are removed, gently slide the side panel towards the back of the case. Some cases may have a button or latch that needs to be released before sliding off the panel.
- Set Aside the Side Panel: Place the side panel in a safe area where it won’t accidentally get bumped or damaged.
- Access the Internal Components: With the side panel removed, you now have access to the internal components of the computer. Take a moment to familiarize yourself with the layout and organization of the components.
- Handle Components with Care: When working inside the computer case, handle the components with care. Avoid putting unnecessary pressure on delicate parts and be mindful of any static electricity that could damage sensitive circuits.
- Clean or Replace Components: If needed, this is an excellent time to clean components or replace them with upgraded ones. Use compressed air or an ESD-safe vacuum cleaner to remove dust and debris from the internal parts.
- Reassemble the Case: Once you’ve finished working on the internal components, carefully slide the side panel back into its original position. Make sure it is securely aligned with the case and use the screws to fasten it in place.
- Double-Check Connections: Before powering on your computer, double-check all cable connections to ensure everything is securely plugged in. Ensure that no cables are obstructing fans or other components.
Remember, this is a general guide, and the specific steps may vary depending on your computer case model. Always consult the manufacturer’s instructions and refer to any specific guidelines provided for your particular case model to ensure proper and safe disassembly and reassembly.
How to Identify Different Types of Desktop Computer Cases
Desktop computer cases come in various shapes, sizes, and designs, each with its own unique features and functions. Understanding the different types of computer cases can help you identify your specific case and work with it more efficiently. Here are a few common types of desktop computer cases and how to identify them:
- Tower Case: Tower cases are the most common and recognizable type of computer case. They stand vertically and are usually taller than they are wide. Tower cases can come in different sizes, including full-tower, mid-tower, and mini-tower, based on their internal space and compatibility.
- Desktop Case: Desktop cases are designed to sit horizontally on a desk or beneath a monitor. They are often flatter and wider than tower cases, offering a compact and space-saving solution. Desktop cases are ideal for those who want their computer to blend seamlessly into their workspace.
- Compact Case: Compact cases, also known as small form factor (SFF) cases, are smaller in size and designed for compact desktop builds. These cases often have limited internal space, and components may need to be specially designed to fit. Compact cases are popular among those who require a portable or space-efficient computer.
- Rackmount Case: Rackmount cases are used in server rooms or data centers. They are designed to be mounted on standard server racks and provide easy access to swap out components. These cases come in various heights, typically measured by rack units (U), and can house multiple servers or computer systems.
- Console Case: Console cases resemble gaming consoles in terms of design. They are usually compact and feature a sleek, modern aesthetic. Console cases are popular among gamers looking to build a compact and visually appealing gaming rig.
To identify the type of computer case you have, consider its size, orientation, and overall design. Look for any labels, branding, or model numbers on the case itself. You can also refer to the documentation or specifications provided by the manufacturer to determine the exact type of case you own. Keep in mind that some cases may combine elements from different types, offering a unique blend of features and functionality.
Common Issues when Opening a Desktop Computer Case and How to Troubleshoot them
While opening a desktop computer case is generally a straightforward process, you may encounter a few common issues along the way. Here are some of these issues and troubleshooting steps to overcome them:
- Stuck or Stubborn Screws: Some screws may be difficult to loosen, especially if they have been tightly secured or if the threads are damaged. To overcome this, ensure you are using the correct screwdriver type and size. Apply gentle pressure while turning the screw counterclockwise. For stubborn screws, you can try using a rubber band or applying a small amount of penetrating oil to facilitate easier removal.
- Tangled or Inaccessible Cables: Inside the computer case, cables can sometimes become tangled or obstruct access to certain components. To troubleshoot this, carefully separate any tangled cables, securing them with zip ties or cable management accessories to keep them organized. If cables are obstructing access, gently move them aside to gain the necessary space for your work.
- Difficulty Identifying Components: If you have limited experience with computer hardware, it can be challenging to identify specific components inside the computer case. To address this, refer to the user manual or documentation provided by the computer manufacturer. Additionally, you can use online resources, such as hardware identification forums or guides, to help you identify various components.
- Overheating or Dust Buildup: Opening the computer case presents an opportunity to clean out dust and debris that may have accumulated over time. Use compressed air or an ESD-safe vacuum cleaner to remove the dust from fans, heatsinks, and other components. Ensure proper airflow by organizing cables and checking that fans are spinning correctly.
- Loose or Disconnected Cables: Sometimes, when opening the computer case, you may accidentally dislodge or disconnect cables. If you notice any loose cables, carefully reattach them to their respective ports. Take extra care with delicate connectors to avoid damaging them or bending any pins.
- Component Compatibility Issues: When upgrading or replacing components, compatibility is a crucial factor. Carefully research and ensure that the components you plan to install are compatible with your computer case and existing hardware. Check for factors such as form factor, power requirements, and cooling support to avoid compatibility issues.
Remember, if you encounter any difficulties or feel uncertain about any steps, it is recommended to seek professional assistance or consult manufacturer support. Opening a computer case and working on internal components requires caution and knowledge of proper handling procedures. By troubleshooting common issues, you can overcome obstacles and successfully complete your tasks while maintaining the integrity of your computer system.
Resources for Further Assistance and Information
If you need further assistance or information regarding opening a desktop computer case, there are several resources available that can help you. Here are some valuable sources to consider:
- Manufacturer’s Website and Documentation: The manufacturer’s website is often a great place to start. They typically provide detailed product information, user guides, and FAQs specific to your computer case model. Refer to the documentation for instructions, troubleshooting tips, and any specific guidelines or precautions.
- Online Forums and Communities: Joining online tech forums and communities can provide access to a wealth of knowledge and expertise. Websites like Reddit, Tom’s Hardware, and Linus Tech Tips have active communities where users share experiences, ask questions, and provide assistance. Participating in these communities allows you to learn from others and gain insights into opening computer cases.
- Video Tutorials: Video tutorials on platforms like YouTube can be incredibly helpful when it comes to visualizing the process of opening a computer case. Many tech enthusiasts and professionals create detailed step-by-step videos that demonstrate the procedure, offer tips, and walk you through the process. Watching these tutorials can provide a clear understanding of each step involved.
- Computer Repair Guides: Websites like iFixit offer comprehensive repair guides that cover a wide range of computer hardware topics. These guides provide detailed instructions, photos, and often include troubleshooting tips for specific computer models and components. They can be an excellent resource for understanding the process of opening and repairing a computer case.
- Local Computer Repair Shops: If you prefer hands-on assistance, local computer repair shops can provide professional guidance and assistance. They have experienced technicians who can help with opening computer cases, upgrading components, and troubleshooting any issues you may be facing. Reach out to nearby repair shops for personalized assistance and expert advice.
Remember, when seeking further assistance and information, always verify the credibility and reliability of the sources. Keep in mind that while these resources can provide valuable insights, it’s important to approach any modifications or repairs with caution, especially if you are not experienced. If you are unsure or uncomfortable with any step, it is always best to consult with a professional to ensure the safety and functionality of your computer system.