
Checking your Graphics Card
Before you can open the Nvidia Control Panel, it’s important to first ensure that your computer has an Nvidia graphics card installed. The Nvidia Control Panel is specifically designed for managing and optimizing Nvidia graphics card settings, so if you are using a different graphics card brand, you may not have access to this control panel.
To check if your computer has an Nvidia graphics card, you can follow these steps:
- Open the Device Manager on your computer. You can do this by right-clicking on the Windows Start button and selecting “Device Manager” from the context menu.
- In the Device Manager window, expand the “Display adapters” category by clicking on the arrow next to it.
- If you see any Nvidia graphics card listed, such as “Nvidia GeForce” or “Nvidia Quadro”, then you have an Nvidia graphics card installed.
- If you don’t see any Nvidia graphics card listed and instead see a different brand, it means you do not have an Nvidia graphics card installed in your computer. In this case, you won’t be able to access the Nvidia Control Panel.
It’s worth noting that some laptops and desktops may have dual graphics cards, with one integrated graphics card (such as Intel) and one dedicated graphics card (such as Nvidia). In this case, you may need to switch to the dedicated graphics card to access the Nvidia Control Panel. Consult your computer’s user manual or the manufacturer’s website for instructions on how to switch between graphics cards.
Once you have confirmed that your computer has an Nvidia graphics card installed, you can proceed to open the Nvidia Control Panel and make necessary adjustments to optimize your graphics card performance.
Downloading the latest Nvidia drivers
In order to ensure that your Nvidia graphics card is functioning optimally and to access all the features of the Nvidia Control Panel, it’s important to have the latest Nvidia drivers installed on your computer. Nvidia regularly releases driver updates to improve performance, fix bugs, and introduce new features.
Here’s how you can download the latest Nvidia drivers:
- Visit the Nvidia website. You can do this by opening a web browser and typing in “www.nvidia.com” in the address bar.
- Once on the Nvidia website, locate the “Drivers” section. This is usually found in the top navigation menu.
- In the “Drivers” section, you may be required to specify the type of graphics card you have. If prompted, choose the appropriate options from the drop-down menus to identify your graphics card model.
- After identifying your graphics card model, you will be presented with a list of available driver downloads. Look for the latest driver version that is compatible with your operating system.
- Click on the download button next to the driver version to start the download process.
- Once the driver file has finished downloading, locate the downloaded file on your computer and double-click on it to start the installation process.
- Follow the on-screen instructions to complete the driver installation. You may be required to restart your computer after the installation is finished.
It’s important to note that if you have already installed the Nvidia drivers on your computer, you can check for updates directly within the Nvidia Control Panel itself. Simply open the Nvidia Control Panel, click on the “Help” menu, and then select “Updates” to check for any available driver updates.
By regularly updating your Nvidia drivers, you can ensure that you are benefiting from the latest improvements and enhancements provided by Nvidia, as well as maximize the performance and compatibility of your Nvidia graphics card.
Opening the Nvidia Control Panel through the Start Menu
The Nvidia Control Panel can be easily accessed through the Start Menu on your Windows computer. Here’s how you can do it:
- Click on the Windows Start button located on the bottom left corner of your screen. This will open the Start Menu.
- In the Start Menu, look for the “Nvidia Corporation” folder. It is usually listed under the list of installed programs.
- Expand the “Nvidia Corporation” folder by clicking on the arrow next to it.
- Inside the “Nvidia Corporation” folder, you should see an option called “Nvidia Control Panel”. Click on it to launch the Nvidia Control Panel.
Alternatively, you can also use the search bar located in the Start Menu to find the Nvidia Control Panel. Simply type “Nvidia Control Panel” in the search bar, and it should appear in the search results. Click on it to open the Nvidia Control Panel.
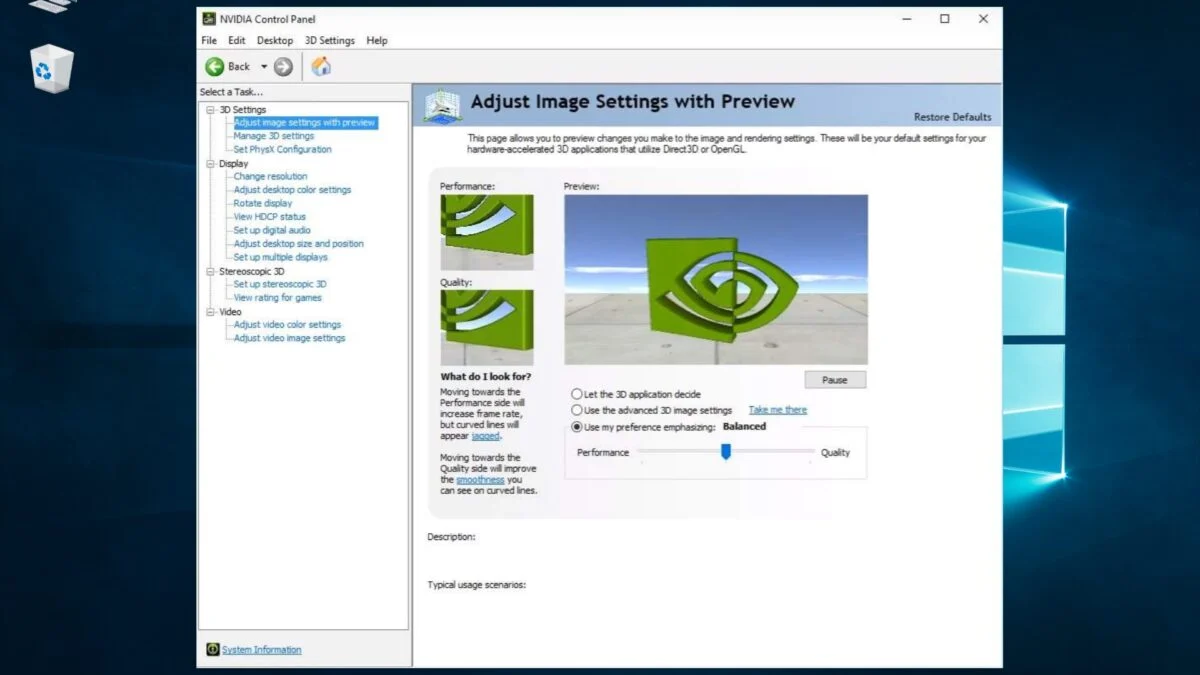
Once the Nvidia Control Panel is open, you will have access to various settings and options to customize and optimize your Nvidia graphics card. You can adjust display settings, manage 3D settings, configure multiple displays, and much more. Take your time to explore the different sections and options available in the Nvidia Control Panel to make the most out of your Nvidia graphics card.
It’s worth noting that some computers may require administrative privileges to access and open the Nvidia Control Panel. If you encounter any issues or restrictions, make sure to log in to your computer with administrative rights or consult your system administrator for assistance.
Opening the Nvidia Control Panel through the Start Menu is a quick and convenient way to access and manage your Nvidia graphics card settings, allowing you to optimize your gaming and multimedia experience.
Opening the Nvidia Control Panel through the System Tray
If you prefer quick access to the Nvidia Control Panel, you can open it directly from the system tray on your Windows computer. The system tray, also known as the notification area, is located on the right side of the taskbar at the bottom of your screen. Here’s how you can open the Nvidia Control Panel through the system tray:
- Locate the Nvidia icon in the system tray. It typically appears as a green Nvidia logo.
- Click on the Nvidia icon to open a context menu.
- In the context menu, you should see an option labeled “Nvidia Control Panel”. Click on it to launch the control panel.
If you don’t see the Nvidia icon in the system tray, it might be hidden. In that case, click on the “^” or “▼” arrow next to the system tray icons to expand the hidden icons and look for the Nvidia icon. If you still don’t see it, it’s possible that the Nvidia Control Panel is not currently running in the background. You can start it by following these steps:
- Press the Windows key + R on your keyboard to open the Run dialog box.
- Type “nvcplui” (without quotes) in the Run dialog box and press Enter.
By executing the command “nvcplui”, you will launch the Nvidia Control Panel. Subsequently, the Nvidia icon should appear in the system tray for easy access in the future.
Opening the Nvidia Control Panel through the system tray offers a convenient way to access it without having to search through menus or desktop shortcuts. This allows for quick adjustments and optimizations of your Nvidia graphics card settings whenever needed. Take advantage of the various options available in the control panel to fine-tune your graphics experience and customize it to your liking.
Opening the Nvidia Control Panel through the Control Panel
If you prefer accessing the Nvidia Control Panel through the Windows Control Panel, you can easily do so by following these steps:
- Click on the Windows Start button located on the bottom left corner of your screen to open the Start Menu.
- Type “Control Panel” in the search bar and click on the Control Panel app in the search results.
- In the Control Panel window, set the “View by” option to “Large icons” or “Small icons” to display all the available control panel items.
- Scroll down and look for the “Nvidia Control Panel” icon. Click on it to open the control panel.
Alternatively, if you prefer a different view or layout for the Control Panel, you can set the “View by” option to “Category” and navigate to the “Hardware and Sound” category. Inside this category, you should find the “Nvidia Control Panel” option.
Once the Nvidia Control Panel is open, you can access all the settings, options, and adjustments related to your Nvidia graphics card. It provides a comprehensive interface to manage various aspects of your graphics card, including display settings, 3D settings, video settings, and more. Adjust these settings according to your preferences and requirements to optimize your graphics performance and enhance your visual experience.
If you are unable to find the Nvidia Control Panel in the Control Panel, it is possible that the Nvidia drivers are not installed on your computer or are outdated. In such cases, you may need to download and install the latest Nvidia drivers from the Nvidia website to gain access to the Nvidia Control Panel.
Opening the Nvidia Control Panel through the Control Panel provides a traditional and reliable way to access and customize your Nvidia graphics card settings. Take your time to explore the options available and make necessary adjustments to enhance your overall graphics experience.
Opening the Nvidia Control Panel through the Desktop Context Menu
An alternative method for opening the Nvidia Control Panel is through the desktop context menu. The desktop context menu is accessed by right-clicking on an empty area of your computer’s desktop screen. Here’s how you can open the Nvidia Control Panel using this method:
- Begin by right-clicking on an empty area of your desktop screen. This will open the desktop context menu.
- In the context menu, look for the “Nvidia Control Panel” option. It is generally listed towards the top of the menu.
- Click on the “Nvidia Control Panel” option to launch the control panel.
If you don’t see the “Nvidia Control Panel” option in the context menu, it may be because it is not enabled. In such cases, you can enable it by following these steps:
- Right-click on an empty area of your desktop screen to open the context menu.
- Navigate to “Nvidia Control Panel” or “Nvidia Graphics Properties” and hover over it.
- In the sub-menu that appears, select “Desktop” to expand the options.
- Under the “Desktop” options, click on “Add Desktop Context Menu”.
Enabling the “Add Desktop Context Menu” option will add the “Nvidia Control Panel” option to your desktop context menu, allowing you to access it directly whenever you right-click on your desktop screen.
Opening the Nvidia Control Panel through the desktop context menu provides a quick and efficient way to access and manage your Nvidia graphics card settings. From there, you can configure display settings, adjust 3D settings, and perform various optimizations to enhance your overall graphics experience.
It’s important to note that the availability and appearance of the Nvidia Control Panel in the desktop context menu may vary depending on your computer’s settings and graphics card model. If you are unable to find the Nvidia Control Panel option in the context menu, make sure you have the latest Nvidia drivers installed and that your graphics card is compatible with accessing the control panel through this method.
Utilize this convenient method to access the Nvidia Control Panel and fine-tune your graphics settings for an enhanced visual experience on your Windows computer.
Troubleshooting common issues with Nvidia Control Panel
While the Nvidia Control Panel provides a powerful tool for managing your Nvidia graphics card settings, you may encounter some common issues that can affect its functionality. Here are a few troubleshooting tips to help you resolve these issues:
1. Ensure you have the latest Nvidia drivers: Outdated or incompatible drivers can cause issues with the Nvidia Control Panel. Make sure you have the latest drivers installed by visiting the Nvidia website and downloading the appropriate driver for your graphics card model and operating system.
2. Restart the Nvidia Control Panel: Sometimes, the Control Panel may encounter minor glitches. You can try restarting it to resolve any issues. Right-click on the Nvidia icon in the system tray, select “Exit” from the context menu, and then open it again from the system tray or start menu.
3. Reset the Nvidia Control Panel settings: If you’re experiencing unusual behavior or display issues, resetting the Control Panel settings to their default values can often help. Open the Nvidia Control Panel, click on the “Manage 3D settings” option, and then click on the “Restore” button to restore the default settings.
4. Reinstall the Nvidia Control Panel: When troubleshooting persistent issues, you may consider reinstalling the Control Panel. Go to the Control Panel or Settings, navigate to “Apps” or “Programs and Features,” find “Nvidia Control Panel,” and uninstall it. Then, download the latest version of the Nvidia Control Panel from the Nvidia website and install it again.
5. Check for conflicting software: Certain software applications, such as antivirus programs or screen recording software, can interfere with the Nvidia Control Panel. Temporarily disable or uninstall any conflicting software and see if the Control Panel functions properly afterward.
6. Update your operating system: In some cases, compatibility issues between the operating system and the Nvidia Control Panel can arise. Ensure that your operating system is up to date with the latest patches, service packs, and updates from Microsoft.
If you have followed these troubleshooting steps and are still experiencing issues with the Nvidia Control Panel, it is recommended to seek further assistance from Nvidia’s support resources, such as their website or customer support. They may be able to provide more specific guidance tailored to your situation.
Remember that the Nvidia Control Panel is a powerful and versatile tool for managing and optimizing your Nvidia graphics card settings. By resolving common issues and ensuring its proper functionality, you can unlock the full potential of your graphics card and enjoy an enhanced visual experience on your computer.