
Gather the necessary components
Before setting up your desktop computer, it’s essential to gather all the necessary components. Here’s a comprehensive list of items you’ll need:
- Computer Case: Choose a case that is compatible with your motherboard size and has enough space for your desired components.
- Power Supply: Select a power supply unit (PSU) that can provide enough power for all the components.
- Motherboard: Consider the form factor and socket type to ensure compatibility with your desired CPU.
- CPU: Choose a processor based on your performance needs and budget.
- RAM: Determine the amount of memory you’ll need, keeping in mind the requirements of your operating system and applications.
- Storage Devices: Select one or more storage devices, such as SSDs or HDDs, depending on your storage needs.
- Graphics Card: If you plan to use your computer for gaming or graphic-intensive applications, choose a graphics card that suits your requirements.
- Expansion Cards: Determine if you need any additional expansion cards, such as sound cards or network cards.
- Peripherals: Consider peripherals such as a keyboard, mouse, monitor, and speakers.
- Operating System: Decide on the operating system you want to install, such as Windows, macOS, or Linux.
- Software: Consider any additional software you’ll need for productivity, creativity, or entertainment purposes.
Take the time to research and choose components that fit your needs and budget. Check compatibility and read reviews to ensure you’re making informed decisions. Once you have gathered all the necessary components, you’re ready to move on to the next step of setting up your desktop computer.
Set up the computer case
Setting up the computer case is the first step in building your desktop computer. Here’s how to do it:
- Start by placing the computer case on a flat and clean surface. Ensure that the case is properly oriented according to your preference, with the front panel facing you.
- Remove the side panels of the case by unscrewing the screws located at the back. Set aside the screws in a safe place as you will need them later.
- Once the side panels are removed, you will have access to the internal compartments of the case. Take this opportunity to clean out any dust or debris that may have accumulated.
- Next, locate the motherboard tray inside the case. This is where your motherboard will be installed. Ensure that the motherboard standoffs are correctly positioned for your motherboard’s form factor.
- Carefully place the motherboard onto the standoffs and align the screw holes. Use the screws provided with the motherboard to secure it to the standoffs. Be cautious not to overtighten the screws.
- After securing the motherboard, you can now install the power supply unit (PSU). Locate the PSU bay in the case and slide the PSU in, aligning it with the mounting holes.
- Use the screws provided with the case to secure the PSU in place. Ensure that it is snugly fitted and the cables face the desired direction for easy cable management.
- With the motherboard and PSU installed, it’s time to connect the necessary cables. Refer to the motherboard and PSU documentation to identify the appropriate connectors and plug them in accordingly.
- Take extra care when connecting cables to avoid applying unnecessary force or causing damage to the components.
- Once all the necessary cables are connected, close the side panels of the case, ensuring they are properly aligned with the case’s structure.
- Secure the side panels using the screws you set aside earlier, ensuring they are firmly tightened but not overly so.
Setting up the computer case is a crucial foundation for building your desktop computer. By following these steps carefully, you have successfully prepared the case to house the internal components.
Install the power supply
The power supply (PSU) is a vital component of your desktop computer, responsible for supplying electrical power to all the other components. Here is how to install the power supply:
- First, make sure your computer case is open and accessible. Locate the PSU bay, usually at the top or bottom of the case.
- Check the orientation of the power supply. Most power supplies have a fan, so you want to ensure the fan faces the interior of the case to facilitate proper airflow.
- Position the power supply in the PSU bay, aligning the screw holes on the power supply with the mounting holes in the case.
- Once aligned, secure the power supply with the screws provided, making sure it is firmly fixed in place.
- Next, you’ll need to connect the necessary cables from the power supply to the various components of your computer.
- Start with the main motherboard power connector, which is typically a 24-pin or 20+4-pin connector. Locate the corresponding socket on your motherboard and firmly insert the connector until it clicks into place.
- For CPUs that require additional power, there may be a separate 4-pin or 8-pin connector near the CPU socket. Connect the appropriate cable from the power supply to this socket.
- Next, identify the SATA power connectors, which are used to power storage devices such as hard drives and SSDs. Connect the SATA power cables from the power supply to the respective devices.
- If you have any peripheral devices, such as optical drives or fans, connect the necessary power cables to them as well.
- Double-check all the connections to ensure they are secure and properly plugged in. Ensure that no cables are tangled or obstructing the airflow within the case.
- Close the computer case and secure it with the screws provided.
By following these steps, you have successfully installed the power supply and connected the necessary cables. A properly installed and connected power supply will ensure stable and reliable power distribution to all the components of your desktop computer.
Install the motherboard
The motherboard is the central component of your desktop computer, connecting all the other components together. Here’s how to install the motherboard:
- First, ensure that you have prepared the computer case by removing the side panels.
- Take your motherboard and carefully align it with the standoffs in the case. The standoffs are small raised screws that provide support and grounding for the motherboard.
- Make sure the motherboard aligns properly with the I/O shield opening at the back of the case.
- Once aligned, gently lower the motherboard onto the standoffs, ensuring that the screw holes on the motherboard line up with the standoffs.
- Secure the motherboard to the standoffs using the screws provided with the case. Begin screwing in the corners first, and then gradually tighten the rest of the screws.
- Be careful not to overtighten the screws, as it may damage the motherboard or strip the screw holes.
- After securing the motherboard, connect the necessary cables. Start by plugging in the main power connector from the power supply to the motherboard. Refer to your motherboard’s manual for the specific connector and its location.
- Next, connect the CPU cooler fan connector to the motherboard. This connector is usually labeled CPU_FAN or something similar, and it powers and controls the CPU cooler fan.
- Connect the front panel connectors, including the power switch, reset switch, HDD LED, power LED, and any other buttons or lights on the front of the case. Consult your motherboard’s manual for the exact pin locations.
- Once all the necessary cables are connected, double-check them to ensure they are secure and correctly aligned. Ensure that no cables are obstructing the fans or other components.
- Finally, reattach the side panels of the computer case by screwing them back into place.
By following these steps, you have successfully installed the motherboard in your desktop computer. The motherboard is now ready for the next steps of connecting the CPU, RAM, and other components to complete the computer setup.
Connect the CPU
The CPU (Central Processing Unit) is the brain of your desktop computer, responsible for executing instructions and performing calculations. Here’s how to connect the CPU:
- Start by locating the CPU socket on your motherboard. It is usually a square-shaped socket with small holes for the pins.
- Before handling the CPU, ensure your hands are clean and free from any oils or debris. This will help prevent any damage to the delicate electronic components.
- Lift the CPU retention arm on the socket to open it. This will expose the socket and allow you to place the CPU.
- Take your CPU and carefully align it with the socket, ensuring that the notches on the CPU align with the corresponding guides on the socket.
- Gently lower the CPU into the socket, making sure it sits flat and in the correct orientation.
- Once the CPU is correctly placed, gently press it down to ensure it is fully inserted into the socket. Be careful not to apply excessive force.
- After inserting the CPU, lower the retention arm back into place. The arm should securely hold the CPU in place.
- Depending on your CPU and motherboard, you may also need to apply thermal paste to the CPU. Check the instructions provided with your CPU cooler for guidance on applying thermal paste.
- If applicable, carefully install the CPU cooler on top of the CPU. Secure it using the provided screws or brackets, following the manufacturer’s instructions.
- Connect the CPU fan to the CPU fan header on the motherboard. This header provides power to the fan and allows for temperature monitoring and control.
By following these steps, you have successfully connected the CPU in your desktop computer. The CPU is now ready to work in tandem with the other components to power your computer and execute tasks.
Install RAM
RAM (Random Access Memory) is a crucial component of your desktop computer, providing temporary storage for data that the CPU needs to access quickly. Here’s how to install RAM:
- Start by referring to your motherboard’s manual to identify the RAM slots. These slots are usually located near the CPU socket and are labeled DIMM slots.
- Before handling the RAM modules, make sure to discharge any static electricity by touching a grounded metal surface or wearing an anti-static wristband.
- Locate the RAM slots on the motherboard and release the retaining clips on each side of the slot. This will create an opening for the RAM module.
- Take your RAM module and align it with the slot, making sure the notch on the module matches the key in the slot.
- Hold the RAM module at an angle and firmly press it into the slot until the clips on each side click into place, securing the RAM module in position.
- Repeat the process for any additional RAM modules you have.
- It is essential to follow the motherboard’s instructions regarding the order of installing RAM modules. Some motherboards require specific slots to be populated first for optimal performance.
- Once all the RAM modules are installed, gently push down on each module to ensure it is fully seated. The clips on the sides should firmly hold the modules in place.
- Double-check that the RAM modules are properly installed, with the retaining clips securely holding them.
- Finally, close the computer case and secure it with the screws provided.
By following these steps, you have successfully installed the RAM modules in your desktop computer. The RAM will now provide the necessary temporary storage for data and help enhance the overall performance of your computer.
Install storage devices
Storage devices are essential components of your desktop computer, enabling you to store and retrieve data. Here’s how to install storage devices:
- Start by identifying the drive bays in your computer case. These are usually located in the front or side of the case and can accommodate various storage devices.
- Depending on your chosen storage device, you may need to remove a drive cage or sled from the drive bay to install it. Refer to the case and storage device documentation for the specific installation instructions.
- Take your storage device, whether it’s an SSD (Solid State Drive) or an HDD (Hard Disk Drive), and gently slide it into the drive bay.
- Ensure the connectors on the storage device align with the corresponding ports in the drive bay. For SSDs, this is usually a SATA connector, while HDDs may also require a power connector.
- Once aligned, secure the storage device in place using the screws or mounting brackets provided. Tighten the screws just enough to hold the device securely, without overtightening.
- Connect the data cable, such as a SATA cable, from the storage device to the appropriate connector on the motherboard. Make sure the connection is secure at both ends.
- If needed, connect the power cable from the power supply unit (PSU) to the storage device. Ensure the power connector matches the device’s power input.
- If installing multiple storage devices, repeat the process for each one, making sure they are properly aligned in the drive bays and connected to the motherboard and PSU.
- Check that all cables are properly connected, with no loose connections or cable obstructions.
- Once everything is securely connected, you can close the computer case and secure it with the screws provided.
By following these steps, you have successfully installed the storage devices in your desktop computer. The storage devices will allow you to store and retrieve data, providing you with the necessary storage capacity for your computing needs.
Connect cables and wires
Connecting the various cables and wires in your desktop computer is an important step in ensuring proper functionality. Here’s how to connect the cables and wires:
- Start by identifying the various cables that need to be connected within your computer case. These may include power cables, data cables, and other connectors.
- Refer to the documentation of your motherboard and other components to identify the appropriate cables and connectors.
- Begin by connecting the main power cables from the power supply unit (PSU) to the appropriate connectors on the motherboard. These typically include the 24-pin or 20+4-pin motherboard connector, as well as the CPU power connector.
- Next, connect the data cables. For storage devices, use SATA cables to connect the drives to the motherboard. Ensure that each cable is securely plugged into both the drive and the motherboard.
- If you have any additional internal components, such as a graphics card, network card, or sound card, consult the documentation to determine the required connections. These components may require additional power connections or data cables.
- When connecting cables, ensure that they are properly routed and do not obstruct any fans or other components. Keep cables organized and secured using cable ties or other cable management solutions to improve airflow and aesthetics.
- Connect any front panel cables from the case to the appropriate connectors on the motherboard. These cables may include power switch, reset switch, HDD LED, power LED, and audio connectors.
- Double-check all the connections to ensure they are properly seated and secure. Avoid applying excessive force while connecting cables to prevent any damage.
- Once all the cables are connected, close the computer case and secure it with the screws provided.
By following these steps, you have successfully connected the necessary cables and wires in your desktop computer. Proper cable management not only ensures functionality but also improves airflow and helps maintain a tidy and organized interior.
Install the graphics card
The graphics card is a critical component for displaying high-quality graphics and rendering images on your desktop computer. Here’s how to install the graphics card:
- Start by identifying the appropriate PCI-Express (PCIe) slot on your motherboard where the graphics card will be installed. Typically, this slot is located closest to the CPU.
- Before installing the graphics card, ensure that the release lever on the PCIe slot is in the unlocked position. This will allow you to insert the graphics card smoothly.
- Gently align the graphics card with the PCIe slot, ensuring that the gold contacts on the card line up with the slot.
- Hold the graphics card by the edges and firmly push it into the PCIe slot. Apply even pressure until the card is fully inserted and the release lever locks into place.
- Depending on the graphics card model, you may need to secure it further using screws or brackets. Consult the documentation that came with your graphics card for specific instructions.
- Next, locate the power connectors on the graphics card. Depending on the card, you may need to connect one or more PCIe power cables from the power supply unit (PSU) to the card. Ensure a secure connection.
- If your graphics card requires additional power connections, such as a 6-pin or 8-pin power connector, make sure to connect them as well. Refer to the graphics card’s documentation for specific instructions.
- Once the graphics card and power connections are in place, double-check that everything is secure and properly connected.
- If your graphics card requires additional support, such as a support bracket or retention arm, install it according to the manufacturer’s instructions.
- Finally, connect the monitor to the graphics card using the appropriate display cable, such as HDMI, DisplayPort, or DVI.
- Turn on your computer and install the necessary drivers for your graphics card. You can typically find the latest drivers on the manufacturer’s website.
By following these steps, you have successfully installed the graphics card in your desktop computer. The graphics card will enhance your computer’s visual capabilities and enable you to enjoy high-quality graphics and smooth gameplay.
Install additional expansion cards (if applicable)
In addition to the graphics card, you may have other expansion cards that provide additional functionality to your desktop computer. Here’s how to install them:
- Start by identifying the available expansion slots on your motherboard. These slots may include PCI, PCI-Express, or other types, depending on your motherboard model.
- Refer to the documentation of the expansion card to identify the appropriate slot for installation.
- Carefully align the expansion card with the selected slot, ensuring that the connectors on the card match the slot.
- Gently but firmly insert the expansion card into the slot, applying even pressure until the card is fully seated.
- If necessary, secure the expansion card to the case using the screws or brackets provided. This will help prevent the card from becoming loose during operation.
- Connect any necessary power cables to the expansion card, if required. Consult the documentation for the specific card to identify the power requirements and connectors.
- Double-check that all connections are secure and properly aligned.
- If you have multiple expansion cards, repeat the above steps for each card, ensuring that they are properly installed and connected.
- Once all the expansion cards are installed, close the computer case and secure it with the screws provided.
Remember to consider factors such as airflow and space availability within the case when installing additional expansion cards. Proper installation and connection are essential to ensure the optimal performance of these cards and compatibility with your motherboard and other components.
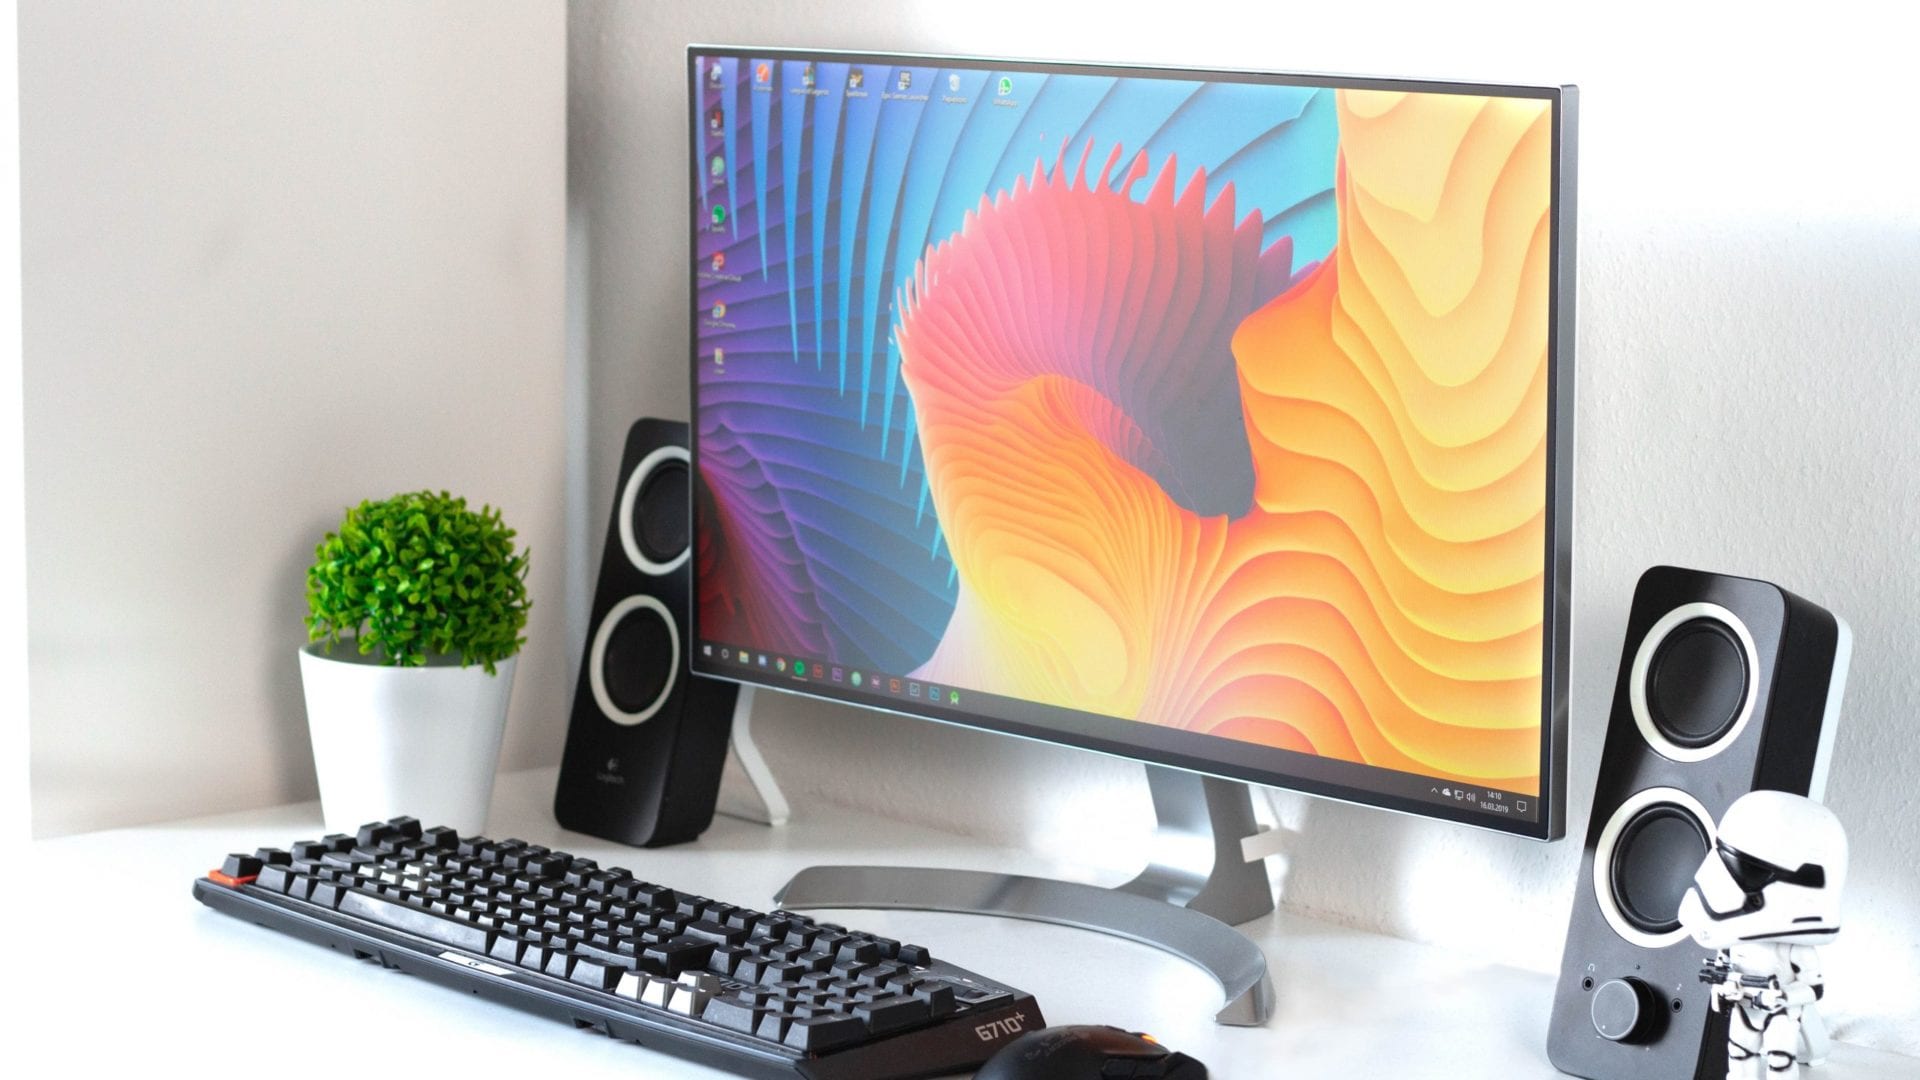
Connect peripherals
Peripherals such as keyboards, mice, monitors, and speakers are crucial for interacting with your desktop computer. Here’s how to connect these peripherals:
- Start by identifying the appropriate ports on your computer case or motherboard for each peripheral.
- Connect the keyboard and mouse to the respective PS/2 or USB ports on the back of the computer case. If you have wireless peripherals, follow the manufacturer’s instructions for connecting them.
- For the monitor, locate the graphics card’s video outputs on the back of the computer case. Connect the appropriate cable, such as HDMI, DisplayPort, or DVI, from the graphics card to the monitor.
- If you have speakers or headphones, connect them to the audio output port on the computer case or motherboard. Ensure the connection is secure and that you have selected the correct audio output in your computer’s settings.
- If you have other peripherals such as printers, scanners, or external storage devices, connect them to the appropriate ports on the computer case or motherboard. Follow the respective device’s instructions for proper connection.
- Double-check that all peripheral connections are secure and properly aligned.
- For wireless peripherals such as Bluetooth devices or Wi-Fi adapters, follow the manufacturer’s instructions for connecting and pairing them with your computer.
- Power on your computer and ensure that all peripherals are functioning correctly.
Properly connecting your peripherals ensures that you can use them seamlessly and interact with your desktop computer effectively. Take care to choose the appropriate ports and connectors for each peripheral and ensure that all connections are secure to avoid any potential issues.
Install the operating system
The operating system (OS) is the software that manages and controls your desktop computer. Here’s how to install the operating system:
- Obtain a copy of the operating system that you want to install, such as Windows, macOS, or Linux. This can be in the form of a DVD, USB drive, or digital download.
- Insert the installation media into the appropriate drive or connect the USB drive to an available port on your computer.
- Restart your computer and enter the BIOS or UEFI settings. Typically, you can access the BIOS or UEFI by pressing a specific key (e.g., F2, Del, Esc) during the boot process. Refer to your motherboard’s manual for the correct key.
- In the BIOS or UEFI settings, change the boot order to prioritize the installation media. Set the optical drive or USB drive where the installation media is located as the first boot option. Save the changes and exit the BIOS or UEFI settings.
- Your computer will restart, and the installation process will begin.
- Follow the prompts and instructions provided by the operating system’s installation wizard. Select the language, time zone, and other settings as required.
- When prompted, choose the installation type, such as a clean installation or an upgrade from an existing operating system.
- Select the destination drive or partition where you want the operating system to be installed. If necessary, format the drive or partition before proceeding with the installation.
- During the installation process, you may be prompted to create user accounts, set passwords, and customize various settings.
- Wait for the installation process to complete. This may take some time, so be patient.
- Once the installation is finished, your computer will restart.
- At this point, you will be prompted to set up your user account and personalize your desktop settings, such as customizing the wallpaper and configuring system preferences.
- Follow any additional instructions or prompts to complete the initial setup of your operating system.
By following these steps, you have successfully installed the operating system on your desktop computer. The computer will now be ready for use, and you can begin installing software and programs to enhance your computing experience.
Update drivers and software
After installing the operating system on your desktop computer, it’s important to update the drivers and software to ensure optimal performance and functionality. Here’s how to update drivers and software:
- Connect your computer to the internet to facilitate the process of updating drivers and software.
- Start by updating the drivers for your essential hardware components, such as the graphics card, motherboard, network adapter, and sound card. Manufacturers often release driver updates that introduce bug fixes, performance improvements, and compatibility enhancements.
- Visit the websites of the respective hardware manufacturers to locate the latest drivers for your specific hardware components. Download the appropriate drivers based on your operating system and hardware model.
- Run the driver installation files and follow the on-screen instructions to update the drivers. Reboot your computer if prompted.
- Next, update your operating system by installing the latest updates and patches available. These updates often address security vulnerabilities, bug fixes, and performance improvements.
- For Windows users, open the “Windows Update” settings and check for updates. Install any available updates and restart your computer if necessary.
- For macOS users, go to the “Software Update” section in the “System Preferences” to check for updates. Install any available updates and restart your computer if prompted.
- Additionally, update other essential software and applications on your computer, such as web browsers, productivity suites, and antivirus programs. Most applications offer built-in update mechanisms to keep them up-to-date.
- Regularly check for updates within each application or use their auto-update features to ensure you have the latest versions installed.
- It’s also advisable to enable automatic updates for your antivirus software to ensure that you’re protected against the latest threats.
- Periodically check for driver and software updates to keep your computer running smoothly and securely.
By following these steps, you have successfully updated the drivers and software on your desktop computer. Keeping your system up-to-date helps improve stability, performance, and security, allowing you to make the most of your computing experience.
Configure system settings
After updating the drivers and software on your desktop computer, it’s important to configure the system settings according to your preferences. Here’s how to configure system settings:
- Start by accessing the system settings of your operating system. This can usually be done by clicking on the corresponding icon in the taskbar or navigating through the Start menu.
- In the system settings, you’ll find various categories such as “Display,” “Sound,” “Network,” “Privacy,” and “Personalization.”
- Adjust the display settings to set the resolution, screen brightness, and color calibration that suit your preferences. You can also configure multiple monitors if you have them connected.
- Customize the sound settings by adjusting the volume, changing the default playback and recording devices, and configuring any specific audio enhancements or effects.
- Access the network settings to connect to Wi-Fi networks, configure network adapters, and set up any necessary proxy or VPN settings.
- Review and modify the privacy settings to control the level of data sharing and privacy preferences for your operating system and installed applications.
- Personalize your desktop by selecting wallpapers, screensavers, themes, and other visual elements that reflect your style and preferences.
- Explore additional system settings related to power management, accessibility options, storage preferences, and more, depending on your operating system.
- Consider configuring security settings to ensure your computer is protected from threats. This includes enabling firewalls, setting up automatic updates, and configuring antivirus software.
- Depending on your needs, you may also want to customize keyboard shortcuts, mouse settings, and other input devices to enhance your productivity and convenience.
- Take your time to navigate through the different settings categories and review the available options to tailor your computer to your specific requirements.
- Make sure to save any changes or apply the settings as you make modifications.
By following these steps, you have successfully configured the system settings on your desktop computer. Customizing these settings will optimize your computer to align with your workflow, preferences, and security requirements.
Install essential software and programs
After configuring the system settings on your desktop computer, it’s time to install essential software and programs that will enhance your productivity and meet your specific needs. Here’s how to install them:
- Identify the essential software and programs that you require for your work, entertainment, or other activities. This may include office suites, web browsers, media players, graphic design tools, and more.
- Visit the official websites or trusted software repositories to download the installation files for the desired software and programs.
- Check the system requirements of each software to ensure compatibility with your operating system and hardware. Make sure you have enough storage space and meet the necessary CPU, RAM, and disk space requirements.
- Run the installation files for each software and program and follow the on-screen instructions. Most installations involve accepting license agreements, choosing installation locations, and selecting desired features or components.
- Pay attention to any additional software bundled with the installation. Opt-out of any unnecessary or unwanted offers to avoid installing unwanted programs.
- Once the installation is complete, you may need to restart your computer. Follow any prompts to do so.
- After restarting, launch each installed software or program and configure any initial settings to customize the experience according to your preferences.
- Depending on the software, you may need to activate or register your license, especially for paid programs. Follow the provided instructions or refer to the software’s documentation for guidance.
- Regularly check for updates for the installed software and keep them up-to-date. Most software applications provide automatic update mechanisms to ensure you have the latest features, bug fixes, and security patches.
- Consider organizing your installed software and programs into folders or shortcuts on your desktop or taskbar, creating a convenient and accessible workspace.
- Keep track of the software licenses and activation keys for future reference or re-installation purposes.
By following these steps, you have successfully installed essential software and programs on your desktop computer. These applications will enhance your workflow and allow you to perform a wide range of tasks efficiently and effectively.
Test the computer functionality
After installing the essential software and programs on your desktop computer, it’s crucial to test its functionality to ensure everything is working correctly. Here’s how to do it:
- Start by powering on your computer and allowing it to boot up. Pay attention to any error messages or unusual behavior during the boot process.
- Check the display by opening different applications, browsing websites, and watching videos. Ensure that the screen resolution, colors, and overall graphics quality are as expected.
- Test the audio output by playing music or videos. Make sure the sound is clear and at the desired volume level. Adjust speaker settings if necessary.
- Connect to the internet and test the network connectivity. Open webpages, stream videos, and check email to verify that your internet connection is stable and functioning properly.
- Test the functionality of your peripherals. Ensure that the keyboard types correctly, the mouse moves smoothly, and any connected devices such as printers, scanners, or external drives are detected and functioning correctly.
- Launch various installed software and programs to verify their functionality. Test their basic features and functions to ensure they are working as expected.
- Perform a virus scan using your installed antivirus software to ensure your computer is protected from malware and potential security threats. Update the antivirus software if necessary.
- Check the performance of your computer by opening multiple applications simultaneously or performing resource-intensive tasks. Monitor the CPU and memory usage to ensure they are within reasonable limits.
- Run synthetic benchmarking tools or performance testing software to evaluate the overall speed and performance of your computer. Compare the results to typical performance benchmarks for your specific hardware.
- Perform a backup of your important files to an external storage device or cloud service to safeguard your data in case of any unforeseen issues or failures.
- If you encounter any issues or abnormalities during the testing process, troubleshoot the problem by referring to the documentation of the affected component or seeking assistance from online forums or technical support.
- Make any necessary adjustments or changes to resolve any issues that arise during the testing process. Update drivers, tweak settings, or seek professional help if required.
By following these steps, you have thoroughly tested the functionality of your desktop computer. Regular testing and maintenance will help ensure that your computer operates smoothly and reliably, providing you with a satisfying computing experience.
Optional: Customize desktop and personalize settings
Customizing your desktop and personalizing the settings can make your computer experience more enjoyable and efficient. Here are some optional steps to personalize your desktop:
- Choose a desktop wallpaper that reflects your style or preference. You can use a personal photo, a scenic image, or select from pre-installed wallpapers.
- Modify the desktop icons and their arrangement to suit your workflow. Organize them into folders or create shortcuts for easy access to frequently used programs or files.
- Customize the taskbar or dock. Pin your most-used applications, rearrange them, or adjust their size to optimize productivity.
- Experiment with different themes or visual styles to change the overall look and feel of your desktop environment. Customize the color scheme, fonts, and window styles to match your taste.
- Explore the settings of your web browser to tailor it to your preferences. Customize the homepage, search engine, privacy settings, and install any desired browser extensions or plugins.
- Configure the display settings to adjust brightness, contrast, and color calibration to ensure optimal visual comfort.
- Personalize the sound settings by choosing unique system sounds or customizing the volume levels for different audio devices.
- Set up keyboard shortcuts or gestures to streamline your workflow and quickly perform common tasks.
- Configure power management settings to optimize the balance between performance and power efficiency, such as adjusting screen timeout, sleep, and hibernate settings.
- Customize accessibility settings to accommodate any specific needs or preferences, such as text size, keyboard shortcuts, or visual enhancements.
- Consider installing additional software or plugins to extend the functionality of your computer and cater to your specific needs, such as productivity tools, design software, or gaming platforms.
- Personalize your user account settings by setting up a unique profile picture, creating a custom username, or customizing the desktop environment for individual user accounts.
- Periodically review and update your personalization settings to adapt to your evolving preferences and needs.
By following these optional steps, you can customize your desktop and personalize its settings according to your style and preferences. This will help create a computer environment that is uniquely tailored to enhance your productivity, creativity, and overall satisfaction.