
How to Access Chrome Autofill Settings
Chrome’s Autofill feature is a convenient way to save time and effort when filling out forms online. Whether you want to enable or disable Autofill, add or edit saved information, manage addresses and payment methods, or troubleshoot any issues, accessing Chrome’s Autofill settings is the first step. Here’s how to access Chrome Autofill settings:
- Open Chrome browser on your computer or mobile device.
- Click on the three-dot menu icon in the top-right corner of the browser window.
- From the drop-down menu, select “Settings.”
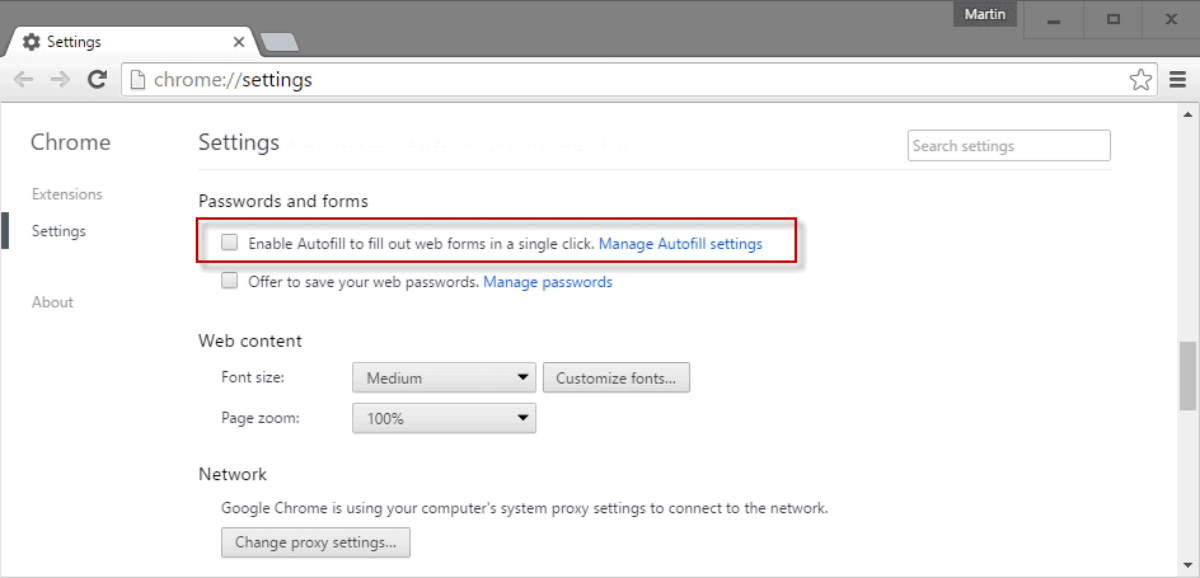
- Scroll down and click on “Advanced” to expand the settings menu.
- Under the “Autofill” section, click on “Autofill settings.”
- You will be directed to the Autofill settings page where you can manage various Autofill options.
Once you’ve accessed the Autofill settings, you can customize the Autofill feature to suit your preferences. This includes enabling or disabling Autofill, adding or editing saved information, managing addresses and payment methods, syncing settings across devices, clearing Autofill data, and enhancing security.
How to Enable or Disable Autofill in Chrome
Autofill in Chrome can be a time-saving feature, automatically filling in commonly used information such as names, addresses, and payment details. If you want to enable or disable Autofill in Chrome, follow these simple steps:
- Access the Chrome Autofill settings by following the steps mentioned in the previous section.
- On the Autofill settings page, toggle the switch next to “Autofill addresses” and “Autofill credit cards” to enable or disable Autofill for addresses and payment information, respectively.
- You can also choose to enable or disable “Autofill and payments” under the “Payment methods” section if you want to use Chrome to save and fill in payment details.
- If you want to clear all saved Autofill data, click on “Addresses and more” or “Payment methods” under the “Autofill” section and click on “Clear all.”
Enabling Autofill can greatly simplify online form filling, especially for frequently entered information. On the other hand, disabling Autofill may be preferred if you have concerns about privacy or security. By taking control of Autofill settings in Chrome, you can customize your browsing experience to meet your specific needs and preferences.
How to Add or Edit Autofill Information in Chrome
Chrome’s Autofill feature allows you to save and automatically fill in information such as addresses, phone numbers, and payment details. If you want to add or edit Autofill information in Chrome, here’s how you can do it:
- Access the Chrome Autofill settings by following the steps mentioned in the previous section.
- Under the “Addresses and more” section, click on “Add” to add a new Autofill entry.
- Fill in the required details such as name, address, phone number, and email address in the provided fields. You can also include additional information such as company name and apartment number if needed.
- Click on “Save” to add the new Autofill entry to Chrome.
- If you already have existing Autofill information that you want to edit, locate the entry under the “Addresses and more” section and click on the three-dot menu icon next to it.
- From the drop-down menu, select “Edit” and make the necessary changes to the information.
- Click on “Save” to update the Autofill entry with the edited information.
By adding or editing Autofill information in Chrome, you can save time and effort when filling out online forms. Whether it’s your home address, work address, or commonly used payment details, Chrome’s Autofill feature ensures that the information is readily available whenever you need it.
How to Delete Autofill Information in Chrome
Over time, you may accumulate outdated or incorrect Autofill information in Chrome. If you want to delete unwanted Autofill entries or clear all saved Autofill data, follow these steps:
- Access the Chrome Autofill settings by following the steps mentioned in the previous section.
- Under the “Addresses and more” section, you will see a list of all saved Autofill entries.
- To delete a specific Autofill entry, click on the three-dot menu icon next to it.
- From the drop-down menu, select “Delete” to remove the entry from Chrome’s Autofill.
- If you want to clear all saved Autofill data, click on “Addresses and more” or “Payment methods” under the “Autofill” section.
- Click on “Clear all” to delete all saved Autofill entries.
Deleting unwanted Autofill information in Chrome ensures that only accurate and up-to-date data is stored. By regularly managing your Autofill entries, you can maintain a streamlined and organized Autofill experience.
How to Manage Addresses and Payment Methods in Chrome Autofill
Chrome’s Autofill feature allows you to conveniently manage and store addresses and payment methods for quick form filling. If you want to add, edit, or remove addresses and payment methods in Chrome Autofill, follow these steps:
- Access the Chrome Autofill settings by following the steps mentioned in the previous section.
- Under the “Addresses and more” section, you will see a list of all saved addresses in Chrome Autofill.
- To add a new address, click on the “Add” button and fill in the required details such as name, address, phone number, and email address. Click “Save” to store the new address in Chrome Autofill.
- If you want to edit an existing address, locate the address in the list and click on the three-dot menu icon next to it. Select “Edit” and make the necessary changes. Click “Save” to update the address.
- To delete an address, click on the three-dot menu icon next to the address you want to remove. Select “Delete” to remove the address from Chrome Autofill.
- Under the “Payment methods” section, you can manage your saved payment methods.
- To add a new payment method, click on the “Add” button and enter the required card details, including the cardholder’s name, card number, expiration date, and security code. Click “Save” to store the payment method in Chrome Autofill.
- If you need to edit a payment method, locate it in the list and click on the three-dot menu icon. Select “Edit” to make changes to the card details, and click “Save” to update the payment method.
- To remove a payment method, click on the three-dot menu icon next to the payment method you want to delete. Select “Delete” to remove the payment method from Chrome Autofill.
By effectively managing your addresses and payment methods in Chrome Autofill, you can streamline your online form filling experience and ensure that your information is accurate and up to date.
How to Sync Autofill Settings Across Multiple Devices in Chrome
If you use Chrome on multiple devices, such as your computer, smartphone, or tablet, you can sync your Autofill settings to ensure a consistent experience across all platforms. To sync your Autofill settings in Chrome, follow these steps:
- Open Chrome on the device that has the Autofill settings you want to sync.
- Click on the three-dot menu icon in the top-right corner of the browser window.
- From the drop-down menu, select “Settings.”
- Scroll down and click on “Sync and Google services.”
- Make sure that the “Autofill” option is enabled under the “Other Google services” section.
- If you haven’t already signed in with your Google account, sign in to enable syncing across devices.
- On your other devices, make sure you are signed in to Chrome using the same Google account.
- Open Chrome on each device and go to the “Sync and Google services” settings.
- Ensure that the “Autofill” option is enabled on these devices as well.
With Autofill settings synced across your devices, any changes or additions you make to your Autofill information will be updated on all devices. This means you won’t have to manually enter the same information on each device, saving you time and effort when filling out online forms.
How to Clear Autofill Data in Chrome
If you want to remove all saved Autofill data in Chrome or clear specific entries, you can easily do so by following these steps:
- Access the Chrome Autofill settings by following the steps mentioned in the earlier section.
- Under the “Addresses and more” section, you will find a list of all saved Autofill entries.
- To delete a specific Autofill entry, click on the three-dot menu icon next to it.
- From the drop-down menu, select “Delete” to remove the entry from Chrome’s Autofill.
- If you want to clear all saved Autofill data at once, click on “Addresses and more” or “Payment methods” under the “Autofill” section.
- Click on the “Clear all” button to remove all saved Autofill entries.
- If you want to selectively clear Autofill data, you can click on the “Edit” button next to each entry and delete the information individually.
- Alternatively, you can access the Chrome browser settings, click on “Privacy and security,” and then “Clear browsing data.”
- In the “Advanced” tab, select the time range for which you want to clear Autofill data.
- Make sure that the “Autofill form data” option is checked.
- Click on “Clear data” to remove the Autofill data for the selected time range.
Clearing Autofill data in Chrome can help maintain privacy and remove outdated or incorrect information. Whether you want to start fresh or remove specific entries, Chrome provides you with the flexibility to manage your Autofill data according to your preferences.
How to Use a Password Manager with Chrome Autofill
Password managers offer a secure way to store and manage your passwords, and they can be integrated with Chrome’s Autofill feature for a seamless and safe browsing experience. Here’s how to use a password manager with Chrome Autofill:
- Choose a reliable password manager that suits your needs. Popular options include LastPass, Dashlane, and 1Password.
- Install the password manager extension in your Chrome browser by visiting the Chrome Web Store and searching for the specific password manager you’ve chosen.
- Follow the prompts to install and set up the password manager extension. This usually involves creating an account with the password manager, setting a master password, and importing or manually adding your existing passwords.
- Once the password manager extension is installed and set up, it will integrate with Chrome’s Autofill feature.
- When you visit a website that requires a login, the password manager extension will detect it and offer to fill in the username and password fields with your saved credentials.
- Click on the password manager icon in the login fields (usually a padlock or key symbol) to access the saved credentials for the website.
- Choose the appropriate login credentials from the password manager’s dropdown menu to autofill the fields.
- If the password manager prompts you to save any new login information, confirm the saving to update your password vault.
- Ensure that you have a strong, unique master password for your password manager to protect all your saved passwords.
- Regularly update and review your passwords in the password manager to enhance your online security.
Using a password manager with Chrome Autofill not only saves you time but also enhances the security of your online accounts. It eliminates the need to remember multiple passwords and reduces the risk of using weak or repetitive passwords. By combining the power of a password manager with Chrome’s Autofill feature, you can enjoy a convenient and secure browsing experience.
How to Troubleshoot Autofill Issues in Chrome
While Chrome’s Autofill feature is designed to make form filling easier, you may encounter occasional issues. If you’re experiencing problems with Autofill in Chrome, here are some troubleshooting steps you can try:
- Check if Autofill is enabled in Chrome. Access the Chrome Autofill settings by following the steps mentioned earlier and make sure that the “Autofill addresses” and “Autofill credit cards” options are turned on.
- Clear your browser cache and cookies. Sometimes, outdated or corrupted data can affect Autofill functionality. To clear the cache and cookies, go to Chrome settings, click on “Privacy and security,” then “Clear browsing data.”
- Update your Chrome browser to the latest version. Outdated versions of Chrome may have bugs or compatibility issues that affect Autofill. Go to Chrome settings, click on “About Chrome,” and update if a new version is available.
- Disable browser extensions or plugins. Some third-party extensions or plugins can interfere with Autofill. Temporarily disable any extensions or plugins and check if the issue is resolved.
- Verify that the website is compatible with Autofill. Not all websites support Autofill functionality. Ensure that the website you’re trying to use Autofill on is compatible.
- Double-check your Autofill information. Make sure that your saved addresses and payment details are correct and up to date. Incorrect information in Autofill can lead to issues when filling out forms.
- Restart your browser or device. Sometimes, a simple restart can resolve temporary glitches and restore Autofill functionality.
- If you’re using a password manager, ensure that it is properly integrated with Autofill in Chrome. Check the settings of your password manager and ensure that it’s set up to work with Chrome’s Autofill feature.
- If none of the above steps resolve the issue, you can try resetting Chrome settings to their default values. Go to Chrome settings, click on “Advanced,” and select “Reset and clean up” to restore Chrome to its original settings.
- If the issue persists, you may consider reaching out to Chrome support or the support team of your password manager for further assistance.
By following these troubleshooting steps, you can address common issues with Autofill in Chrome and ensure a smooth and efficient form filling experience.
How to Enhance Security in Chrome Autofill
While Chrome’s Autofill feature offers convenience, it is important to take steps to enhance the security of your Autofill information. Here are some measures you can take to improve the security of Chrome Autofill:
- Use a strong and unique master password for your Chrome browser and any associated password managers. This adds an extra layer of security to protect your Autofill data from unauthorized access.
- Regularly update your passwords and avoid using weak or easily guessable passwords. Strong passwords should be a mix of uppercase and lowercase letters, numbers, and special characters.
- Be cautious when saving sensitive information in Chrome Autofill. While it can be convenient to save payment information, consider whether it is necessary to save sensitive details like credit card numbers. Evaluate the risk versus the convenience before saving such data.
- Enable two-factor authentication (2FA) for your Google account. This adds an extra layer of protection by requiring a second verification step, such as a verification code sent to your mobile device, when logging in.
- Regularly monitor your Autofill settings and saved information to ensure accuracy and prevent outdated or incorrect data from being filled in. Review and update your addresses and payment methods as needed.
- Keep your browser and password manager up to date with the latest security patches and updates. These updates often include bug fixes and security enhancements that can protect against vulnerabilities.
- Be cautious of phishing attempts and only enter sensitive information on trusted websites. Ensure that you are on the official website of a trusted organization before entering login credentials or making online payments.
- Consider using a reputable antivirus or antimalware software to protect your device from potential threats. These tools can help detect and remove malicious software that may compromise your Autofill data.
- Regularly clear your browsing history, cache, and cookies to remove any stored information that could be accessed by unauthorized individuals.
- Regularly review your Autofill data and remove any unnecessary or outdated entries. Minimizing the amount of stored data can help reduce the risk of it falling into the wrong hands.
By following these security practices, you can enhance the security of your Autofill data in Chrome and reduce the risk of your personal information being compromised.