
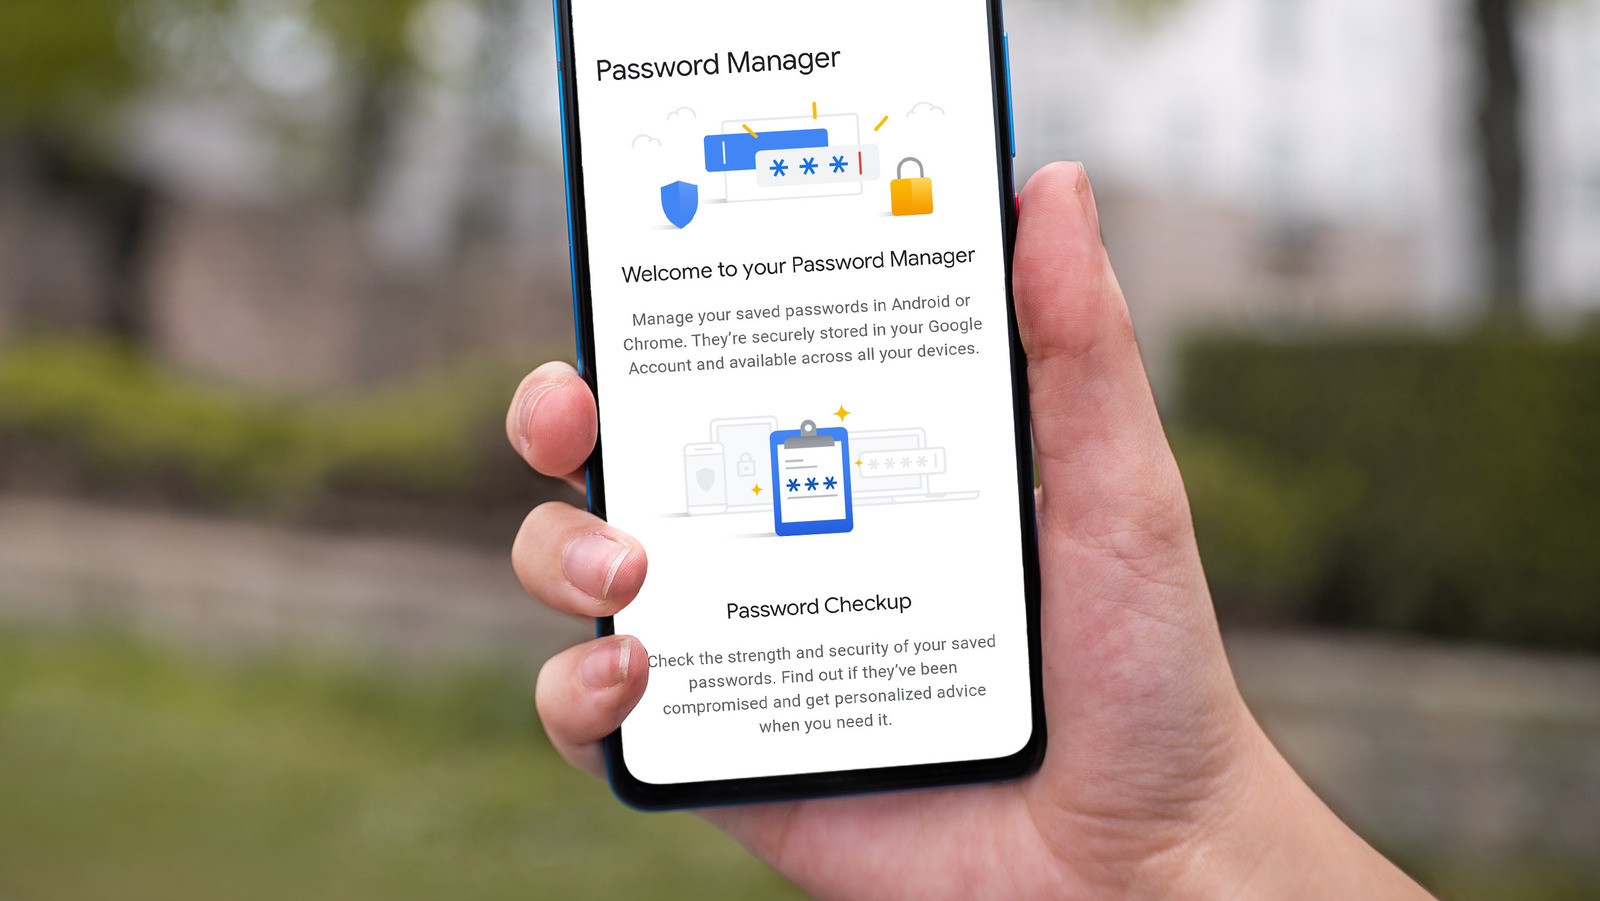
Enable the Chrome Password Manager
If you’re tired of constantly having to remember and enter passwords for all your online accounts, Google Chrome’s built-in password manager can be a lifesaver. Enabling the Chrome Password Manager allows you to securely store and manage your passwords with ease. Here’s how to enable it:
1. Open Google Chrome on your computer or mobile device.
2. Click on the three-dot menu icon in the top-right corner of the browser window.
3. Select “Settings” from the drop-down menu.
4. Scroll down and click on “Passwords.”
5. Toggle the switch next to “Offer to save passwords” to enable the password manager.
6. If prompted, enter your Google account password to confirm.
Once enabled, the Chrome Password Manager will automatically offer to save your usernames and passwords when you log in to websites. You can also manually save passwords for sites you’ve already logged into.
It’s important to note that the Chrome Password Manager securely encrypts your saved passwords using your Google Account credentials. This means that passwords are only accessible when you’re signed in to your Google Account and have the necessary authentication.
Enabling the Chrome Password Manager provides a convenient and secure way to manage your passwords across devices. Now you won’t have to worry about forgetting your login credentials or using weak, easy-to-guess passwords. With just a few clicks, you’ll be on your way to a more streamlined and secure online experience.
Save Passwords in Chrome
Once you’ve enabled the Chrome Password Manager, saving passwords for your favorite websites is quick and effortless. Here’s how to save passwords in Chrome:
1. Visit a website for which you want Chrome to remember your login information.
2. Enter your username and password in the respective fields.
3. When prompted by Chrome, click on “Save Password” or “Save” to store the login details.
Chrome will now remember your username and password for that website. The next time you visit the site, Chrome will automatically fill in the login information for you.
It’s important to note that Chrome will only offer to save passwords for websites that allow it. Some websites may have disabled the password saving feature for security reasons.
If you want to have more control over which passwords Chrome saves, you can adjust the settings. Here’s how:
1. Open Chrome and click on the three-dot menu icon in the top-right corner.
2. Go to “Settings” and then click on “Passwords”.
3. Toggle the switch next to “Auto sign-in” to enable or disable the automatic sign-in feature.
4. To view and manage saved passwords, click on “Manage passwords”.
By following these steps, you can easily save and manage your passwords in Chrome. This feature not only saves you time by automatically filling in login information, but it also adds an extra layer of convenience and security to your online activities.
View and Manage Saved Passwords
As you use the Chrome Password Manager to save your passwords, you may eventually need to view or manage them. Fortunately, Chrome provides an easy way to access and modify your saved passwords. Here’s how:
1. Open Chrome and click on the three-dot menu icon in the top-right corner of the browser window.
2. Select “Settings” from the drop-down menu.
3. Scroll down and click on “Passwords.”
Here, you’ll find a list of all the websites for which you have saved passwords. Each entry includes the website name, username, and an obscured password. To view the password for a specific site, click on the eye icon next to the entry. Chrome will prompt you to enter your computer password for verification.
If you want to modify a saved password, follow these steps:
1. In the “Passwords” settings, locate the website for which you wish to change the password.
2. Click on the three-dot menu icon next to the entry.
3. Select “Edit,” and Chrome will open a window where you can update the username and password details.
4. Once you’ve made the necessary changes, click “Save” to update the password entry.
Furthermore, if you would like to delete a saved password, you can do so by following these steps:
1. In the “Passwords” settings, locate the website for which you want to delete the saved password.
2. Click on the three-dot menu icon next to the entry.
3. Select “Remove” or “Delete.” Confirm the action when prompted.
By being able to view and manage your saved passwords, you have greater control over your online security. Whether you need to access a forgotten password or update login information, Chrome makes it simple and convenient to handle your saved passwords.
Remove Saved Passwords
Over time, you may accumulate a list of saved passwords in Chrome that you no longer need or want to keep. Thankfully, removing saved passwords is a straightforward process. Here’s how you can do it:
1. Open Chrome and click on the three-dot menu icon in the top-right corner.
2. Select “Settings” from the drop-down menu.
3. Scroll down and click on “Passwords.”
In the “Passwords” settings, you’ll find a list of all your saved passwords. To remove a password from the list, follow these steps:
1. Locate the website for which you want to delete the saved password.
2. Click on the three-dot menu icon next to the entry.
3. Select “Remove” or “Delete.”
4. Confirm the action when prompted.
Chrome will immediately remove the saved password from its database. This means that the next time you visit the respective website, Chrome will no longer offer to fill in the login information automatically.
If you want to remove multiple passwords at once, you can use the bulk delete option:
1. In the “Passwords” settings, click on the three-dot menu icon at the top-right corner.
2. Select “Remove all” or “Clear all.”
3. Confirm the action when prompted.
This will remove all of your saved passwords in one go. Be cautious when using this option, as it cannot be undone.
It’s important to note that removing a saved password in Chrome does not affect your ability to sign in to the respective website. You can still manually enter your login details and save them again if needed.
By regularly reviewing and removing unnecessary saved passwords, you can keep your Chrome password manager organized and reduce the risk of unauthorized access to your accounts.
Update Saved Passwords
As you change passwords or update your login information for various websites, it’s important to keep your saved passwords in Chrome up to date. Thankfully, updating saved passwords in Chrome is a simple process. Here’s what you need to do:
1. Open Chrome and click on the three-dot menu icon in the top-right corner.
2. Select “Settings” from the drop-down menu.
3. Scroll down and click on “Passwords.”
In the “Passwords” settings, you’ll find a list of all your saved passwords. To update a saved password, follow these steps:
1. Locate the website for which you want to update the password.
2. Click on the three-dot menu icon next to the entry.
3. Select “Edit,” and Chrome will open a window where you can update the username and password details.
4. Once you’ve made the necessary changes, click “Save” to update the password entry.
By updating your saved passwords in Chrome, you ensure that the password manager has the most recent login information for each website. This feature can be especially helpful when you’ve changed your password for security reasons or if you’ve encountered a login issue.
It’s worth noting that Chrome also offers a helpful password suggestion feature. When you update a password, Chrome may generate a strong, unique password for you to use. These generated passwords are highly secure and are typically a combination of letters, numbers, and special characters.
Additionally, you can manually generate strong passwords for websites using Chrome’s password generator feature. Here’s how to use it:
1. When creating or updating a password for a website, click on the password field.
2. Chrome will display a prompt suggesting a strong password.
3. Click “Use suggested password” to accept the generated password.
With the ability to update saved passwords and generate strong, unique passwords, Chrome helps you maintain better security for your online accounts while reducing the burden of remembering complex passwords.
Generate Strong Passwords
Creating strong and unique passwords is crucial for maintaining the security of your online accounts. Fortunately, Google Chrome offers a built-in password generator feature that can help you generate strong passwords effortlessly. Here’s how to generate strong passwords in Chrome:
1. When signing up for a new online account or changing your password on a website, navigate to the password field.
2. Click on the password field to activate it.
3. Chrome will display a prompt offering to generate a strong password for you.
4. The suggested password will be a combination of uppercase and lowercase letters, numbers, and special characters.
5. Click on “Use suggested password” to accept the generated password.
By utilizing the built-in password generator, you can ensure that your passwords are complex and hard to guess. This significantly enhances the security of your online accounts, as it becomes nearly impossible for hackers to crack such passwords using brute force methods.
Additionally, if you prefer using a third-party password manager, you can still take advantage of Chrome’s password generator feature. Simply copy and paste the generated password into your password manager of choice.
Remember, it’s crucial to use different passwords for each website and to avoid using personal information or common words in your passwords. By generating strong and unique passwords for all your online accounts, you can greatly reduce the risk of unauthorized access or identity theft.
Furthermore, if you have previously saved a weak password in Chrome and want to replace it with a stronger one, follow these steps:
1. Go to the website for which you want to update the password.
2. Click on the password field and manually erase the existing password.
3. Use Chrome’s password generator to create a new, strong password.
4. Enter the generated password in the password field.
5. Chrome will prompt you to save the updated password.
By taking advantage of Chrome’s password generator, you can have peace of mind knowing that your online accounts are protected with strong and unique passwords, minimizing the risk of unauthorized access and potential security breaches.
Autofill Passwords on Websites
One of the most convenient features of the Chrome Password Manager is the ability to autofill your saved passwords on websites. With just a few clicks, Chrome can automatically fill in your login credentials, saving you time and effort. Here’s how to enable and use the autofill feature:
1. Ensure that you have the Chrome Password Manager enabled by following the steps mentioned earlier in this guide.
2. Visit a website where you have saved login information.
3. When you arrive at the login page, you will see a pop-up window at the top-right corner of the screen.
4. The pop-up will display the username associated with the website. Click on it to reveal the list of saved accounts.
5. Select the appropriate username for the website you’re visiting.
6. Chrome will automatically fill in the password field for you.
7. If you have multiple accounts saved for the website, you can select the correct account from the list of options.
By using the autofill feature, you no longer need to manually enter your login credentials each time you visit a website. This not only saves time but also reduces the risk of typing errors that may cause login issues.
It’s worth noting that Chrome may prompt you to confirm your Google Account password or use biometric authentication (such as fingerprint or face recognition) to access your saved passwords. These additional security measures ensure that only authorized users can access and autofill passwords in Chrome.
In case you want to disable the autofill feature temporarily, you can do so by following these steps:
1. Open Chrome and click on the three-dot menu icon in the top-right corner.
2. Select “Settings” from the drop-down menu.
3. Scroll down and click on “Passwords.”
4. Toggle off the switch next to “Auto sign-in.”
This way, Chrome won’t automatically fill in passwords for websites unless you manually select the username and password from the pop-up suggestion.
The autofill feature in Chrome simplifies the login process by securely and conveniently filling in your passwords on websites. It streamlines your online experience and allows you to focus on what matters most without the hassle of remembering and typing complex passwords.
Sync Passwords Across Devices
One of the standout features of the Chrome Password Manager is its ability to sync passwords across multiple devices. This means that you can access your saved passwords from any device where you are signed in to your Google Account. Here’s how to enable and take advantage of password syncing in Chrome:
1. Ensure that you are signed in to the same Google Account on all devices you want to sync passwords with.
2. On each device, open Chrome and click on the three-dot menu icon in the top-right corner.
3. Select “Settings” from the drop-down menu.
4. Scroll down and click on “Sync and Google services.”
5. Toggle on the switch next to “Passwords.”
6. If prompted, enter your Google Account password to confirm.
Once password syncing is enabled, any changes you make to saved passwords on one device will automatically sync to all your other devices. This includes adding new passwords, updating existing passwords, and removing saved passwords.
It’s important to note that password syncing in Chrome is secure. Your saved passwords are encrypted and can only be accessed when you’re signed in to your Google Account with the necessary authentication.
By syncing passwords across your devices, you can enjoy a seamless and consistent experience when accessing your online accounts. Whether you’re using your computer, smartphone, or tablet, you’ll have easy access to your saved passwords without the need to manually transfer or remember them.
If you want to disable password syncing or customize synchronization settings, you can do so by following these steps:
1. Open Chrome on any device and navigate to the “Sync and Google services” settings as mentioned earlier.
2. Click on “Manage Sync” found under the “Sync and Google services” section.
3. Here, you can choose what data you want to sync and adjust the settings according to your preferences.
Disabling password syncing will only prevent future changes to passwords from syncing across devices. However, any previously synced passwords will still be available on the individual devices on which they were saved.
With password syncing in Chrome, you can enjoy a seamless and secure experience across all your devices, making it easier than ever to access your saved passwords wherever you go.
Use a Master Password in Chrome
While Chrome’s built-in password manager offers convenience and security, some users may prefer an additional layer of protection for their saved passwords. One way to enhance the security of your Chrome password manager is by using a master password. This adds an extra step of authentication before accessing your saved passwords. Here’s how you can set up and use a master password in Chrome:
1. Open Chrome and click on the three-dot menu icon in the top-right corner.
2. Select “Settings” from the drop-down menu.
3. Scroll down and click on “Passwords.”
4. Toggle on the switch next to “Ask me to save passwords.”
5. You will be prompted to enter your computer login password as verification.
Once you’ve set up the master password, Chrome will require you to enter it before revealing any saved passwords. When you click on a password field on a website, a pop-up window will prompt you to enter the master password. Only after successful verification will Chrome fill in the username and password for the website.
It’s important to choose a strong and memorable master password to ensure the security of your saved passwords. Avoid using common words, personal information, or easily guessable patterns.
Keep in mind that the master password is device-specific and needs to be set up individually on each device where you want to utilize this additional layer of security.
Using a master password in Chrome gives you greater control and peace of mind over your saved passwords. Even if someone gains unauthorized access to your device, they won’t be able to view or use your saved passwords without the master password.
However, it’s important to note that if you forget or lose your master password, Chrome cannot recover it for you. Make sure to choose a secure password that you can remember or consider using a trusted password manager for extra assistance.
By opting to use a master password, you can add an extra layer of protection to your Chrome password manager and have greater confidence in the security of your saved passwords.
Backup and Restore Saved Passwords in Chrome
Your saved passwords in Chrome are valuable assets, and it’s essential to have a backup in case of data loss or device failure. Chrome provides an easy way to backup and restore your saved passwords, ensuring that you never lose access to your important login information. Here’s how you can backup and restore saved passwords in Chrome:
Backup:
1. Open Chrome and click on the three-dot menu icon in the top-right corner.
2. Select “Settings” from the drop-down menu.
3. Scroll down and click on “Passwords.”
4. At the top-right corner of the “Passwords” settings page, you will find three vertical dots. Click on them.
5. Select “Export passwords” from the drop-down menu.
6. Chrome will ask you to enter your computer password as verification.
7. Choose a secure location on your device to save the exported passwords file. It is recommended to use encrypted storage or password-protected external drives for added security.
By following these steps, you can create a backup file containing all your saved passwords. Remember to keep this backup file in a safe place and protect it from unauthorized access.
Restore:
In case you need to restore your saved passwords on a new device or after a data loss event, follow these steps:
1. Open Chrome on the new device or after reinstalling it.
2. Sign in to your Google Account, which was used to create the backup file.
3. Open the “Passwords” settings as mentioned earlier.
4. At the top-right corner of the “Passwords” settings page, click on the three vertical dots.
5. Select “Import” from the drop-down menu.
6. Navigate to the location where you saved the backup file and select it.
7. Follow the on-screen instructions and enter any required authentication, such as your Google Account password.
Chrome will then import and restore your saved passwords from the backup file, allowing you to access your accounts without the need to re-enter the login information.
By regularly backing up your saved passwords in Chrome, you can ensure that you always have a copy of your valuable login information. This provides peace of mind and ensures you can quickly restore your passwords in case of any loss or unexpected events.