
Finding the Perfect Song
Setting a custom ringtone on your iPhone allows you to personalize your device and make it reflect your style and personality. One of the first steps in creating a custom ringtone is finding the perfect song. Here are some tips to help you in this process:
- Choose a song that you love: The first step in finding the perfect song is selecting one that you genuinely enjoy. It could be a current hit, a classic tune, or even a song from your favorite artist. The key is to choose a song that resonates with you.
- Consider the mood: Think about the mood you want your ringtone to set. Do you want something upbeat and energetic? Or perhaps something more calming and soothing? Select a song that matches the desired vibe.
- Pick a memorable section: Look for a memorable section in the song that will work well as a ringtone. It could be a catchy chorus, a guitar riff, or a distinctive instrumental part. This will ensure that your ringtone instantly grabs attention.
- Keep it recognizable: Opt for a song that is easily recognizable. You want your friends and family to be able to identify your unique ringtone when they hear it. Avoid overly obscure tracks that might leave people guessing.
- Consider the length: Remember that a ringtone should be short and sweet. Aim for a section of the song that is no longer than 30 seconds, as anything longer may annoy your callers or disrupt the flow of a meeting.
By following these tips, you can find the perfect song that will make your iPhone ringtone stand out from the crowd. Once you’ve selected the ideal song, it’s time to convert it to the correct format.
Converting the Song to the Right Format
Now that you’ve found the perfect song for your iPhone ringtone, the next step is to convert it to the appropriate format. The default ringtone format for iPhones is M4R, so you’ll need to convert your song to this format. Here are a few methods you can use to accomplish this:
- Online conversion tools: There are various online tools available that allow you to convert audio files to different formats. Simply upload your song file, select the M4R format, and let the tool do its magic. Once the conversion is complete, you can download the converted file and proceed to the next step.
- Audio editing software: If you have audio editing software like Audacity or Adobe Audition, you can import your song and save it in the M4R format. These software programs give you more control over the conversion process and allow you to fine-tune the ringtone to your liking.
- Ringtone maker apps: There are also dedicated apps available for both iOS and Android devices that let you create custom ringtones directly on your phone. These apps typically have built-in conversion features, allowing you to select your song, trim it to the desired length, and save it as an M4R file.
Once you’ve successfully converted your song to the M4R format, you’re ready to transfer it to your iPhone and set it as your ringtone. This can be done using either GarageBand or iTunes, depending on your preference and the available tools on your device.
Using GarageBand to Create a Ringtone
If you’re an iPhone user, you’re in luck because GarageBand, a music creation app developed by Apple, is available for free on iOS devices. Here’s how you can use GarageBand to create a custom ringtone:
- Import the converted song: Start by opening GarageBand on your iPhone and creating a new project. Tap the “+” icon and select “Audio Recorder” from the list of options. Then, tap on the three-line menu icon in the top-left corner and choose “Files” to import the converted song file from your device or cloud storage.
- Trim the song: Once your song is imported, tap on the track to select it and then tap on the scissor icon to enter the editing mode. Use the handles at the beginning and end of the track to trim it down to the desired length for your ringtone. You can preview the selection by tapping the play button.
- Add fade-in and fade-out effects: To give your ringtone a professional touch, you can add fade-in and fade-out effects to the audio. Tap on the track, then tap on the volume icon on the left side of the screen. Adjust the fade-in and fade-out sliders to create a smooth transition at the beginning and end of the ringtone.
- Export and save as a ringtone: Once you’re satisfied with your edited ringtone, tap on the arrow icon in the top-left corner of the screen to go back to the main project view. Tap on “My Songs” and press and hold on your project. Select the “Share” option, then choose “Ringtone” when prompted. Give your ringtone a name and tap “Export” to save it to your iPhone’s ringtone library.
With GarageBand, you can easily create custom ringtones that are unique and tailored to your preferences. Once you’ve saved your ringtone, you can proceed to the next step of setting it as your iPhone’s default ringtone using iTunes.
Using iTunes to Create a Ringtone
If you prefer to use your computer to create a custom ringtone, you can rely on iTunes, the media management software developed by Apple. Here’s how you can use iTunes to create a personalized ringtone for your iPhone:
- Import the converted song: Ensure that you have the latest version of iTunes installed on your computer. Connect your iPhone to your computer and open iTunes. Click on the “Files” or “Music” tab, depending on your iTunes version, and select the converted song file. Drag and drop the file into your iTunes library.
- Trim the song: Right-click on the song in your iTunes library and select “Get Info”. Go to the “Options” tab and set the start and stop time for your ringtone by entering the desired duration in the designated fields. Keep in mind that the maximum length for a ringtone is 30 seconds. Click “OK” to save the changes.
- Create AAC version: Right-click on the song again, this time selecting “Create AAC Version”. iTunes will create a shortened version of the song using the start and stop time you specified.
- Convert the file to M4R: Right-click on the newly created AAC version and select “Show in Finder” (on Mac) or “Show in Windows Explorer” (on PC). The file will be highlighted in the Finder or Explorer window. Change the file extension from “.m4a” to “.m4r” to convert it to the required ringtone format.
- Sync the ringtone to your iPhone: Go back to iTunes, and under the “Devices” section, select your iPhone. Go to the “Tones” tab and check the box that says “Sync Tones”. Choose to sync either all tones or selected tones, depending on your preference. Finally, click “Apply” to sync the ringtone to your iPhone’s library.
Using iTunes, you can easily create custom ringtones from your favorite songs. Once the ringtone is synced to your iPhone, you can proceed to the final step of setting it as your default ringtone directly from your device settings.
Setting the Ringtone on Your iPhone
After creating and syncing your custom ringtone to your iPhone, the final step is to set it as your default ringtone. Here’s how you can do it:
- Open the Settings app: Tap on the Settings app on your iPhone’s home screen to access the device settings.
- Go to Sounds & Haptics (or Sounds): Scroll down and tap on the “Sounds & Haptics” option. If you’re using an older version of iOS, look for just “Sounds”.
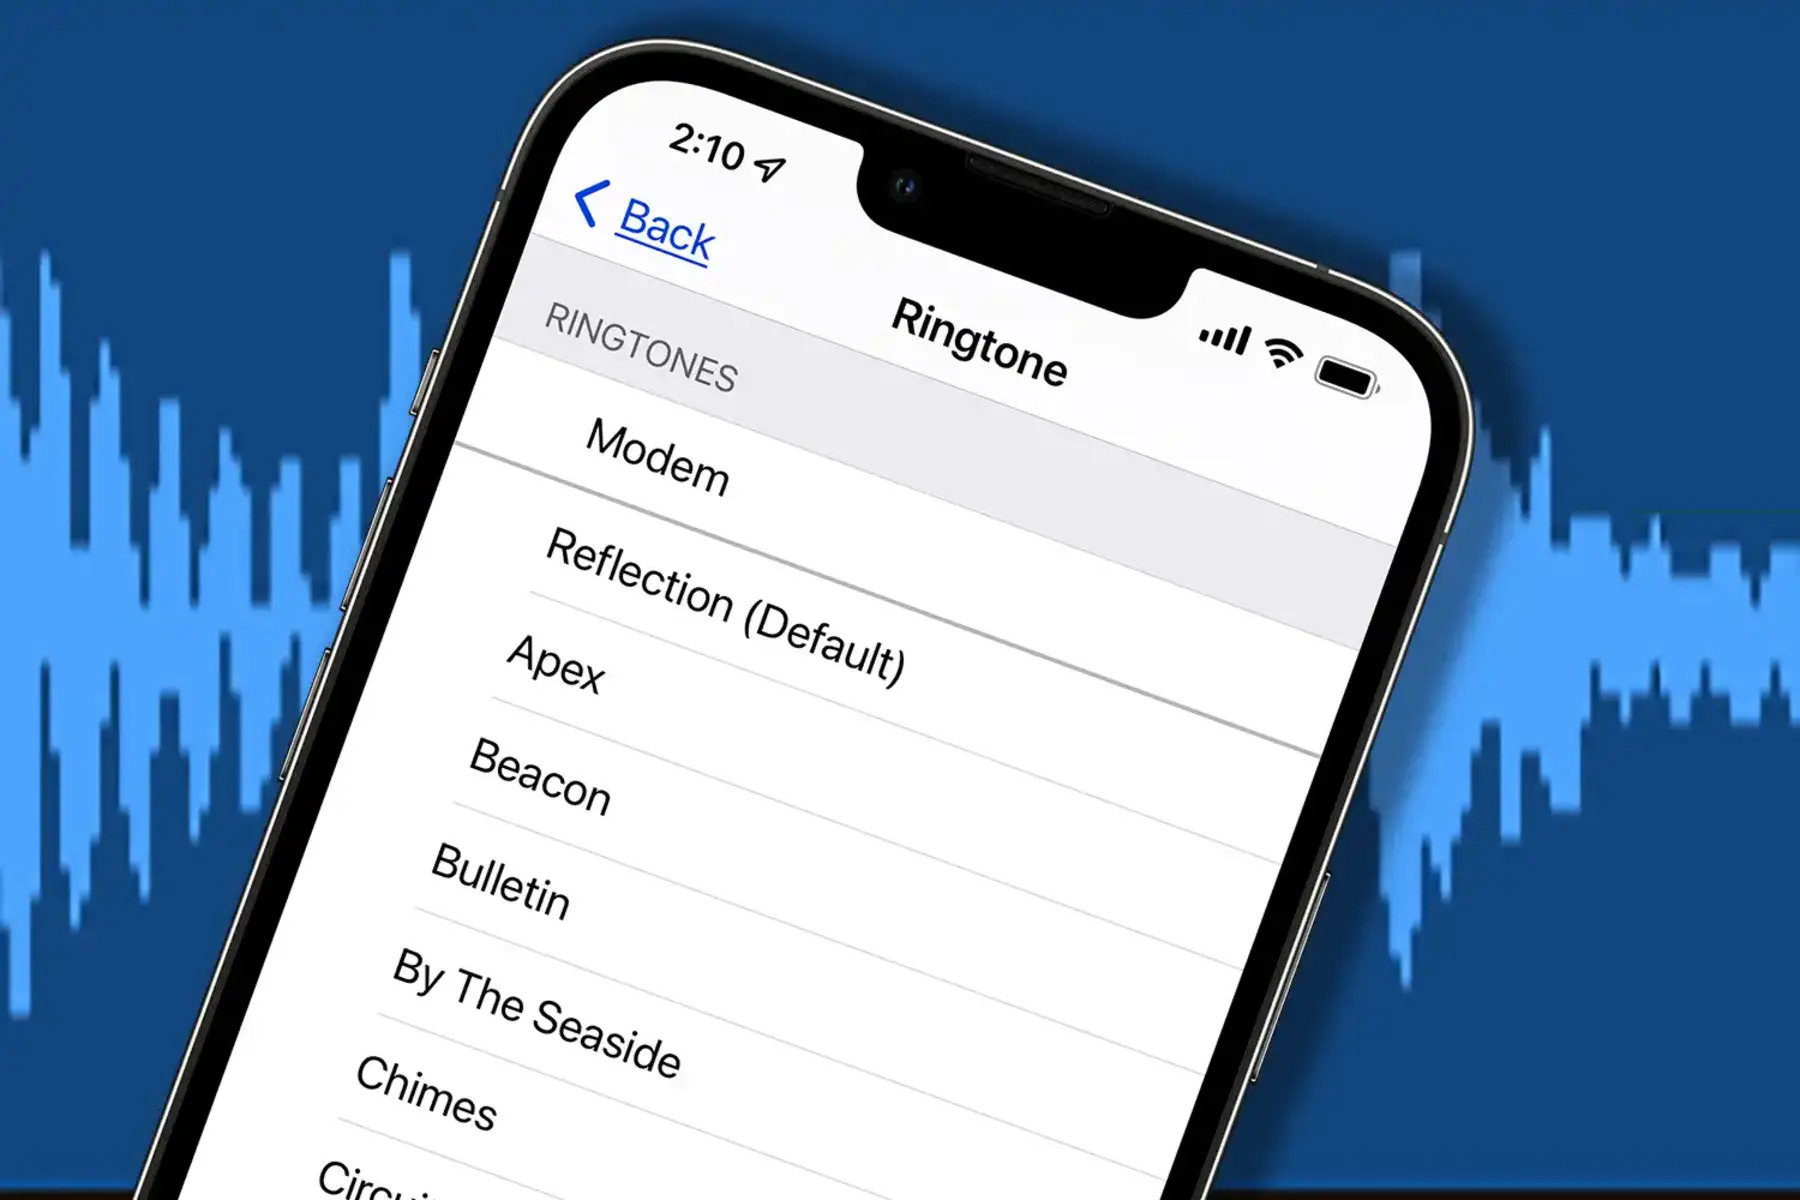
- Select Ringtone (or Text Tone): Under the “Sounds and Vibration Patterns” section, tap on “Ringtone” (or “Text Tone” if you want to set a specific sound for incoming text messages).
- Choose your custom ringtone: On the Ringtone screen, you’ll find a list of available ringtones. Scroll down to the “Ringtones” section, where you’ll see all the custom ringtones you’ve synced to your device. Tap on the one you want to set as your default ringtone.
- Confirm the new ringtone: After selecting your custom ringtone, it will be highlighted with a checkmark. You can tap on the back button to exit the settings and save the changes.
Now, whenever you receive a call, your iPhone will play your newly set custom ringtone instead of the default options. You can follow the same steps to select a custom ringtone for specific contacts by going to the Contacts app, selecting the desired contact, and choosing “Ringtone” under their details.
Remember, you can always go back to these settings to change your ringtone or revert to the default options if you ever feel like switching things up. Now, enjoy the personalized touch of your custom ringtone and let it bring a smile to your face whenever your phone rings!