
Choosing the Right Speakers
When it comes to installing in-wall stereo speakers, one of the most crucial components is selecting the right speakers for your needs. The quality and performance of your speakers will greatly impact the audio experience in your home, so it’s important to make an informed decision. Here are a few key factors to consider when choosing the right speakers for your setup:
- Size and Power: Start by determining the size of the room where the speakers will be installed. Larger rooms may require speakers with more power and a wider frequency response to fill the space adequately. Conversely, smaller rooms may benefit from smaller speakers that still offer excellent audio quality.
- Sound Quality: Pay attention to the overall sound quality of the speakers. Look for models that offer a balanced and accurate frequency response, allowing for clear highs, rich mids, and a deep bass. Reading reviews and listening to demonstration models can help you assess the sound quality before making a purchase.
- Compatibility: Consider the compatibility of the speakers with your audio system or receiver. Check the impedance rating of the speakers and ensure it matches the output capability of your amplifier. Additionally, verify that the speakers have the necessary connections (such as banana plugs or spring clips) that are compatible with your wiring setup.
- Design and Aesthetics: In-wall speakers are designed to blend seamlessly into your home decor. Consider the design and finish of the speakers, ensuring they will match the style of the room where they will be installed. Many speakers offer paintable grilles, allowing you to customize their appearance to match your walls.
- Budget: Set a budget for your in-wall speakers and stick to it. Determine how much you are willing to invest and compare different models within that price range. Keep in mind that while higher-end speakers may offer superior sound quality, there are often budget-friendly options available that still provide excellent performance.
By considering these factors, you can find the right speakers for your in-wall installation. Remember to research different brands and models, read customer reviews, and consult with audio professionals for further guidance. Investing time and effort into selecting the best speakers will ultimately enhance your audio experience and ensure your satisfaction for years to come.
Gathering the Necessary Tools and Materials
Before you embark on the installation of your in-wall stereo speakers, it’s important to gather all the necessary tools and materials to ensure a smooth process. Having everything at hand will save you time and frustration along the way. Here are the essential tools and materials you’ll need:
- Stud Finder: A stud finder is an essential tool for locating the wall studs behind the drywall. This will help you determine the optimal placement for your speakers and ensure they are securely mounted.
- Tape Measure: Accurate measurements are crucial when cutting the speaker holes and positioning them in the wall. Use a tape measure to mark the exact locations and ensure a precise fit.
- Utility Knife: A sharp utility knife will come in handy when cutting through the drywall to create the speaker holes. Ensure the blade is sharp to achieve clean and precise cuts.
- Screwdriver or Drill: Depending on the type of screws or fasteners used to mount the speakers, you’ll need either a screwdriver or drill to secure them in place. Make sure you have the appropriate tool and bits for the job.
- Wire Cutters and Strippers: To prepare and connect the speaker wires, you’ll need wire cutters to trim the excess length and wire strippers to remove the insulation from the ends of the wires.
- Speaker Wire: Choose high-quality speaker wire that is appropriate for the distance between your audio system and the speakers. Consider the gauge of the wire based on the power requirements of your speakers to ensure optimal audio performance.
- Level: An accurate level will help you ensure the speakers are mounted straight and level on the wall. This is important both for aesthetic purposes and to maintain optimal sound projection.
- Painter’s Tape and Drop Cloth: To protect your walls and floors during the installation process, have painter’s tape and a drop cloth ready. Cover any surfaces that may be at risk of being damaged or soiled.
By gathering these tools and materials beforehand, you’ll be well-prepared and equipped to carry out the installation of your in-wall stereo speakers. Having everything organized and readily available will make the process easier and more efficient, allowing you to enjoy your new audio setup in no time.
Determining the Speaker Placement
Proper speaker placement is crucial for achieving optimal sound quality and ensuring an immersive audio experience. When installing in-wall stereo speakers, take the time to carefully determine the best placement for your speakers. Here are some considerations to keep in mind:
- Listening Position: Start by identifying the primary listening position in the room. This is typically where you will be sitting or standing the majority of the time while enjoying audio playback. Consider factors such as the layout of the room, the location of furniture, and any obstructions that may affect sound projection.
- Stereo Imaging: In order to create a sense of depth and stereo imaging, it’s important to position your speakers correctly. The ideal setup is to have the left and right speakers at an equal distance from the primary listening position, forming an equilateral triangle with the listener at the center.
- Room Acoustics: Take into account the acoustic properties of the room. Rooms with hard surfaces and minimal sound-absorbing materials may produce echoes or a boomy bass response. Consider using acoustic treatments, such as rugs, curtains, or wall panels, to help improve the overall sound quality.
- Surround Sound Setup: If you are implementing a surround sound setup with additional speakers, such as center speakers, subwoofers, and rear speakers, follow the guidelines recommended by the speaker manufacturer or refer to industry-standard setups like 5.1 or 7.1 configurations.
- Obstacles and Constraints: Be mindful of any obstacles or constraints that may limit speaker placement options. This could include windows, doors, electrical outlets, or existing furniture arrangements. Work around these limitations to find the best compromise for optimal sound distribution.
- Personal Preferences: Ultimately, personal preferences play a role in determining the speaker placement. Consider factors such as your listening habits, audio preferences, and the specific characteristics of the room. Experiment with different placements and make adjustments based on your personal preference and the sound quality you desire.
By taking these factors into account, you can determine the ideal placement for your in-wall stereo speakers that will provide a balanced, immersive, and enjoyable audio experience. Remember to consider the unique characteristics of your room and make adjustments as necessary to achieve the best possible sound quality.
Finding the Wall Studs
Locating the wall studs is an essential step when installing in-wall stereo speakers, as they provide the necessary support for securely mounting the speakers. Here are some methods you can use to find the wall studs:
- Using a Stud Finder: The most reliable and efficient way to locate wall studs is by using a stud finder. This handheld device uses electronic sensors to detect changes in density behind the wall and locate the studs. Start by turning on the stud finder and slowly moving it across the wall until it indicates the presence of a stud. Mark the location with a pencil or tape.
- Knocking on the Wall: An old-fashioned method is to tap on the wall and listen for a solid, firm sound. Hollow sounds indicate empty spaces, while denser, less hollow sounds indicate the presence of a wall stud. Use this technique along with other methods to confirm the stud location.
- Measuring from an Outlet: Electrical outlets are usually mounted on a wall stud. If you can access an outlet near the desired speaker location, measure the distance between the outlet and the intended speaker placement. Typically, studs are spaced at 16 or 24 inches apart, so you can use this measurement as a starting point to find the adjacent studs.
- Using a Magnet: This method works if the wall studs are made of metal. Place a small magnet against the wall and move it around horizontally. If it is attracted to the wall, it indicates the presence of metal, possibly a wall stud. Use a pencil or tape to mark the spot.
- Looking for Wall Outlets: In some cases, wall outlets are installed directly next to wall studs. Check the wall for outlets or switches and use their locations as a reference point to estimate the position of the studs. This method can provide a general idea of the stud spacing but use additional methods to confirm the exact location.
It’s important to note that while these methods can be effective, they are not foolproof. Factors such as uneven stud spacing or non-standard construction techniques may affect the accuracy of your measurements. For more certainty, you may also consider consulting a professional or contractor to assist with locating the wall studs.
Once you have determined the locations of the wall studs, mark them clearly and use this information as a guide for the upcoming steps of cutting the speaker holes and mounting the speakers securely.
Cutting the Speaker Holes
Now that you have determined the optimal placement and located the wall studs, it’s time to cut the speaker holes in the wall. Properly sized and positioned speaker holes are crucial for seamless integration and optimal sound projection. Follow these steps to cut the speaker holes:
- Measure the Speaker Dimensions: Start by carefully measuring the dimensions of your speakers. Use a tape measure to determine the width, height, and depth of each speaker. Take note of these measurements as they will guide you in cutting the appropriate-sized holes in the wall.
- Mark the Hole Locations: Based on your desired speaker positions, use a pencil or marker to mark the exact locations where you will cut the speaker holes. Ensure that these marks align with the stud locations you previously identified. Double-check the measurements and use a level to ensure the marks are straight and aligned with your reference points.
- Use a Drywall Saw: With the hole locations marked, use a drywall saw to carefully cut the speaker holes. Start by making a small pilot hole near the center of each marked location. Insert the blade of the drywall saw into the pilot hole and slowly saw along the marked lines. Be precise and take your time to create clean, straight cuts. Work slowly and avoid cutting through any electrical wiring or plumbing behind the wall.
- Check the Fit: After cutting the speaker holes, test the fit of the speakers. Gently slide each speaker into its respective hole to ensure it fits securely and aligns properly with the wall surface. Make any necessary adjustments to the hole size or shape to achieve a snug and seamless fit.
- Remove any Debris: Once you are satisfied with the speaker hole cuts, carefully remove any debris or excess drywall material from the holes. Use a handheld vacuum cleaner or a brush to clean the area and ensure a clean installation surface.
- Consider Speaker Backboxes: To further enhance the audio performance and prevent sound leakage into adjacent rooms or spaces, you may consider adding speaker backboxes. These are enclosures that can be installed behind the speakers before mounting them in the wall. Backboxes help improve sound isolation and create a more controlled audio environment.
Remember, take your time and work with caution when cutting the speaker holes. Double-check measurements and alignment to ensure a precise fit. By following these steps, you will be well on your way to seamlessly integrating your in-wall stereo speakers into your home.
Running Speaker Wire
Running speaker wire is a crucial step in the installation process of in-wall stereo speakers. Properly routing and securing the wires will ensure optimal signal transmission and prevent any potential audio interference. Follow these steps to run speaker wire:
- Plan the Wire Routes: Before running the speaker wire, plan the routes they will take from your audio system or receiver to each speaker location. Consider the distance, accessibility, and any obstacles you may encounter along the way. It’s typically advisable to run the wire through the walls or ceiling, following the same path as the wall studs for a cleaner and more discreet installation.
- Prepare the Wire: Measure and cut the speaker wire to the required lengths, leaving some extra length for flexibility during installation. Use wire cutters to strip off a small section of insulation from the ends of the wire, exposing the bare copper conductor for proper connection.
- Locate Wall Access Points: Identify access points in the wall where you can route the wire through. This could be existing wall outlets or any openings that allow you to feed the wire into the wall cavity. Use a fish tape or wire snake to help guide the wire through small openings and navigate the wall cavity.
- Run the Wire: Starting from your audio system or receiver, carefully run the speaker wire along the planned routes. Use cable staples or clips to secure the wire to the wall, keeping it neat and organized. Avoid running the wire too close to electrical wiring to minimize potential interference.
- Feed the Wire through Wall Access Points: Once you reach the wall access points, use a fish tape or wire snake to feed the wire through the openings and into the wall cavity. Be gentle to avoid damaging the wire or the walls. Retrieve the wire at the speaker locations and leave some extra length for easy connection.
- Label the Wires: To ensure easy identification during the speaker connection process, label the wires at both ends. This will help you match the correct wire to its corresponding speaker terminal, preventing any confusion or mistakes.
- Consider Concealing the Wire: To further enhance the aesthetics of your installation, you may consider concealing the speaker wires using wire moldings, cable raceways, or in-wall wire conduits. These options can provide a clean and professional look, minimizing the visibility of the wires along the walls.
By following these steps, you will be able to properly run the speaker wire and ensure a clean and efficient installation of your in-wall stereo speakers. Take your time, secure the wire properly, and maintain organization throughout the process to achieve the best audio performance and a visually pleasing installation.
Mounting the Speakers
Mounting the speakers securely is a crucial step in the installation of in-wall stereo speakers. Proper mounting ensures stability, optimal sound projection, and a seamless integration with your home decor. Follow these steps to mount your speakers:
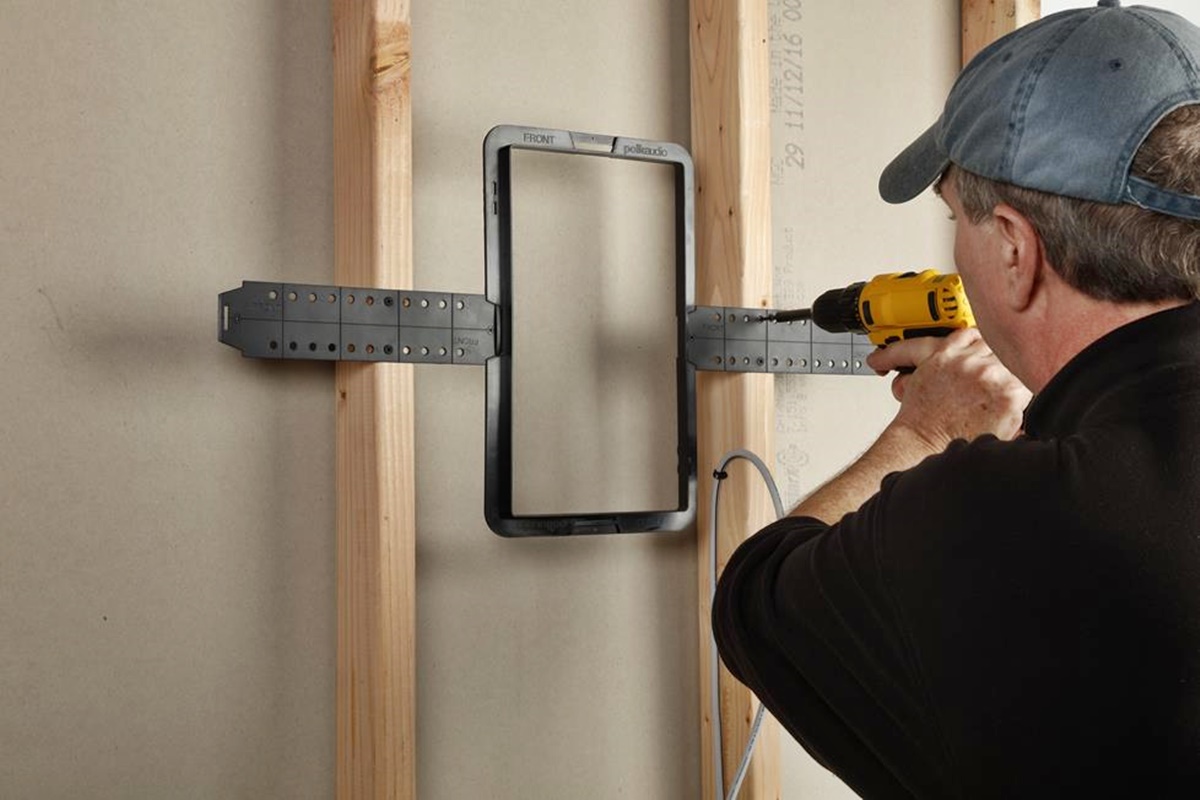
- Align with the Wall Studs: Position the speakers in alignment with the wall studs you previously identified. Ensure that the speaker screw holes align with the stud locations for maximum stability. If the speakers don’t align with the studs, use wall anchors or toggle bolts to provide additional support.
- Mark the Mounting Holes: Once you have positioned the speakers, use a pencil or marker to mark the locations of the mounting holes on the wall. Double-check the alignment and placement of the marks to ensure proper speaker positioning.
- Pre-Drill the Mounting Holes: Using a drill and an appropriately-sized drill bit, pre-drill the marked holes on the wall. Take care not to drill too deep or damage any electrical or plumbing components behind the wall.
- Attach the Mounting Brackets: If your speakers come with mounting brackets, attach them to the speakers using the provided screws or fasteners. Ensure that the brackets are secure and properly aligned before proceeding.
- Mount the Speakers: With the mounting holes pre-drilled and the brackets attached, carefully position the speakers against the wall, aligning the holes with the pre-drilled holes. Insert the screws into the holes and use a screwdriver or drill to tighten them securely, but be careful not to overtighten and damage the speakers or wall.
- Test the Speaker Stability: After mounting the speakers, gently give them a slight tug to ensure they are firmly attached and stable. If there is any movement, make sure to tighten the screws or bolts further to secure the speakers in place.
- Level the Speakers: Use a level to ensure that the mounted speakers are perfectly level. Adjust the positioning if necessary, making small adjustments to achieve a balanced and visually pleasing look.
- Double-check the Speaker Alignment: Once the speakers are mounted, step back and double-check their alignment and positioning. Ensure that they are symmetrically placed and at the desired height and angle for optimal sound dispersion.
By following these steps, you can confidently and securely mount your in-wall stereo speakers. Taking the time to properly align, mark, and attach the speakers ensures both excellent sound performance and an aesthetically pleasing installation.
Connecting the Speakers to the Audio System
Once your in-wall stereo speakers are securely mounted, the next step is to connect them to your audio system or receiver. Properly connecting the speakers will ensure optimal audio performance and an enjoyable listening experience. Follow these steps to connect your speakers:
- Locate the Speaker Terminals: Identify the speaker terminals on your audio system or receiver. These are typically labeled as “Speaker Out” or “Speaker Outputs” and are usually color-coded for convenience.
- Prepare the Speaker Wire: If you haven’t already, strip off a small section of insulation from the ends of the speaker wire, exposing the bare copper conductor. This will allow for proper connections.
- Identify the Polarity: Most speakers and audio systems have terminals labeled as positive (+) and negative (-) or red and black. Ensure that you correctly identify the polarity of the wires to connect them properly.
- Connect the Speaker Wires: Starting with one speaker at a time, insert the exposed wire ends into the corresponding speaker terminal on the audio system or receiver. Make sure the positive wire is connected to the positive terminal and the negative wire to the negative terminal. Secure the connections by tightening any screws or fasteners on the terminals.
- Repeat for all Speakers: Repeat the previous step for each in-wall stereo speaker, ensuring that the wiring connections are correct and secure for each speaker.
- Double-Check the Connections: Once all the speakers are connected, double-check the wiring connections to ensure there are no loose or crossed wires. Incorrectly connected wires can result in phase cancellation and degraded audio quality.
- Configure your Audio System: Depending on your audio system or receiver, you may need to configure the settings to match the number and placement of the connected speakers. This may include selecting the appropriate audio channel configuration (e.g., stereo, 5.1 surround sound, etc.) and adjusting levels and settings to optimize the audio output.
- Test the Speakers: With the speakers connected and the audio system configured, play some test audio or music to ensure that each speaker is functioning correctly. Check for balanced sound output from each speaker and make any necessary adjustments to ensure even sound distribution.
By following these steps and double-checking the connections, you can successfully connect your in-wall stereo speakers to your audio system. Take your time to ensure proper polarity and secure connections for optimal audio quality and an immersive listening experience.
Testing the Speakers
After connecting your in-wall stereo speakers to the audio system, it’s important to test them to ensure they are working properly and delivering the desired sound quality. Here are the steps to follow when testing your speakers:
- Prepare Audio Content: Before testing the speakers, make sure you have audio content ready. This can be music, movies, or any audio source that allows you to assess the speakers’ performance across different frequencies and sound levels.
- Start with Low Volume: Begin testing the speakers at a low volume. Gradually increase the volume to a comfortable listening level, paying attention to any distortion, rattling, or abnormal sounds that may indicate speaker or audio system issues.
- Check All Speakers: Play audio that specifically tests different aspects of your speaker setup, such as stereo imaging, channel separation, and subwoofer response. Make sure that each speaker is producing sound and that the audio is balanced and evenly distributed throughout the room.
- Adjust Audio Settings: Use the audio system controls to adjust the balance, equalization, and other settings to fine-tune the sound to your preferences. Make note of any adjustments that need to be made to optimize the audio performance of your speakers.
- Check Surround Sound: If you have a surround sound setup, ensure that the rear speakers are properly playing surround effects, adding depth and dimension to the audio. Confirm that the dialogue and sound effects are clear and distinguishable from different directions.
- Listen for Dynamics and Detail: Pay attention to the dynamic range and level of detail that the speakers are capable of reproducing. High-quality speakers should deliver clear and nuanced sound with a wide frequency response, allowing you to hear fine details and enjoy a full and immersive audio experience.
- Test at Different Listening Positions: Move around the room and test the speakers’ performance at different listening positions. This will help you assess the consistency and quality of sound throughout the room, ensuring that all listeners can enjoy a balanced audio experience.
- Make Adjustments as Needed: Based on your testing, make any necessary adjustments to the speakers, audio settings, or room acoustics to optimize the sound quality. This may involve adjusting the position of the speakers, repositioning furniture, or fine-tuning the audio system settings.
By thoroughly testing the speakers, you can ensure that they are performing as expected and delivering the desired audio quality. Pay attention to any issues or inconsistencies and take the necessary steps to resolve them. By doing so, you can fully enjoy the superior sound reproduction offered by your in-wall stereo speakers.
Patching and Painting the Wall
Once you have completed the installation of your in-wall stereo speakers, you may need to patch and paint the wall to restore its appearance. This step is important to ensure a seamless integration of the speakers into your home decor. Here are the steps to patch and paint the wall:
- Prepare the Patching Material: Start by preparing the patching material that matches the type of wall you have. For drywall, you can use joint compound or spackle. For plaster walls, plaster or joint compound will work. Follow the manufacturer’s instructions for mixing the patching material to achieve the desired consistency.
- Apply the Patching Material: Using a putty knife or a trowel, apply the patching material to the areas where you made the speaker holes or any other damaged areas. Spread a thin layer of the material over the holes, ensuring a smooth and level surface. Feather the edges of the patch to blend it seamlessly with the surrounding wall.
- Allow the Patch to Dry: Give the patching material enough time to dry completely, following the instructions provided by the manufacturer. This typically takes several hours, but it may vary depending on the type and thickness of the patching material used.
- Sand the Patched Areas: Once the patching material is fully dry, use fine-grit sandpaper to gently smooth the patched areas. Sand in a circular motion until the patched surface is flush and level with the surrounding wall. Avoid applying too much pressure to prevent damaging the underlying wall surface.
- Clean the Wall: After sanding, use a damp cloth or sponge to remove any dust or debris from the wall. Ensuring a clean surface will help the paint adhere properly and result in a smoother and more professional finish.
- Prime the Patched Areas: Before painting, it might be necessary to apply a primer to the patched areas. This helps to create an even and uniform surface for the paint to adhere to. Follow the instructions on the primer label for the best results.
- Paint the Wall: Once the primer is dry, it’s time to paint the wall. Choose a paint color that matches the existing wall color or a new color if desired. Use a roller or brush to apply the paint evenly over the entire wall, including the patched areas. Apply multiple coats if necessary, allowing each coat to dry completely before applying the next.
- Blend the Paint: To ensure a seamless look, feather the paint around the patched areas, gradually blending it with the surrounding wall. This will help to disguise the patched areas and achieve a uniform appearance.
- Clean Up: Once the paint is dry, clean up any painting supplies and remove any protective coverings you had in place. Inspect the wall to ensure that the patched areas are completely blended and that the overall appearance is pleasing to the eye.
By following these steps, you can effectively patch and paint the wall to restore its original look or create a fresh new finish. Take your time, pay attention to details, and ensure a smooth and professional result that complements your newly installed in-wall stereo speakers.