
What is Philips Hue and Razer?
Philips Hue is a smart lighting system developed by Philips, allowing users to control and customize the lighting in their homes through an app or voice commands. The system includes smart bulbs, light strips, and other fixtures that can be programmed to change colors, brightness, and even sync with music, movies, and games.
Razer, on the other hand, is a leading brand in the gaming industry that creates top-quality gaming peripherals and accessories. Known for their cutting-edge technology and sleek designs, Razer devices such as mice, keyboards, and headsets offer gamers an immersive and enhanced gaming experience.
While Philips Hue specializes in transforming the ambiance of a room with its smart lighting solutions, Razer focuses on optimizing gaming performance and providing gamers with customizable settings for their devices. Both brands have garnered a loyal following and are constantly pushing the boundaries of what is possible in their respective fields.
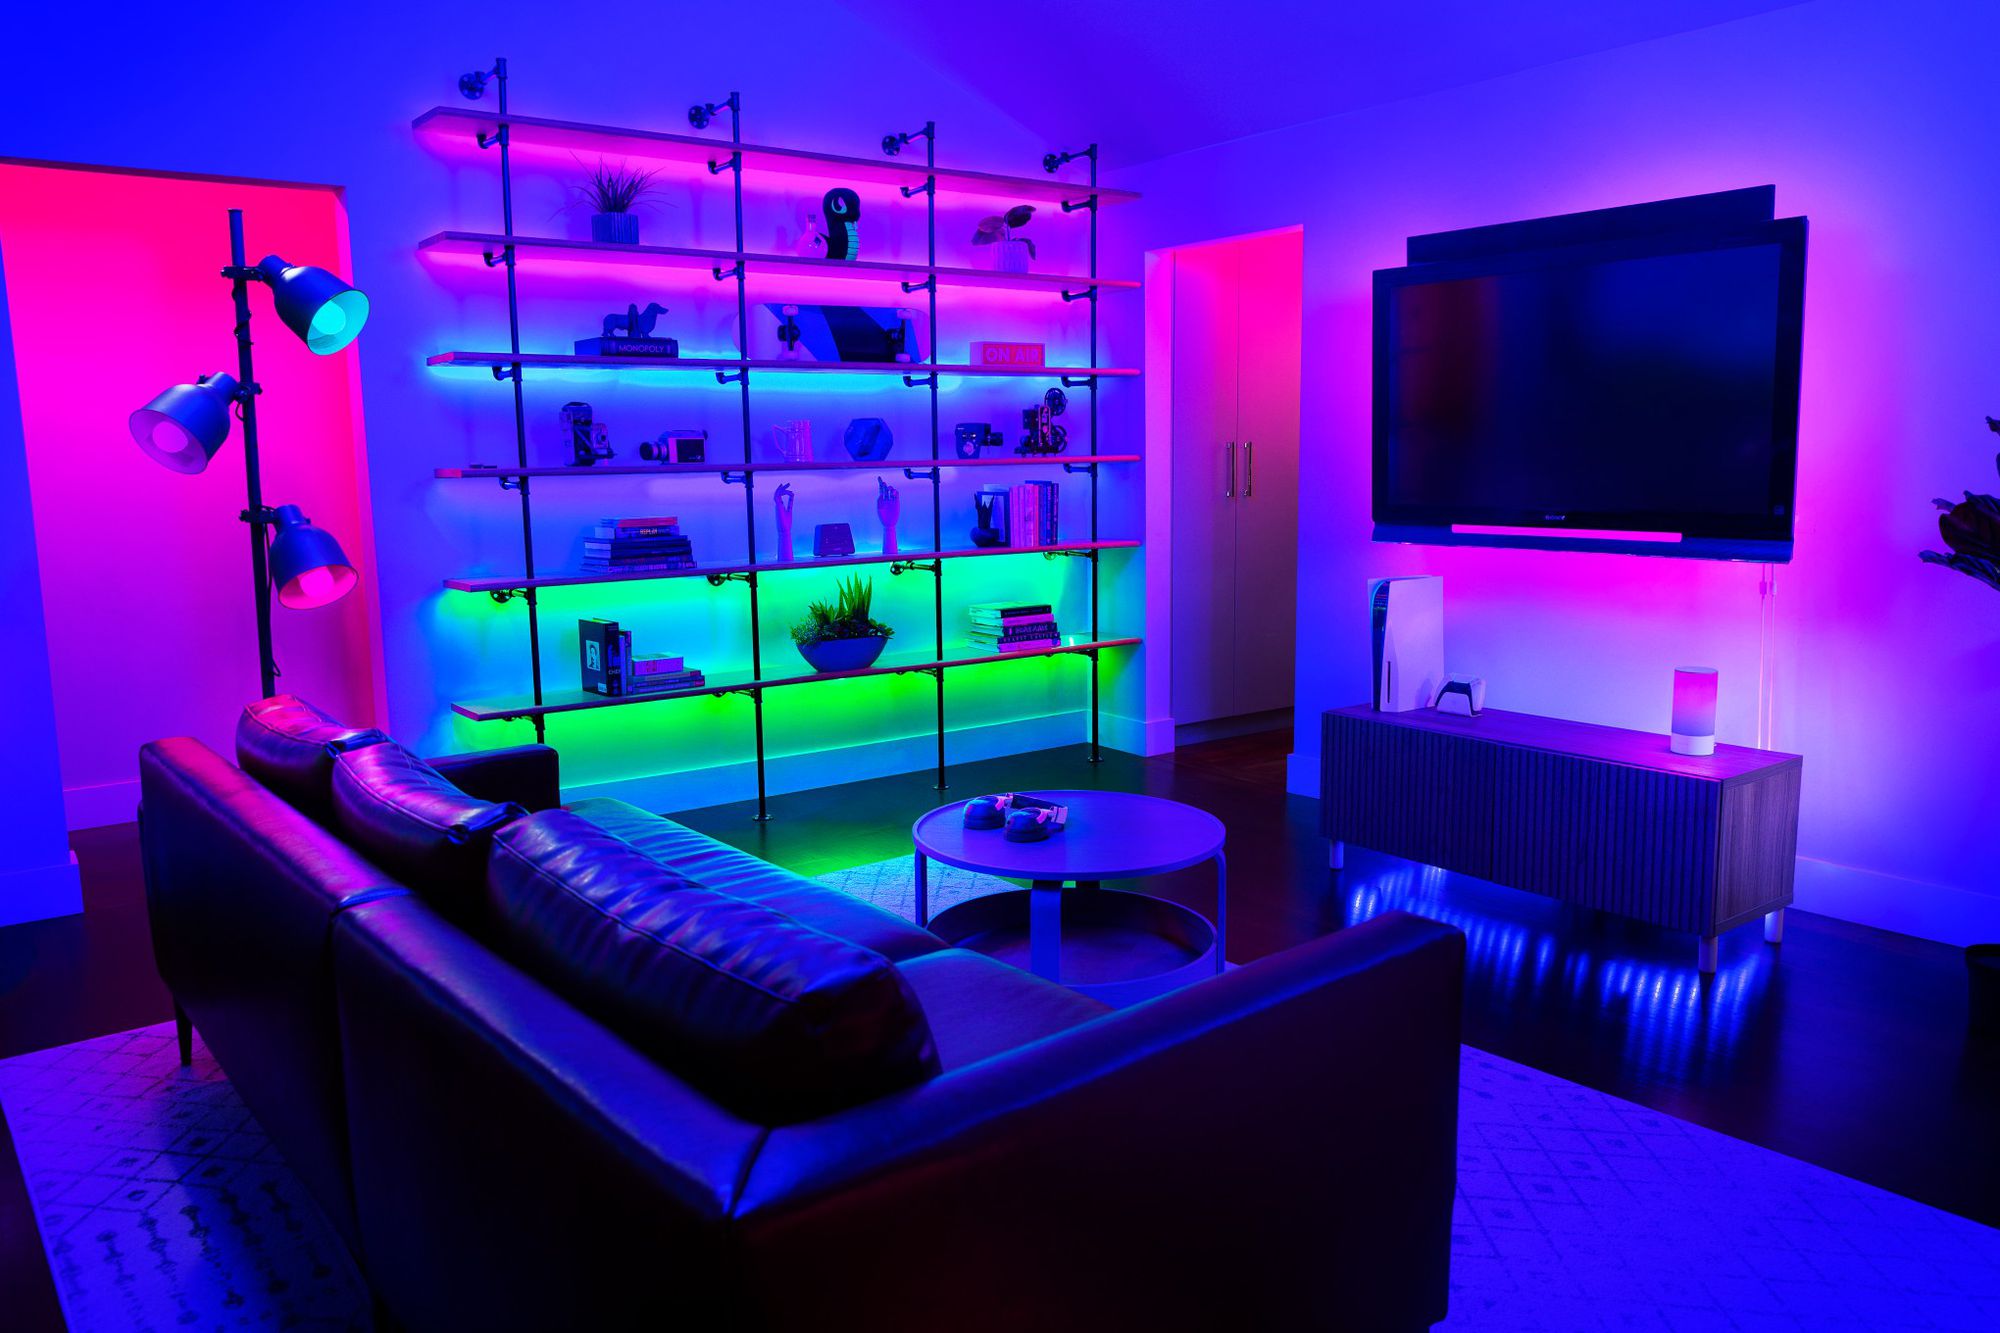
When these two innovative technologies come together, the result is a seamless integration that enhances the gaming experience by combining immersive lighting effects with intuitive controls. By connecting Philips Hue to Razer, gamers can synchronize their game room lighting with their keyboard and mouse, making the gaming experience more immersive and visually stunning.
Compatibility between Philips Hue and Razer
Before diving into the process of connecting Philips Hue to Razer, it is important to understand the compatibility between these two systems. Both Philips Hue and Razer have made efforts to ensure seamless integration and interoperability.
Philips Hue is compatible with various Razer devices, including keyboards, mice, and mouse mats. This means that users can sync their lighting effects between their Philips Hue smart lights and Razer peripherals to create a cohesive and immersive gaming setup.
Razer Chroma, the proprietary lighting technology by Razer, acts as the bridge between Philips Hue and Razer devices. It enables the control and synchronization of lighting effects across multiple devices, including the smart lights from Philips Hue.
It’s worth noting that not all Razer peripherals are compatible with Philips Hue. Make sure to check the official compatibility list provided by Razer and Philips before making your purchase.
Additionally, to connect and control Philips Hue lights with Razer devices, you’ll need a stable internet connection and the latest version of the Razer Synapse software installed on your computer. The Razer Synapse software serves as the central hub for managing lighting presets, creating custom effects, and controlling the integration between Philips Hue and Razer devices.
Overall, the compatibility between Philips Hue and Razer offers users an incredible opportunity to elevate their gaming experience by synchronizing lighting effects and creating a visually stunning gaming setup. With the right combination of compatible Razer devices and Philips Hue smart lights, gamers can immerse themselves in a world of vibrant and dynamic lighting that reacts to their every move.
Prerequisites for connecting Philips Hue to Razer
Before you can connect and control your Philips Hue lights with your Razer devices, there are a few prerequisites that need to be met. Here’s what you’ll need:
- Razer Synapse Software: Make sure you have the latest version of Razer Synapse software installed on your computer. This software acts as the central hub for managing lighting presets and controlling the integration between Philips Hue and Razer devices.
- Philips Hue Bridge: The Philips Hue Bridge is the central hub that connects your Philips Hue lights to your home network. Ensure that you have a working Philips Hue Bridge properly set up and connected to your Wi-Fi network.
- Philips Hue Lights: Of course, you’ll need Philips Hue smart lights or light strips to connect with your Razer devices. These lights should be properly installed and configured through the Philips Hue app.
- Razer Devices: You’ll need at least one Razer device that supports Razer Chroma. This includes Razer keyboards, mice, mouse mats, and other compatible peripherals. Check the Razer website or product documentation to confirm if your device supports Razer Chroma integration.
- Stable Internet Connection: To ensure seamless connectivity and control between Philips Hue and Razer, a stable internet connection is essential. Make sure that your Wi-Fi or Ethernet connection is stable and provides reliable internet access.
By meeting these prerequisites, you’ll have everything in place to proceed with connecting your Philips Hue lights to your Razer devices. With the right setup and configuration, you’ll be able to enjoy synchronized lighting effects and create a visually appealing gaming environment.
Connecting Philips Hue to Razer
Now that you have all the prerequisites in place, let’s dive into the process of connecting your Philips Hue lights to your Razer devices. Follow these steps to set up the integration:
- Make sure your Philips Hue lights and Razer devices are properly connected and powered on.
- Launch the Razer Synapse software on your computer.
- In the Razer Synapse software, navigate to the “Chroma Connect” tab or section.
- Look for the Philips Hue option and click on it to start the pairing process.
- Follow the on-screen instructions to authorize the connection between Philips Hue and Razer. This may involve signing in to your Philips Hue account or granting permission.
- Once the connection is established, you should see your Philips Hue lights listed in the Razer Synapse software.
- From here, you can start customizing and creating lighting effects for your Philips Hue lights using the Razer Synapse software. Explore the various options and settings available to personalize your gaming experience.
- Test the synchronization by launching a game or application that supports Razer Chroma integration. You should see your Philips Hue lights respond and change colors according to the in-game actions or settings.
Remember, the specific steps and options may vary depending on the version of Razer Synapse software and the Razer device you are using. Consult the Razer documentation or support resources for detailed instructions tailored to your specific setup.
With your Philips Hue lights successfully connected and integrated with your Razer devices, you can now enjoy a fully immersive gaming experience with synchronized lighting effects that react to your gameplay. The combination of Philips Hue and Razer technologies brings a new level of visual excitement to your gaming sessions.
Controlling Philips Hue Lights with Razer Devices
Once you have successfully connected your Philips Hue lights to your Razer devices, you can take control of your lighting setup using the Razer Synapse software. Here’s how you can control your Philips Hue lights with your Razer devices:
1. Lighting Presets: Razer Synapse allows you to create lighting presets for your Razer devices, including your Philips Hue lights. You can choose from a wide range of pre-defined lighting effects or create custom ones to match your gaming preferences. These presets can be easily activated with a single click, instantly transforming your gaming environment.
2. Chroma Studio: Razer Synapse features Chroma Studio, a powerful tool that lets you design and customize lighting effects for your Razer devices and Philips Hue lights. With Chroma Studio, you can select individual Philips Hue lights or groups and sync them with your Razer devices, creating visually stunning lighting setups that respond to your gaming actions, music, or even system events.
3. Device Integration: Some Razer peripherals, such as keyboards and mouse mats, feature integrated Philips Hue lighting zones. This means that specific areas of your Razer device can mimic the color and effects of your Philips Hue lights, creating a cohesive and immersive lighting experience. Check the documentation for your specific Razer device to learn how to configure and customize this integration.
4. Voice Control: Razer Synapse also supports voice control through popular virtual assistants like Alexa and Cortana. By enabling the relevant integrations, you can use voice commands to control your Philips Hue lights along with your Razer devices. With a simple voice command, you can change colors, adjust brightness, or activate different lighting presets without even touching your peripherals.
By leveraging the capabilities of Razer Synapse and the integration between Philips Hue and Razer, you have full control over your lighting setup. Experiment with different lighting effects, synchronize them with your gaming preferences, and create an immersive atmosphere that enhances your gaming experience.
Creating Lighting Presets in Razer Synapse
Razer Synapse provides a powerful tool for creating and customizing lighting presets for your Razer devices, including your Philips Hue lights. Lighting presets allow you to define specific color schemes, effects, and patterns that can be easily activated with a single click or keypress. Here’s how you can create your own lighting presets in Razer Synapse:
- Launch the Razer Synapse software on your computer and navigate to the Chroma tab or section.
- Click on the “Lighting” or “Lighting Effects” option to access the lighting customization settings.
- Choose the device or devices you want to customize. If you have Philips Hue lights connected, they should be listed along with your Razer devices.
- Select the lighting effect you want to apply. Razer Synapse offers a variety of options, such as Spectrum Cycling, Breathing, and Reactive, to name a few.
- Customize the lighting effect by adjusting parameters like color, speed, and brightness. Experiment with different settings until you achieve the desired effect.
- Save your customized lighting preset by assigning it a unique name and clicking the “Save” or “Apply” button.
- To activate your lighting preset, simply click on it from the list of presets in Razer Synapse. Your Razer devices, including the connected Philips Hue lights, will instantly sync to the chosen lighting effect.
Additionally, Razer Synapse allows for advanced customization through the Chroma Studio feature. Chroma Studio lets you create intricate lighting designs by combining and sequencing multiple effects. You can even synchronize the lighting effects with your games, music, or other applications to create a dynamic lighting experience.
Take the time to experiment and explore the various lighting options and effects available in Razer Synapse. With creativity and personalization, you can create lighting presets that perfectly match your gaming style and create an immersive atmosphere in your gaming setup.
Automating Philips Hue Lights with Razer Chroma Integration
Razer Chroma integration allows for seamless synchronization between your Philips Hue lights and Razer devices, enhancing your gaming experience. With the integration in place, you can automate your Philips Hue lights to respond to certain events or actions. Here’s how you can automate your Philips Hue lights with Razer Chroma integration:
1. Game Events: Razer Synapse can automatically trigger lighting effects on your Philips Hue lights based on in-game events. For example, when playing a first-person shooter, you can configure the lights to flash red when taking damage or change color when switching weapons. This adds a new level of immersion and excitement to your gaming sessions.
2. Audio Effects: Razer Chroma integration also enables your Philips Hue lights to react to audio cues from games, music, or other applications. The lights can pulsate, strobe, or change colors in sync with the music or sound effects playing from your computer. This creates a dynamic and visually captivating environment.
3. Razer Hypersense: Razer Hypersense technology extends the integration beyond just lighting effects and allows for tactile feedback. When enabled, your Razer devices can vibrate or provide haptic feedback in sync with the lighting effects on your Philips Hue lights. This combination immerses you in a multi-sensory gaming experience.
4. Alexa or Cortana Commands: If you have a compatible virtual assistant device like Amazon Echo or Windows PC with Cortana, you can further enhance automation by controlling your Philips Hue lights using voice commands. Sync your virtual assistant with Razer Synapse to control your lights without even lifting a finger.
With the automation capabilities provided by Razer Chroma integration, you can effortlessly create a dynamic and immersive environment for gaming and entertainment. Customize the lighting effects, synchronize them with audio and game events, and let your Philips Hue lights react in real time to enhance your overall gaming experience.
Troubleshooting Common Issues in Connecting Philips Hue to Razer
While connecting Philips Hue lights to Razer devices is generally a straightforward process, you may encounter some common issues along the way. Here are a few troubleshooting steps to help you resolve any connectivity problems:
1. Check Network Connectivity: Ensure that your Philips Hue Bridge and Razer devices are connected to the same network. Make sure your Wi-Fi or Ethernet connection is stable and providing reliable internet access to both devices.
2. Update Firmware and Software: Check for firmware updates for your Philips Hue Bridge and software updates for your Razer devices, including Razer Synapse. Keeping the devices up to date ensures compatibility and optimal performance.
3. Restart Devices: Try restarting your Philips Hue Bridge, Razer devices, and your computer. Sometimes, a simple reboot can resolve connectivity issues and restore the connection between the devices.
4. Reauthorize Connection: If you’re experiencing issues with the integration, try reauthorizing the connection between Philips Hue and Razer in the respective software. Follow the instructions to unlink and relink the devices to establish a fresh connection.
5. Check Device Compatibility: Verify that your Razer devices and Philips Hue lights are compatible and listed as supported devices for integration. Refer to the official documentation and compatibility lists provided by Razer and Philips Hue to confirm compatibility.
6. Double-Check Settings: Review the settings and configurations in Razer Synapse to ensure that you have properly enabled the Philips Hue integration. Check that the appropriate lighting zones and effects are selected and that the synchronization settings are properly configured.
7. Check Bridge Connection: If your Philips Hue Bridge is not detected by Razer Synapse, ensure that it is powered on, connected to your network, and within range of the devices you’re trying to control. You may need to move the bridge closer or adjust the Wi-Fi settings.
If you have tried all of these troubleshooting steps and are still experiencing issues, it’s recommended to reach out to the official support channels of Razer and Philips Hue. Their support teams can provide further assistance and help troubleshoot specific issues based on your device setup and software versions.
Remember, patience and persistence can often resolve any connectivity hiccups, and once the connection is established, you can enjoy the seamless integration between your Philips Hue lights and Razer devices for an enhanced gaming experience.