
What is Winhttp.dll?
Winhttp.dll is a Dynamic Link Library (DLL) file that is a vital component of the Windows operating system. DLL files contain reusable code and data that multiple applications can utilize. In the case of Winhttp.dll, it provides the necessary functionality for applications to access the internet by handling HTTP and HTTPS requests.
This DLL file is an integral part of the Windows HTTP Services, also known as WinHTTP. It allows applications to communicate with servers using the HTTP protocol, making it essential for various network-related tasks such as web browsing, downloading files, and interacting with web services.
Winhttp.dll is typically located in the System32 folder within the Windows directory. It is a critical system file, and any issues or errors related to it can lead to application failures and restricted internet connectivity.
When this DLL file is missing or not found, it can result in various error messages and prevent applications from functioning properly. These errors can be frustrating and can affect the overall performance and usability of your system.
Understanding the causes of Winhttp.dll errors can help you troubleshoot and resolve these issues effectively. In the following sections, we will explore the common error messages associated with Winhttp.dll and the methods to fix them.
Common Error Messages
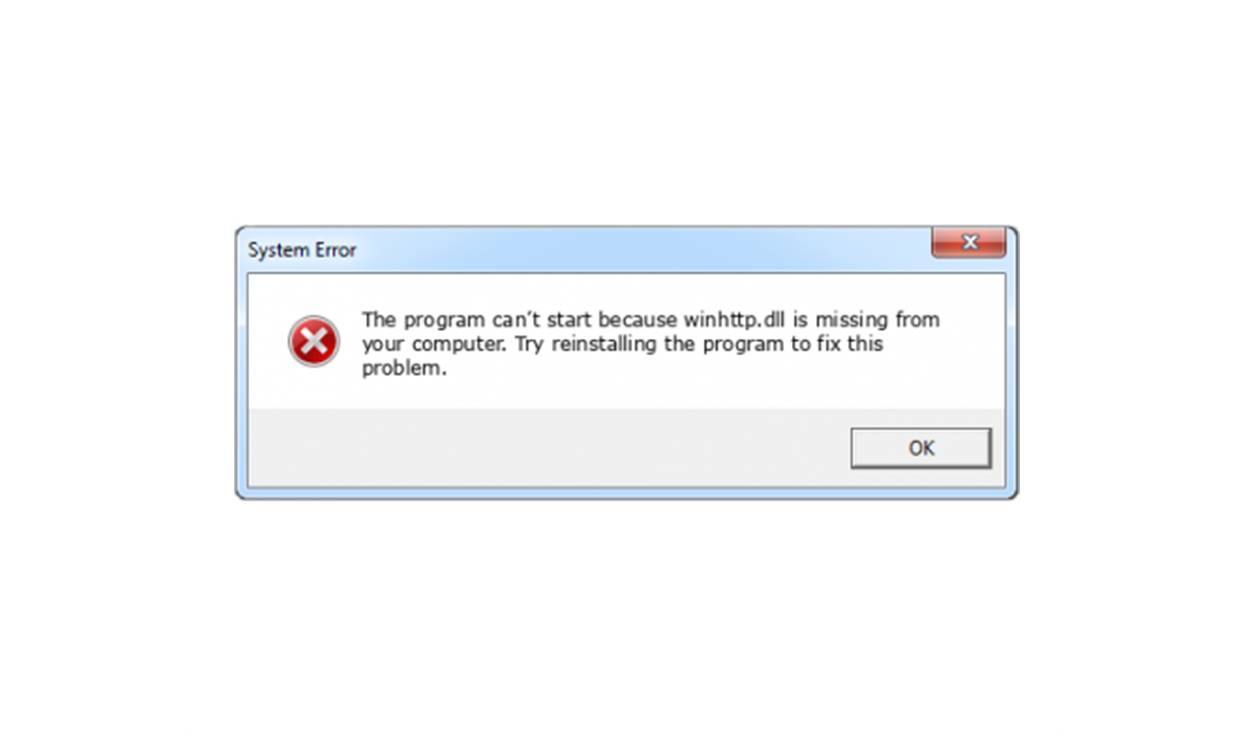
When the Winhttp.dll file is missing or encounters an error, you may come across various error messages that indicate the problem. These error messages can provide valuable clues for troubleshooting and resolving the issue. Here are some of the common error messages related to Winhttp.dll:
- Winhttp.dll not found: This error message occurs when the operating system fails to locate the Winhttp.dll file. It can prevent applications from launching or functioning correctly.
- Cannot register Winhttp.dll: This error message indicates a problem with registering the Winhttp.dll file. It can occur when there is an issue with the file itself or if the required permissions are not set correctly.
- Winhttp.dll is missing or corrupted: This error message suggests that the Winhttp.dll file has either been deleted, damaged, or overwritten by another program. As a result, applications relying on this DLL file may not work as expected.
- Entry point not found – Winhttp.dll: This error message indicates that the application is unable to locate a specific function or entry point within the Winhttp.dll file. It can occur due to file corruption or compatibility issues.
- Winhttp.dll is incompatible: This error message occurs when the version of Winhttp.dll being used is not compatible with the application or the operating system. It can cause crashes or other unexpected behavior.
Understanding these common error messages can help you identify and resolve Winhttp.dll-related issues effectively. In the next section, we will explore the possible causes behind these errors and discuss the methods to fix them.
Causes of Winhttp.dll Errors
Winhttp.dll errors can occur due to various reasons, ranging from file corruption to compatibility issues. Understanding the causes behind these errors is essential for effectively resolving them. Here are some common causes of Winhttp.dll errors:
- Missing or deleted Winhttp.dll file: If the Winhttp.dll file is missing or has been accidentally deleted, applications that rely on this DLL file will encounter errors.
- Corrupted Winhttp.dll file: File corruption can occur due to various reasons such as improper system shutdown, malware infections, or hardware issues. A corrupted Winhttp.dll file can lead to errors when accessing the internet or using related applications.
- Invalid registry entries: The Windows registry stores information about DLL files and their locations. If there are invalid or incorrect entries related to Winhttp.dll in the registry, it can cause errors when accessing or loading the DLL file.
- Outdated or incompatible applications: If you are using outdated or incompatible applications that require Winhttp.dll to function, it can result in errors. This can happen when a newer version of the DLL file is required, or if the application itself is not compatible with the version of Windows you are using.
- Malware infections: Malicious software can interfere with DLL files, including Winhttp.dll. Malware can modify or delete DLL files, leading to errors and disruptions in functionality.
- Hardware problems: In some cases, hardware-related issues, such as faulty RAM or a failing hard drive, can cause Winhttp.dll errors. These errors can occur when the DLL file is not accessed or loaded correctly due to hardware malfunctions.
By identifying the underlying causes of Winhttp.dll errors, you can take appropriate steps to resolve them. In the following sections, we will discuss several methods to fix Winhttp.dll is missing or not found errors and restore the proper functioning of your applications.
How to Fix Winhttp.dll Is Missing Errors
Encountering a “Winhttp.dll is missing” error can be frustrating, as it can impact the functionality of various applications. Fortunately, there are several methods you can try to resolve this issue and restore the missing Winhttp.dll file. Here are some effective solutions to fix Winhttp.dll is missing errors:
- Reinstall the Application: Sometimes, the missing Winhttp.dll file may be specific to a particular application. In such cases, reinstalling the affected application can help resolve the issue. Uninstall the application, download the latest version from the official website, and install it again.
- Update Windows: Make sure your Windows operating system is up to date. Outdated system files can sometimes cause Winhttp.dll errors. Go to the Windows Update settings, check for updates, and install any available updates for your system.
- Run SFC Scan: The System File Checker (SFC) tool can help repair corrupted system files, including Winhttp.dll. Open the Command Prompt as an administrator and run the command “sfc /scannow”. Wait for the scan to complete and follow any on-screen instructions to fix any detected issues.
- Perform a System Restore: If you recently made changes to your system, such as installing new software or drivers, it may have led to the Winhttp.dll error. Performing a system restore to a previous point in time can revert your system back to a working state. Access the System Restore utility through the Control Panel or by searching for “System Restore” in the Start menu.
- Repair Corrupted System Files: In addition to the SFC scan, Windows has another tool called DISM (Deployment Image Servicing and Management) that can help repair corrupted system files. Open the Command Prompt as an administrator and run the command “DISM /Online /Cleanup-Image /RestoreHealth”. Allow the process to complete and then restart your computer.
- Restore Winhttp.dll from the Recycle Bin: If you recently deleted the Winhttp.dll file, it may still be in the Recycle Bin. Open the Recycle Bin, locate the file, and restore it to its original location. Ensure that you do not permanently delete the file again.
- Perform a Clean Installation of Windows: If all else fails, you may consider performing a clean installation of Windows. This will reinstall the operating system, including all system files, and can help resolve any underlying issues causing the Winhttp.dll error. Remember to back up your important files before proceeding with this method.
By following these methods, you can effectively fix Winhttp.dll is missing errors and restore the proper functioning of your applications. If the problem persists, you may need to seek further assistance from technical support or a professional computer technician.
Method 1: Reinstall the Application
One of the simplest and most effective solutions to fix the “Winhttp.dll is missing” error is to reinstall the application that is encountering the issue. Sometimes, the missing Winhttp.dll file may be specific to a particular program, and reinstalling it can help resolve the problem. Here’s how you can reinstall the application:
- Uninstall the Application: First, you need to uninstall the affected application from your computer. To do this, go to the Control Panel and access the “Programs and Features” or “Add or Remove Programs” section. Locate the application in the list of installed programs, right-click on it, and select “Uninstall” or “Remove.”
- Download the Latest Version: After uninstalling the application, visit the official website of the software and look for the latest version available for download. Make sure to download the appropriate version that matches your operating system and architecture (32-bit or 64-bit).
- Install the Application: Once the download is complete, run the installer file to install the application on your system. Follow the on-screen instructions to proceed with the installation. It is recommended to choose the default installation settings unless you have specific preferences.
- Restart Your Computer: After the installation is complete, restart your computer to ensure that the changes take effect. This will also refresh the system and ensure all necessary files and configurations are properly updated.
- Test the Application: Once your computer has restarted, launch the reinstalled application and check if the Winhttp.dll error has been resolved. The application should now be able to access the required DLL file and function without any issues. If the error persists, you may need to explore other troubleshooting methods or seek technical assistance.
Reinstalling the application helps ensure that all necessary files, including Winhttp.dll, are correctly installed on your system. It is a straightforward method that can often resolve the “Winhttp.dll is missing” error and restore the proper functioning of the application.
Method 2: Update Windows
Updating your Windows operating system can often resolve various issues, including the “Winhttp.dll is missing” error. Outdated system files can cause compatibility issues and prevent applications from accessing the necessary DLL files. By updating Windows, you can ensure that your system has the latest updates and patches installed. Here’s how you can update Windows to fix the Winhttp.dll error:
- Open Windows Update: Go to the Start menu and search for “Windows Update” to access the Windows Update settings. Alternatively, you can open the Control Panel and navigate to the Windows Update section.
- Check for Updates: In the Windows Update settings, click on the “Check for updates” button. This will initiate a search for available updates for your system.
- Install Updates: If any updates are found, click on the “Install” or “Download and install” button to start the update process. Depending on the number and size of the updates, this process may take some time. It is important to have a stable internet connection during the update process.
- Restart Your Computer: After the updates are installed, you will be prompted to restart your computer. This is necessary to apply the changes and ensure that the updated system files are in effect.
- Check for Additional Updates: Once your computer has restarted, repeat the process of checking for updates to ensure that all available updates have been installed. Sometimes, updates are released in multiple phases, so it is essential to keep checking for additional updates until none are available.
- Test the Application: After updating Windows, launch the application that was encountering the Winhttp.dll error and check if the issue has been resolved. The updated system files should now allow the application to access the necessary DLL files without any errors. If the error persists, you may need to try other troubleshooting methods or seek professional assistance.
Updating your Windows operating system is an important maintenance step that can often resolve various system-related issues. By keeping your system up to date, you ensure that all necessary files, including Winhttp.dll, are compatible and accessible to the applications on your computer.
Method 3: Run SFC Scan
The System File Checker (SFC) scan is a built-in Windows tool that can help repair corrupted system files, including Winhttp.dll. Running an SFC scan can fix file-related issues that may be causing the “Winhttp.dll is missing” error. Here’s how to perform an SFC scan:
- Open Command Prompt as Administrator: Right-click on the Start button and select “Command Prompt (Admin)” from the context menu. If you are using Windows 10, you can also search for “Command Prompt” in the Start menu, right-click on it, and choose “Run as administrator”.
- Run SFC Scan: In the Command Prompt window, type the command “sfc /scannow” and press Enter. This command instructs the SFC tool to scan and repair any corrupted system files it finds. The scan may take some time to complete, so be patient.
- Follow On-Screen Instructions: Once the scan is finished, the SFC tool will provide a detailed report of the scan results. If any issues are found and fixed, the tool will display the details in the Command Prompt window. If prompted, follow any on-screen instructions to complete the repair process.
- Restart Your Computer: After the SFC scan and repairs are complete, it is recommended to restart your computer. This will ensure that the repaired system files are properly implemented and active.
- Test the Application: Launch the application that was encountering the Winhttp.dll error and check if the issue has been resolved. The SFC scan should have repaired any corrupted files, including Winhttp.dll, allowing the application to function properly. If the error persists, you may need to try other troubleshooting methods or consult with a technical professional.
The SFC scan is a useful tool for repairing corrupted system files, such as Winhttp.dll. By running this scan, you can fix file-related issues and resolve the “Winhttp.dll is missing” error. It is a straightforward method that can be performed without the need for any additional software or technical expertise.
Method 4: Perform a System Restore
Performing a system restore can help resolve the “Winhttp.dll is missing” error if it was caused by recent changes to your system. System Restore is a built-in feature in Windows that allows you to revert your computer’s settings to a previous point in time. Here’s how to perform a system restore:
- Access System Restore: Open the Start menu and search for “System Restore.” Select the “Create a restore point” option from the search results. In the System Properties window that appears, click on the “System Restore” button.
- Select a Restore Point: On the System Restore window, select the option that says “Choose a different restore point” and click “Next.” You will then see a list of available restore points, which are specific points in time when your system created a backup. Choose a restore point that predates the occurrence of the Winhttp.dll error.
- Start the Restore Process: After selecting the restore point, click “Next” and then “Finish” to confirm your selection. System Restore will then begin the restoration process, which may take some time. Your system will restart during this process, so ensure that you save any unsaved work before proceeding.
- Check Application Functionality: Once the restoration process is complete and your computer has restarted, launch the application that was encountering the Winhttp.dll error and check if the issue has been resolved. The system restore should have rolled back your system settings to a previous state, allowing the application to function as it did before the error occurred. If the error persists, you may need to explore other troubleshooting methods or seek professional assistance.
Performing a system restore allows you to undo recent changes to your system, including any modifications that may have caused the “Winhttp.dll is missing” error. It is recommended to choose a restore point that is closest to the time when the error first occurred for the best chance of resolving the issue. However, keep in mind that performing a system restore will not affect your personal files, but it may remove recently installed applications or updates.
Method 5: Repair Corrupted System Files
If the “Winhttp.dll is missing” error is caused by corrupted system files, you can use the System File Checker (SFC) and Deployment Image Servicing and Management (DISM) tools to repair them. These built-in Windows tools can help fix file-related issues that may be causing the error. Here’s how to repair corrupted system files:
- Open Command Prompt as Administrator: Right-click on the Start button and select “Command Prompt (Admin)” from the context menu. If you are using Windows 10, you can also search for “Command Prompt” in the Start menu, right-click on it, and choose “Run as administrator”.
- Run SFC Scan: In the Command Prompt window, type the command “sfc /scannow” and press Enter. This will initiate a System File Checker scan to detect and repair corrupted system files. The scan may take some time to complete, so be patient.
- Run DISM Scan: If the SFC scan doesn’t resolve the issue, you can run a DISM scan to repair any corrupted system image files. In the same Command Prompt window, type the command “DISM /Online /Cleanup-Image /RestoreHealth” and press Enter. Wait for the scan to complete; this may take a while.
- Restart Your Computer: After both the SFC and DISM scans are complete, it is recommended to restart your computer. Restarting will ensure that the repaired system files are implemented and active.
- Test the Application: Launch the application that was encountering the Winhttp.dll error and check if the issue has been resolved. The scans should have repaired any corrupted files, including Winhttp.dll, allowing the application to function properly. If the error persists, continue with other troubleshooting methods or seek professional assistance.
Repairing corrupted system files using the SFC and DISM scans is an effective way to fix the “Winhttp.dll is missing” error. These scans can detect and repair issues within the system files, restoring the proper functioning of your applications. It is recommended to run these scans periodically to ensure the overall health and stability of your Windows system.
Method 6: Restore Winhttp.dll from Recycle Bin
If you accidentally deleted the Winhttp.dll file, it might still be in the Recycle Bin. Restoring the file from the Recycle Bin can be a simple solution to fix the “Winhttp.dll is missing” error. Here’s how you can restore the Winhttp.dll file from the Recycle Bin:
- Open the Recycle Bin: Double-click on the Recycle Bin icon located on your desktop. Alternatively, you can search for “Recycle Bin” in the Start menu and open it from the search results.
- Locate the Winhttp.dll File: In the Recycle Bin window, look for the Winhttp.dll file. You can use the search bar in the top-right corner of the window to search for the file by name. If you have many items in the Recycle Bin, you may need to scroll through the list to find it.
- Restore the Winhttp.dll File: Once you locate the Winhttp.dll file, right-click on it and select “Restore” from the context menu. This action will restore the file to its original location.
- Restart Your Computer: After restoring the Winhttp.dll file, it is recommended to restart your computer. Restarting will ensure that the file is properly recognized and accessible by the applications that require it.
- Test the Application: Launch the application that was encountering the Winhttp.dll error and check if the issue has been resolved. The application should now have access to the Winhttp.dll file, allowing it to function properly. If the error persists, you may need to explore other troubleshooting methods or seek professional assistance.
Restoring the Winhttp.dll file from the Recycle Bin is a simple solution if you accidentally deleted the file. It is important to double-check the Recycle Bin before permanently deleting any items to avoid such errors. Additionally, always exercise caution when deleting files to ensure that essential system files are not accidentally removed.
Method 7: Perform a Clean Installation of Windows
If all other methods have failed to resolve the “Winhttp.dll is missing” error, performing a clean installation of Windows may be your last resort. A clean installation involves reinstalling the entire operating system, which can help eliminate any underlying issues causing the error. Here’s how you can perform a clean installation of Windows:
Note: Performing a clean installation will erase all data on your computer, so it is crucial to back up your important files before proceeding. Additionally, ensure that you have a valid Windows installation media (such as a USB drive or DVD) and product key.
- Backup Your Files: Copy all your important files to an external storage device or cloud storage service. This will ensure that you can restore your data after the clean installation of Windows.
- Create Windows Installation Media: Download the latest version of Windows from the official Microsoft website. Follow the instructions to create a bootable USB drive or DVD containing the Windows installation files.
- Boot from Installation Media: Insert the Windows installation media into your computer and restart it. Access the BIOS settings (usually by pressing a specific key during startup, such as F2 or Del) to change the boot order and set the installation media as the primary boot device.
- Install Windows: Proceed with the installation process, following the on-screen instructions. When prompted, choose the “Custom” installation option. Select the hard drive or partition where you want to install Windows and format it to perform a clean installation.
- Complete the Installation: Allow the installation process to complete. This may take some time. Follow the prompts to set up your preferences, including language, region, and any necessary user accounts.
- Restore Your Files: After Windows is fully installed, copy your backed-up files from the external storage device or cloud storage service back to your computer. Remember to reinstall any necessary applications as well.
- Test the Application: Launch the application that was encountering the Winhttp.dll error and check if the issue has been resolved. The clean installation of Windows should have eliminated any underlying issues, allowing the application to function properly. If the error persists, it may be necessary to consult with a technical professional to further troubleshoot the problem.
Performing a clean installation of Windows is a drastic step that should only be taken when all other methods have failed. It provides a fresh start that can resolve complex system issues, including the “Winhttp.dll is missing” error. However, it is important to remember to back up your important files beforehand, as they will be erased during the installation process.